Difference between revisions of "Community Sharkbay strategy"
m (Auto: EnforceCapitalization(Scouts) (Review RC#3674468)) |
GrampaSwood (talk | contribs) (Fixed infobox, added nav, mc on the strategies. Please do not put random line breaks in sentences. Removed some tips that were essentially just the first general strategy (all involved the plank and were just repeats)) |
||
| Line 2: | Line 2: | ||
{{Map infobox | {{Map infobox | ||
| − | |||
| map-status = community | | map-status = community | ||
| + | | map-game-type = King of the Hill | ||
| map-name = Sharkbay | | map-name = Sharkbay | ||
| − | | map- | + | | map-strategy = yes |
| map-file-name = koth_sharkbay | | map-file-name = koth_sharkbay | ||
| map-image = Koth_sharkbay.png | | map-image = Koth_sharkbay.png | ||
| map-released = {{Patch name|7|12|2023}} | | map-released = {{Patch name|7|12|2023}} | ||
| map-released-major = Summer 2023 Update | | map-released-major = Summer 2023 Update | ||
| − | | map-environment | + | | map-environment = Port |
| − | | map-setting | + | | map-setting = Daylight |
| map-hazards = [[Environmental death#Sharks|Sharks]] | | map-hazards = [[Environmental death#Sharks|Sharks]] | ||
| map-stamp-link = https://steamcommunity.com/stats/TF2/leaderboards/11230213 | | map-stamp-link = https://steamcommunity.com/stats/TF2/leaderboards/11230213 | ||
| Line 17: | Line 17: | ||
== General strategy == | == General strategy == | ||
| − | * The | + | * The Transfer building has a small plank on the very top, which can be used to gain a high ground advantage over enemies capturing the point. |
| − | + | ||
== Class-specific strategy == | == Class-specific strategy == | ||
=== {{class link|Scout}} === | === {{class link|Scout}} === | ||
| − | + | ||
| − | |||
=== {{class link|Soldier}} === | === {{class link|Soldier}} === | ||
| − | + | ||
=== {{class link|Pyro}} === | === {{class link|Pyro}} === | ||
| − | * Because of the | + | * Because of the sharks around the control point you can use your [[Compression blast|airblast]] to clear off the entire point and feed the enemy team to the sharks. This pairs very well with the [[Termal Thruster]]'s additional mobility and knockback after landing, combined with an airblast to knock everyone away. |
| − | the sharks. This pairs very well with the Termal Thruster's additional mobility. | + | |
=== {{class link|Demoman}} === | === {{class link|Demoman}} === | ||
| − | + | ||
| − | |||
=== {{class link|Heavy}} === | === {{class link|Heavy}} === | ||
| Line 40: | Line 38: | ||
=== {{class link|Spy}} === | === {{class link|Spy}} === | ||
| + | |||
| + | {{Map Strategy Nav}} | ||
Revision as of 19:08, 21 November 2024
| “Sun Tzu's got nothing on us!” This article is a Community strategy stub. As such, it is not complete. You can help the Team Fortress Wiki Community Strategy Project by expanding it. |
| Sharkbay | |
|---|---|

| |
| Basic Information | |
| Map type: | King of the Hill |
| File name: | koth_sharkbay
|
| Released: | July 12, 2023 Patch (Summer 2023 Update) |
| Developer(s): | Vasilis "Billo" Chatzikostas Patrick "Zeus" Hennessy Seb "Tianes" Necula Benjamin "blaholtzen" Blåholtz Nickolas "KrazyZark" Fenech |
| Map Info | |
| Environment: | Port |
| Setting: | Daylight |
| Hazards: | Sharks |
| Map Photos | |
| Map Overview | |
Contents
General strategy
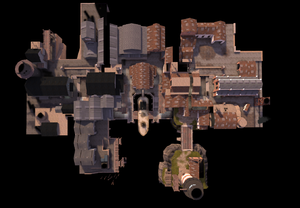
- The Transfer building has a small plank on the very top, which can be used to gain a high ground advantage over enemies capturing the point.
Class-specific strategy
 Scout
Scout
 Soldier
 Pyro
Pyro
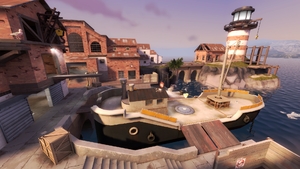
- Because of the sharks around the control point you can use your airblast to clear off the entire point and feed the enemy team to the sharks. This pairs very well with the Termal Thruster's additional mobility and knockback after landing, combined with an airblast to knock everyone away.

