Community Lakeside strategy
| “You are so small! Is funny to me!” This article is a stub. As such, it is not complete. You can help Team Fortress Wiki by expanding it. |
| Community Lakeside strategy | |
|---|---|

| |
| Basic Information | |
| Developer(s): | Unknown |
| Map Info | |
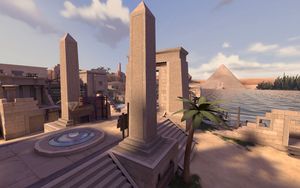
| Environment: | Egyptian |
| Setting: | Daylight, sunny |
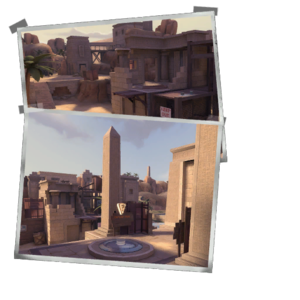
| Map Photos | |
This article is about Community Lakeside strategy.
Contents
General (All Classes)
- There are water pits on both sides of the Control Point. Go there if you are lit on fire by either a flaming arrow or a Pyro.
Class-specific strategy
 Scout
Scout
- As a Scout, when your team has captured the point, harass the enemies as they head towards the point.
- Use the stone wall by the medium health kit on the side to reach the enemy battlements and harass their Snipers.
 Soldier
- The approach to the control point requires approaching by the low ground. Rocket Jump to reach the point quickly, but be careful of enemy Snipers and Sentry Guns.
- The Direct Hit is useful because the opportunities for splash damage are already somewhat limited, and is also effective against Snipers in their confined nests. However, it is not as good at suppressing the enemy team.
- The large amount of health items available means that the Black Box is less useful than the standard Rocket Launcher on this map.
 Pyro
Pyro
- There are several approaches to the control point. Take advantage of these to flank the enemy team as they attack teammates.
- The only area with water is near the full health kit next to the point. Remember that enemies that are on fire will often run for this location. Shoot them with a secondary weapon before they can flee.
- The flanking opportunities on this map offer many rewards for Pyros using the Backburner. Few opponents will watch all the available exits for their team, which allows stealthy Pyros to inflict considerable critical damage on the enemy. Hide in the corner at the point to score huge Backburner damage.
- When attacking an opponent, be sure they don't reach one of those wealthy health packs or the pool of water. This may spell your defeat if they get to take off afterburn or get their health back to full.
 Demoman
- Consider using the Scottish Resistance to control the entries to the room containing the full health pickup. This will prevent enemies from reaching the health or flanking teammates. It also allows a chance to control access to the control point itself.
- The area around the control point is large and open. This offers more room for grenades and sticky bombs to fly uninterrupted. Arc grenades and sticky bombs over the point to push back the other team.
 Heavy
Heavy
- Try to control the room containing the large health pickup surrounded by water, next to the control point. This room is extremely confined and enemies will quickly fall to the Minigun, especially if they get caught in the water. It also gives access to the control point to block enemy captures.
- Avoid being out in the open. The map has a large amount of clear space around the central area, which is ideal for Snipers.
- Be wary of Spies. There are numerous paths they can take to approach from behind.
 Engineer
- Because there are not many effective choke points on this map, consider using the Gunslinger for temporary sentry support.
- An alternative is to set up at a distance and employ the Wrangler to support the team, but this setup is vulnerable to Spies.
- Make sure to build a Dispenser as quickly as possible. Ammo pickups are spaced far apart on the map, and teammates will need much more than the map provides to push the attack.
- A popular Dispenser location is next to the stairwell leading to the point. It allows teammates to easily access it during battles for the point.
 Medic
Medic
- Health is plentiful on this map, but remember where the healing pickups are anyway. The numerous paths on the map mean it is very easy for a priority target like a Medic to be flanked or ambushed by a powerful close-range class like the Pyro or Scout.
- If using the Kritzkrieg, consider applying its charge to a Heavy instead of a Soldier or Demoman. The Heavy's bullets can quickly dominate the central area, which the Soldier and Demoman would not be able to do as effectively because of the wide space.
 Sniper
- There are several platforms, stands, and high areas to take advantage of long lines of sight. Use these to support the team from a safe distance, but be careful of enemy Spies, Pyros, and Scouts.
- The wooden platforms overlooking the point are a good place to snipe from, but there is little room to maneuver. Avoid being caught by surprise in these Sniper nests.
- Make sure to move around a lot in this map; it's vital that the other Snipers don't find you, and neither do the Spies. This map has many sniping spots, so take advantage of them.
 Spy
Spy
- As with the Pyro, take advantage of the numerous routes available. There are several ways to approach enemies from behind.
- Compared to health, there are markedly fewer ammo refills on the map. Keep this in mind when recharging the Dead Ringer or normal Invisibility Watch.
- The number of health refills means that it is easier to escape a bad situation and heal, without being forced to rely on an enemy Engineer's Dispenser or the enemy's Medics.
- Most of the time, Snipers will have their back to the walls around the catwalks in this map. Use your Revolver or other primary weapon to shoot them instead of trying to get a backstab.
