Community Bigrock strategy
| “Let's go, let's go, let's go!” This article documents a recent addition. It may contain speculation, broken links or errors. You can help improve it by editing this page to include new information. |
| “You are so small! Is funny to me!” This article is a stub. As such, it is not complete. You can help Team Fortress Wiki by expanding it. |
| Community Bigrock strategy | |
|---|---|

| |
| Basic Information | |
| Developer(s): | Unknown |
| Map Info | |
| Environment: | Desert |
| Setting: | Day, sunny |
| Hazards: | Pits |
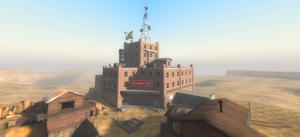
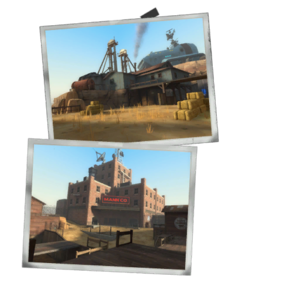
| Map Photos | |
This article is about Community Bigrock strategy.
Contents
General (All Classes)
Class-specific strategy
 Scout
Scout
- as theres not much space in this map, a Scout can easily collect the Cash due to the fact it'll not be so Spread out much.
- it is Wise for a Scout to get Resistance around to it's Max, as the Map does have alot of Bullets, bombs and etc. firing out, if the Scout doesn't have much Resistance on them, it'll be hard for them to Collect the Cash to help the team.
 Soldier
 Pyro
Pyro
- there is one spot where the bomb can be Reset, it's best if the Pyro tries to push the bomb carrier down the gap in the Fence in the mine, as it may not be a long reset, it can Buy your Team some time if the robots can broke out of the Mine.
 Demoman
- It's wise to set up sticky traps at the chokepoint past the mine, as there is no alternative path for the robots.
- Since Engineer robots build a sentry to guard their Teleporters, you are one of the best classes to destroy the nest.
 Heavy
Heavy
 Engineer
- Build Sentry Gun on the rocks of the left corner (player perspective) near the entrance. Build the Dispenser behind the wire mesh. You can also crouch and get protection from the rocks while fixing your Sentry Gun.
- You can build a disposable Sentry Gun on the small rock directly facing the entrance. There is a low wire mesh bulkhead that can be used as protection.
- Teleporter exit can be build behind the wire mesh of the entrance of the tunnel. That is usually a main battlefield.
 Medic
Medic
- with tons of Robots Around, a Medic is Best to use the stock medi-gun with Crit Carteens to use on their Team-mates, this Increases the Chance of Survival,
- you can also do this With the Kritzkrieg and Uber Carteens.
- with Resistance of your own, you'll be able have a higher Survival Rate allowing you to make sure you can heal your team-mates to raise their Survival too.
- Be Careful when there is Spy bots about, you could end up healing a Spy bot who you think is your Team-mate, Always be sure to spy-check but healing, Talk to your Team when the Spy bots enter.
 Sniper
- Make sure you use the long stretches of land to your advantage. Use the Sidney sleeper and upgrade reload and recharge speed for best
use.
- with the Chokepoint, a Sniper with Projectile Penetration upgrade on their Weapon, they can Easily take out alot of robots at once, even more with the Explosive Headshots.
- Snipers can be useful for taking out Engineer bots, as snipers can deal with them from afar,
- the sniper can take out the Sentry and allow the Team-mates to Dish up the rest of the engineer Bot's Nest.
 Spy
Spy
- with an Upgraded Sapper, a Spy can Sap most of the robots that Come in as a Gaint pack, even if you get killed, the sapped robots can't do much until the sapper pops off them, this allows for your Team-mates to quickly destroy them,
- Even Through Gaints don't get Disabled when Sapped, they do get slowed Down, which can be very helpful to the team.
- Don't Be Scared to Spam Your Weapons in this Map, as it's not that Big, most of your weapon spamming Will end up Damaging a Robot a little bit, Remember: every little helps.
- due to the fact that this map isn't all that big, it makes it harder to stop the bomb from getting' to the hatch, make sure to use Knockback and Slowdown Effects to their Fullest.
