Community Rottenburg strategy
| Community Rottenburg strategy | |
|---|---|

| |
| Basic Information | |
| Developer(s): | Unknown |
| Map Info | |
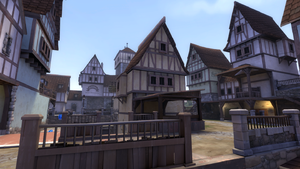
| Environment: | Mountain Village |
| Setting: | Daylight, Sunny |
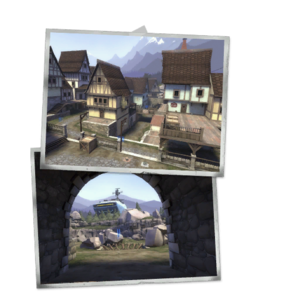
| Map Photos | |
This article is about Community Rottenburg strategy
Contents
General (All Classes)
- Whenever tanks appear, only 2 players, usually Soldier and Demoman (possibly Pyro) should follow the tank into the town. It is important for the rest of the team to hold the front and keep the bomb carrier from buffing.
- Don't allow the bomb to get into the town. The further the bomb gets, the further Engineer bots will come.
- Make sure you or someone else picks up money that drops in unusual locations.
- Avoid popping Uber Medics before the Demoman or other appropriate class can get rid of them.
- Note the bomb carrier path before the wave starts. It will help you plan your secondary defense if the bomb makes it into the town.
Class-specific strategy
 Scout
Scout
- Use your Mad Milk to soak Giant Scouts that are running with the bomb.
- Due to the maps large, open spaces, the Soda Popper can greatly help in credit collection and general agility.
- Pay attention to teammates who like to kill robots in weird places and not collect the money.
- Use your Fan-O-War or upgraded Sandman to mark giants for death. Remember, only one giant is marked at a time.
- While collecting money and not using your support weapons, shoot at the bomb carrier to keep him from buffing.
- Consider Ammo Refill Canteens for your Mad Milk on waves with Super Scouts.
- Destroy any nearby Snipers.
 Soldier
- As Soldier, it is recommended to use Rocket Specialist, especially against Giants or clumps of robots. Try to land direct hits to stagger giants, especially Super Scouts.
- Equip the Buff Banner and deploy it as much as possible.
- Upgrade Reload Speed and Firing Speed before Damage.
- Soldier's mobility and weaponry make him good at removing Engineer bots, which can be quite a nuisance on this map if left unchecked.
- Soldier is also good at eliminating Snipers.
 Pyro
Pyro
- Most servers favor a Medic and Soldier over a Pyro for this map, but a very popular strategy is to abuse the Refund option and have multiple Pyros for the 3-Tank last wave of Hamlet Hostility.
- If the bomb path follows the lower route, it can be hard-reset in the bottomless pit in the middle of the map.
- If the bomb path follows the upper route, it can be soft-reset by airblasting the bomb carrier off of the bridge in the middle of the map.
- M1-ing with Health on Kill can be a reasonably effective strategy on this map, though not ideal.
- Spychecking is usually your first priority when Spy robots are on the map.
 Demoman
- The Scottish Resistance has a higher damage output and is cheaper to upgrade than the stock Sticky Launcher.
- Take advantage of your ability to kill targets not in your direct line of sight.
- Upgrading your Grenade Launcher is a great way to kill tanks, at the expense of requiring greater skill against robots.
- Sticky traps are very effective against Giant Medics.
 Heavy
Heavy
- Use your rage creatively to push back giants.
- Kill Giant Medics by shooting them point-blank.
- Remember, Heavy's damage is nerfed against Tanks. Be efficient and use your firepower to keep your teammates alive.
- Although the Brass Beast does more damage when all things are equal, the stock Minigun allows for more mobility, allowing you to move closer to your targets and take advantage of damage ramp-up.
- Hover near your team's Dispenser to stay alive.
 Engineer
- Popular Teleporter Exit spots include the tower in the middle of the map and the forward Upgrade Station.
- Don't make your teleporter face walls.
- The Dispenser usually goes behind the rock formation to the left of the barricade. The Sentry can go right next to it on waves without Super Scouts or Medic bots, but placing it on the right near the tunnel exit is usually better. This way, it covers the right side choke when unwrangled, and has a clear shot of the middle of the field while Wrangled. Place it as needed to block Super Scouts.
- If you get pushed back, Sentry placement becomes more complicated. Hold the tunnel if possible. Otherwise, it is sometimes best to just set up at spawn.
- The Wrangler is important for killing giants, Tanks, and Snipers and avoiding ÜberCharges on this map.
 Sniper
- Shoot slow robots in the head while upgrades with Explosive Headshots. Giants and the bomb carrier are your first priority.
 Medic
Medic
- Most players don't know how to stay alive without a Medic. Use your Reanimator and Projectile Shield to help them.
- Ubersaw robots when safe to do so, especially Sir Nukesalot.
- Revived players will respawn next to you. Make sure you're standing in a safe spot before you Reanimate!
 Spy
Spy
- Spy is very powerful on the last few waves of Bavarian Botbash. Consider having a Spy instead of a Scout for all or part of that mission, especially if your team has trouble killing Giant Medics.
- Focus on stabbing Giants, Medics, Snipers, and the bomb carrier. Your Sapper can be used to sap and chainstab groups of robots when upgraded.
- One point of Sapper upgrade is all you need at first. Stabbing Speed and Armor Penetration are higher priorities.
- Spy can easily assassinate the bomb carrier once buffed by taking advantage of his disguises to approach safely, unlike other classes.
- The Diamondback stores a crit for each backstab you make. Consider using it to help out a bit with Tanks.
- Upgrade Movement Speed and disguise as a Scout.
