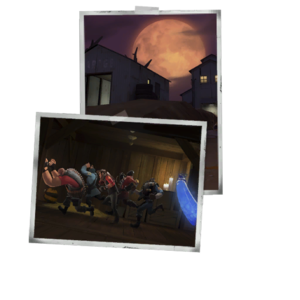
Community Harvest Event strategy
| “You are so small! Is funny to me!” This article is a stub. As such, it is not complete. You can help Team Fortress Wiki by expanding it. |
| Community Harvest Event strategy | |
|---|---|
| 300px | |
| Basic Information | |
| Developer(s): | Unknown |
| Map Info | |
| Environment: | Farmland |
| Setting: | Nighttime |
| Hazards: | Pumpkin bombs, Ghost |
| Map Photos | |
This article is about Community Harvest Event strategy.
Contents
General (All Classes)
- The center shed provides more cover for attackers than defenders. Capturing the point is easiest with support from team members outside the shed.
- Soldiers and Demomen can jump onto the roof of the shed with rockets or stickies and attack from above. It's also possible to lob grenades.
- The peaked roof of the farmhouse can provide cover for Snipers if they stand on the back of the roof and fire over it at the enemy, but this prevents them from firing at the area between the farmhouse and the center shed.
- Snipers like to stay in the upper levels of their team's farmhouses. If you happen to be in the area, take a moment to sweep the upper floor for enemy Snipers.
- Unlike in Harvest, Harvest Event has the deadly tool of Pumpkins Bombs in several locations around the map. These aforementioned Pumpkin Bombs can be used to kill enemy players close to the area of the pumpkin. The Pumpkin Bomb is a lethal tool by due to its explosive nature. To detonate the Pumpkin Bomb, one should simply attack it.
- Pumpkin Bombs can be used as a means for sneak attacks. Wait at a distance from the Pumpkin Bomb, and when an enemy gets near it, shoot the Pumpkin Bomb to detonate it, killing the enemy player.
- These pumpkins can also be used in Kamikaze attacks when needed. When in close range of the enemy and the pumpkin, attack the pumpkin for a swift, but lethal explosion.
- Pumpkin Bombs can be used as a means for sneak attacks. Wait at a distance from the Pumpkin Bomb, and when an enemy gets near it, shoot the Pumpkin Bomb to detonate it, killing the enemy player.
Class-specific strategy
 Scout
Scout
- Scouts can double-jump from their building to the middle shed and then across to the other team's building. This can be useful if the ground-level area is highly contested.
- With the Crit-a-Cola equipped, a Scout can clear choke areas, including the Control point barn. However, be aware that it also sets Scouts up for eased death; approach hordes with caution.
- When an enemy is on the Control Point, a Scout can use the Sandman to stun enemies. This will grant the Scout and his teammates greater ease to clear the Control Point.
- The sheer speed of the Scout is excellent for clearing Snipers in tight sniping areas. Use this to your advantage to eliminate any threats of Sniper attacks.
 Soldier
- While many parts of the map are open spaces, many spaces are also tight, indoor spaces. With the splash damage inflicted by Soldier Primaries, this is very advantageous.
- Soldiers, along with Demomen, can use the Pain Train to cap the Control Point with twice the speed.
- Soldiers can use the high firing-speed of the Direct Hit or the Liberty Launcher to quickly take out enemy Snipers that dwell in typical sniping locations.
- With the Equalizer equipped, a Soldier can sneak into the chaos of a conflicting Control Point, and use the Kamikaze taunt to kill unsuspecting enemies en masse.
- The Buff Banner is an imperative tool in ending Control Point conflicts. The Battalion's Backup is good for the opposite reason, as it can be used when defending the Control Point.
 Pyro
Pyro
 Demoman
 Heavy
Heavy
 Engineer
 Medic
Medic
 Sniper
 Spy
Spy
- In order to get across to behind the enemy's lines, one good way to go is to the far left and behind the shed, backstabbing any Snipers who get in your way. Be wary of the ghost, however.
