Community Mannhattan strategy
| “Sun Tzu's got nothing on us!” This article is a Community strategy stub. As such, it is not complete. You can help the Team Fortress Wiki Community Strategy Project by expanding it. Notes: Expand the "General strategy" section to cover map locations in more detail. Potentially look at the class-specific strategies as well. |
| Community Mannhattan strategy | |
|---|---|

| |
| Basic Information | |
| Developer(s): | Unknown |
| Map Info | |
| Environment: | Urban City |
| Setting: | Daylight, Sunny |
| Hazards: | Grinder (and banana peel) |
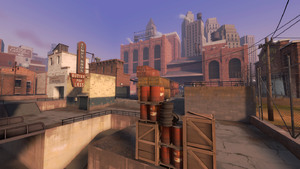
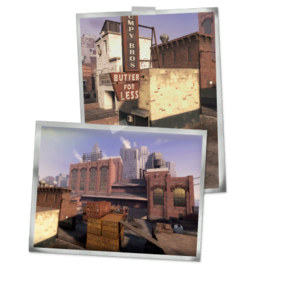
| Map Photos | |
This article is about Community Mannhattan strategy.
Note: It is recommended to read the main Mannhattan article first to become familiar with the names of key map locations used in this article.
General strategy
- All teammates must work together to make sure the robots don't capture the gates. Once the gates are captured, you cannot re-capture them and remain captured for the rest of the wave.
- Keep an eye out for robots with lit-up yellow heads; they mean the bots are headed for a nearby gate.
- Tanks do not spawn on this map, so don't put your money into anti-Tank strategies.
- When Gate A is captured and the gatebots become stunned, take out as many as possible so they can't get a head start on capturing Gate B.
- Any class with knockback capabilities can push bomb carriers into the grinder near Gate A, e.g. Soldier, Pyro, Demo.
- Never let Engineer Bots slip past you. Once they build their Sentry Gun, it will be very hard to take it down.
Class-specific strategy
 Scout
Scout
- Use your Mad Milk to soak Giant Scouts that are running with the bomb, and help keep your team alive against battle-oriented Giants.
- The Force-A-Nature can help push away Gatebots and bots carrying the bomb.
- Due to the maps large, open spaces, the Soda Popper can greatly help in credit collection and general agility.
- Since most of your team will be killing every robot once they drop out of their spawn area, try to run up and collect the money the robots drop when killed.
- Use your Fan-O-War's mark for death to weaken a Giant Robot's defenses. Make sure to mark Giant Medics before their pockets.
- The Sandman can also accomplish this with the proper upgrade.
 Soldier
- Upgrade one point of Rocket Specialist to slow Giants, especially Super Scouts, and negate damage fall-off.
- Rocket jumping allows you to easily reach the left ledge near the initial robot spawn. Kill any bots coming down the stairs there.
- The lack of Tanks on Mannhattan makes the Buff Banner less valuable than on other maps. Equipping the Battalion's Backup to aid your team against crit-boosted bots should be considered. The Concheror is also a great choice, especially when paired with the Beggar's Bazooka.
- Soldier is more useful on Empire Escalation than on Metro Malice.
- Point A
- Having a Soldier using the Airstrike combo at the container sentry spot can easily help the team on killing the giant Heavies as the heavy will be distracted on the rest of the team instead of you and the Engineer.
- The Engineer will provide you ammo and health if he have the Dispenser up with him or the ammo and health pack behind you and him will be extremely helpful for you.
 Pyro
Pyro
- The lack of Tanks on this map makes Pyro with Phlogistinator less effective. However, using your Airblast to reflect Crit-boosted Projectiles to protect your teammates may be very helpful.
- Its also one of the best ways to deny Giant Black Box Soldier's main source of healing.
- Bonk Super Scouts can spawn on this map, so a fully upgraded Airblast ability can be helpful in keeping them from slipping by.
- The Backburner is the best primary for maximizing your damage on this map. Let robots focus on your teammates and attack them from behind. At the initial robot spawn, hide below the ledge, or drop down from the balcony.
 Demoman
- Use your stickies to take out large clusters of Gatebots that have either been stunned, or are capturing.
- Wave 2 of Empire Escalation begins with Crit Huntsman Snipers pocketed by Uber Medics coming from the upper entrance. Lay sticky traps to take them out.
- Wave 4 of Metro Malice includes 2 pairs of Giant Heater Heavy and Giant Medic, which are supported by Backup Soldiers. Avoid using your Crit-boosted Stickies against these giants.
 Heavy
Heavy
- Heavy does best up close. Attack Giants at point-blank range, especially Giant Medics & Giant Black Box Soldiers; Giant Medics on Mannhattan don't deploy Megaheal, and Giant Black Box Soldiers can be killed before they reload.
- Investing in Destroy Projectiles can help you tank Giant Soldiers.
- Knockback Rage can push Giant Gatebots away from the gates.
- If you have a pocket Medic, stay near the robot spawn and bodyblock by the crate. You can easily stop the robots from capturing a gate and advancing their spawn.
- Consider using Natasha for the 3rd Wave of Metro Malice due to the large amount of Giant Scouts.
 Engineer
Main Gate
- You can place your Dispenser behind the red oil tank near the main gate to keep your team healed.
- There are multiple Sentry Gun spots to cover the main gate.
- Placing your Sentry on the choke point on the bridge behind the oil tank will block Super Scouts and give it very good coverage.
- Placing your Sentry on the crates near the oil tank will allow you to not only attack robots near the oil tank, but also part of the balcony and outside the factory as well. However, this leaves it more open to attack.
- Placing your Sentry on the large oil barrel can easily camp the robots coming out of the main gate. However, this doesn't effectively cover the balcony or behind the Sentry Gun, so use caution when using this spot.
- Placing your Sentry on the balcony itself covers both exits, and can provide your team with backup fire.
- Another good spot is on the ramp behind the balcony, as this can catch any robots trying to capture A, while still covering the upper entrance. However, this isn't very useful at attacking the main spawn.
- It's not recommended to put your Teleporter in the factory, as robots can easily reach it and destroy it unprotected. Instead, consider placing it above or in the small cave of shipping containers near A.
Point A
- The large stack of shipping containers makes for a good Engineer base, both on top and in the small cave underneath.
- The cave is a good spot for a Dispenser and Teleporter while the main gate is active, but while Gate A is open, robots can run in and destroy them.
- The top of the containers makes for a very good sentry base, as you have great coverage over the choke point between A and B.
- If Gatebots are posing a problem to your team, consider putting your sentry facing Gate B.
- Another good Dispenser spot is to the right of the opening between Gate A and the shipping containers.
- Due to the small nature of this point, Giant Scouts can be a problem. Consider having a Scout or Sniper Jarate or Milk them to help your Sentry destroy them.
Point B/Bomb Slot
- Hiding your sentry behind the fences at the hatch is a good last resort.
- If your team can manage to control B, then keep your sentry on the shipping crates/the elavated concrete area if there are no Giant Scouts.
- If there are Giant Scouts, then move your sentry back near the bomb slot.
- There is a bug in the Sentry Buster AI on this map that involves you dying with your sentry near the buster, making the buster wander around your death point. Use this to your team's advantage (e.g. Ubersaw Ubercharge, Banner Rage).
 Medic
Medic
- Sentry Busters, lone Scouts, deactivated robots, and boss robots with "dumb" AI all provide an easy Ubersaw charge. A skilled Medic should have a Kritzkrieg charge almost constantly.
- Maximize Movement Speed to help catch Sentry Busters. This is cheaper and more efficient than Ubercharge Rate upgrades.
- Using the Projectile Shield, block projectiles and bullets from Giants. The shield can also damage the robots, so use it to effectively block weaker targets like Scouts.
- Your Mad Milk syringes can help your team regain health when you can't reach them to heal them.
- Reviving your team with the Reanimator can be good for your defenses, e.g. your team's Heavy dies when he needs to be alive.
- There is a bug in the Sentry Buster AI on this map that involves the Engineer dying with his sentry near the buster, making the buster wander around the Engineer's death point. Coordinate with the Engineer for free uber!
 Sniper
- Mannhattan is nice and open, meaning a Sniper can attack anywhere he needs to.
- Focus Medics. Explosive Headshots can drop groups of Uber Medics, and high-damage headshots can quickly take down Giant Medics.
- Use the Machina's ability to go through multiple targets to take out large amounts of Gatebots. Explosive Headshot supplements this even further.
 Spy
Spy
- Mannhattan is a great Spy map. The enclosed area in the front makes it easy to collect money there, and the zig-zagging bomb path includes plenty of cover to dodge behind.
- The Sapper upgrade is more useful here than other maps due to the large numbers of robots, as are resistances, but Movement Speed, Stabbing Speed, and Armor Penetration are still a priority. Make sure to get a point of Health on Kill for your knife so you can survive.
- This map features plenty of Giants and Steel Gauntlets to backstab.
- When Giant Black Box Soldiers appear, avoid getting hit and giving them health. Wait until they are low on health, then finish them off.
- If your team lets a Super Scout through, try catching it and backstabbing it. Only resort to your Sapper if there are teammates around to finish it off.
- Deactivated robots act as if they are sapped and can be stabbed from any direction. Chainstab any that your Medic isn't using for Ubersaw charge.
