Community Mannworks strategy
| “You are so small! Is funny to me!” This article is a stub. As such, it is not complete. You can help Team Fortress Wiki by expanding it. |
| Community Mannworks strategy | |
|---|---|

| |
| Basic Information | |
| Developer(s): | Unknown |
| Map Info | |
| Environment: | Alpine |
| Map Photos | |
This article is about Community Mannworks strategy.
Contents
General (All Classes)
- Watch those arrows before each wave to see where the robots will go, either left or right of the frontmost building. It is costly to move defenses to the correct side if you are wrong.
- Before choosing a class, keep in mind that Steel Gauntlets spawn on this map. They have more HP than regular Heavy Robots and have a resistance to ranged weapons, so your team should have classes that can deal immense damage to make up for the resistance, a player with buffs or who can apply status effects, or hardy/quick players to melee the robots.
- The large landscape of the map allows enemy Soldiers and Demomen to shoot their weapons even at long distances. Though it may not pose a problem if the opposing group is minuscule in size, the harm it would deliver is grand when a couple of them are able to aim at a single target, commonly at a Sentry Gun or a Heavy. A way to easily counter this is for a Heavy to utilize the Deflector upgrade, and keep close to a nearby Dispenser.
Class-specific strategy
 Scout
Scout
- Focus on collecting all dropped money.
- Use your speed to do quick hit-and-run attacks on the Steel Gauntlets.
- Once you have speed and jump height upgraded, draw fire from the projectile firing bots, like the Giant Rapid Fire Demoman.
 Soldier
 Pyro
Pyro
- Due to the map's fairly large entry point for robots, a common strategy is to have Pyros airblast Sentry Busters into a Sentry Gun's sights, keeping them from getting too close to the nest.
- There is a small blind spot beneath each of the cliffs that the robots spawn from. By standing in these blind spots, players who often use the Backburner can deal large amounts of damage to robots as soon as they drop off the cliffs.
- There are several points where a Pyro can airblast the bomb carrier back to a lower elevation, forcing them to walk back to the path. Using these opportunities can give your team the extra time they need to prepare defenses, or eliminate high priority targets.
 Demoman
 Heavy
Heavy
- Due to the abundance of the Major League Scouts in the default mission on this map, and the relatively short distance most Sentry Busters travel to the standard location for Engineer nests, the Natascha works well as a way to assist your teammates.
- The spread of your Minigun makes things difficult here, and ammo pickups are somewhat spaced out. As such, having a Shotgun as your secondary could pay off.
 Engineer
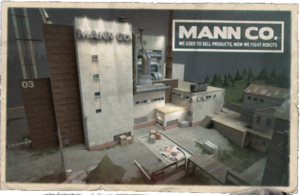
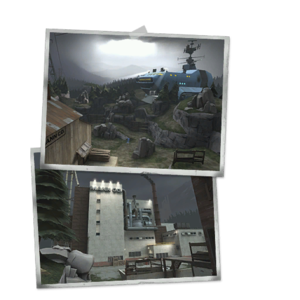
- A Sentry Gun in the building closest to the robots' entrance on the side of the arrow-marked path can cover the entire field. Watch out for Sentry Busters though, since they will take a shorter route to reach your Sentry Gun. Another good Sentry Gun location is to the right of the bags of quicklime on the front building. The Sentry will cover most of the field and the quicklime will provide a good cover.
 Medic
Medic
 Sniper
- While the front building may seem like a good sniping spot, Robots will usually target this area first if most defenders are located there. Setup at the outcropping on the right, or the building on the left, depending on the bomb path.
 Spy
Spy
- As mentioned above, there are Steel Gauntlets on this map. You can slow them down with your Sapper and eliminate each with a single backstab.
- You can also help your teammates by sapping the Major League Scouts that appear in the Manouvers mission. The Scouts can easily mess up the whole wave if they grab the bomb, so slowing them down with Sappers will help your teammates to destroy them before they reach the bomb hole.
