Community Gorge Event strategy
| “Sun Tzu's got nothing on us!” This article is a Community strategy stub. As such, it is not complete. You can help the Team Fortress Wiki Community Strategy Project by expanding it. Notes: Combine "General map strategy" and "General strategy" into one section, and add some more detail. Make the mention of the halloween-ness of this map cleaner, potentially by placing it in the intro section between the two existing lines. Improve the class-specific strategies as well, which are not only largely empty but also missing some classes entirely. |
| Gorge Event | |
|---|---|

| |
| Basic Information | |
| Map type: | Control Point |
| File name: | cp_gorge_event
|
| Released: | October 28, 2015 Patch (Scream Fortress VII) |
| Variants: | 5Gorge, Attack/Defend and Mannpower |
| Developer(s): | Paul "puxorb" Broxup |
| Map Info | |
| Environment: | Halloween |
| Setting: | Nighttime, overcast |
| Bot support: | Yes |
| Map Items | |
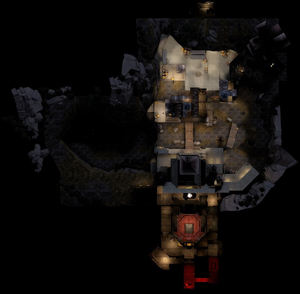
| Map Overview | |
This article is about Community Gorge Event strategy.
Note: It is recommended to read the main Gorge Event article first to become familiar with the names of key map locations used in this article.
General map strategy
This Halloween map features pumpkin bombs, Halloween pumpkins, and the Soul Gargoyle; see Community Halloween maps strategy.
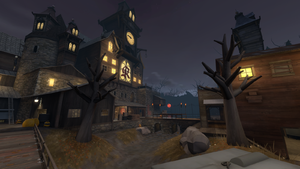
Gorge Event is a modification of the original Gorge 2CP Attack/Defend Control Point map. Very little is changed in the Entrance Yard; however, features have been added elsewhere that do have effects on strategy.
For much of the original Gorge 2CP Community strategy that still applies to this map, see Community Gorge strategy.
General strategy
Offense
- The new porch flank is an important shortcut into the mansion's second floor Flank Hall and the Choke.
- The BLU side balcony doors can be important in flanking the Sentry Gun in the new covered corner (arrow) of the Choke.
Defense
- The new porch flank makes holding the far entrance and stairwell of the mansion much more difficult.
- This makes jumps up to the BLU-side balconies of the Choke by Soldiers, Demomen, Scouts, and Flyros all the more necessary to flank and harass BLU's probes into the Flank Halls.
Witching Hour
When the first point is captured, a Witching Hour occurs that spawns Skeletons that attack both teams.
- See also: Community Skeletons strategy.
- Skeletons spawn in two groups in two separate but tactically significant positions impacting both teams:
- The first group of 9 Skeletons spawn in three squads around the first point in a position that can delay BLU's movement across the bridge and into the front of the mansion.
- The second group of 6 Skeletons with the Skeleton King spawn spawn in three squads on and around the great table in the Grand Hall between RED Spawn and the rest of the map, cutting off forward members of RED.
- The upshot of this is that the contest for the front battlements of the mansion is influenced by the disruption caused by the Skeletons, and the outcome of the two skirmishes can depend on the speed and effectiveness with which either team can deal with and exploit the Skeletons.
- While Skeletons can disrupt a team’s position, do not abandon a tactical position needlessly.
- Remember, even if you are up on the platform in front of BLU’s forward Spawn, the Skeleton King can still reach you.
- The Skeletons in the mansion are well aware of the stairs from the lower floor in the Grand Hall and will quickly use them to get to any players on the main floor.
- The Skeletons keep a distance from the main exit of RED Spawn, making that a safe zone for firing on Skeletons, especially if the Witching Hour caught a lot of RED team in Respawn.
- The second point remains locked during the Witching Hour, preventing Backcapping until the Witching Hour ends.
Engineers:
- Monitor the capture timer and consider whether or not and where to relocate your Sentry Gun to best support your team when the Skeletons spawn. There is no single best position; this all depends on where you are, where your Sentry Gun and other buildings are, and how your team and the enemy are deployed. Consider:
- Whether your Sentry Gun needs to be left in place to defend against an onrush of the enemy during the spawning or if you need to withdraw it to save it from the same.
- Whether your Sentry Gun needs to be in place to cover your teammates running from Skeletons.
- Whether there is a safe and effective position for your Sentry Gun to cover the Skeleton spawn locations, firing on them immediately as they spawn.
Other classes:
- As BLU capture of the first point becomes certain, become aware of your position relative to the capture points (where the Skeletons spawn) and the current or possible positions of Sentry Guns.
- Skeletons are not normally drawn to buildings. Attempt to get the Skeletons to chase you towards your Sentry Guns.
- During the Witching Hour, watch for any enemy Sentry Gun that is engaged with a mob of Skeletons so that you can safely attack that Sentry Gun at range.
Class-specific strategy
 Scout
Scout
- Don't jump onto the second point to Backcap it the moment the first point is captured; wait for the delayed unlock.
 Pyro
Pyro
- The Hell Pit dominates the middle floor of the Choke, the enemy must walk the narrow ledge around it passing multiple places for Pyros to ambush from. Puff once to light them up, then a compression blast to try to send them into the pit.
 Demoman
- The Skeletons spawn in specific locations that can be trapped:
- Offense: As you are capping the point, lay small traps on the point, the boulder to the right, and to the right of the doorway from the Checkpoint Building -- one, at most two, close Sticky Bombs can kill any Normal Skeleton.
- Defense: Lay all of the Stickies on the second point for the Skeleton King. After that trap is exploded, second traps can be quickly set up on the stairs up, or next or the Engineers on the nest, if there is one there already.
 Heavy
Heavy
 Engineer
Offense
- Quickly getting a Teleporter somewhere up on the porch roof after the first point is captured will help non-jumpers to use that flank to the second story Flank Hall; fortunately the route for running up there avoids the Skeleton spawns.
Defense
- Adept Sentry Jumpers can place Buildings on top of the large tank inside Checkpoint Building.
- The added fireplace chimney at the final point affords additional cover for you to set up a nest. Be warned though, if you want to set up a sentry overlooking the point, the small space between the chimney and the walls won't afford it very much visibility.
 Medic
Medic
 Sniper
- The flank doorway over the porch or the rooftop over the side entrance are good places for sniping that were not available on the original 2CP Gorge.
 Spy
Spy
- Cloak and Dagger Spies on either side can use the board across the Hell Pit to avoid bumping into enemy rushing around the narrow edges
- Don't uncloak or give up your Disguise to Backcap until after the end of the Witching Hour.
- The porch roof flank may be away to avoid a crowded flank hall, even if you have to go the whole route without a Teleporter on the porch roof.
