Difference between revisions of "Community Asteroid strategy"
(→{{class link|Heavy}}: Explained the Hustle Heavy zone control strategy.) |
m (Auto: EnforceCapitalization(Minigun) (Review RC#1761438)) |
||
| Line 72: | Line 72: | ||
**Around their own spawn when enemies rush the base. | **Around their own spawn when enemies rush the base. | ||
* Heavies can also be used to push as there is little room to dodge the Heavy's large cone of fire and high damage output. He can be a reliable source of damage and pushing power. | * Heavies can also be used to push as there is little room to dodge the Heavy's large cone of fire and high damage output. He can be a reliable source of damage and pushing power. | ||
| − | * The wide open spaces and vertical dimension around the midbridge and A Bridge dramatically diminish the Heavy's effectiveness in these areas. If at all possible, the Heavy should avoid making a stand in these areas. A better option is to use your greater health, covering fire from teammates, and possibly the GRU to move quickly to the next chokepoint, establish a screen of | + | * The wide open spaces and vertical dimension around the midbridge and A Bridge dramatically diminish the Heavy's effectiveness in these areas. If at all possible, the Heavy should avoid making a stand in these areas. A better option is to use your greater health, covering fire from teammates, and possibly the GRU to move quickly to the next chokepoint, establish a screen of Minigun fire, and delay enemy reinforcements while your teammates mop up. |
=== {{class link|Engineer}} === | === {{class link|Engineer}} === | ||
Revision as of 21:30, 28 July 2014
| Community Asteroid strategy | |
|---|---|

| |
| Basic Information | |
| Developer(s): | Unknown |
| Map Info | |
| Environment: | Space Station |
| Setting: | Outer Space |
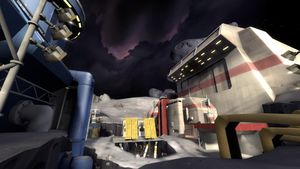
| Map Photos | |
This article is about Community Asteroid strategy. Asteroid is a Mann Co. Beta Map, so strategies may change until the final version is released.
Contents
General (All Classes)
Attack the enemy robots
Each robot drops Power Cores which increases the team score when you collect them. First team to reach 300 points wins the game.
- Attack and destroy both A robots and collect the 2x5=10 Power Cores that they drop. Then proceed up to the left for health & ammo along the way and move through the A door which opened up as a result of destroying the A robots. The A robots will re-spawn after 60 seconds.
- You will arrive above the B robots...destroy them and collect the 2x10=20 Power Cores that they drop. Move to the right along the walkway and through the B door which opened up as a result of destroying the B robots. The B robots will re-spawn after 90 seconds and the A robot timer will restart in-sync with the B robot re-spawn timer.
- Destroy the C robots and collect the 2x25=50 Power Cores that they drop. Your team will now have 10 + 20 + 50 = 80 points on the board. The C robots will re-spawn after 90 seconds and both the A & B robot timers will restart in-sync with the C robot re-spawn timer, so all robots will re-spawn at the same time...after 90 seconds but only the A robots will be vulnerable.
Steal the enemy reactor core
- If it looks like the enemy is getting close to 300 points then steal their Reactor Core and bring it back to your Reactor Core location (your Reactor Core doesn't need to be present to capture the enemy Reactor Core) and all of the enemy's points will be added to your teams points.
- The fastest way to steal the core is to leave via the one-way gate in the vault room. Having a teammate nearby to hold it open or open it on demand can make a huge difference.
- Unlike CTF, stealing the core requires significant time: first to charge it, and then to negotiate a route out either through the lasers, through the vents, or (with the assistance of a teammate) out the one-way gate in the vault room. Depending on the number of points being stolen, it can take 10-20 seconds for an attacker to even get free of the vault area. Because a core that is dropped within the vault area is nearly as (or even more) secure than one on the original capture point, cores do not require nearly as much close defense as CTF intelligence does.
- Stealing the enemy's core can also be an effective way to force an enemy to break off an attack and return to defense.
- Even if your team doesn't capture it, stealing the core temporarily takes the stored points out of play for as long as the core remains active (60 seconds, can be "refreshed" by being picked up by any teammate no matter how briefly). In a close end game, a stolen core can buy your team enough time to score the 300 points needed to win even if the other team has more than 300 points "on the board."
Defend your Reactor Core
If the enemy takes your Reactor Core back to their Reactor room then all of the points that the Core was loaded with will be added to theirs. When they steal your Reactor Core there will be an icon showing how many points are in the core and where the core is in the map. You temporarily lose those points while the Reactor Core is in enemy possession. If the enemy manages to capture your Reactor Core then all of those points will be gained by them.
Reactor Core steals become increasingly valuable (and difficult to recover from) as the score imbalance increases. Thus, you should be particularly attentive to core defense when when your team is ahead by a large margin, because the other team is likely to increasingly concentrate on a "Hail Mary" core steal.
Defend your robots
- Losing a few points may not seem like a big deal, but each point contributes to the other team winning.
- The first group of robots may seem like an unimportant loss, but it adds up. The more robots that are destroyed, the closer the enemy team is to your reactor core. Don't let the enemy team into your base!
Class-specific strategy
 Scout
Scout
- Work as a team of two Scouts. One Scout enters the enemy Reactor Core area through the right gate and the other Scout keeps the gate open so the Scout with the enemy Reactor Core can get out without going through the lasers or the crawlspace.
- Bonk protects against the lasers in the Reactor Core room, and allows quicker access than the 2 alternate paths..
 Soldier
- Soldiers work best attacking the robots, or if necessary escorting Scouts.
- Soldiers are very powerful on this map due to the enclosed spaces, splash damage is a very viable and consistent source of damage output here.
 Pyro
Pyro
- Pyros consistent damage makes them reasonably good Robot attackers, but this consumes significant ammunition and requires directed attacking (unlike e.g. Demomen). Fortunately, two Robot gibs will fully recharge a completely empty Flame Thrower.
- Airblast can be useful for escorting Scouts or blocking pushes.
- The importance of Engineer buildings, particularly in the enemy base, makes a Pyro buddy very valuable for Engineers that are the constant target of enemy Spies.
- The Phlogistinator's healing and crit ability allows you to roam freely, targeting enemies at choke points where you can quickly take out a whole group at once.
- The circuitous map lay out lends itself to ambushing enemies from behind, where the the Backburner is particularly effective.
- The Bridges and many balconies and ledges give many opportunities for timely airblasts to throw enemies over the edge.
- An airblast off into the Crevice makes for a quick, cheap kill.
- Airblasts can hold an attacking enemy off of dropped Power Cores, and in some stages, throw an enemy off a ledge, removing the attacker from the collecting area completely.
 Demoman
- Demomen seem to be most valuable destroying enemy Sentry Guns or sticky trapping the Reactor Core area.
- Demomen are also very powerful in this map due to their high splash damage, capitalize on this, and you can control large areas of the map if you have a keen eye.
- Stickies can be laid in masses and detonated to destroy a whole stage of robots instantly before the enemy team can respond to the Robot damage alert.
- The Scottish Resistance can be used to destroy the robots with rapid succession, one group right after the other.
 Heavy
Heavy
- The short sightlines makes the spin up time on your Minigun a liability. Consider aggressively spinning up if you think enemies are nearby, or switching to the Tomislav for better reaction time.
- Heavies seem to be more valuable on area defense:
- Around the robots when they are being attacked.
- Around the Reactor Core if it gets stolen or is in jeopardy of being stolen.
- Around a Sentry nest of more than 1 Engineer.
- Around their own spawn when enemies rush the base.
- Heavies can also be used to push as there is little room to dodge the Heavy's large cone of fire and high damage output. He can be a reliable source of damage and pushing power.
- The wide open spaces and vertical dimension around the midbridge and A Bridge dramatically diminish the Heavy's effectiveness in these areas. If at all possible, the Heavy should avoid making a stand in these areas. A better option is to use your greater health, covering fire from teammates, and possibly the GRU to move quickly to the next chokepoint, establish a screen of Minigun fire, and delay enemy reinforcements while your teammates mop up.
 Engineer
- The attackers must destroy the first group of robots, so defending that group is critical to denying the enemy from scoring points.
- Protect the reactor core by placing a sentry in the corridor to the left of the core, forcing any player who manages to take the core to go through the lasers (if there isn't another enemy player holding the one-way gate open).
- Sentry Guns will automatically attack enemy robots, and since the robots don't shoot back the Gunslinger becomes much more useful.
 Medic
Medic
- Medics should be flexible and be where their team is getting hurt the most...either with a Soldier or Heavy, or perhaps a Pyro.
- The tight corridors means that the Kritzkrieg is relatively effective on this map.
- Übercharge specific advantages:
- It is possible to get multiple team-mates through the enemy lasers using an Übercharge.
- An Übercharge can easily block an enemy player from crawling through the vents.
- Using an Übercharge can allow a brief moment for your healing target to destroy and robots in the immediate area without sustaining damage..
 Sniper
- The sniping options on Asteroid are fairly limited, though they remain effective:
- The roof areas next to the mid bridge.
- The upper decks on either side of the B robots bridge.
- The close quarters inside both bases makes Snipers generally less effective on this map. They do, however, make Jarate and the Machina somewhat more effective.
 Spy
Spy
- Note that Sappers do not work on the robots.
- Spies are great for sneaking behind enemy lines with Cloak and stealing the Core or killing robots.
- Using Cloak can also help with sneaking across the Mid Bridge or Under Bridge without getting noticed.
- Using the Basement areas as a main way of travel can easily help with ambushing the enemy team.
