Difference between revisions of "Australian Christmas"
Techno6666 (talk | contribs) (→Items) |
ThatHatGuy (talk | contribs) m |
||
| (111 intermediate revisions by 68 users not shown) | |||
| Line 1: | Line 1: | ||
| − | {{ | + | [[Image:Australian Christmas.png|420px|right|link=http://www.teamfortress.com/australianchristmas/]] |
| − | The '''Australian Christmas''' was a [[Patches#Major updates|major content]] update for ''[[Team Fortress 2]]'' | + | {{Quotation|'''TF2 Official Blog'''|You demanded a Holiday update, and by gad, you're going to get it and like it, pal. We've cooked up a fine feast of new weapons, garnished it with more headgear than you have heads, and left it simmering overnight in a new game mode. What are you waiting for?! Get over to the Update Page and chow down!}} |
| − | + | The <span class="plainlinks">'''[http://www.teamfortress.com/australianchristmas/ Australian Christmas]'''</span> was a [[Patches#Major updates|major seasonal content]] update for ''[[Team Fortress 2]]'' and was released on | |
| + | {{Patch name|12|17|2010}}. It was the first in what would later become the annual [[Smissmas]] event. | ||
| − | A new game mode, [[Medieval Mode]], was introduced | + | A new game mode, [[Medieval Mode]], was introduced with this update. It featured a new map, [[DeGroot Keep]]. |
| − | + | The update also increased default backpack slots from 200 to 300, and added the ability to acquire additional slots (100 at a time) by purchasing the [[Backpack Expander]] item. The maximum backpack size became 1000 slots. | |
| − | The update increased backpack slots from 200 to 300, | ||
| − | + | As part of the event, the [[Festive Winter Crate]] was added. These were unlockable with a [[Festive Winter Crate Key]], that was only available as a purchase from the [[Mann Co. Store]] for $2.49 / £1.99 / €2.49. | |
| − | + | This update also introduced the [[Itemtest]] map for the first time. | |
| − | == | + | == Background == |
| − | + | On December 18, 1788, less than a year after the first settlers colonized Australia, an old cutthroat named [[non-player characters#Nicholas_Crowder.2FOld_Nick|Nicolas Crowder]] arrived on a boat with some other new settlers, took one look at the heat and privations, said "screw this," commandeered the boat, and set course on a one-man voyage to conquer the South Pole. Legend tells that he lives there still. | |
| − | On December | ||
Every December 18th, "Old Nick" returns down under to find out if Australia's children have been naughty or nice. The nice children are given the greatest gift of all -- they are not abducted along with the naughty ones and carted off to the South Pole. | Every December 18th, "Old Nick" returns down under to find out if Australia's children have been naughty or nice. The nice children are given the greatest gift of all -- they are not abducted along with the naughty ones and carted off to the South Pole. | ||
| − | For the next twelve months, the naughty children make toys to Old Nick's exacting specifications. Then, on December 17th, the presents are gift-wrapped, placed in a sleigh, and driven to Old Nick's mansion, where he opens them. Naturally, given the sheer number of hats and weapons Old Nick receives, there are bound to be duplicates | + | For the next twelve months, the naughty children make toys to Old Nick's exacting specifications. Then, on December 17th, the presents are gift-wrapped, placed in a sleigh, and driven to Old Nick's mansion, where he opens them. Naturally, given the sheer number of hats and weapons Old Nick receives, there are bound to be duplicates – and every December 18th, he posts them online, selling them at prices so low that he's practically giving them away. |
| − | == | + | == Additions == |
| + | === Maps === | ||
| + | {{main|List of maps}} | ||
| + | {| class="wikitable" cellpadding=2 style="text-align:center;" | ||
| + | |- style="height: 20px;" | ||
| + | ! class="header" style="background-color:#b3d5ad;" | Name | ||
| + | ! class="header" style="background-color:#b3d5ad;" | Picture | ||
| + | ! class="header" style="background-color:#b3d5ad;" | Game mode | ||
| + | ! class="header" style="background-color:#b3d5ad;" | File name | ||
| + | |- | ||
| + | | style="background-color:#d7efd2;" | '''[[DeGroot Keep]]''' | ||
| + | | width="100px" | [[File:Degroot Keep Castle.png|230px|link=DeGroot Keep]] | ||
| + | | align="center" | '''[[Control Point (game mode)|Control Point]]<br />([[Medieval mode|Medieval]])'''<br />[[File:Controlpoint.png|50px|link=Control Point (game mode)]] | ||
| + | | width="60px" | {{code|cp_degrootkeep}} | ||
| + | |- | ||
| + | | style="background-color:#d7efd2;" | '''[[Itemtest]]''' | ||
| + | | width="100px" | [[File:Item test.jpg|230px|link=Itemtest]] | ||
| + | | align="center" | '''None''' | ||
| + | | width="60px" | {{code|itemtest}} | ||
| + | |} | ||
| − | {{main | + | === Item sets === |
| − | + | {{main|Item sets}} | |
| − | {| class="wikitable | + | {| class="wikitable collapsible" cellpadding=2 style="text-align:center;" |
| − | + | | width="80px" style="background:#b3d5ad;" rowspan=3 | '''{{Class link|demoman|br=yes}}''' | |
| − | + | | align="center" style="background:#FEF5E0;" rowspan=3 | [[File:Backpack Demoman Bundle.png|80px|link=Expert's Ordnance{{if lang}}]]<br />'''{{item link|Expert's Ordnance}}'''<br /> | |
| − | + | | width="80px" style="background:#d7efd2;" | {{Icon item|item=Loch-n-Load|icon-size=75px}} | |
| − | + | | align="center" style="background:#FEF5E0;" | '''{{item link|Loch-n-Load}}''' | |
| − | |||
|- | |- | ||
| − | | | + | | style="background:#d7efd2;" | {{Icon item|item=Ullapool Caber|icon-size=75px}} |
| − | + | | style="background:#FEF5E0;" | '''{{item link|Ullapool Caber}}''' | |
| − | |||
| − | | | ||
| − | |||
|- | |- | ||
| − | | {{ | + | | style="background:#d7efd2;" | {{Icon item|item=Scotch Bonnet|icon-size=75px}} |
| − | | | + | | style="background:#FEF5E0;" | '''{{item link|Scotch Bonnet}}''' |
| − | |||
|- | |- | ||
| − | | {{ | + | | style="background:#b3d5ad;" rowspan=4 | '''{{Class link|heavy|br=yes}}''' |
| − | | | + | | style="background:#FFFCF7;" rowspan=4 | [[File:Backpack Heavy Bundle.png|80px|link=Hibernating Bear{{if lang}}]]<br />'''{{item link|Hibernating Bear}}'''<br /> |
| − | | | + | | style="background:#d7efd2;" | {{Icon item|item=Brass Beast|icon-size=75px}} |
| + | | '''{{item link|Brass Beast}}''' | ||
|- | |- | ||
| − | | | + | | style="background:#d7efd2;" | {{Icon item|item=Buffalo Steak Sandvich|icon-size=75px}} |
| − | + | | '''{{item link|Buffalo Steak Sandvich}}''' | |
| − | |||
| − | |||
| − | |||
|- | |- | ||
| − | |{{ | + | | style="background:#d7efd2;" | {{Icon item|item=Warrior's Spirit|icon-size=75px}} |
| − | + | | '''{{item link|Warrior's Spirit}}''' | |
| − | |||
|- | |- | ||
| − | | | + | | style="background:#d7efd2;" | {{Icon item|item=Big Chief|icon-size=75px}} |
| − | + | | '''{{item link|Big Chief}}''' | |
| − | |||
| − | |||
| − | |||
|- | |- | ||
| − | |{{ | + | | style="background:#b3d5ad;" rowspan=3 | '''{{Class link|medic|br=yes}}''' |
| − | | | + | | style="background:#FEF5E0;" rowspan=3 | [[File:Backpack Medic Bundle.png|80px|link=Medieval Medic{{if lang}}]]<br />'''{{item link|Medieval Medic}}'''<br /> |
| − | | | + | | style="background:#d7efd2;" | {{Icon item|item=Crusader's Crossbow|icon-size=75px}} |
| + | | style="background:#FEF5E0;" | '''{{item link|Crusader's Crossbow}}''' | ||
|- | |- | ||
| − | |{{ | + | | style="background:#d7efd2;" | {{Icon item|item=Amputator|icon-size=75px}} |
| − | + | | style="background:#FEF5E0;" | '''{{item link|Amputator}}''' | |
| − | |||
|- | |- | ||
| − | |{{ | + | | style="background:#d7efd2;" | {{Icon item|item=Berliner's Bucket Helm|icon-size=75px}} |
| − | + | | style="background:#FEF5E0;" | '''{{item link|Berliner's Bucket Helm}}''' | |
| − | |||
|- | |- | ||
| − | | | + | | height="30px" style="background:#b3d5ad;" | '''Notes''' |
| − | | | + | | colspan="3" | Sets did not originally require Cosmetics. |
| − | + | |} | |
| − | | | + | |
| − | | {{ | + | === Weapons === |
| + | {{main|Weapons}} | ||
| + | {| class="wikitable collapsible" cellpadding=2 style="text-align:center;" | ||
| + | | width="80px" style="background-color:#b3d5ad;" rowspan=2 | '''{{Class link|Scout|br=yes}}''' | ||
| + | | width="80px" style="background-color:#d7efd2;" | {{Icon item|item=Candy Cane|icon-size=75px}} | ||
| + | | '''{{item link|Candy Cane}}''' | ||
|- | |- | ||
| − | | {{ | + | | style="background-color:#d7efd2;" | {{Icon item|item=Boston Basher|icon-size=75px}} |
| − | + | | '''{{item link|Boston Basher}}''' | |
| − | |||
|- | |- | ||
| − | | | + | | style="background-color:#b3d5ad;" | '''{{Class link|pyro|br=yes}}''' |
| − | | {{ | + | | style="background-color:#d7efd2;" | {{Icon item|item=Back Scratcher|icon-size=75px}} |
| − | | | + | | '''{{item link|Back Scratcher}}''' |
| − | | {{ | ||
|- | |- | ||
| − | |{{ | + | | style="background-color:#b3d5ad;" | '''{{Class link|demoman|br=yes}}''' |
| − | + | | style="background-color:#d7efd2;" | {{Icon item|item=Claidheamh Mòr|icon-size=75px}} | |
| − | + | | '''{{item link|Claidheamh Mòr}}''' | |
|- | |- | ||
| − | |{{ | + | | style="background-color:#b3d5ad;" | '''{{Class link|heavy|br=yes}}''' |
| − | + | | style="background-color:#d7efd2;" | {{Icon item|item=Fists of Steel|icon-size=75px}} | |
| − | + | | '''{{item link|Fists of Steel}}''' | |
|- | |- | ||
| − | | | + | | style="background-color:#b3d5ad;" | '''{{Class link|engineer|br=yes}}''' |
| − | | | + | | style="background-color:#d7efd2;" | {{Icon item|item=Jag|icon-size=75px}} |
| − | | {{ | + | | '''{{item link|Jag}}''' |
| − | | | + | |} |
| − | | {{ | + | |
| + | === Cosmetic items === | ||
| + | {{main|Cosmetic items}} | ||
| + | {| class="wikitable collapsible" cellpadding=2 style="text-align:center;" | ||
| + | | width="80px" style="background-color:#b3d5ad;" | '''{{Class link|scout|br=yes}}''' | ||
| + | | width="80px" style="background-color:#d7efd2;" | {{Icon item|item=Flipped Trilby|icon-size=75px}} | ||
| + | | '''{{item link|Flipped Trilby}}''' | ||
|- | |- | ||
| − | | {{ | + | | style="background-color:#b3d5ad;" rowspan=2 | '''{{Class link|soldier|br=yes}}''' |
| − | | | + | | style="background-color:#d7efd2;" | {{Icon item|item=Defiant Spartan|icon-size=75px}} |
| − | | {{ | + | | '''{{item link|Defiant Spartan}}''' |
|- | |- | ||
| − | | {{ | + | | style="background-color:#d7efd2;" | {{Icon item|item=Exquisite Rack|icon-size=75px}} |
| − | + | | '''{{item link|Exquisite Rack}}''' | |
| − | |||
|- | |- | ||
| − | | rowspan= | + | | style="background-color:#b3d5ad;" rowspan=3 | '''{{Class link|pyro|br=yes}}''' |
| − | | {{ | + | | style="background-color:#d7efd2;" | {{Icon item|item=Madame Dixie|icon-size=75px}} |
| − | | | + | | '''{{item link|Madame Dixie}}''' |
| − | | {{ | ||
|- | |- | ||
| − | |{{ | + | | style="background-color:#d7efd2;" | {{Icon item|item=Prancer's Pride|icon-size=75px}} |
| − | + | | '''{{item link|Prancer's Pride}}''' | |
| − | |||
|- | |- | ||
| − | |{{ | + | | style="background-color:#d7efd2;" | {{Icon item|item=Pyromancer's Mask|icon-size=75px}} |
| − | + | | '''{{item link|Pyromancer's Mask}}''' | |
| − | |||
|- | |- | ||
| − | |{{ | + | | style="background-color:#b3d5ad;" | '''{{Class link|demoman|br=yes}}''' |
| − | + | | style="background-color:#d7efd2;" | {{Icon item|item=Prince Tavish's Crown|icon-size=75px}} | |
| − | + | | '''{{item link|Prince Tavish's Crown}}''' | |
|- | |- | ||
| − | | rowspan= | + | | style="background-color:#b3d5ad;" rowspan=2 | '''{{Class link|heavy|br=yes}}''' |
| − | | | + | | style="background-color:#d7efd2;" | {{Icon item|item=Coupe D'isaster|icon-size=75px}} |
| − | | {{ | + | | '''{{item link|Coupe D'isaster}}''' |
| − | |||
| − | |||
|- | |- | ||
| − | |{{ | + | | style="background-color:#d7efd2;" | {{Icon item|item=Magnificent Mongolian|icon-size=75px}} |
| − | + | | '''{{item link|Magnificent Mongolian}}''' | |
| − | |||
|- | |- | ||
| − | |{{ | + | | style="background-color:#b3d5ad;" rowspan=2 | '''{{Class link|engineer|br=yes}}''' |
| − | + | | style="background-color:#d7efd2;" | {{Icon item|item=Buckaroo's Hat|icon-size=75px}} | |
| − | + | | '''{{item link|Buckaroo's Hat}}''' | |
|- | |- | ||
| − | | | + | | style="background-color:#d7efd2;" | {{Icon item|item=Industrial Festivizer|icon-size=75px}} |
| − | + | | '''{{item link|Industrial Festivizer}}''' | |
| − | | | ||
| − | |||
| − | |||
|- | |- | ||
| − | | {{ | + | | style="background-color:#b3d5ad;" rowspan=2 | '''{{Class link|medic|br=yes}}''' |
| − | | | + | | style="background-color:#d7efd2;" | {{Icon item|item=Blighted Beak|icon-size=75px}} |
| − | | {{ | + | | '''{{item link|Blighted Beak}}''' |
|- | |- | ||
| − | | | + | | style="background-color:#d7efd2;" | {{Icon item|item=German Gonzila|icon-size=75px}} |
| − | |{{ | + | | '''{{item link|German Gonzila}}''' |
| − | |||
| − | |||
|- | |- | ||
| − | |{{ | + | | style="background-color:#b3d5ad;" | '''{{Class link|sniper|br=yes}}''' |
| − | + | | style="background-color:#d7efd2;" | {{Icon item|item=Larrikin Robin|icon-size=75px}} | |
| − | + | | '''{{item link|Larrikin Robin}}''' | |
|- | |- | ||
| − | ||{{ | + | | style="background-color:#b3d5ad;" rowspan=2 | '''{{Class link|spy|br=yes}}''' |
| − | + | | style="background-color:#d7efd2;" | {{Icon item|item=Détective Noir|icon-size=75px}} | |
| − | + | | '''{{item link|Détective Noir}}''' | |
|- | |- | ||
| − | | | + | | style="background-color:#d7efd2;" | {{Icon item|item=Le Party Phantom|icon-size=75px}} |
| − | + | | '''{{item link|Le Party Phantom}}''' | |
| − | |||
| − | |||
| − | |||
|- | |- | ||
| − | | rowspan=2|{{ | + | | style="background-color:#b3d5ad;" rowspan=2 | '''{{Class link|all classes|br=yes}}''' |
| − | | | + | | style="background-color:#d7efd2;" | {{Icon item|item=A Rather Festive Tree|icon-size=75px}} |
| − | |{{ | + | | '''{{item link|A Rather Festive Tree}}''' |
| − | |||
| − | |||
|- | |- | ||
| − | |{{icon item|item= | + | | style="background-color:#d7efd2;" | {{Icon item|item=World Traveler's Hat|icon-size=75px}} |
| − | | | + | | '''{{item link|World Traveler's Hat}}''' |
| − | | | + | |} |
| + | |||
| + | === Tools === | ||
| + | {{main|Tools}} | ||
| + | {| class="wikitable collapsible" cellpadding=2 style="text-align:center;" | ||
| + | | width="80px" style="background:#b3d5ad;" | {{Icon item|item=Backpack Expander|icon-size=75px}} | ||
| + | | style="background:#d7efd2;" | '''{{item link|Backpack Expander}}''' | ||
| + | | style="text-align:left;" | Expands the user's backpack by 100 slots. | ||
|- | |- | ||
| − | | | + | | style="background:#b3d5ad;" | {{Icon item|item=Map Stamps Collection|icon-size=75px}} |
| − | + | | style="background:#d7efd2;" | '''{{item link|Map Stamp}}''' | |
| − | |{{ | + | | style="text-align:left;" | Buy Map Stamps to support community map makers.<br>The first time a player buys a Map Stamp they will receive a [[World Traveler's Hat|hat]] that includes a stamp [[particle effect]].<br>The particle effect only occurs when a player has purchased a map stamp for the map upon which they are playing. |
| − | | | ||
| − | | | ||
|- | |- | ||
| − | |{{ | + | | style="background:#b3d5ad;" | {{Icon item|item=Festive Winter Crate|icon-size=75px}} |
| − | | | + | | style="background:#d7efd2;" | '''{{item link|Festive Winter Crate}}''' |
| − | | | + | | style="text-align:left;" | As of December 31, 2010, this crate can no longer be opened. |
|- | |- | ||
| + | | style="background:#b3d5ad;" | {{Icon item|item=Festive Winter Crate Key|icon-size=75px}} | ||
| + | | style="background:#d7efd2;" | '''{{item link|Festive Winter Crate Key}}''' | ||
| + | | style="text-align:left;" | Used to open Festive Winter Crates.<br>After December 31, 2010, this key turned into a regular [[Mann Co. Supply Crate Key]]. | ||
|} | |} | ||
| − | == | + | == Gallery == |
| − | + | <gallery perrow=4> | |
| − | + | File:Australian Christmas Update.png|The Australian Christmas update page | |
| − | + | File:Store xmas sale 1.png|1st Christmas Announcement from Mann Co. | |
| − | + | File:Store xmas sale 2.png|2nd Christmas Announcement from Mann Co. | |
| − | + | File:Store xmas sale 3.png|3rd Christmas Announcement from Mann Co. | |
| + | File:News item 2010-12-18 Winter Update.png|In-game announcement of the update | ||
| + | File:News item 2010-12-22 A Stocking Stuffer.png|In-game notification of the [[Stocking Stuffer Key]] | ||
| + | File:News item 2010-12-24 Hat Sale On Now!.png|The Hat Sale advertisement | ||
| + | File:News item 2010-12-30 Festive Winter Crates Expire Soon!.png|Crate expiry warning | ||
| + | </gallery> | ||
| − | + | == External links == | |
| + | * [http://www.teamfortress.com/australianchristmas/ Australian Christmas] | ||
| − | [[Category: | + | {{Australian Christmas Nav}} |
| + | {{Smissmas Events Nav}} | ||
| + | {{Major updates nav}} | ||
| + | [[Category:Major updates]] | ||
| + | [[Category:Smissmas]] | ||
Latest revision as of 00:47, 18 August 2023

| “ | You demanded a Holiday update, and by gad, you're going to get it and like it, pal. We've cooked up a fine feast of new weapons, garnished it with more headgear than you have heads, and left it simmering overnight in a new game mode. What are you waiting for?! Get over to the Update Page and chow down!
— TF2 Official Blog
|
” |
The Australian Christmas was a major seasonal content update for Team Fortress 2 and was released on December 17, 2010 Patch. It was the first in what would later become the annual Smissmas event.
A new game mode, Medieval Mode, was introduced with this update. It featured a new map, DeGroot Keep.
The update also increased default backpack slots from 200 to 300, and added the ability to acquire additional slots (100 at a time) by purchasing the Backpack Expander item. The maximum backpack size became 1000 slots.
As part of the event, the Festive Winter Crate was added. These were unlockable with a Festive Winter Crate Key, that was only available as a purchase from the Mann Co. Store for $2.49 / £1.99 / €2.49.
This update also introduced the Itemtest map for the first time.
Contents
Background
On December 18, 1788, less than a year after the first settlers colonized Australia, an old cutthroat named Nicolas Crowder arrived on a boat with some other new settlers, took one look at the heat and privations, said "screw this," commandeered the boat, and set course on a one-man voyage to conquer the South Pole. Legend tells that he lives there still.
Every December 18th, "Old Nick" returns down under to find out if Australia's children have been naughty or nice. The nice children are given the greatest gift of all -- they are not abducted along with the naughty ones and carted off to the South Pole.
For the next twelve months, the naughty children make toys to Old Nick's exacting specifications. Then, on December 17th, the presents are gift-wrapped, placed in a sleigh, and driven to Old Nick's mansion, where he opens them. Naturally, given the sheer number of hats and weapons Old Nick receives, there are bound to be duplicates – and every December 18th, he posts them online, selling them at prices so low that he's practically giving them away.
Additions
Maps
| Name | Picture | Game mode | File name |
|---|---|---|---|
| DeGroot Keep | 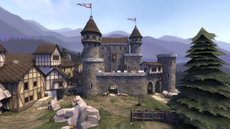
|
Control Point (Medieval) |
cp_degrootkeep
|
| Itemtest | 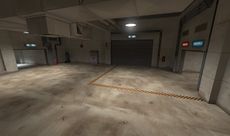
|
None | itemtest
|
Item sets
 The Expert's Ordnance |
Loch-n-Load | ||
| Ullapool Caber | |||
| Scotch Bonnet | |||
 The Hibernating Bear |
Brass Beast | ||
| Buffalo Steak Sandvich | |||
| Warrior's Spirit | |||
| Big Chief | |||
 The Medieval Medic |
Crusader's Crossbow | ||
| Amputator | |||
| Berliner's Bucket Helm | |||
| Notes | Sets did not originally require Cosmetics. | ||
Weapons
| Candy Cane | ||
| Boston Basher | ||
| Back Scratcher | ||
| Claidheamh Mòr | ||
| Fists of Steel | ||
| Jag |
Cosmetic items
Tools
| Backpack Expander | Expands the user's backpack by 100 slots. | |
| Map Stamp | Buy Map Stamps to support community map makers. The first time a player buys a Map Stamp they will receive a hat that includes a stamp particle effect. The particle effect only occurs when a player has purchased a map stamp for the map upon which they are playing. | |
| Festive Winter Crate | As of December 31, 2010, this crate can no longer be opened. | |
| Festive Winter Crate Key | Used to open Festive Winter Crates. After December 31, 2010, this key turned into a regular Mann Co. Supply Crate Key. |
Gallery

The Australian Christmas update page
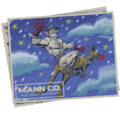
1st Christmas Announcement from Mann Co.
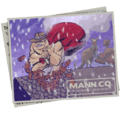
2nd Christmas Announcement from Mann Co.
3rd Christmas Announcement from Mann Co.
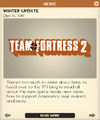
In-game announcement of the update
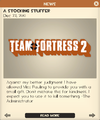
In-game notification of the Stocking Stuffer Key
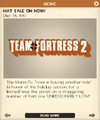
The Hat Sale advertisement
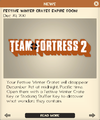
Crate expiry warning


External links
| |||||
| |||||||||||||||||||||||||||||||||||||||||||||||||||||||||||||||||||||||||||||||||||||||||||||||