Difference between revisions of "Respawn"
m (→Update history) |
GrampaSwood (talk | contribs) (Tag: Undo) |
||
| (73 intermediate revisions by 47 users not shown) | |||
| Line 1: | Line 1: | ||
| − | [[ | + | [[File:Heavyrespawns.png|275px|right]] |
{{Quotation|'''The Spy''' on coming back to life|I'm back, you subnormal halfwit!|sound=Spy_Revenge02.wav}} | {{Quotation|'''The Spy''' on coming back to life|I'm back, you subnormal halfwit!|sound=Spy_Revenge02.wav}} | ||
| − | The term '''respawn''' may be used to refer to either the act or event of respawning, the place in which it occurs, or the reappearance of map [[pickups]] after they have been used, such as [[Ammo]] and [[Health]] packs. The game respawns players in waves in order for them to appear together with other players who died at a similar time, thus forcing them to work together. | + | The term '''respawn''' may be used to refer to either the act or event of respawning, the place in which it occurs, or the reappearance of map [[pickups]] after they have been used, such as [[Ammo]] and [[Health]] packs. The game respawns players in waves in order for them to appear together with other players who died at a similar time, thus forcing them to work together. Ammo and Health kits take around 10-20 seconds to respawn. |
| − | The initial entry in which | + | The initial entry in which a player first joins a map, as well as the creation of new entities (such as the appearance of [[Skeletons]]), simply goes by the term '''spawn'''. |
| − | In [[Arena]] Mode, or when | + | In [[Arena]] Mode, or when matches turn to [[Sudden Death]] Mode, players that die do not respawn until the next round has begun. |
== Respawn times == | == Respawn times == | ||
| − | + | {{Hatnote|For exact timing measurements on all [[List of maps|official maps]], see [[Respawn times]].}} | |
| − | The time it takes for the respawn wave to occur after being killed, or '''respawn time''', is variable, and a countdown is shown at the top of | + | The time it takes for the respawn wave to occur after being killed, or '''respawn time''', is variable, and a countdown is shown at the top of the player's [[Heads-up display|HUD]] when their character has died. Respawn waves occur at regular intervals and are based on the map settings. Most official maps use a 10-second respawn wave time. Those 10 seconds are then modified by the map state, generally reduced for the team that controls the most [[Control point (objective)|control points]]. Each team's respawn wave time is then scaled down when the team has less than 8 players in it. The minimum respawn wave time is 5 seconds, occurring when the team has 3 or less players in it. When a player dies, they are assigned to the respawn wave after the next one. Therefore, if the respawn wave time is currently 10 seconds for the player's team, they respawn somewhere between 10 and 20 seconds after their death. A player's individual performance does not affect their respawn wave time in any way. |
| − | Respawn wave time on a [[server]] can be altered by changing the {{code|mp_respawnwavetime}} variable. | + | Respawn wave time on a [[Servers|server]] can be altered by changing the {{code|mp_respawnwavetime}} variable. |
=== Instant respawn times === | === Instant respawn times === | ||
| Line 21: | Line 21: | ||
== Areas == | == Areas == | ||
=== Respawn === | === Respawn === | ||
| − | The '''respawn''' area refers to where newly-joined and resurrected players are placed. On some maps, this may be a separate room from the resupply area. Frequently, the two areas overlap and there is no visible distinction between the two. The use of the respawn area as a separate room is frequently found on [[ | + | The '''respawn''' area refers to where newly-joined and resurrected players are placed. On some maps, this may be a separate room from the resupply area. Frequently, the two areas overlap and there is no visible distinction between the two. The use of the respawn area as a separate room is frequently found on [[Capture the Flag]] maps. In this case, there are sometimes automatic double doors leading to the resupply area. These doors frequently may only be opened from the inside, and when present provide one of the few safe places during [[Match outcomes#Humiliation|Humiliation]]. |
| − | + | Players may change class within the respawn area without committing [[suicide]]. On most maps, it is also safe to change class within the [[#Resupply|resupply area]], even if they are separate rooms. The point where a player respawns is randomly chosen, but on [[Control Point (game mode)|Control Point]] maps, it is often determined by which control points their team has control over. It should be noted that changing classes may at times instantly put the player in a different respawn area if more than one is present. | |
| − | |||
| − | |||
=== Resupply === | === Resupply === | ||
| − | The '''resupply''' area is a room which is generally safe from opponents and provides | + | The '''resupply''' area is a room which is generally safe from opponents and provides players with Resupply lockers to replenish health and ammunition. Depending on the map, this area may be adjacent, separate, or even overlapping to the respawn area. Most resupply areas contain one or more Resupply lockers which instantly provide full health, metal, and ammunition (including refilling all the magazines of the player's weapons) upon opening, while also playing [[Media:Regenerate.wav|a unique sound]]. They also are able to remove the effects of [[Jarate]] and [[Mad Milk]], stop [[bleeding]], and extinguish [[Fire#Afterburn|afterburn]]. Using a Resupply locker also allows players to switch between [[cosmetic items]] and/or [[weapons]] if they have already respawned, therefore eliminating the need to switch between [[classes]] in order to update their weapon [[loadout]] (unless the option 'Automatically respawning when you change your loadout' is checked). Honorbound [[Demoman|Demomen]] or [[Soldier]]s with the [[Half-Zatoichi]] out can touch a Resupply locker to switch weapons without losing health. Finally, using a Resupply locker recharges the explosive in the [[Ullapool Caber]] and gives another [[Razorback]] to a [[Sniper]] who has been backstabbed while wearing one. To open a Resupply locker, the player must simply walk near it. It should be noted that Resupply lockers cannot be opened during [[Sudden Death]] or by the losing team during [[Match outcomes#Humiliation|Humiliation]]. |
| − | Other purely decorative objects within the resupply area may include lockers in which the various | + | Other purely decorative objects within the resupply area may include lockers in which the various classes keep their personal belongings, free weights, and targets for practice. |
=== Gallery === | === Gallery === | ||
<gallery> | <gallery> | ||
| − | + | File:Resupplylocker.png|Resupply lockers, found in resupply areas, return players to full health and ammunition when used. | |
| − | + | File:Resupply locker open.png|An open Resupply locker. | |
| − | + | File:Pyroland Supply Closed.png|Resupply Locker, as seen in [[Pyroland]]. | |
| − | + | File:Pyroland Supply Open.png|An open Resupply Locker, as seen in Pyroland. | |
| + | File:Medieval resupply locker closed.png|The Medieval Mode Resupply locker used on [[Degroot Keep]], [[Burghausen]], [[Sandcastle]], and [[Embargo]]. | ||
| + | File:Medieval resupply locker open.png|An open Medieval Mode Resupply locker. | ||
| + | File:Suijin Supply 1.png|The resupply locker used on [[Suijin]]. | ||
| + | File:Suijin Supply 2.png|An open resupply locker from Suijin. | ||
| + | File:Breadspace red resupply locker.png |The resupply locker on [[RED]] team used on [[Bread Space]]. | ||
| + | File:Breadspace red resupply locker open.png |A RED team opened resupply locker from Bread Space. | ||
| + | File:Breadspace blu resupply locker.png |The resupply locker on [[BLU]] team used on Bread Space. | ||
| + | File:Breadspace blu resupply locker open.png |A BLU team opened resupply locker from Bread Space. | ||
| + | File:Sinthetic resupply locker closed.png|The resupply locker used on [[Sinthetic]], [[Farmageddon]], and [[Bonesaw (map)|Bonesaw]]. | ||
| + | File:Sinthetic resupply locker open.png|An open resupply locker from Sinthetic, Farmageddon, and Bonesaw. | ||
| + | File:Mannsylvania resupply locker closed.png|The resupply locker used on [[Mannsylvania]]. | ||
| + | File:Mannsylvania resupply locker open.png|An open resupply locker from Mannsylvania. | ||
| + | File:Hoodoo resupply locker closed.png|The resupply locker on the first stage of [[Hoodoo]]. | ||
| + | File:Hoodoo resupply locker open.png|An open resupply locker on the first stage of Hoodoo. | ||
| + | File:Embargo red resupply locker.png|The resupply locker on RED team used on Embargo. | ||
| + | File:Embargo red resupply locker open.png|A RED team opened resupply locker from Embargo. | ||
| + | File:Embargo blu resupply locker.png|The resupply locker on BLU team used on Embargo. | ||
| + | File:Embargo blu resupply locker open.png|A BLU team opened resupply locker from Embargo. | ||
</gallery> | </gallery> | ||
== Related achievements == | == Related achievements == | ||
| − | ==={{class link|Spy}}=== | + | === {{class link|Spy}} === |
{{Achievement table | {{Achievement table | ||
| 1 = {{Show achievement|Spy|Slash and Burn}} | | 1 = {{Show achievement|Spy|Slash and Burn}} | ||
| Line 49: | Line 65: | ||
{{Update history| | {{Update history| | ||
'''{{Patch name|10|5|2007}}''' | '''{{Patch name|10|5|2007}}''' | ||
| − | * Fixed teleporter/spawn doorway exploit | + | * Fixed teleporter/spawn doorway exploit. |
'''{{Patch name|11|15|2007}}''' | '''{{Patch name|11|15|2007}}''' | ||
| − | * Fixed exploit where spectators could spawn into the world without actually joining a team | + | * Fixed exploit where spectators could spawn into the world without actually joining a team. |
'''{{Patch name|12|31|2007}}''' | '''{{Patch name|12|31|2007}}''' | ||
| − | * Fixed an exploit allowing players to spawn into the enemy territory at the start of a round | + | * Fixed an exploit allowing players to spawn into the enemy territory at the start of a round. |
'''{{Patch name|6|25|2009}}''' | '''{{Patch name|6|25|2009}}''' | ||
| − | * Fixed Bonk! ammo count exploit after using a regeneration locker | + | * Fixed Bonk! ammo count exploit after using a regeneration locker. |
'''{{Patch name|7|14|2009}}''' | '''{{Patch name|7|14|2009}}''' | ||
| − | * Fixed being able to respawn during the chat time before a level change | + | * Fixed being able to respawn during the chat time before a level change. |
'''{{Patch name|9|30|2010}}''' | '''{{Patch name|9|30|2010}}''' | ||
| − | * {{Undocumented}} Players will automatically be respawned with their | + | * {{Undocumented}} Players will automatically be respawned with their loadouts if they switch weapons while in a spawn area. |
'''{{Patch name|3|11|2011}}''' | '''{{Patch name|3|11|2011}}''' | ||
| Line 70: | Line 86: | ||
'''{{Patch name|3|21|2011}}''' | '''{{Patch name|3|21|2011}}''' | ||
| − | * Updated honor-bound weapons so they can be holstered within a second of touching a supply cabinet | + | * Updated [[Half-Zatoichi|honor-bound weapons]] so they can be holstered within a second of touching a supply cabinet. |
'''{{Patch name|4|14|2011}}''' ([[Hatless Update]]) | '''{{Patch name|4|14|2011}}''' ([[Hatless Update]]) | ||
| Line 76: | Line 92: | ||
'''{{Patch name|8|23|2011}}''' | '''{{Patch name|8|23|2011}}''' | ||
| − | * Fixed supply closets regenerating players while they are taunting | + | * Fixed supply closets regenerating players while they are taunting. |
| + | |||
| + | '''{{Patch name|12|23|2014}}''' | ||
| + | * Fixed the [[Grappling Hook|grapple]] still being connected to players after they die and respawn. | ||
| + | |||
| + | '''{{Patch name|3|12|2015}}''' | ||
| + | * Fixed an exploit related to [[List of game modes#Highlander|Highlander]] mode and changing teams with instant respawn. | ||
| + | |||
| + | '''{{Patch name|6|21|2022}}''' | ||
| + | * Fixed an exploit where players could teleport back to their own spawn by changing loadout/class while touching the other team's No Entry gate. | ||
}} | }} | ||
| + | |||
| + | == Unused content == | ||
| + | * In the VPK files of ''[[Team Fortress 2]]'', and in unused sound effects, there is a turret that may have been intended to guard the respawn area rather than the eventual invisible wall, similar to ''[[Team Fortress Classic]]''. | ||
== Bugs == | == Bugs == | ||
| − | * Rarely, the player | + | * Rarely, the player becomes stuck in the respawn wave after dying. The time resets whenever it reaches "Prepare to respawn". This can sometimes be fixed by re-selecting one's class. |
| + | * When joining a game, if the player selected a team, the player can be kicked out of the class selection. When going back to the class selection and choosing a class, the player does not respawn. Leaving the game and rejoining the server can fix this issue. | ||
| + | * It is possible to circumvent the disabled respawn after the round ends on the winning team by changing class after the respawn timer would have expired. | ||
| + | * In the [[PlayStation 3]] version of ''Team Fortress 2'', the spawn room gates appear to go underground. | ||
== See also == | == See also == | ||
| Line 86: | Line 117: | ||
== External links == | == External links == | ||
| − | * [ | + | * [https://www.teamfortress.com/post.php?id=1872 TF2 Official Website, October 8, 2008 blog post] – Explains the reasoning behind the respawn "waves" system. |
| + | |||
| + | {{Mechanics Nav}} | ||
[[Category:Gameplay]] | [[Category:Gameplay]] | ||
Latest revision as of 11:37, 9 December 2024
| “ | I'm back, you subnormal halfwit!
Click to listen
— The Spy on coming back to life
|
” |
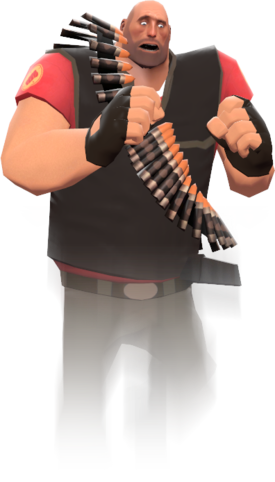
The term respawn may be used to refer to either the act or event of respawning, the place in which it occurs, or the reappearance of map pickups after they have been used, such as Ammo and Health packs. The game respawns players in waves in order for them to appear together with other players who died at a similar time, thus forcing them to work together. Ammo and Health kits take around 10-20 seconds to respawn.
The initial entry in which a player first joins a map, as well as the creation of new entities (such as the appearance of Skeletons), simply goes by the term spawn.
In Arena Mode, or when matches turn to Sudden Death Mode, players that die do not respawn until the next round has begun.
Contents
Respawn times
The time it takes for the respawn wave to occur after being killed, or respawn time, is variable, and a countdown is shown at the top of the player's HUD when their character has died. Respawn waves occur at regular intervals and are based on the map settings. Most official maps use a 10-second respawn wave time. Those 10 seconds are then modified by the map state, generally reduced for the team that controls the most control points. Each team's respawn wave time is then scaled down when the team has less than 8 players in it. The minimum respawn wave time is 5 seconds, occurring when the team has 3 or less players in it. When a player dies, they are assigned to the respawn wave after the next one. Therefore, if the respawn wave time is currently 10 seconds for the player's team, they respawn somewhere between 10 and 20 seconds after their death. A player's individual performance does not affect their respawn wave time in any way.
Respawn wave time on a server can be altered by changing the mp_respawnwavetime variable.
Instant respawn times
Some servers feature instant respawn times where the waiting period for players to respawn is drastically reduced or even eliminated for all players. Servers can use either third-party custom plugins to enable this feature or the in-built command mp_disable_respawn_times. The amount of time between death and actual respawn can vary if the server forces the Deathcam to be displayed.
Areas
Respawn
The respawn area refers to where newly-joined and resurrected players are placed. On some maps, this may be a separate room from the resupply area. Frequently, the two areas overlap and there is no visible distinction between the two. The use of the respawn area as a separate room is frequently found on Capture the Flag maps. In this case, there are sometimes automatic double doors leading to the resupply area. These doors frequently may only be opened from the inside, and when present provide one of the few safe places during Humiliation.
Players may change class within the respawn area without committing suicide. On most maps, it is also safe to change class within the resupply area, even if they are separate rooms. The point where a player respawns is randomly chosen, but on Control Point maps, it is often determined by which control points their team has control over. It should be noted that changing classes may at times instantly put the player in a different respawn area if more than one is present.
Resupply
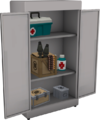
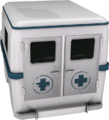
The resupply area is a room which is generally safe from opponents and provides players with Resupply lockers to replenish health and ammunition. Depending on the map, this area may be adjacent, separate, or even overlapping to the respawn area. Most resupply areas contain one or more Resupply lockers which instantly provide full health, metal, and ammunition (including refilling all the magazines of the player's weapons) upon opening, while also playing a unique sound. They also are able to remove the effects of Jarate and Mad Milk, stop bleeding, and extinguish afterburn. Using a Resupply locker also allows players to switch between cosmetic items and/or weapons if they have already respawned, therefore eliminating the need to switch between classes in order to update their weapon loadout (unless the option 'Automatically respawning when you change your loadout' is checked). Honorbound Demomen or Soldiers with the Half-Zatoichi out can touch a Resupply locker to switch weapons without losing health. Finally, using a Resupply locker recharges the explosive in the Ullapool Caber and gives another Razorback to a Sniper who has been backstabbed while wearing one. To open a Resupply locker, the player must simply walk near it. It should be noted that Resupply lockers cannot be opened during Sudden Death or by the losing team during Humiliation.
Other purely decorative objects within the resupply area may include lockers in which the various classes keep their personal belongings, free weights, and targets for practice.
Gallery
Resupply Locker, as seen in Pyroland.
The Medieval Mode Resupply locker used on Degroot Keep, Burghausen, Sandcastle, and Embargo.
The resupply locker used on Suijin.
The resupply locker on RED team used on Bread Space.
The resupply locker on BLU team used on Bread Space.
The resupply locker used on Sinthetic, Farmageddon, and Bonesaw.
The resupply locker used on Mannsylvania.
The resupply locker on the first stage of Hoodoo.
Related achievements
 Spy
Spy
|
Update history
- Fixed teleporter/spawn doorway exploit.
- Fixed exploit where spectators could spawn into the world without actually joining a team.
- Fixed an exploit allowing players to spawn into the enemy territory at the start of a round.
- Fixed Bonk! ammo count exploit after using a regeneration locker.
- Fixed being able to respawn during the chat time before a level change.
- [Undocumented] Players will automatically be respawned with their loadouts if they switch weapons while in a spawn area.
- Fixed players not being able to fire their weapons right after spawning.
- Updated honor-bound weapons so they can be holstered within a second of touching a supply cabinet.
April 14, 2011 Patch (Hatless Update)
- Items in the action slot no longer swap before returning to a supply cabinet.
- Fixed supply closets regenerating players while they are taunting.
- Fixed the grapple still being connected to players after they die and respawn.
- Fixed an exploit related to Highlander mode and changing teams with instant respawn.
- Fixed an exploit where players could teleport back to their own spawn by changing loadout/class while touching the other team's No Entry gate.
Unused content
- In the VPK files of Team Fortress 2, and in unused sound effects, there is a turret that may have been intended to guard the respawn area rather than the eventual invisible wall, similar to Team Fortress Classic.
Bugs
- Rarely, the player becomes stuck in the respawn wave after dying. The time resets whenever it reaches "Prepare to respawn". This can sometimes be fixed by re-selecting one's class.
- When joining a game, if the player selected a team, the player can be kicked out of the class selection. When going back to the class selection and choosing a class, the player does not respawn. Leaving the game and rejoining the server can fix this issue.
- It is possible to circumvent the disabled respawn after the round ends on the winning team by changing class after the respawn timer would have expired.
- In the PlayStation 3 version of Team Fortress 2, the spawn room gates appear to go underground.
See also
External links
- TF2 Official Website, October 8, 2008 blog post – Explains the reasoning behind the respawn "waves" system.
| ||||||||||||||
