Difference between revisions of "User:Lolimsogreat21/Sandbox2"
(Completed the second checkpoint.) |
m (Cutting down the maps) |
||
| (395 intermediate revisions by 3 users not shown) | |||
| Line 1: | Line 1: | ||
| − | + | {{Quotation|'''The Engineer''' running from zombies |Move, ''move,'' '''''move!'''''|sound=Engineer sf13 magic reac01.wav}} | |
| − | |||
| − | {{ | ||
| − | |||
| − | ''' | ||
| − | |||
| − | |||
| − | |||
| − | |||
| − | ''' | + | '''Zombie Escape''', not to be confused with [[Zombie Survival]] or [[Zombie Fortress]], is a Community gameplay modification of [[Zombie Mod]]. |
| − | |||
| − | |||
| − | |||
| − | + | Zombie Escape, as the name implies, is a mod where you escape from zombies. | |
| − | |||
| − | + | ==Gameplay== | |
| + | The gameplay is a simple start-to-finish race between spawn and the final holdout, where the map makes up a reason to kill players that have not yet escaped (as most maps have a simple story). After setup (the survivors' headstart), two players are chosen as the alpha zombies, incredibly resilient players with huge health pools (often referred to as simply alphas). The goal of an alpha is to kill all the runners without getting killed themselves. Runners, when infected, turn into zombies. Zombies, similarly to alphas, have an enormous health pool compared to their living counterparts. They only receive half health, however, as they are expendable and can respawn an unlimited amount of times. | ||
| − | + | There are two ways to finish the round: One is to get through the race, holding out at places that require players to wait (mostly doors opening and vehicles waiting to move), and the second is to kill the alphas. The latter is much harder due to the large amount of health alphas have, and as such should be only focused on as a secondary goal. | |
| − | * | + | ===Gameplay Changes=== |
| + | A list of changes that affect gameplay: | ||
| + | * There is no standard gameplay objective. | ||
| + | :* The round ends with a BLU team victory if all RED team members are dead at the same time. | ||
| + | :* The round ends with a RED team victory if all players are on the RED team. | ||
| + | * The player's max ammo is infinite, but the clip is not; no weapons run out of ammunition, but still have to reload (this excludes weapons that draw from the Engineer's metal supply). | ||
| + | * Players on the BLU team have a cross permanently above their head, only visible to the RED team. | ||
| + | * Upon being killed or general death, BLU team members are automatically assigned to the RED team. | ||
| + | :* Being killed by a zombie does not kill the player ''per-se''; the player is immediately assigned to the RED team, without any respawn time and without producing a ragdoll. | ||
| + | * RED team members automatically have their class's [[Voodoo-Cursed Soul]] equipped. The Voodoo-Cursed Soul displays as [[Item levels|Level]] 0 on inspection. | ||
| + | * Players on the RED team have an increased amount of health (commonly between 8000 and 12000) and take an increased amount of knockback. | ||
| + | * Any weapons with projectiles that do not function as their primary fire, such as the [[Sandman]]'s baseball, are removed. | ||
| + | * Scouts are no longer able to double jump. Whether the [[Atomizer]] allows the Scout to double jump again varies between different Zombie Escape plugins. | ||
| + | * Engineers do not drain metal under any circumstance, except when shooting with the [[Widowmaker]] or [[Short Circuit]]. If metal is spent by the Engineer, they can still replenish their ammo supply with conventional methods, such as [[Ammo|medium ammo pickups]] dropped by dead players or with a [[Dispenser]]; nonetheless, metal slowly regenerates on its own. | ||
| + | * Engineers can only build [[Combat Mini-Sentry|Combat Mini-Sentry Guns]], regardless of what melee weapon they are using. There can also be only four or five Mini-Sentry Guns deployed at one time, depending on the map. | ||
| + | * Some classes have a limit of only 6 at a time for survivors. Which classes specifically heavily depends on the plugin/server, but the Scout is most commonly limited. | ||
| − | ''' | + | ===Weapon Rebalances=== |
| + | ====Scout==== | ||
| + | {| class="wikitable grid collapsible" width="100%" | ||
| + | ! colspan="5" class="header" | Scout Primaries | ||
| + | |- | ||
| + | ! class="header" width="15%" | Weapon | ||
| + | ! class="header" width="30%" | Vanilla Attributes | ||
| + | ! class="header" width="30%" | Zombie Escape Attributes | ||
| + | |- | ||
| + | <!-- Scout ---> | ||
| + | | align="center" | [[File:Backpack Scattergun.png|135px]]<br> | ||
| + | <small>[[Primary]]</small><br> | ||
| + | '''[[Scattergun]]''' | ||
| + | | | ||
| + | {{Neutral}} Stock Weapon.<br/> | ||
| + | | | ||
| + | {{Pro}}200% larger clip size.<br/> | ||
| + | {{Pro}}88% damage bonus.<br/> | ||
| + | {{Pro}}65% shorter reload time.<br/> | ||
| + | {{Pro}}60% faster firing speed.<br/> | ||
| + | |- | ||
| + | | align="center" | [[File:Backpack Force-A-Nature.png|135px]]<br> | ||
| + | <small>[[Primary]]</small><br> | ||
| + | '''[[Force-A-Nature]]''' | ||
| + | | | ||
| + | {{Pro}}On hit: applies a [[knockback]] effect that propels enemies backwards and the user in the opposite direction (if airborne). This allows the user to perform a [[Jumping#Force_Jump|Force Jump]] and to horizontally prolong any other [[Jumping#Scout_Jumps|jumping technique]].<br/> | ||
| + | {{Pro}}20% more pellets per shot.<br/> | ||
| + | {{Pro}}50% faster firing speed.<br/> | ||
| + | {{Pro}}This weapon reloads its entire clip at once.<br> | ||
| + | {{Con}}66% smaller clip size.<br/> | ||
| + | {{Con}}10% damage penalty per pellet.<br/> | ||
| + | {{Con}}If one shot is unused before reloading, it is lost.<br/> | ||
| + | | | ||
| + | {{Pro}}100% larger clip size.<br> | ||
| + | {{Pro}}100% damage bonus '''(against players)'''.<br> | ||
| + | {{Pro}}20% more pellets per shot.<br> | ||
| + | {{Pro}}73% faster firing speed.<br> | ||
| + | {{Pro}}This weapon reloads its entire clip at once.<br> | ||
| + | {{Con}}12% damage penalty.<br> | ||
| + | {{Con}}25% longer reload time.<br> | ||
| + | {{Con}}100% wider pellet spread.<br> | ||
| + | {{Con}}Successive shots become less accurate.<br> | ||
| + | {{Con}}If one shot is unused before reloading, it is lost.<br/> | ||
| + | {{Con}}While weapon is active: 8% slower movement speed on wearer.<br> | ||
| + | {{Con}}Disabled knockback on user.<br> | ||
| + | |- | ||
| + | | align="center" | [[File:Backpack Shortstop.png|135px]]<br> | ||
| + | <small>[[Primary]]</small><br> | ||
| + | '''[[Shortstop]]''' | ||
| + | | | ||
| + | {{Pro}}100% damage bonus per pellet.<br> | ||
| + | {{Pro}}42.4% faster firing speed.<br> | ||
| + | {{Pro}}40% tighter pellet spread.<br> | ||
| + | {{Pro}}This weapon reloads its entire clip at once.<br> | ||
| + | {{Pro}}Alt-Fire: does a shove that pushes enemies.<br> | ||
| + | {{Con}}33% smaller clip size.<br> | ||
| + | {{Con}}60% pellets per shot.<br> | ||
| + | {{Con}}50% longer reload time.<br> | ||
| + | {{Con}}25% less ramp-up.<br> | ||
| + | {{Con}}20% more knockback from all damage sources.<br> | ||
| + | {{Con}}If one shot is unused before reloading, it is lost.<br/> | ||
| + | | | ||
| + | {{Pro}}100% larger clip size.<br> | ||
| + | {{Pro}}25% damage bonus '''(against players)'''.<br> | ||
| + | {{Pro}}25% more pellets per shot.<br> | ||
| + | {{Pro}}50% faster firing speed.<br> | ||
| + | {{Pro}}This weapon reloads its entire clip at once.<br> | ||
| + | {{Con}}18% damage penalty.<br> | ||
| + | {{Con}}50% longer reload time.<br> | ||
| + | {{Con}}If one shot is unused before reloading, it is lost.<br/> | ||
| + | |- | ||
| + | | align="center" | [[File:Backpack_Soda_Popper.png|135px]]<br> | ||
| + | <small>[[Primary]]</small><br> | ||
| + | '''[[Soda Popper]]''' | ||
| + | | | ||
| + | {{Pro}}On hit:Build Hype.<br> | ||
| + | {{Pro}}Activate Hype to sextuple jump.<br> | ||
| + | {{Pro}}25% shorter reload time.<br> | ||
| + | {{Pro}}50% faster firing speed.<br> | ||
| + | {{Pro}}This weapon reloads its entire clip at once.<br> | ||
| + | {{Con}}66% smaller clip size.<br> | ||
| + | | | ||
| + | {{Pro}}100% larger clip size.<br> | ||
| + | {{Pro}}75% faster firing speed.<br> | ||
| + | {{Pro}}50% faster deploy and holster speed.<br> | ||
| + | {{Pro}}[[Critical hits|Crits]] whenever it would normally [[Critical hits#Mini-Crits|mini-crit]].<br> | ||
| + | {{Pro}}On kill: 100% chance to inflict critical hits for 5 seconds.<br> | ||
| + | {{Pro}}This weapon reloads its entire clip at once.<br> | ||
| + | {{Con}}19% damage penalty.<br> | ||
| + | {{Con}}50% longer reload time.<br> | ||
| + | {{Con}}Critical damage is affected by range.<br> | ||
| + | {{Con}}If one shot is unused before reloading, it is lost.<br/> | ||
| + | {{Con}}Hype is disabled.<br> | ||
| + | |- | ||
| + | | align="center" | [[File:Backpack Baby Face's Blaster.png|135px]]<br> | ||
| + | <small>[[Primary]]</small><br> | ||
| + | '''[[Baby Face's Blaster]]''' | ||
| + | | | ||
| + | {{Pro}}On hit: builds Boost.<br> | ||
| + | {{Pro}}Run speed increased with Boost.<br> | ||
| + | {{Con}}34% clip size.<br> | ||
| + | {{Con}}10% slower move speed on wearer.<br> | ||
| + | {{Con}}Boost reduced on air jumps.<br> | ||
| + | {{Con}}Boost reduced when hit.<br> | ||
| + | | | ||
| + | {{Pro}}On hit: builds Boost.<br/> | ||
| + | {{Pro}}5% damage bonus.<br/> | ||
| + | {{Pro}}65% shorter reload time.<br/> | ||
| + | {{Pro}}60% faster firing speed.<br/> | ||
| + | {{Pro}}25% tighter pellet spread<br/> | ||
| + | {{Pro}}Disabled fall damage on wearer.<br/> | ||
| + | {{Con}}19.5% slower movement speed on wearer.<br/> | ||
| + | {{Con}}Boost reduced from 173% to 116%.<br/> | ||
| + | {{Con}}Boost reduced on air jumps.<br/> | ||
| + | {{Con}}Boost reduced when hit.<br/> | ||
| + | |- | ||
| + | | align="center" | [[File:Backpack Back Scatter.png|135px]]<br> | ||
| + | <small>[[Primary]]</small><br> | ||
| + | '''[[Back Scatter]]''' | ||
| + | | | ||
| + | {{Pro}}Minicrits targets when fired at their back from close range.<br> | ||
| + | {{Con}}34% smaller clip size.<br/> | ||
| + | {{Con}}20% wider pellet spread.<br/> | ||
| + | {{Con}}No random critical hits.<br/> | ||
| + | | | ||
| + | {{Pro}}Mini-crits targets when fired at their back from close range.<br/> | ||
| + | {{Pro}}100% larger clip size.<br/> | ||
| + | {{Pro}}25% damage bonus '''(against players)'''.<br/> | ||
| + | {{Pro}}50% more pellets per shot.<br/> | ||
| + | {{Pro}}60% shorter reload time.<br/> | ||
| + | {{Pro}}55% faster firing speed.<br/> | ||
| + | {{Con}}15% damage penalty.<br/> | ||
| + | {{Con}}50% wider pellet spread.<br/> | ||
| + | |- | ||
| + | ! colspan="5" class="header" | Scout Secondaries | ||
| + | |- | ||
| + | | align="center" | [[File:Backpack Pistol.png|135px]]<br> | ||
| + | <small>[[Secondary]]</small><br> | ||
| + | '''[[Pistol]]''' | ||
| + | | | ||
| + | {{Neutral}} Stock weapon.<br/> | ||
| + | | | ||
| + | {{Pro}}300% larger clip size.<br/> | ||
| + | {{Pro}}27.5% damage bonus.<br/> | ||
| + | {{Pro}}33% faster firing speed.<br/> | ||
| + | {{Pro}}50% tighter bullet spread.<br/> | ||
| + | {{Con}}50% longer reload time.<br/> | ||
| + | |- | ||
| + | | align="center" | [[File:Backpack Bonk! Atomic Punch.png|135px]]<br> | ||
| + | <small>[[Secondary]]</small><br> | ||
| + | '''[[Bonk! Atomic Punch]]''' | ||
| + | | | ||
| + | {{Neutral}} When used, the player is immune to all damage, but is unable to attack and is still vulnerable to knockback.<br/> | ||
| + | {{Neutral}} After the effect wears off, the user is subjected to a slowdown effect that lasts for 5 seconds and is based on the damage absorbed; scaling from 25% at low damage to 50% at 200+ damage.<br/> | ||
| + | {{Neutral}}The invulnerability effect lasts for 8 seconds and has a 22 seconds cooldown before it can be used again.<br/> | ||
| + | | | ||
| + | {{Neutral}} When used, the player is immune to all damage, but is unable to attack and is still vulnerable to knockback.<br/> | ||
| + | {{Neutral}} After the effect wears off, the user is subjected to a slowdown effect that lasts for 5 seconds and is based on the damage absorbed; scaling from 25% at low damage to 50% at 200+ damage.<br/> | ||
| + | {{Neutral}}The invulnerability effect lasts for 8 seconds and has a 30 seconds cooldown before it can be used again.<br/> | ||
| + | {{Pro}}On consumption: grants a 20% speed boost to all nearby teammates that lasts for 8 seconds.. <br/> | ||
| + | |- | ||
| + | | align="center" | [[File:Backpack Winger.png|135px]]<br> | ||
| + | <small>[[Secondary]]</small><br> | ||
| + | '''[[Winger]]''' | ||
| + | | | ||
| + | {{Pro}}15% damage bonus.<br/> | ||
| + | {{Pro}}When weapon is active: 25% higher jump height.<br/> | ||
| + | {{Con}}60% smaller clip size.<br/> | ||
| + | | | ||
| + | {{Pro}}100% larger clip size.<br/> | ||
| + | {{Pro}}57% damage bonus.<br/> | ||
| + | {{Pro}}33% faster firing speed.<br/> | ||
| + | {{Pro}}37.5% tighter bullet spread.<br/> | ||
| + | {{Pro}}25% faster deploy and holster speed.<br/> | ||
| + | {{Con}}25% longer reload time.<br/> | ||
| + | {{Con}}Disabled extra jump height.<br/> | ||
| + | |- | ||
| + | | align="center" | [[File:Backpack Pretty Boy's Pocket Pistol.png|135px]]<br> | ||
| + | <small>[[Secondary]]</small><br> | ||
| + | '''[[Pretty Boy's Pocket Pistol]]''' | ||
| + | | | ||
| + | {{Pro}}On Hit: Gain up to +3 health.<br/> | ||
| + | {{Pro}}15% faster firing speed.<br/> | ||
| + | {{Con}}25% smaller clip size.<br/> | ||
| + | | | ||
| + | {{Pro}}On Hit: Gain up to +3 health.<br/> | ||
| + | {{Pro}}200% larger clip size.<br/> | ||
| + | {{Pro}}15% damage bonus.<br/> | ||
| + | {{Pro}}45% faster firing speed.<br/> | ||
| + | {{Pro}}17% tighter pellet spread.<br/> | ||
| + | {{Con}}50% longer reload time.<br/> | ||
| + | |- | ||
| + | | align="center" | [[File:Backpack Mad Milk.png|135px]]<br> | ||
| + | <small>[[Secondary]]</small><br> | ||
| + | '''[[Mad Milk]]''' | ||
| + | | | ||
| + | {{Pro}}Any damage (except afterburn) done to enemies covered in milk restores 60% of the damage dealt to the attacking player's health.<br/> | ||
| + | {{Pro}}Partially nullifies Cloak on enemy Spies.<br/> | ||
| + | {{Pro}}Extinguishes fire on wielder and allied players.<br/> | ||
| + | {{Pro}}20% decrease in recharge time when you extinguish an allied player.<br/> | ||
| + | {{Neutral}}Has a 20-second recharge time.<br/> | ||
| + | | | ||
| + | {{Pro}}+25 max health on wearer.<br/> | ||
| + | {{Pro}}Any damage (except afterburn) done to enemies covered in milk restores 60% of the damage dealt to the attacking player's health.<br/> | ||
| + | {{Pro}}Partially nullifies Cloak on enemy Spies.<br/> | ||
| + | {{Pro}}Extinguishes flames on wielder and allied players.<br/> | ||
| + | {{Pro}}20% decrease in recharge time when you extinguish an allied player.<br/> | ||
| + | {{Neutral}}Has a 20 second recharge time.<br/> | ||
| + | |- | ||
| + | | align="center" | [[File:Backpack Crit-a-Cola.png|135px]]<br> | ||
| + | <small>[[Secondary]]</small><br> | ||
| + | '''[[Crit-a-Cola]]''' | ||
| + | | | ||
| + | {{Neutral}}When consumed, user receives the following effects:<br/> | ||
| + | :{{Pro}}Guaranteed Mini-Crits.<br/> | ||
| + | :{{Con}}Making any attack while under the effect causes a 5-second Marked-For-Death debuff.<br/> | ||
| + | {{Neutral}}The mini-crit boost effect lasts for 8 seconds and then has to recharge for about 22 seconds in order to be used again.<br/> | ||
| + | | | ||
| + | {{Neutral}}When consumed, user receives the following effects:<br/> | ||
| + | :{{Pro}}Guaranteed Mini-Crits.<br/> | ||
| + | :{{Con}}Making any attack while under the effect causes a 5-second Marked-For-Death debuff.<br/> | ||
| + | {{Neutral}}The mini-crit boost effect lasts for 8 seconds and then has to recharge for about 15 seconds in order to be used again.<br/> | ||
| + | {{Pro}}100% faster holster and deploy speed. | ||
| + | |- | ||
| + | | align="center" | [[File:Backpack Flying Guillotine.png|135px]]<br> | ||
| + | <small>[[Secondary]]</small><br> | ||
| + | '''[[Flying Guillotine]]''' | ||
| + | | | ||
| + | {{Neutral}}Can be thrown to damage enemies. Recharges after 6 seconds.<br/> | ||
| + | {{Pro}}On hit: inflicts bleed for 8 seconds and deals 50 damage.<br/> | ||
| + | {{Pro}}Long-distance hit reduces recharge time by 1.5 seconds.<br/> | ||
| + | {{Con}}No random Critical Hits.<br/> | ||
| + | {{Con}}Cannot be picked up after being thrown.<br/> | ||
| + | | | ||
| + | {{Neutral}}Can be thrown to damage enemies and mark zombies for death. Recharges after 6 seconds.<br/> | ||
| + | {{Pro}}On hit: one target at a time is marked for death, causing all damage taken to be mini-crits for 15 seconds.<br/> | ||
| + | {{Pro}}On hit: inflicts bleed for 8 seconds and deals 111 damage.<br/> | ||
| + | {{Pro}}Long-distance hit reduces recharge time by 1.5 second.<br/> | ||
| + | {{Pro}}100% bleed damage bonus.<br/> | ||
| + | {{Con}}Cannot be picked up after being thrown.<br/> | ||
| + | |- | ||
| + | ! colspan="5" class="header" | Scout Melees | ||
| + | |- | ||
| + | | align="center" | [[File:Backpack Bat.png|135px]]<br> | ||
| + | <small>[[Melee]]</small><br> | ||
| + | '''[[Bat]]''' | ||
| + | | | ||
| + | {{Neutral}} Stock weapon.<br/> | ||
| + | | | ||
| + | {{Neutral}} No changes.<br/> | ||
| + | |- | ||
| + | | align="center" | [[File:Backpack Sandman.png|135px]]<br> | ||
| + | <small>[[Melee]]</small><br> | ||
| + | '''[[Sandman]]''' | ||
| + | | | ||
| + | {{Pro}}Alt Fire: Launches a baseball that slows the enemy between 1–7 seconds, depending on distance. The baseball recharges over 10 seconds, can be picked up from the ground after launch, or can be replenished from a resupply cabinet.<br> | ||
| + | {{Con}}-15 max health on wearer.<br> | ||
| + | | | ||
| + | {{Pro}}Alt Fire: Launches a baseball that slows the enemy between 1–7 seconds, depending on distance. The baseball recharges over 10 seconds, can be picked up from the ground after launch, or can be replenished from a resupply cabinet.<br> | ||
| + | {{Pro}} +2 max balls on wearer (3 total balls).<br> | ||
| + | {{Con}}-15 max health on wearer.<br> | ||
| + | {{Con}}100% slower swing speed.<br> | ||
| + | {{Con}} Each ball recharges one after the other (not all at the same time).<br> | ||
| + | |- | ||
| + | | align="center" | [[File:Backpack Atomizer.png|135px]]<br> | ||
| + | <small>[[Melee]]</small><br> | ||
| + | '''[[Atomizer]]''' | ||
| + | | | ||
| + | {{Pro}}When weapon is active: +1 extra air jump on wearer.<br> | ||
| + | {{Pro}}Guaranteed mini crits while the user is airborne.<br> | ||
| + | {{Con}}15% damage penalty.<br> | ||
| + | {{Con}}50% slower deploy speed.<br> | ||
| + | | | ||
| + | {{Neutral}}When weapon is active:<br> | ||
| + | :{{Pro}}3% faster movement speed on wearer.<br> | ||
| + | :{{Con}}Up to -3 health drained per second.<br> | ||
| + | {{Pro}}Guaranteed mini crits while the user is airborne.<br> | ||
| + | {{Con}}15% damage penalty '''against players'''<br> | ||
| + | {{Con}}100% slower swing speed.<br> | ||
| + | {{Con}}Does not grant an extra jump while deployed<br> | ||
| + | |- | ||
| + | | align="center" | [[File:Backpack Sun-on-a-Stick.png|135px]]<br> | ||
| + | <small>[[Melee]]</small><br> | ||
| + | '''[[Sun-on-a-Stick]]''' | ||
| + | | | ||
| + | {{Pro}}Guaranteed crits on burning players.<br> | ||
| + | {{Pro}}When weapon is active: lowers fire damage vulnerability by 25% on wearer.<br> | ||
| + | {{Con}}25% damage penalty.<br> | ||
| + | | | ||
| + | {{Pro}}20% faster universal deploy and holster speed on wearer.<br> | ||
| + | {{Con}}100% damage penalty.<br> | ||
| + | |- | ||
| + | | align="center" | [[File:Backpack Wrap Assassin.png|135px]]<br> | ||
| + | <small>[[Melee]]</small><br> | ||
| + | '''[[Wrap Assassin]]''' | ||
| + | | | ||
| + | {{Pro}}Alt-Fire: Launches a festive ornament that shatters causing bleeding on direct hit and explodes hurting everyone close to the explosion. The Bauble recharges over 7.5 seconds.<br> | ||
| + | {{Pro}}Guaranteed crits on long range hits.<br> | ||
| + | {{Con}}65% damage penalty.<br> | ||
| + | {{Con}}25% increase in ball recharge rate.<br> | ||
| + | | | ||
| + | {{Pro}}Alt-Fire: Launches a festive ornament that shatters causing bleeding on direct hit and explodes hurting everyone close to the explosion. The Bauble recharges over 15 seconds.<br> | ||
| + | {{Pro}} On direct hit: decreases enemy movement speed by 40% for 1.5 seconds.<br> | ||
| + | {{Pro}}+1 max ball on wearer (2 total balls).<br> | ||
| + | {{Pro}}Guaranteed crits on long range hits.<br> | ||
| + | {{Con}}75% damage penalty.<br> | ||
| + | {{Con}}100% slower swing speed.<br> | ||
| + | {{Con}}50% decrease in ball recharge rate.<br> | ||
| + | {{Con}}When weapon is active: 3% slower movement speed on wearer.<br> | ||
| + | {{Con}} Each ball recharges one after the other (not all at the same time).<br> | ||
| + | |- | ||
| + | | align="center" | [[File:Backpack Fan O'War.png|135px]]<br> | ||
| + | <small>[[Melee]]</small><br> | ||
| + | '''[[Fan O'War]]''' | ||
| + | | | ||
| + | {{Pro}}On hit: one target at a time is marked for death, causing all damage taken to be mini-crits for 15 seconds.<br> | ||
| + | {{Pro}}Crits whenever it would normally mini-crit.<br> | ||
| + | {{Con}}75% damage penalty.<br> | ||
| + | | | ||
| + | {{Neutral}} No changes. | ||
| + | |- | ||
| + | | align="center" | [[File:Backpack Candy Cane.png|135px]]<br> | ||
| + | <small>[[Melee]]</small><br> | ||
| + | '''[[Candy Cane]]''' | ||
| + | | | ||
| + | {{Pro}}A small health pack is dropped when the player kills an enemy, regardless of what weapon the player was using in order to kill the enemy.<br> | ||
| + | {{Con}}Raises explosive damage vulnerability by 25% on wearer.<br> | ||
| + | | | ||
| + | {{Pro}}When weapon is active: Up to +3 health regenerated per second.<br> | ||
| + | {{Pro}}On hit: restores up to +50 health. <br> | ||
| + | {{Pro}}A small health pack is dropped when the player kills a zombie with the Candy Cane.<br> | ||
| + | {{Con}}Raises explosive damage vulnerability by 25% on wearer.<br> | ||
| + | {{Con}}User takes mini-crits when weapon is active, and for 3 seconds after switching away.<br> | ||
| + | |- | ||
| + | | align="center" | [[File:Backpack Boston Basher.png|135px]]<br> | ||
| + | <small>[[Melee]]</small><br> | ||
| + | '''[[Boston Basher]]''' | ||
| + | | | ||
| + | {{Pro}}On hit: inflicts bleed to enemy for 5 seconds.<br> | ||
| + | {{Con}}On miss: inflicts self-damage and bleed to the wearer for 5 seconds.<br> | ||
| + | | | ||
| + | {{Pro}}On hit: inflicts bleed to enemy for 5 seconds.<br> | ||
| + | {{Con}}25% damage penalty.<br> | ||
| + | |} | ||
| − | + | ==== Soldier ==== | |
| + | {| class="wikitable grid collapsible" width="100%" | ||
| + | ! colspan="5" class="header" | Soldier Primaries | ||
| + | |- | ||
| + | ! class="header" width="15%" | Weapon | ||
| + | ! class="header" width="30%" | Base Game Attributes | ||
| + | ! class="header" width="30%" | Zombie Escape Attributes | ||
| + | |- | ||
| + | | align="center" | [[File:Backpack Rocket Launcher.png|135px]]<br> | ||
| + | <small>[[Primary]]</small><br> | ||
| + | '''[[Rocket Launcher]]''' | ||
| + | | | ||
| + | {{Neutral}} Stock weapon. | ||
| + | | | ||
| + | {{Pro}}171% damage bonus.<br> | ||
| + | {{Pro}}25% shorter reload time.<br> | ||
| + | {{Con}}50% damage penalty '''against players'''.<br> | ||
| + | {{Con}}Disabled self-knockback<br> | ||
| + | |- | ||
| + | | align="center" | [[File:Backpack Direct Hit.png|135px]]<br> | ||
| + | <small>[[Primary]]</small><br> | ||
| + | '''[[Direct Hit]]''' | ||
| + | | | ||
| + | {{Pro}}25% damage penalty.<br> | ||
| + | {{Pro}}80% faster projectile speed.<br> | ||
| + | {{Pro}}Guarantees mini-crit damage on opponents sent airborne by an explosion, [[Grappling Hook|grapple hook]], or enemy attack.<br> | ||
| + | {{Con}}70% smaller splash damage radius.<br> | ||
| + | | | ||
| + | {{Pro}}204% damage bonus.<br> | ||
| + | {{Pro}}100% faster projectile speed.<br> | ||
| + | {{Pro}}25% shorter reload time.<br> | ||
| + | {{Pro}}Guarantees mini-crit damage on opponents sent airborne by an explosion, grapple hook, or enemy attack.<br> | ||
| + | {{Pro}}Applies a strong downwards force on hit.<br> | ||
| + | {{Con}}-25 max health on wearer.<br> | ||
| + | {{Con}}25% damage penalty '''against players'''.<br> | ||
| + | {{Con}}70% smaller splash damage radius.<br> | ||
| + | {{Con}}100% more self damage from blast jumping.<br> | ||
| + | {{Con}}Disabled self-knockback.<br> | ||
| + | |- | ||
| + | | align="center" | [[File:Backpack Black Box.png|135px]]<br> | ||
| + | <small>[[Primary]]</small><br> | ||
| + | '''[[Black Box]]''' | ||
| + | | | ||
| + | {{Pro}}On hit: restores up to +20 health.<br> | ||
| + | {{Con}}25% smaller clip size.<br> | ||
| + | | | ||
| + | {{Pro}}144% damage bonus.<br> | ||
| + | {{Pro}}Up to 20% damage bonus as rage increases.<br> | ||
| + | {{Pro}}25% shorter reload time.<br> | ||
| + | {{Pro}}On hit: restores up to +20 health.<br> | ||
| + | {{Pro}}34% longer banner duration.<br> | ||
| + | {{Con}}25% smaller clip size.<br> | ||
| + | {{Con}}50% damage penalty '''against players'''.<br> | ||
| + | {{Con}}15% slower firing speed.<br> | ||
| + | {{Con}}Disabled self-knockback.<br> | ||
| + | |- | ||
| + | | align="center" | [[File:Backpack Rocket Jumper.png|135px]]<br> | ||
| + | <small>[[Primary]]</small><br> | ||
| + | '''[[Rocket Jumper]]''' | ||
| + | | | ||
| + | {{Pro}}+200% max primary ammo on wearer.<br> | ||
| + | {{Pro}} No self inflicted blast damage taken.<br> | ||
| + | {{Con}} 100% damage penalty.<br> | ||
| + | {{Con}} No random critical hits.<br> | ||
| + | {{Con}} Unable to carry the intelligence and the PASS Time JACK.<br> | ||
| + | | | ||
| + | {{Pro}}1011% damage bonus.<br> | ||
| + | {{Pro}}25% larger splash damage radius.<br> | ||
| + | {{Pro}}On direct hit: decreases enemy movement speed by 40% for 3 seconds.<br> | ||
| + | {{Con}}75% smaller clip size.<br> | ||
| + | {{Con}}50% damage penalty '''against players'''.<br> | ||
| + | {{Con}}50% slower projectile speed.<br> | ||
| + | {{Con}}63% longer reload time.<br> | ||
| + | {{Con}}337% slower firing speed.<br> | ||
| + | {{Con}}150% slower deploy and holster speed.<br> | ||
| + | {{Con}}When weapon is active: 20% slower movement speed on wearer.<br> | ||
| + | {{Con}}200% more self damage from blast jumping.<br> | ||
| + | {{Con}}Disabled self-knockback.<br> | ||
| + | |- | ||
| + | | align="center" | [[File:Backpack Liberty Launcher.png|135px]]<br> | ||
| + | <small>[[Primary]]</small><br> | ||
| + | '''[[Liberty Launcher]]''' | ||
| + | | | ||
| + | {{Pro}}25% larger clip size.<br> | ||
| + | {{Pro}}40% faster projectile speed.<br> | ||
| + | {{Pro}}25% less self damage from blast jumping.<br> | ||
| + | {{Con}}25% damage penalty.<br> | ||
| + | | | ||
| + | {{Pro}}25% larger clip size.<br> | ||
| + | {{Pro}}204% damage bonus.<br> | ||
| + | {{Pro}}40% faster projectile speed.<br> | ||
| + | {{Pro}}25% less self damage from blast jumping.<br> | ||
| + | {{Pro}}1 point of [[Upgrade Station#Primary|Rocket Specialist]].<br> | ||
| + | :{{Pro}}15% faster projectile speed.<br> | ||
| + | :{{Pro}}On direct hits:rocket does maximum damage, stuns target, and blast radius increased by 15%.<br> | ||
| + | {{Con}}50% damage penalty '''against players'''.<br> | ||
| + | {{Con}}25% longer reload time.<br> | ||
| + | {{Con}}15% slower firing speed.<br> | ||
| + | |- | ||
| + | | align="center" | [[File:Backpack Cow Mangler 5000.png|135px]]<br> | ||
| + | <small>[[Primary]]</small><br> | ||
| + | '''[[Cow Mangler 5000]]''' | ||
| + | | | ||
| + | {{Pro}}Does not use ammo (replaced with an ammo meter).<br> | ||
| + | {{Con}}80% damage penalty against buildings.<br> | ||
| + | {{Con}}Mini-crits whenever it would normally crit.<br> | ||
| + | {{Con}}No random critical hits.<br> | ||
| + | {{Neutral}}Secondary fire is a charged shot that:<br> | ||
| + | :{{Pro}} Guarantees mini-crits on players<br> | ||
| + | :{{Pro}} Causes enemies to suffer afterburn for 6 seconds.<br> | ||
| + | :{{Pro}} Disables buildings for 4 seconds.<br> | ||
| + | :{{Con}} Empties entire ammo meter.<br> | ||
| + | :{{Con}} Cannot be used unless ammo meter is full.<br> | ||
| + | | | ||
| + | {{Pro}}155% damage bonus.<br> | ||
| + | {{Pro}}Up to 20% damage bonus as rage increases.<br> | ||
| + | {{Pro}}Does not use ammo (replaced with an ammo meter).<br> | ||
| + | {{Pro}}67% longer banner duration.<br> | ||
| + | {{Neutral}}Secondary fire is a charged shot that:<br> | ||
| + | :{{Pro}} Guarantees mini-crits on players<br> | ||
| + | :{{Pro}} Causes enemies to suffer afterburn for 6 seconds.<br> | ||
| + | :{{Pro}} Disables buildings for 4 seconds.<br> | ||
| + | :{{Con}} Empties entire ammo meter.<br> | ||
| + | :{{Con}} Cannot be used unless ammo meter is full.<br> | ||
| + | {{Con}}50% damage penalty '''against players'''.<br> | ||
| + | {{Con}}15% slower firing speed.<br> | ||
| + | {{Con}}Mini-crits whenever it would normally crit.<br> | ||
| + | {{Con}}Disabled self-knockback.<br> | ||
| + | |- | ||
| + | | align="center" | [[File:Backpack Beggar's Bazooka.png|135px]]<br> | ||
| + | <small>[[Primary]]</small><br> | ||
| + | '''[[Beggar's Bazooka]]''' | ||
| + | | | ||
| + | {{Neutral}}Hold Fire to load up to three rockets.<br> | ||
| + | :{{Pro}} Release Fire to unleash the barrage at 223% faster firing speed.<br> | ||
| + | :{{Con}} +3 degrees random projectile deviation.<br> | ||
| + | :{{Con}} Overloading the chamber will cause a misfire.<br> | ||
| + | {{Con}}20% smaller splash damage radius.<br> | ||
| + | {{Con}}30% longer reload time.<br> | ||
| + | {{Con}} Cannot collect ammo from dispensers while active.<br> | ||
| + | | | ||
| + | {{Pro}}100% damage bonus.<br> | ||
| + | {{Neutral}}Hold Fire to load up to three rockets.<br> | ||
| + | :{{Pro}} Release Fire to unleash the barrage at 180.7% faster firing speed.<br> | ||
| + | :{{Con}} +1.5 degrees random projectile deviation.<br> | ||
| + | :{{Con}} Overloading the chamber will cause a misfire.<br> | ||
| + | {{Con}}50% damage penalty '''against players'''<br> | ||
| + | {{Con}}20% smaller splash damage radius.<br> | ||
| + | {{Con}}30% longer reload time.<br> | ||
| + | {{Con}}15% slower firing speed,<br> | ||
| + | {{Con}}Cannot collect ammo from dispensers while active.<br> | ||
| + | {{Con}}Disabled self-knockback.<br> | ||
| + | |- | ||
| + | | align="center" | [[File:Backpack Air Strike.png|135px]]<br> | ||
| + | <small>[[Primary]]</small><br> | ||
| + | '''[[Air Strike]]''' | ||
| + | | | ||
| + | {{Pro}}185% faster firing speed while blast jumping.<br> | ||
| + | {{Pro}}On kill: +1 larger clip size ( Up to 4).<br> | ||
| + | {{Pro}}15% less self-damage from blast jumping.<br> | ||
| + | {{Con}}15% damage penalty.<br> | ||
| + | {{Con}}10% smaller splash damage radius radius.<br> | ||
| + | {{Con}}20% smaller splash damage radius while blast jumping.<br> | ||
| + | | | ||
| + | {{Pro}}134% damage bonus.<br> | ||
| + | {{Pro}}40% faster projectile speed.<br> | ||
| + | {{Pro}}On kill: +1 larger clip size ( Up to 4).<br> | ||
| + | {{Pro}}15% less self-damage from blast jumping.<br> | ||
| + | {{Pro}}1 point of [[Upgrade Station#Primary|Rocket Specialist]].<br> | ||
| + | :{{Pro}}15% faster projectile speed.<br> | ||
| + | :{{Pro}}On direct hits:rocket does maximum damage, stuns target, and blast radius increased +15%.<br> | ||
| + | {{Neutral}}Hold Fire to load up to four rockets.<br> | ||
| + | :{{Pro}} Release Fire to unleash the barrage at 180% increased fire rate.<br> | ||
| + | :{{Con}} +1 degrees random projectile deviation.<br> | ||
| + | {{Con}}50% damage penalty '''against players'''.<br> | ||
| + | {{Con}}50% longer reload time.<br> | ||
| + | {{Con}}10% smaller splash damage radius.<br> | ||
| + | {{Con}}Cannot collect ammo from dispensers while active.<br> | ||
| + | {{Con}}Disabled self-knockback.<br> | ||
| + | |- | ||
| + | ! colspan="5" class="header" | Soldier Secondaries | ||
| + | |- | ||
| + | | align="center" | [[File:Backpack Shotgun.png|135px]]<br> | ||
| + | <small>[[Secondary]]</small><br> | ||
| + | '''[[Shotgun]]''' | ||
| + | | | ||
| + | {{Neutral}} Stock weapon.<br> | ||
| + | | | ||
| + | {{Pro}}200% larger clip size.<br> | ||
| + | {{Pro}}20% damage bonus.<br> | ||
| + | {{Pro}}60% shorter reload time.<br> | ||
| + | {{Pro}}60% faster firing speed.<br> | ||
| + | |- | ||
| + | | align="center" | [[File:Backpack Buff Banner.png|135px]]<br> | ||
| + | <small>[[Secondary]]</small><br> | ||
| + | '''[[Buff Banner]]''' | ||
| + | | | ||
| + | {{Neutral}}Charges a rage meter with damage dealt — takes 600 damage to fully charge rage meter.<br> | ||
| + | {{Pro}}While the buff is active, for 10 seconds the user and nearby teammates receive: guaranteed Mini-Crits.<br> | ||
| + | | | ||
| + | {{Neutral}}Charges a rage meter with damage dealt — takes 600 damage to fully charge rage meter.<br> | ||
| + | {{Pro}}While the buff is active, for 15 seconds the user and nearby teammates receive: guaranteed Mini-Crits.<br> | ||
| + | {{Pro}}When weapon is acrive:10% faster movement speed on wearer.<br> | ||
| + | {{Pro}}50% longer banner duration.<br> | ||
| + | {{Con}}15% longer banner activation time.<br> | ||
| + | |- | ||
| + | | align="center" | [[File:Backpack Battalion's Backup.png|135px]]<br> | ||
| + | <small>[[Secondary]]</small><br> | ||
| + | '''[[Battalion's Backup]]''' | ||
| + | | | ||
| + | {{Neutral}} Charges a rage meter with damage dealt — takes 600 damage to fully charge rage meter.<br> | ||
| + | {{Pro}}While the buff is active, for 10 seconds the user and nearby teammates receive:<br> | ||
| + | :{{Pro}}Immunity to Critical damage.<br> | ||
| + | :{{Pro}}Lowers damage vulnerability by 35%.<br> | ||
| + | :{{Pro}}Lowers Sentry Gun damage vulnerability by 50% (does not stack with previous resistance).<br> | ||
| + | {{Pro}}+20 max health on wearer.<br> | ||
| + | | | ||
| + | {{Neutral}} Charges a rage meter with damage dealt — takes 600 damage to fully charge rage meter.<br> | ||
| + | {{Pro}}While the buff is active, for 15 seconds the user and nearby teammates receive:<br> | ||
| + | :{{Pro}}Immunity to Critical damage.<br> | ||
| + | :{{Pro}}Lowers damage vulnerability by 35%.<br> | ||
| + | :{{Pro}}Lowers Sentry Gun damage vulnerability by 50% (does not stack with previous resistance).<br> | ||
| + | {{Pro}}+20 max health on wearer.<br> | ||
| + | {{Pro}}50% longer banner duration.<br> | ||
| + | |- | ||
| + | | align="center" | [[File:Backpack Concheror.png|135px]]<br> | ||
| + | <small>[[Secondary]]</small><br> | ||
| + | '''[[Concheror]]''' | ||
| + | | | ||
| + | {{Neutral}}Charges its rage meter with damage dealt — takes 480 damage to fully charge rage meter.<br> | ||
| + | {{Pro}}While the buff is active, for 10 seconds the user and nearby teammates:<br> | ||
| + | :{{Pro}}Between 25% and 40% faster movement speed.<br> | ||
| + | :{{Pro}}On hit: restores 35% of the damage dealt as health.<br> | ||
| + | {{Pro}}Up to +4 health regenerated per second passively.<br> | ||
| + | | | ||
| + | {{Neutral}}Charges its rage meter with damage dealt — takes 480 damage to fully charge rage meter.<br> | ||
| + | {{Pro}} While the buff is active, for 15 seconds the user and nearby teammates receive:<br> | ||
| + | :{{Pro}}Between 25% and 40% faster movement speed.<br> | ||
| + | :{{Pro}}On hit: restores 35% of the damage dealt as health.<br> | ||
| + | {{Pro}}Up to +4 health regenerated per second passively.<br> | ||
| + | {{Pro}}50% longer banner duration.<br> | ||
| + | {{Con}}15% longer banner activation time.<br> | ||
| + | |- | ||
| + | | align="center" | [[File:Backpack Mantreads.png|135px]]<br> | ||
| + | <small>[[Secondary]]</small><br> | ||
| + | '''[[Mantreads]]''' | ||
| + | | | ||
| + | {{Pro}} 75% reduction in push force taken from enemy damage.<br> | ||
| + | {{Pro}} Deals 3x falling damage to the player you land on.<br> | ||
| + | {{Pro}} Lowers airblast vulnerability by 75%<br> | ||
| + | {{Pro}} 200% increased air control when blast jumping.<br> | ||
| + | {{Neutral}} Grants its abilities passively, does not need to be selected first in order to apply the ability.<br> | ||
| + | | | ||
| + | {{c|No|Weapon is banned.}}<br> | ||
| + | |- | ||
| + | | align="center" | [[File:Backpack Righteous Bison.png|135px]]<br> | ||
| + | <small>[[Secondary]]</small><br> | ||
| + | '''[[Righteous Bison]]''' | ||
| + | | | ||
| + | {{Neutral}} Shoots an electric projectile instead of shotgun pellets.<br> | ||
| + | {{Pro}} Projectiles penetrate players and damage enemies behind them.<br> | ||
| + | {{Pro}} Does not use ammo (replaced with an ammo meter).<br> | ||
| + | {{Pro}} Projectiles cannot be deflected.<br> | ||
| + | {{Con}} 33% smaller clip size.<br> | ||
| + | {{Con}} 28% slower firing speed.<br> | ||
| + | {{Con}} 20% damage penalty against buildings.<br> | ||
| + | | | ||
| + | {{Neutral}} Shoots an electric projectile instead of shotgun pellets.<br> | ||
| + | {{Pro}}33% larger clip size.<br> | ||
| + | {{Pro}}130% damage bonus '''against players'''.<br> | ||
| + | {{Pro}}35% faster firing speed.<br> | ||
| + | {{Pro}}25% shorter reload time.<br> | ||
| + | {{Pro}} Projectiles penetrate players and damage enemies behind them.<br> | ||
| + | {{Pro}} Does not use ammo (replaced with an ammo meter).<br> | ||
| + | {{Pro}} Projectiles cannot be deflected.<br> | ||
| + | {{Con}} Deals only 20% damage to buildings.<br> | ||
| + | {{Con}} Deals no damage against NPCs.<br> | ||
| + | |- | ||
| + | | align="center" | [[File:Backpack Reserve Shooter.png|135px]]<br> | ||
| + | <small>[[Secondary]]</small><br> | ||
| + | '''[[Reserve Shooter]]''' | ||
| + | | | ||
| + | {{Pro}}20% faster deploy speed.<br> | ||
| + | {{Pro}}15% faster holster speed.<br> | ||
| + | {{Pro}}Guaranteed mini-crits targets that are blast jumping, knocked back, launched by a Thermal Thruster stomp, or using the grapple hook.<br> | ||
| + | :{{Neutral}} Mini-crits only take affect within 5 seconds of deploying this weapon.<br> | ||
| + | {{Con}}34% smaller clip size<br> | ||
| + | | | ||
| + | {{Pro}}100% larger clip size.<br> | ||
| + | {{Pro}}20% damage bonus.<br> | ||
| + | {{Pro}}60% shorter reload time.<br> | ||
| + | {{Pro}}60% faster firing speed.<br> | ||
| + | {{Pro}}40% tighter pellet spread.<br> | ||
| + | {{Pro}}20% faster deploy speed.<br> | ||
| + | {{Pro}} Mini-crits targets that are blast jumping, knocked back, launched by a Thermal Thruster stomp, or using the grapple hook.<br> | ||
| + | :{{Neutral}} Mini-crits only take affect within 5 seconds of deploying this weapon.<br> | ||
| + | |- | ||
| + | | align="center" | [[File:Backpack Panic Attack.png|135px]]<br> | ||
| + | <small>[[Secondary]]</small><br> | ||
| + | '''[[Panic Attack]]''' | ||
| + | | | ||
| + | {{Pro}}50% more pellets per shot.<br> | ||
| + | {{Pro}}50% faster deploy speed.<br> | ||
| + | {{Pro}}Fires a fixed shot pattern.<br> | ||
| + | {{Con}}20% damage penalty.<br> | ||
| + | {{Con}}Successive shots become less accurate.<br> | ||
| + | | | ||
| + | {{Pro}}200% larger clip size.<br> | ||
| + | {{Pro}}25% damage bonus '''against players'''.<br> | ||
| + | {{Pro}}50% more pellets per shot.<br> | ||
| + | {{Pro}}45% shorter reload time<br> | ||
| + | {{Pro}}80% faster firing speed<br> | ||
| + | {{Pro}}50% faster deploy speed.<br> | ||
| + | {{Pro}}Fires a fixed shot pattern.<br> | ||
| + | {{Con}}37% damage penalty<br> | ||
| + | {{Con}}50% wider pellet spread.<br> | ||
| + | {{Con}} Successive shots become less accurate.<br> | ||
| + | |- | ||
| + | | align="center" | [[File:Backpack Gunboats.png|135px]]<br> | ||
| + | <small>[[Secondary]]</small><br> | ||
| + | '''[[Gunboats]]''' | ||
| + | | | ||
| + | {{Pro}}Lowers explosive self-damage vulnerability by 60%<br> | ||
| + | :{{Neutral}} This doesn't affect fall damage.<br> | ||
| + | :{{Neutral}} Grants its abilities passively, does not need to be selected first in order to apply the ability<br>. | ||
| + | | | ||
| + | {{Pro}}Lowers explosive self-damage vulnerability by 60%<br> | ||
| + | :{{Neutral}} This doesn't affect fall damage.<br> | ||
| + | :{{Neutral}} Grants its abilities passively, does not need to be selected first in order to apply the ability.<br> | ||
| + | {{Pro}} Wearer receives an unmodified stock shotgun.<br> | ||
| + | |- | ||
| + | | align="center" | [[File:Backpack B.A.S.E. Jumper.png|135px]]<br> | ||
| + | <small>[[Secondary]]</small><br> | ||
| + | '''[[Base Jumper]]''' | ||
| + | | | ||
| + | {{Neutral}} Allows player to activate a parachute whilst midair, slowing down their descent.<br> | ||
| + | {{Pro}}Parachute can be deactivated at any time.<br> | ||
| + | {{Con}}Once deactivated, parachute cannot be activated again until the user has touched the ground. | ||
| + | | | ||
| + | {{c|No|Weapon is banned.}}<br> | ||
| + | |- | ||
| + | ! colspan="5" class="header" | Soldier Melees | ||
| + | |- | ||
| + | | align="center" | [[File:Backpack Shovel.png|135px]]<br> | ||
| + | <small>[[Melee]]</small><br> | ||
| + | '''[[Shovel]]''' | ||
| + | | | ||
| + | {{Neutral}} Stock weapon.<br> | ||
| + | | | ||
| + | {{Neutral}} No changes.<br> | ||
| + | |- | ||
| + | | align="center" | [[File:Backpack Equalizer.png|135px]]<br> | ||
| + | <small>[[Melee]]</small><br> | ||
| + | '''[[Equalizer]]''' | ||
| + | | | ||
| + | {{Neutral}} When weapon is active:<br> | ||
| + | {{Pro}} Damage increase as user's remaining health decreases.<br> | ||
| + | {{Con}} 90% less healing from Medic sources.<br> | ||
| + | | | ||
| + | {{Neutral}} No changes. | ||
| + | |- | ||
| + | | align="center" | [[File:Backpack Market Gardener.png|135px]]<br> | ||
| + | <small>[[Melee]]</small><br> | ||
| + | '''[[Market Gardener]]''' | ||
| + | | | ||
| + | {{Pro}} Guaranteed critical hits while wielder is rocket jumping.<br> | ||
| + | {{Con}} 20% slower swing speed.<br> | ||
| + | {{Con}} No random critical hits.<br> | ||
| + | | | ||
| + | {{Neutral}} No changes. | ||
| + | |- | ||
| + | | align="center" | [[File:Backpack Pain Train.png|135px]]<br> | ||
| + | <small>[[Melee]]</small><br> | ||
| + | '''[[Pain Train]]''' | ||
| + | | | ||
| + | {{Pro}} Increases user's capture rate by 1 for points and carts.<br> | ||
| + | {{Con}} Raises bullet damage vulnerability by 10%.<br> | ||
| + | | | ||
| + | {{Pro}} Increases user's capture rate by 1 for points and carts.<br> | ||
| + | When weapon is active.<br> | ||
| + | :{{Pro}}10% faster movement speed.<br> | ||
| + | :{{Con}}Raised damage vulnerability by 20%.<br> | ||
| + | {{Con}} Raises bullet damage vulnerability by 10%.<br> | ||
| + | |- | ||
| + | | align="center" | [[File:Backpack Half-Zatoichi.png|135px]]<br> | ||
| + | <small>[[Melee]]</small><br> | ||
| + | '''[[Half-Zatoichi]]''' | ||
| + | | | ||
| + | {{Pro}} 50% longer melee range.<br> | ||
| + | {{Pro}} On kill: heals 50% of user's base health.<br> | ||
| + | {{Pro}} Returned health can overheal.<br> | ||
| + | {{Con}} 75% slower deploy and holster speed.<br> | ||
| + | {{Con}} This weapon is Honorbound and once drawn will be holstered for -50 HP unless it kills.<br> | ||
| + | {{Con}} No random critical hits.<br> | ||
| + | {{Neutral}} A single successful hit will kill an enemy wielding the same weapon.<br> | ||
| + | | | ||
| + | {{Pro}} 50% longer melee range.<br> | ||
| + | {{Con}} No random critical hits.<br> | ||
| + | {{Con}} 75% slower deploy and holster time.<br> | ||
| + | {{Neutral}} A single successful hit will kill an enemy wielding the same weapon.<br> | ||
| + | |- | ||
| + | | align="center" | [[File:Backpack Disciplinary Action.png|135px]]<br> | ||
| + | <small>[[Melee]]</small><br> | ||
| + | '''[[Disciplinary Action]]''' | ||
| + | | | ||
| + | {{Pro}} 70% longer melee range.<br> | ||
| + | {{Pro}} On hitting an ally: boosts player's speed for 3 seconds and boosts ally's speed for 2 seconds.<br> | ||
| + | {{Con}} 25% damage penalty.<br> | ||
| + | | | ||
| + | {{Pro}} 70% longer melee range.<br> | ||
| + | {{Con}} 25% slower swing speed.<br> | ||
| + | |- | ||
| + | | align="center" | [[File:Backpack Escape Plan.png|135px]]<br> | ||
| + | <small>[[Melee]]</small><br> | ||
| + | '''[[Escape Plan]]''' | ||
| + | | | ||
| + | {{Neutral}} When weapon is active:<br> | ||
| + | {{Pro}} Movement speed increase as user's remaining health decreases. (Up to 128%).<br> | ||
| + | {{Con}} User takes mini-crits when weapon is active, and for 3 seconds after switching away.<br> | ||
| + | {{Con}} 90% less healing from Medic sources.<br> | ||
| + | | | ||
| + | {{Neutral}} When weapon is active:<br> | ||
| + | {{Pro}} Movement speed increase as user's remaining health decreases (Up to 115%).<br> | ||
| + | {{Con}} 28% slower move speed.<br> | ||
| + | {{Con}} User takes mini-crits when weapon is active, and for 3 seconds after switching away.<br> | ||
| + | {{Con}} 90% less healing from Medic sources.<br> | ||
| + | |} | ||
| − | + | ==== Pyro ==== | |
| + | {| class="wikitable grid collapsible" width="100%" | ||
| + | ! colspan="5" class="header" | Pyro Primaries | ||
| + | |- | ||
| + | ! class="header" width="15%" | Weapon | ||
| + | ! class="header" width="30%" | Edited Attributes | ||
| + | ! class="header" width="30%" | Zombie Escape Attributes | ||
| + | |- | ||
| + | | align="center" | [[File:Backpack Flame Thrower.png|135px]]<br> | ||
| + | <small>[[Primary]]</small><br> | ||
| + | '''[[Flame Thrower]]''' | ||
| + | | | ||
| + | {{Neutral}} Stock weapon<br> | ||
| + | | | ||
| + | {{Pro}}On hit:100% chance to slow down target.<br> | ||
| + | {{Con}}50% slower repressurization rate on Alt-Fire.<br> | ||
| + | {{Con}}Airblast costs 50% more ammo to fire (30 instead of 20).<br> | ||
| + | {{Con}}Zombies accumulate gradual Airblast resistance with each usage (resets after 10 seconds).<br> | ||
| + | |- | ||
| + | | align="center" | [[File:Backpack Backburner.png|135px]]<br> | ||
| + | <small>[[Primary]]</small><br> | ||
| + | '''[[Backburner]]''' | ||
| + | | | ||
| + | {{Pro}}Guaranteed Critical hits when attacking from behind.<br> | ||
| + | {{Con}}Airblasts cost 150% more ammo to fire (50 instead of 20).<br> | ||
| + | {{Con}}No random critical hits.<br> | ||
| + | | | ||
| + | {{Pro}}Guaranteed Critical hits when attacking from behind.<br> | ||
| + | {{Pro}}On hit:100% chance to slow down target.<br> | ||
| + | {{Pro}}200% greater Airblast push force.<br> | ||
| + | {{Con}}50% slower repressurization rate on Alt-Fire.<br> | ||
| + | {{Con}}When weapon is active:100% less metal from Dispensers and Pickups.<br> | ||
| + | {{Con}}Airblast costs 350% more ammo to fire (80 instead of 20).<br> | ||
| + | {{Con}} Zombies accumulate gradual Airblast resistance with each usage (resets after 10 seconds).<br> | ||
| + | |- | ||
| + | | align="center" | [[File:Backpack Degreaser.png|135px]]<br> | ||
| + | <small>[[Primary]]</small><br> | ||
| + | '''[[Degreaser]]''' | ||
| + | | | ||
| + | {{Pro}}60% faster deploy speed.<br> | ||
| + | {{Pro}}30% faster holster speed.<br> | ||
| + | {{Con}}Airblasts cost 25% more ammo to fire (25 instead of 20).<br> | ||
| + | {{Con}}66% afterburn damage penalty.<br> | ||
| + | | | ||
| + | {{Pro}}60% faster deploy speed.<br> | ||
| + | {{Pro}}30% faster holster speed.<br> | ||
| + | {{Pro}}On hit:100% chance to slow down target.<br> | ||
| + | {{Con}}66% afterburn damage penalty.<br> | ||
| + | {{Con}}50% slower repressurization rate on Alt-Fire.<br> | ||
| + | {{Con}}Airblast costs 100% more ammo to fire (40 instead of 20).<br> | ||
| + | {{Con}}Zombies accumulate gradual Airblast resistance with each usage (resets after 10 seconds).<br> | ||
| + | |- | ||
| + | | align="center" | [[File:Backpack Phlogistinator.png|135px]]<br> | ||
| + | <small>[[Primary]]</small><br> | ||
| + | '''[[Phlogistinator]]''' | ||
| + | | | ||
| + | {{Pro}}Upon dealing 300 fire damage, secondary fire initiates 'Mmmph', which gives guaranteed Critical hits over a short period of time. No damage and knockback is taken during the taunt.<br> | ||
| + | {{Con}}Cannot fire blasts of compressed air.<br> | ||
| + | {{Con}}No random critical hits.<br> | ||
| + | | | ||
| + | {{Pro}}Upon dealing 300 fire damage, secondary fire initiates 'Mmmph', which gives guaranteed Critical hits over a short period of time. No damage and knockback is taken during the taunt.<br> | ||
| + | {{Pro}}10% damage bonus.<br> | ||
| + | {{Pro}}10% longer flamethrower range.<br> | ||
| + | {{Pro}}300% larger flame hitbox.<br> | ||
| + | {{Pro}}On hit:100% chance to slow down target.<br> | ||
| + | {{Con}}Cannot fire blasts of compressed air.<br> | ||
| + | {{Con}}Zombies accumulate gradual Airblast resistance with each usage (resets after 10 seconds).<br> | ||
| + | |- | ||
| + | | align="center" | [[File:Backpack Dragon's Fury.png|135px]]<br> | ||
| + | <small>[[Primary]]</small><br> | ||
| + | '''[[Dragon's Fury]]''' | ||
| + | | | ||
| + | {{Neutral}}A single-shot flamethrower that launches a fast moving projectile that briefly ignites enemies.<br> | ||
| + | {{Neutral}}Uses a shared pressure tank for Primary Fire and Alt-Fire.<br> | ||
| + | {{Pro}}300% damage bonus to burning players.<br> | ||
| + | :{{Neutral}}Bonus damage against a burning target requires the fireball's center to make contact with the target's hitbox.<br> | ||
| + | {{Pro}}50% faster repressurization rate on hit.<br> | ||
| + | {{Pro}}40% longer flamethrower range.<br> | ||
| + | {{Con}}50% slower repressurization rate on Alt-Fire.<br> | ||
| + | {{Con}}No random critical hits.<br> | ||
| + | | | ||
| + | {{Neutral}}A single-shot flamethrower that launches a fast moving projectile that briefly ignites enemies.<br> | ||
| + | {{Neutral}}Uses a shared pressure tank for Primary Fire and Alt-Fire.<br> | ||
| + | {{Pro}}300% damage bonus to burning players.<br> | ||
| + | {{Pro}}50% faster repressurization rate on hit.<br> | ||
| + | {{Pro}}40% longer flamethrower range.<br> | ||
| + | {{Pro}}On hit:100% chance to slow down target.<br> | ||
| + | {{Con}}50% slower repressurization rate on Alt-Fire.<br> | ||
| + | {{Con}}Zombies accumulate gradual Airblast resistance with each usage (resets after 10 seconds).<br> | ||
| + | |- | ||
| + | ! colspan="5" class="header" | Pyro Secondaries | ||
| + | |- | ||
| + | | align="center" | [[File:Backpack Shotgun.png|135px]]<br> | ||
| + | <small>[[Secondary]]</small><br> | ||
| + | '''[[Shotgun]]''' | ||
| + | | | ||
| + | {{Neutral}} Stock weapon. | ||
| + | | | ||
| + | {{Pro}}200% larger clip size.<br> | ||
| + | {{Pro}}20% damage bonus.<br> | ||
| + | {{Pro}}60% shorter reload time.<br> | ||
| + | {{Pro}}60% faster firing speed.<br> | ||
| + | |- | ||
| + | | align="center" | [[File:Backpack Flare Gun.png|135px]]<br> | ||
| + | <small>[[Secondary]]</small><br> | ||
| + | '''[[Flare Gun]]''' | ||
| + | | | ||
| + | {{Neutral}}Fires an accurate flare projectile that sets targets on fire instead of bullets.<br> | ||
| + | {{Pro}} Guaranteed Critical damage on burning targets.<br> | ||
| + | {{Pro}} This weapon reloads automatically when not holstered.<br> | ||
| + | {{Pro}} Can be fired into water to damage enemies (no afterburn will be applied).<br> | ||
| + | | | ||
| + | {{Neutral}}Fires an accurate flare projectile that sets targets on fire instead of bullets.<br> | ||
| + | {{Pro}}700% damage bonus.<br> | ||
| + | {{Pro}}25% shorter reload time.<br> | ||
| + | {{Pro}}Guaranteed critical hits on burning targets.<br> | ||
| + | {{Pro}}This weapon reloads automatically when not holstered.<br> | ||
| + | {{Pro}}Applies a strong downwards force on hit.<br> | ||
| + | {{Pro}}Can be fired into water to damage enemies (no afterburn will be applied).<br> | ||
| + | {{Con}}58% damage penalty '''against players'''.<br> | ||
| + | |- | ||
| + | | align="center" | [[File:Backpack Detonator.png|135px]]<br> | ||
| + | <small>[[Secondary]]</small><br> | ||
| + | '''[[Detonator]]''' | ||
| + | | | ||
| + | {{Neutral}}Fires an accurate flare projectile that sets targets on fire instead of bullets.<br> | ||
| + | {{Neutral}} Flares detonate on impact, with a greatly reduced explosion radius.<br> | ||
| + | {{Pro}} Alt-fire: detonates flare in flight, creating a small explosion which ignites nearby players, but does less damage than a normal hit. The knockback can be used to flare jump.<br> | ||
| + | {{Pro}} On detonation flare destroys enemy sticky bombs.<br> | ||
| + | {{Pro}} Guaranteed Mini-Crit damage on burning targets.<br> | ||
| + | {{Pro}} This weapon reloads automatically when not holstered.<br> | ||
| + | {{Pro}} Can be fired into water to damage enemies (no afterburn will be applied).<br> | ||
| + | {{Con}} 25% damage penalty.<br> | ||
| + | {{Con}} 50% more self-damage from blast jumping.<br> | ||
| + | | | ||
| + | {{Neutral}}Fires an accurate flare projectile that sets targets on fire instead of bullets.<br> | ||
| + | {{Neutral}} Flares detonate on impact, with a greatly reduced explosion radius.<br> | ||
| + | {{Pro}} Alt-fire: detonates flare in flight, creating a small explosion which ignites nearby players, but does less damage than a normal hit. The knockback can be used to flare jump.<br> | ||
| + | {{Pro}} 600% damage bonus.<br> | ||
| + | {{Pro}} 25% shorter reload time.<br> | ||
| + | {{Pro}} On detonation flare destroys enemy sticky bombs.<br> | ||
| + | {{Pro}} Guaranteed Mini-Crit damage on burning targets.<br> | ||
| + | {{Pro}} This weapon reloads automatically when not holstered.<br> | ||
| + | {{Pro}} Can be fired into water to damage enemies (no afterburn will be applied).<br> | ||
| + | {{Con}} 58% damage penalty '''against players'''.<br> | ||
| + | {{Con}} 50% more self-damage from blast jumping.<br> | ||
| + | {{Con}} Deals normal damage whenever it would normally crit.<br> | ||
| + | {{Con}} Disabled self-knockback.<br> | ||
| + | |- | ||
| + | | align="center" | [[File:Backpack Manmelter.png|135px]]<br> | ||
| + | <small>[[Secondary]]</small><br> | ||
| + | '''[[Manmelter]]''' | ||
| + | | | ||
| + | {{Neutral}}Fires an accurate flare projectile that sets targets on fire instead of bullets.<br> | ||
| + | {{Pro}} Alt-fire: extinguishes teammates. Doing so gives 1 guaranteed crit per teammate extinguished (can hold up to 35).<br> | ||
| + | {{Pro}} 50% faster projectile speed.<br> | ||
| + | {{Pro}} Does not use ammo.<br> | ||
| + | {{Pro}} This weapon reloads automatically when not holstered.<br> | ||
| + | {{Pro}} Can be fired into water to damage enemies (no afterburn will be applied).<br> | ||
| + | {{Pro}} Extinguishing teammates heals you +20 HP.<br> | ||
| + | {{Con}} Does not get random Critical hits.<br> | ||
| + | | | ||
| + | {{Neutral}}Fires an accurate flare projectile that sets targets on fire instead of bullets.<br> | ||
| + | {{Pro}}Alt-fire: extinguishes teammates. Doing so gives 1 guaranteed crit per teammate extinguished (can hold up to 35).<br> | ||
| + | {{Pro}}160% damage bonus.<br> | ||
| + | {{Pro}}50% faster projectile speed.<br> | ||
| + | {{Pro}}70% faster firing speed.<br> | ||
| + | {{Pro}}Does not use ammo.<br> | ||
| + | {{Pro}}This weapon reloads automatically when not holstered.<br> | ||
| + | {{Pro}}Can be fired into water to damage enemies (no afterburn will be applied).<br> | ||
| + | {{Pro}}Applies a strong downwards force on hit.<br> | ||
| + | {{Pro}}Extinguishing teammates heals you +20 HP.<br> | ||
| + | {{Con}}50% damage penalty '''against players'''.<br> | ||
| + | {{Con}}Mini-crits whenever it would normally crit.<br> | ||
| + | |- | ||
| + | | align="center" | [[File:Backpack Scorch Shot.png|135px]]<br> | ||
| + | <small>[[Secondary]]</small><br> | ||
| + | '''[[Scorch Shot]]''' | ||
| + | | | ||
| + | {{Neutral}} Fires an accurate flare projectile that sets targets on fire instead of bullets.<br> | ||
| + | {{Pro}} Flare falls to the ground after directly hitting an enemy where it explodes, igniting more targets.<br> | ||
| + | {{Pro}} On detonation flare destroys enemy stickybombs.<br>. | ||
| + | {{Pro}} Guaranteed Mini-Crit damage and increased knockback on burning targets.<br> | ||
| + | {{Pro}} This weapon reloads automatically when not holstered.<br> | ||
| + | {{Con}} 35% damage penalty.<br> | ||
| + | {{Con}} 35% less knockback from blast jumping.<br> | ||
| + | | | ||
| + | {{Neutral}}Fires an accurate rocket projectile that sets targets on fire instead of bullets.<br> | ||
| + | {{Pro}}Rocket ignites enemies in a small radius.<br> | ||
| + | {{Pro}}740% damage bonus.<br> | ||
| + | {{Pro}}100% damage bonus against burning players.<br> | ||
| + | {{Pro}}700% afterburn damage bonus.<br> | ||
| + | {{Pro}}81% faster projectile speed.<br> | ||
| + | {{Pro}}10% shorter reload time.<br> | ||
| + | {{Pro}}Guaranteed Mini-Crit damage and increased knockback on burning targets.<br> | ||
| + | {{Pro}}This weapon reloads automatically when not holstered.<br> | ||
| + | {{Con}}50% damage penalty '''against players'''.<br> | ||
| + | {{Con}}50% smaller splash damage radius.<br> | ||
| + | {{Con}}67% shorter afterburn duration.<br> | ||
| + | {{Con}}Disabled self-knockback.<br> | ||
| + | |- | ||
| + | | align="center" | [[File:Backpack Thermal Thruster.png|135px]]<br> | ||
| + | <small>[[Secondary]]</small><br> | ||
| + | '''[[Thermal Thruster]]''' | ||
| + | | | ||
| + | {{Neutral}}Contains two charges that allows the player to launch themselves into the air. | ||
| + | {{Pro}} Pushes nearby enemies away upon landing.<br> | ||
| + | {{Pro}} Deals 3x the fall damage to an enemy you land on.<br> | ||
| + | {{Pro}} Extinguish teammates at the beginning of your launch.<br> | ||
| + | {{Pro}} Lowers fall damage vulnerability by 75% when a charge is used.<br> | ||
| + | {{Con}} Has a 15 second recharge for each charge.<br> | ||
| + | {{Con}} 0.8 second locked holster penalty.<br> | ||
| + | {{Con}} 30% more knockback from all damage sources when a charge is used.<br> | ||
| + | | | ||
| + | {{c|No|Weapon is banned.}}<br> | ||
| + | |- | ||
| + | | align="center" | [[File:Backpack Gas Passer.png|135px]]<br> | ||
| + | <small>[[Secondary]]</small><br> | ||
| + | '''[[Gas Passer]]''' | ||
| + | | | ||
| + | {{Pro}} Creates a horrific visible gas that coats enemies with a flammable material.<br> | ||
| + | {{Pro}} Enemies covered in gas ignite into afterburn if they take any damage (even enemy Pyros!).<br> | ||
| + | {{Pro}} Gas meter builds with damage done and/or time.<br> | ||
| + | {{Con}} Spawning and resupply do not affect the Gas meter.<br> | ||
| + | {{Con}} Gas meter starts empty.<br> | ||
| + | {{Neutral}} Has a 60 second recharge if no damage is dealt.<br> | ||
| + | | | ||
| + | {{Neutral}}Throws an incendiary grenade instead of a gas canister.<br> | ||
| + | {{Pro}} Creates a horrific visible gas that coats enemies with a flammable material.<br> | ||
| + | {{Pro}}19900% damage bonus.<br> | ||
| + | {{Pro}}900% afterburn damage bonus.<br> | ||
| + | {{Pro}}50% faster holster and deploy speed.<br> | ||
| + | {{Pro}}Grenades have very little bounce and roll.<br> | ||
| + | {{Pro}}Gas meter builds with damage done and/or time.<br> | ||
| + | {{Pro}}19900% larger misc. ammo size.<br> | ||
| + | {{Con}}90% damage penalty '''against players'''.<br> | ||
| + | {{Con}}900% slower firing speed.<br> | ||
| + | {{Con}}Gas meter starts empty.<br> | ||
| + | |- | ||
| + | | align="center" | [[File:Backpack Reserve Shooter.png|135px]]<br> | ||
| + | <small>[[Secondary]]</small><br> | ||
| + | '''[[Reserve Shooter]]''' | ||
| + | | | ||
| + | {{Pro}} Guaranteed Mini-crits on target that are blast jumping, knocked back, launched by the Thermal Thruster stomp, or using the grapple hook.<br> | ||
| + | :{{Con}} Mini-crits only take affect within 5 seconds of deploying this weapon.<br> | ||
| + | {{Pro}} 20% faster weapon deploy speed.<br> | ||
| + | {{Pro}} 15% faster weapon holster speed.<br> | ||
| + | {{Con}} 33% smaller clip size.<br> | ||
| + | | | ||
| + | {{Pro}}Mini-crits targets that are blast jumping, knocked back, launched by a Thermal Thruster stomp, or using the grapple hook.<br> | ||
| + | :{{Con}} Mini-crits only take affect within 5 seconds of deploying this weapon.<br> | ||
| + | {{Pro}}100% larger clip size.<br> | ||
| + | {{Pro}}20% damage bonus.<br> | ||
| + | {{Pro}}60% shorter reload speed.<br> | ||
| + | {{Pro}}60% faster firing speed.<br> | ||
| + | {{Pro}}40% tighter pellet spread.<br> | ||
| + | {{Pro}}20% faster weapon deploy speed.<br> | ||
| + | |- | ||
| + | | align="center" | [[File:Backpack Panic Attack.png|135px]]<br> | ||
| + | <small>[[Secondary]]</small><br> | ||
| + | '''[[Panic Attack]]''' | ||
| + | | | ||
| + | {{Pro}}50% more pellets per shot.<br> | ||
| + | {{Pro}}50% faster deploy speed.<br> | ||
| + | {{Pro}}Fires a fixed shot pattern.<br> | ||
| + | {{Con}}20% damage penalty.<br> | ||
| + | {{Con}}Successive shots become less accurate.<br> | ||
| + | | | ||
| + | {{Pro}}200% larger clip size.<br> | ||
| + | {{Pro}}25% damage bonus '''against players'''.<br> | ||
| + | {{Pro}}50% more pellets per shot.<br> | ||
| + | {{Pro}}45% shorter reload time<br> | ||
| + | {{Pro}}80% faster firing speed<br> | ||
| + | {{Pro}}50% faster deploy speed.<br> | ||
| + | {{Pro}}Fires a fixed shot pattern.<br> | ||
| + | {{Con}}37% damage penalty<br> | ||
| + | {{Con}}50% wider pellet spread.<br> | ||
| + | {{Con}} Successive shots become less accurate.<br> | ||
| + | |- | ||
| + | ! colspan="5" class="header" | Pyro Melees | ||
| + | |- | ||
| + | | align="center" | [[File:Backpack Homewrecker.png|135px]]<br> | ||
| + | <small>[[Melee]]</small><br> | ||
| + | '''[[Homewrecker]]''' | ||
| + | | | ||
| + | {{Pro}}100% damage bonus against [[building]]s.<br/> | ||
| + | {{Pro}}Able to remove [[Electro Sapper]]s (in one hit).<br/> | ||
| + | {{Con}}25% damage penalty against players.<br/> | ||
| + | | | ||
| + | |- | ||
| + | | align="center" | [[File:Backpack Sharpened Volcano Fragment.png|135px]]<br> | ||
| + | <small>[[Melee]]</small><br> | ||
| + | '''[[Sharpened Volcano Fragment]]''' | ||
| + | | | ||
| + | {{Pro}}On Hit: target is engulfed in flames.<br/> | ||
| + | {{Con}}20% damage penalty.<br/> | ||
| + | | | ||
| + | {{Info}} No changes.<br/> | ||
| + | |- | ||
| + | | align="center" | [[File:Backpack Hot Hand.png|135px]]<br> | ||
| + | <small>[[Melee]]</small><br> | ||
| + | '''[[Hot Hand]]''' | ||
| + | | | ||
| + | {{info}}Broadcasts every successful hit on an enemy player over the death-notice area.<br/> | ||
| + | {{info}}Kills are labelled as "'''SLAP-KILL'''" in the death-notice area.<br/> | ||
| + | {{Pro}}On attack: dishes out two consecutive slaps.<br/> | ||
| + | {{Pro}}Gain a speed boost when you hit an enemy player.<br/> | ||
| + | {{Con}}20% damage penalty.<br/> | ||
| + | | | ||
| + | {{Info}} No changes.<br/> | ||
| + | |- | ||
| + | | align="center" | [[File:Backpack Back Scratcher.png|135px]]<br> | ||
| + | <small>[[Melee]]</small><br> | ||
| + | '''[[Backscratcher]]''' | ||
| + | | | ||
| + | {{Pro}}25% damage bonus.<br/> | ||
| + | {{Pro}}50% more healing from map health sources (healthpacks).<br/> | ||
| + | {{Con}}75% less healing from medic sources.<br/> | ||
| + | | | ||
| + | {{Info}}No changes.<br/> | ||
| + | |- | ||
| + | | align="center" | [[File:Backpack Neon Annihilator.png|135px]]<br> | ||
| + | <small>[[Melee]]</small><br> | ||
| + | '''[[Neon Annihilator]]''' | ||
| + | | | ||
| + | {{Pro}}Guaranteed critical hits against [[Soaked|wet]] players.<br/> | ||
| + | {{Pro}}Able to remove [[Electro Sapper]]s (in two hits).<br/> | ||
| + | {{Con}}20% damage penalty against players.<br/> | ||
| + | {{Con}}No random critical hits.<br/> | ||
| + | | | ||
| + | {{Info}}No changes.<br/> | ||
| + | |- | ||
| + | | align="center" | [[File:Backpack Third Degree.png|135px]]<br> | ||
| + | <small>[[Melee]]</small><br> | ||
| + | '''[[Third Degree]]''' | ||
| + | | | ||
| + | {{Pro}}Damage transfers to all players connected via Medic beams. | ||
| + | | | ||
| + | {{Info}}No changes.<br/> | ||
| + | |- | ||
| + | | align="center" | [[File:Backpack Fire Axe.png|135px]]<br> | ||
| + | <small>[[Melee]]</small><br> | ||
| + | '''[[Axe]]''' | ||
| + | | | ||
| + | {{Info}}Stock weapon.<br/> | ||
| + | | | ||
| + | {{Info}}No changes.<br/> | ||
| + | |- | ||
| + | | align="center" | [[File:Backpack Axtinguisher.png|135px]]<br> | ||
| + | <small>[[Melee]]</small><br> | ||
| + | '''[[Axtinguisher]]''' | ||
| + | | | ||
| + | {{Pro}}Guaranteed mini-crits on burning targets.<br/> | ||
| + | {{Pro}}Damage increases based on remaining duration of afterburn.<br/> | ||
| + | {{Pro}}Killing blows on burning players guarantee a speed boost. <br/> | ||
| + | {{Con}}33% damage penalty.<br/> | ||
| + | {{Con}}35% slower deploy speed.<br/> | ||
| + | {{Con}}No random critical hits.<br/> | ||
| + | {{Con}}Hitting burning targets extinguishes them. | ||
| + | | | ||
| + | {{Info}}No changes.<br/> | ||
| + | |- | ||
| + | | align="center" | [[File:Backpack Powerjack.png|135px]]<br> | ||
| + | <small>[[Melee]]</small><br> | ||
| + | '''[[Powerjack]]''' | ||
| + | | | ||
| + | {{Pro}}On kill: restores up to +25 health points.<br/> | ||
| + | {{Pro}}When weapon in active: 15% faster movement speed on wearer.<br/> | ||
| + | {{Con}}When weapon ins active: raises damage vulnerability by 20%.<br/> | ||
| + | | | ||
| + | {{Pro}}On kill: restores up to +25 health points.<br/> | ||
| + | {{Pro}}When weapon in active: 5% faster movement speed on wearer.<br/> | ||
| + | {{Con}}When weapon ins active: raises damage vulnerability by 40%.<br/> | ||
| + | |- | ||
| + | |} | ||
| − | + | ==== Demoman ==== | |
| + | {| class="wikitable grid collapsible" width="100%" | ||
| + | ! colspan="5" class="header" | Demoman Primaries | ||
| + | |- | ||
| + | ! class="header" width="15%" | Weapon | ||
| + | ! class="header" width="30%" | Edited Attributes | ||
| + | ! class="header" width="30%" | Zombie Escape Attributes | ||
| + | |- | ||
| + | | align="center" | [[File:Backpack Grenade Launcher.png|135px]]<br> | ||
| + | <small>[[Primary]]</small><br> | ||
| + | '''[[Grenade Launcher]]''' | ||
| + | | | ||
| + | {{Neutral}}Stock weapon.<br> | ||
| + | | | ||
| + | {{Pro}}210% damage bonus.<br> | ||
| + | {{Pro}}25% shorter reload time.<br> | ||
| + | {{Con}}55% damage penalty '''against players'''.<br> | ||
| + | |- | ||
| + | | align="center" | [[File:Backpack Loch-n-Load.png|135px]]<br> | ||
| + | <small>[[Primary]]</small><br> | ||
| + | '''[[Loch-n-Load]]''' | ||
| + | | | ||
| + | {{Pro}}20% damage bonus against buildings.<br> | ||
| + | {{Pro}}25% faster projectile speed.<br> | ||
| + | {{Pro}}Grenades do not tumble when fired.<br> | ||
| + | {{Con}}25% smaller clip size.<br> | ||
| + | {{Con}}25% smaller splash damage radius.<br> | ||
| + | {{Con}}Launched bombs shatter on surfaces.<br> | ||
| + | | | ||
| + | {{Pro}}150% damage bonus.<br> | ||
| + | {{Pro}}50% faster projectile speed.<br> | ||
| + | {{Pro}}75% faster firing speed.<br> | ||
| + | {{Pro}}25% faster weapon deploy and holster speed.<br> | ||
| + | {{Con}}25% smaller clip size.<br> | ||
| + | {{Con}}75% smaller splash damage radius.<br> | ||
| + | {{Con}}25% shorter reload time.<br> | ||
| + | |- | ||
| + | | align="center" | [[File:Backpack Ali Baba's Wee Booties.png|135px]]<br> | ||
| + | <small>[[Primary]]</small><br> | ||
| + | '''[[Ali Baba's Wee Booties]]''' | ||
| + | | | ||
| + | {{Pro}}+25 max health on wearer.<br> | ||
| + | {{Pro}}Increases turning speed while charging by 200%.<br> | ||
| + | {{Pro}}Melee kills refill 25% of your charge meter.<br> | ||
| + | {{Pro}}10% faster movement speed on wearer with Chargin' Targe, Tide Turner or Splendid Screen.<br> | ||
| + | {{Neutral}}Grants its abilities passively, does not need to be selected.<br> | ||
| + | | | ||
| + | {{c|No|Weapon is banned.}}<br> | ||
| + | |- | ||
| + | | align="center" | [[File:Backpack Loose Cannon.png|135px]]<br> | ||
| + | <small>[[Primary]]</small><br> | ||
| + | '''[[Loose Cannon]]''' | ||
| + | | | ||
| + | {{Neutral}}Cannonballs have a fuse time of 1 second; fuses can be primed to explode earlier by holding down the fire key.<br> | ||
| + | {{Neutral}}Holding down the fire key for too long will cause a misfire.<br> | ||
| + | {{Pro}}Cannonballs push players back on impact.<br> | ||
| + | {{Pro}}20% faster projectile speed.<br> | ||
| + | {{Pro}}Double-Donk: If a cannonball deals both impact and explosive damage to an enemy within half a second, explosive damage will be a mini-crit.<br> | ||
| + | {{Con}}Cannonballs do not explode on impact.<br> | ||
| + | {{Con}}Cannonballs must be charged for at least 0.10 seconds for Double-Donks.<br> | ||
| + | | | ||
| + | {{Neutral}}Pills have a fuse time of 1 second; fuses can be primed to explode earlier by holding down the fire key.<br> | ||
| + | {{Pro}}520% damage bonus.<br> | ||
| + | {{Pro}}25% larger splash damage radius.<br> | ||
| + | {{Pro}}50% faster projectile speed.<br> | ||
| + | {{Pro}}Applies a strong downwards force on hit.<br> | ||
| + | {{Con}}40% damage penalty '''against players'''.<br> | ||
| + | {{Con}}25% longer reload time.<br> | ||
| + | {{Con}}65% slower firing speed.<br> | ||
| + | {{Con}}100% more self-damage from blast jumping.<br> | ||
| + | {{Con}}Disabled self-knockback.<br> | ||
| + | |- | ||
| + | | align="center" | [[File:Backpack Iron Bomber.png|135px]]<br> | ||
| + | <small>[[Primary]]</small><br> | ||
| + | '''[[Iron Bomber]]''' | ||
| + | | | ||
| + | {{Pro}}Grenades have very little bounce and roll.<br> | ||
| + | {{Pro}}30% faster fuse time on grenades<br> | ||
| + | {{Con}}15% smaller splash damage radius.<br> | ||
| + | | | ||
| + | {{Pro}} Grenades have very little bounce and roll.<br> | ||
| + | {{Pro}}210% damage bonus.<br> | ||
| + | {{Pro}}25% shorter reload time.<br> | ||
| + | {{Pro}}30% faster fuse time on grenades<br> | ||
| + | {{Con}}55% damage penalty '''against players'''.<br> | ||
| + | {{Con}}15% smaller splash damage radius.<br> | ||
| + | |- | ||
| + | | align="center" | [[File:Backpack B.A.S.E. Jumper.png|135px]]<br> | ||
| + | <small>[[Secondary]]</small><br> | ||
| + | '''[[Base Jumper]]''' | ||
| + | | | ||
| + | {{Neutral}} Allows player to activate a parachute whilst midair, slowing their descent.<br> | ||
| + | | | ||
| + | {{c|No|Weapon is banned.}}<br> | ||
| + | |- | ||
| + | ! colspan="5" class="header" | Demoman Secondaries | ||
| + | |- | ||
| + | | align="center" | [[File:Backpack Stickybomb Launcher.png|135px]]<br> | ||
| + | <small>[[Secondary]]</small><br> | ||
| + | '''[[Stickybomb Launcher]]''' | ||
| + | | | ||
| + | {{Neutral}}Stock weapon.<br> | ||
| + | | | ||
| + | {{Pro}}+25 max health on wearer.<br> | ||
| + | {{Pro}}25% damage bonus.<br> | ||
| + | {{Pro}}Up to 100% damage bonus based on charge.<br> | ||
| + | {{Pro}}25% shorter reload time.<br> | ||
| + | {{Pro}}On hit: 100% chance to stun zombies for 3 seconds.<br> | ||
| + | {{Con}}25% damage penalty '''against players'''.<br> | ||
| + | {{Con}}No knockback.<br> | ||
| + | |- | ||
| + | | align="center" | [[File:Backpack Chargin' Targe.png|135px]]<br> | ||
| + | <small>[[Secondary]]</small><br> | ||
| + | '''[[Chargin' Targe]]''' | ||
| + | | | ||
| + | {{Neutral}} Secondary fire (with any weapon deployed) makes the player charge forward at high speed in a straight line (turning is limited to very slight angles to the left or right). During the charge, the next melee swing is a guaranteed mini-crit at 25% charge or a critical hit at 60% charge. Any enemy hit by only the shield charge takes up to 50 damage (scales by distance), with additional damage based on the number of heads collected with the Eyelander, Horseless Headless Horsemann's Headtaker or Nessie's Nine Iron.<br> | ||
| + | {{Pro}} Charging removes debuffs.<br> | ||
| + | {{Pro}} Lowers fire damage vulnerability by 50%.<br> | ||
| + | {{Pro}} Lowers explosive damage vulnerability by 30%.<br> | ||
| + | {{Neutral}} Grants its abilities passively, does not need to be selected.<br> | ||
| + | {{Neutral}} Does not grant resistance to self-inflicted damage.<br> | ||
| + | | | ||
| + | {{Neutral}} Secondary fire (with any weapon deployed) makes the player charge forward at high speed in a straight line (turning is limited to very slight angles to the left or right). During the charge, the next melee swing is a guaranteed mini-crit at 25% charge or a critical hit at 60% charge. Any enemy hit by only the shield charge takes up to 50 damage (scales by distance), with additional damage based on the number of heads collected with the Eyelander, Horseless Headless Horsemann's Headtaker or Nessie's Nine Iron.<br> | ||
| + | {{Pro}}When hit: Consumes entire charge meter and applies 1 second of invulnerability.<br> | ||
| + | {{Pro}} Charging removes debuffs.<br> | ||
| + | {{Pro}} Lowers fire damage vulnerability by 50%.<br> | ||
| + | {{Pro}} Lowers explosive damage vulnerability by 30%.<br> | ||
| + | {{Pro}} Grants its abilities passively, does not need to be selected.<br> | ||
| + | {{Neutral}} Does not grant resistance to self-inflicted damage.<br> | ||
| + | {{Neutral}} Taking damage while shield charging reduces charge time.<br> | ||
| + | |- | ||
| + | | align="center" | [[File:Backpack Splendid Screen.png|135px]]<br> | ||
| + | <small>[[Secondary]]</small><br> | ||
| + | '''[[Splendid Screen]]''' | ||
| + | | | ||
| + | {{Neutral}} Secondary fire (with any weapon deployed) makes the player charge forward at high speed in a straight line (turning is limited to very slight angles to the left or right). During the charge, the next melee swing is a guaranteed mini-crit at 25% charge or a critical hit at 60% charge. Any enemy hit by only the shield charge takes up to 85 damage (scales by distance), with additional damage based on the number of heads collected with the Eyelander, Horseless Headless Horsemann's Headtaker or Nessie's Nine Iron.<br> | ||
| + | {{Pro}} Charging removes debuffs.<br> | ||
| + | {{Pro}} 70% charge impact damage bonus.<br> | ||
| + | {{Pro}} 50% increase in charge recharge rate.<br> | ||
| + | {{Pro}} Lowes fire damage vulnerability by 20%.<br> | ||
| + | {{Pro}} Lowes explosive damage vulnerability by 20%.<br> | ||
| + | {{Neutral}} Grants its abilities passively, does not need to be selected.<br> | ||
| + | {{Neutral}} Does not grant resistance to self-inflicted damage.<br> | ||
| + | | | ||
| + | {{Neutral}} Secondary fire (with any weapon deployed) makes the player charge forward at high speed in a straight line. During the charge, the next melee swing is a guaranteed mini-crit at 25% charge. Any enemy hit by only the shield charge takes up to 85 damage (scales by distance), with additional damage based on the number of heads collected with the Eyelander, Horseless Headless Horsemann's Headtaker or Nessie's Nine Iron.<br> | ||
| + | {{Pro}}When hit: Consumes entire charge meter and applies 1 second of invulnerability.<br> | ||
| + | {{Pro}} Charging removes debuffs.<br> | ||
| + | {{Pro}} 70% charge impact damage bonus.<br> | ||
| + | {{Pro}} 50% increase in charge recharge rate.<br> | ||
| + | {{Pro}} Lowes fire damage vulnerability by 20%.<br> | ||
| + | {{Pro}} Lowes explosive damage vulnerability by 20%.<br> | ||
| + | {{Pro}} Full turning control while charging.<br> | ||
| + | {{Pro}} Melee kills refill 75% of charge meter.<br> | ||
| + | {{Neutral}} Grants its abilities passively, does not need to be selected.<br> | ||
| + | {{Neutral}} Does not grant resistance to self-inflicted damage.<br> | ||
| + | |- | ||
| + | | align="center" | [[File:Backpack Tide Turner.png|135px]]<br> | ||
| + | <small>[[Secondary]]</small><br> | ||
| + | '''[[Tide Turner]]''' | ||
| + | | | ||
| + | {{Neutral}} Secondary fire (with any weapon deployed) makes the player charge forward at high speed in a straight line. During the charge, the next melee swing is a guaranteed mini-crit at 25% charge. Any enemy hit by only the shield charge takes up to 50 damage (scales by distance), with additional damage based on the number of heads collected with the Eyelander, Horseless Headless Horsemann's Headtaker or Nessie's Nine Iron.<br> | ||
| + | {{Pro}} Charging removes debuffs.<br> | ||
| + | {{Pro}} Lowes fire damage vulnerability by 15%.<br> | ||
| + | {{Pro}} Lowes explosive damage vulnerability by 15%.<br> | ||
| + | {{Pro}} Full turning control while charging.<br> | ||
| + | {{Pro}} Melee kills refill 75% of charge meter.<br> | ||
| + | {{Con}} Taking damage while shield charging reduces charge time.<br> | ||
| + | {{Neutral}} Grants its abilities passively, does not need to be selected.<br> | ||
| + | {{Neutral}} Does not grant resistance to self-inflicted damage.<br> | ||
| + | | | ||
| + | {{Pro}} Secondary fire (with any weapon deployed) makes the player charge forward at high speed in a straight line. During the charge, the next melee swing is a guaranteed mini-crit at 25% charge. Any enemy hit by only the shield charge takes up to 85 damage (scales by distance), with additional damage based on the number of heads collected with the Eyelander, Horseless Headless Horsemann's Headtaker or Nessie's Nine Iron.<br> | ||
| + | {{Pro}}When hit: Consumes entire charge meter and applies 1 second of invulnerability.<br> | ||
| + | {{Pro}} Charging removes debuffs.<br> | ||
| + | {{Pro}} Lowes fire damage vulnerability by 15%.<br> | ||
| + | {{Pro}} Lowes explosive damage vulnerability by 15%.<br> | ||
| + | {{Pro}} Full turning control while charging.<br> | ||
| + | {{Pro}} Melee kills refill 75% of charge meter.<br> | ||
| + | {{Con}} Taking damage while shield charging reduces charge time.<br> | ||
| + | {{Neutral}} Grants its abilities passively, does not need to be selected.<br> | ||
| + | {{Neutral}} Does not grant resistance to self-inflicted damage.<br> | ||
| + | |- | ||
| + | | align="center" | [[File:Backpack Sticky Jumper.png|135px]]<br> | ||
| + | <small>[[Secondary]]</small><br> | ||
| + | '''[[Sticky Jumper]]''' | ||
| + | | | ||
| + | {{Pro}} 200% larger secondary ammo size.(max is 72).<br> | ||
| + | {{Pro}} No self inflicted blast damage taken.<br> | ||
| + | {{Con}}100% damage penalty.<br> | ||
| + | {{Con}}Unable to carry the intelligence and the PASS Time JACK.<br> | ||
| + | {{Con}}75% less total stickybombs out.(max is 2)<br> | ||
| + | {{Neutral}} No random critical hits (purely cosmetic, as they don't inflict any damage either).<br> | ||
| + | | | ||
| + | {{Pro}}275% damage bonus.<br> | ||
| + | {{Pro}}Up to 220% damage bonus based on charge.<br> | ||
| + | {{Pro}}25% larger splash damage radius.<br> | ||
| + | {{Pro}}On hit: 100% chance to stun zombies for 3 seconds.<br> | ||
| + | {{Con}}90% smaller clip size.<br> | ||
| + | {{Con}}25% damage penalty '''against players'''.<br> | ||
| + | {{Con}}37% longer reload time.<br> | ||
| + | {{Con}}315% slower firing speed.<br> | ||
| + | {{Con}}+1.15 sec slower bomb arm time.<br> | ||
| + | {{Con}}150% slower weapon deploy and holster speed.<br> | ||
| + | {{Con}}When weapon is active: 20% slower movement speed on wearer.<br> | ||
| + | {{Con}}200% more self-damage from blast jumping.<br> | ||
| + | {{Con}}25% less total stickybombs out.(max is 6)<br> | ||
| + | {{Con}}No knockback.<br> | ||
| + | |- | ||
| + | | align="center" | [[File:Backpack Scottish Resistance.png|135px]]<br> | ||
| + | <small>[[Secondary]]</small><br> | ||
| + | '''[[Scottish Resistance]]''' | ||
| + | | | ||
| + | {{Neutral}} Stickies are visible through walls and any obstacle, and can be selectively detonated by aiming at them and pressing the secondary fire button.<br> | ||
| + | {{Pro}} On detonation stickies destroys enemy stickybombs.<br> | ||
| + | {{Pro}} 75% more total stickybombs out at once (max is 14).<br> | ||
| + | {{Pro}} 50% larger secondary ammo size (max is 36).<br> | ||
| + | {{Pro}} 25% faster firing speed.<br> | ||
| + | {{Con}} +0.8 sec slower bomb arm time. | ||
| + | | | ||
| + | {{Neutral}}Stickies are visible through walls and any obstacle, and can be selectively detonated by aiming at them and pressing the secondary fire button.<br> | ||
| + | {{Pro}}+25 max health on wearer.<br> | ||
| + | {{Pro}}25% damage bonus.<br> | ||
| + | {{Pro}}Up to 100% damage bonus based on charge.<br> | ||
| + | {{Pro}}25% shorter reload time.<br> | ||
| + | {{Pro}}On hit: 100% chance to stun zombies for 3 seconds.<br> | ||
| + | {{Pro}}25% more total stickybombs out at once (max is 10).<br> | ||
| + | {{Con}}25% damage penalty '''against players'''.<br> | ||
| + | {{Con}}+0.8 sec slower bomb arm time.<br> | ||
| + | {{Con}}No knockback. | ||
| + | |- | ||
| + | | align="center" | [[File:Backpack Quickiebomb Launcher.png|135px]]<br> | ||
| + | <small>[[Secondary]]</small><br> | ||
| + | '''[[Quickiebomb Launcher]]''' | ||
| + | | | ||
| + | {{Pro}} Up to 35% damage bonus based on charge.<br> | ||
| + | {{Pro}} 70% faster charge rate<br> | ||
| + | {{Pro}} -0.2 sec faster bomb arm time.<br> | ||
| + | {{Pro}} On detonation stickies destroys enemy stickybombs.<br> | ||
| + | {{Con}} 50% smaller clip size.<br> | ||
| + | {{Con}} 15% damage penalty.<br> | ||
| + | | | ||
| + | {{Pro}}+25 max health on wearer.<br> | ||
| + | {{Pro}}5% Damage bonus.<br> | ||
| + | {{Pro}}Up to 170% damage bonus based on charge.<br> | ||
| + | {{Pro}}25% shorter reload time.<br> | ||
| + | {{Pro}}40% faster firing speed.<br> | ||
| + | {{Pro}}70% faster charge rate<br> | ||
| + | {{Pro}} -0.2 sec faster bomb arm time.<br> | ||
| + | {{Pro}}On hit: 100% chance to stun zombies for 3 seconds.<br> | ||
| + | {{Con}}25% damage penalty '''against players'''.<br> | ||
| + | {{Con}}No knockback.<br> | ||
| + | |- | ||
| + | ! colspan="5" class="header" | Demoman Melees | ||
| + | |- | ||
| + | | align="center" | [[File:Backpack Bottle.png|135px]]<br> | ||
| + | <small>[[Melee]]</small><br> | ||
| + | '''[[Bottle]]''' | ||
| + | | | ||
| + | {{Neutral}} Stock weapon.<br> | ||
| + | | | ||
| + | {{Neutral}} No changes.<br> | ||
| + | |- | ||
| + | | align="center" | [[File:Backpack Scotsman's Skullcutter.png|135px]]<br> | ||
| + | <small>[[Melee]]</small><br> | ||
| + | '''[[Scotsman's Skullcutter]]''' | ||
| + | | | ||
| + | {{Pro}} 50% longer melee range.<br> | ||
| + | {{Pro}} 20% damage bonus.<br> | ||
| + | {{Con}} 75% slower deploy and holster time.<br> | ||
| + | {{Con}} 15% slower movement speed on wearer.<br> | ||
| + | | | ||
| + | {{Neutral}}No changes.<br> | ||
| + | |- | ||
| + | | align="center" | [[File:Backpack Eyelander.png|135px]]<br> | ||
| + | <small>[[Melee]]</small><br> | ||
| + | '''[[Eyelander]]''' | ||
| + | | | ||
| + | {{Pro}} 50% longer melee range.<br> | ||
| + | {{Pro}} Every killing blow decapitates the enemy, increasing its head counter. Every head taken raises user's speed (7.5%) and health points (+15) to a maximum of 4 times.<br> | ||
| + | {{Pro}} If a shield is equipped, every head taken raises shield damage by 5 to a maximum of 5 times.<br> | ||
| + | {{Pro}} If you kill an enemy that has the Eyelander, any of its reskins, the Bazaar Bargain, or the Air Strike equipped, you steal their heads (or kills).<br> | ||
| + | {{Con}} Upon death: heads, and their bonuses, reset.<br> | ||
| + | {{Con}} 75% slower deploy and holster time.<br> | ||
| + | {{Con}} -25 max health on wearer.<br> | ||
| + | {{Con}} No random Critical hits.<br> | ||
| + | | | ||
| + | {{Pro}} 50% longer melee range.<br> | ||
| + | {{Con}} 75% slower deploy and holster time.<br> | ||
| + | {{Con}} -25 max health on wearer.<br> | ||
| + | |- | ||
| + | | align="center" | [[File:Backpack Half-Zatoichi.png|135px]]<br> | ||
| + | <small>[[Melee]]</small><br> | ||
| + | '''[[Half-Zatoichi]]''' | ||
| + | | | ||
| + | {{Pro}} 50% longer melee range.<br> | ||
| + | {{Pro}} On kill: gain up to 50% base health.<br> | ||
| + | {{Pro}} Restored health can overheal.<br> | ||
| + | {{Con}} No random critical hits.<br> | ||
| + | {{Con}} 75% slower deploy and holster time.<br> | ||
| + | {{Con}} This weapon is Honorbound and once drawn will be holstered for -50 HP unless it kills.<br> | ||
| + | {{Neutral}} A single successful hit will kill an enemy wielding the same weapon.<br> | ||
| + | | | ||
| + | {{Pro}} 50% longer melee range.<br> | ||
| + | {{Con}} 75% slower deploy and holster time.<br> | ||
| + | {{Con}} This weapon is Honorbound and once drawn will be holstered for -50 HP unless it kills.<br> | ||
| + | {{Neutral}} A single successful hit will kill an enemy wielding the same weapon.<br> | ||
| + | |- | ||
| + | | align="center" | [[File:Backpack Pain Train.png|135px]]<br> | ||
| + | <small>[[Melee]]</small><br> | ||
| + | '''[[Pain Train]]''' | ||
| + | | | ||
| + | {{Pro}} Increases user's capture rate by 1 for points and carts.<br> | ||
| + | {{Con}} Raises bullet damage vulnerability by 10%.<br> | ||
| + | | | ||
| + | {{Neutral}}When weapon is active:<br> | ||
| + | :{{Pro}}10% faster movement speed on wearer.<br> | ||
| + | :{{Con}}Raises damage vulnerability by 20%.<br> | ||
| + | {{Con}} Raises bullet damage vulnerability by 10%.<br> | ||
| + | |- | ||
| + | | align="center" | [[File:Backpack Ullapool Caber.png|135px]]<br> | ||
| + | <small>[[Melee]]</small><br> | ||
| + | '''[[Ullapool Caber]]''' | ||
| + | | | ||
| + | {{Neutral}} The initial hit against an enemy or a solid object triggers an explosion that damages the user, who will also be propelled in the air, and every enemy standing in the explosion radius.<br> | ||
| + | {{Con}} Deals only melee damage if the head is destroyed.<br> | ||
| + | {{Con}}15% damage penalty.<br> | ||
| + | {{Con}} 20% slower swing speed.<br> | ||
| + | {{Con}} No random Critical hits.<br> | ||
| + | {{Con}} 100% slower deploy speed.<br> | ||
| + | | | ||
| + | {{Con}} 20% slower swing speed.<br> | ||
| + | {{Con}} 100% slower deploy speed.<br> | ||
| + | |- | ||
| + | | align="center" | [[File:Backpack Claidheamh Mòr.png|135px]]<br> | ||
| + | <small>[[Melee]]</small><br> | ||
| + | '''[[Claidheamh Mòr]]''' | ||
| + | | | ||
| + | {{Pro}} 50% longer melee range.<br> | ||
| + | {{Pro}} Melee kills refill 25% of your charge meter.<br> | ||
| + | {{Pro}} +0.5 sec increase in charge duration.<br> | ||
| + | {{Con}} 75% slower deploy and holster time.<br> | ||
| + | {{Con}} No random Critical hits.<br> | ||
| + | {{Con}} Raises damage vulnerability by 15%<br> | ||
| + | | | ||
| + | {{Pro}} Has 50% longer melee range.<br> | ||
| + | {{Pro}} Melee kills refill 25% of your charge meter.<br> | ||
| + | {{Pro}} 0.5 sec increase in charge duration.<br> | ||
| + | {{Con}} 75% slower deploy and holster time.<br> | ||
| + | {{Con}} Raises damage vulnerability by 15%<br> | ||
| + | |- | ||
| + | | align="center" | [[File:Backpack Persian Persuader.png|135px]]<br> | ||
| + | <small>[[Melee]]</small><br> | ||
| + | '''[[Persian Persuader]]''' | ||
| + | | | ||
| + | {{Pro}} 50% longer melee range.<br> | ||
| + | {{Pro}} Ammo can recharge charge.<br> | ||
| + | {{Pro}} Melee hits refill 20% of your charge meter.<br> | ||
| + | {{Con}} No random critical hits.<br> | ||
| + | {{Pro}} 80% smaller secondary ammo size.<br> | ||
| + | {{Con}} Cannot refill ammo from ammo boxes unless charge meter is full.<br> | ||
| + | {{Con}} 75% slower deploy and holster time.<br> | ||
| + | | | ||
| + | {{Pro}} 50% longer melee range.<br> | ||
| + | {{Pro}} 80% smaller secondary ammo size.<br> | ||
| + | {{Con}} 75% slower deploy and holster time.<br> | ||
| + | |} | ||
| − | ==== | + | ==== Heavy ==== |
| − | ''' | + | {| class="wikitable grid collapsible" width="100%" |
| + | ! colspan="5" class="header" | Heavy Primaries | ||
| + | |- | ||
| + | ! class="header" width="15%" | Weapon | ||
| + | ! class="header" width="30%" | Edited Attributes | ||
| + | ! class="header" width="30%" | Zombie Escape Attributes | ||
| + | |- | ||
| + | | align="center" | [[File:Backpack Minigun.png|135px]]<br> | ||
| + | <small>[[Primary]]</small><br> | ||
| + | '''[[Minigun]]''' | ||
| + | | | ||
| + | {{Info}}Secondary fire spins-up the barrel without firing.<br /> | ||
| + | {{Info}}Fires 4 bullets per unit of ammo used.<br /> | ||
| + | {{Info}} Stock weapon.<br> | ||
| + | | | ||
| + | {{Info}}Secondary fire spins-up the barrel without firing.<br /> | ||
| + | {{Info}}Fires 4 bullets per unit of ammo used.<br /> | ||
| + | {{Con}}25% damage penalty '''against players'''.<br> | ||
| + | {{Con}}30% damage penalty.<br> | ||
| + | |- | ||
| + | | align="center" | [[File:Backpack Natascha.png|135px]]<br> | ||
| + | <small>[[Primary]]</small><br> | ||
| + | '''[[Natascha]]''' | ||
| + | | | ||
| + | {{Info}}Secondary fire spins-up the barrel without firing.<br /> | ||
| + | {{Info}}Fires 4 bullets per unit of ammo used.<br /> | ||
| + | {{Pro}}On hit: 100% chance to slow down enemy players.<br /> | ||
| + | :{{Info}}[[Slowdown]]-on-hit effect is reduced over distance.<br> | ||
| + | {{Pro}}Lowers damage vulnerability by 20% when spun up and health is less than 50% of max.<br /> | ||
| + | {{Con}}25% damage penalty.<br /> | ||
| + | {{Con}}30% longer spin-up time.<br /> | ||
| + | | | ||
| + | {{Info}}Secondary fire spins-up the barrel without firing.<br /> | ||
| + | {{Info}}Fires 6 bullets per unit of ammo used.<br /> | ||
| + | {{Pro}}50% more bullets per shot.<br> | ||
| + | {{Pro}}25% faster firing speed.<br> | ||
| + | {{Pro}}Lowers damage vulnerability by 20% when spun up and health is less than 50% of max.<br /> | ||
| + | {{Con}}19% damage penalty.<br> | ||
| + | {{Con}}25% damage penalty '''against players'''.<br> | ||
| + | {{Con}}30% slower spin up time.<br> | ||
| + | {{Con}}25% wider bullet spread.<br> | ||
| + | |- | ||
| + | | align="center" | [[File:Backpack Brass Beast.png|135px]]<br> | ||
| + | <small>[[Primary]]</small><br> | ||
| + | '''[[Brass Beast]]''' | ||
| + | | | ||
| + | {{Info}}Secondary fire spins-up the barrel without firing.<br /> | ||
| + | {{Info}}Fires 4 bullets per unit of ammo used.<br /> | ||
| + | {{Pro}}20% damage bonus.<br /> | ||
| + | {{Pro}}Lowers damage vulnerability by 20% when spun up and health is less than 50% of max.<br /> | ||
| + | {{Con}}50% slower spin up time.<br /> | ||
| + | {{Con}}60% slower movement speed when spun-up.<br /> | ||
| + | | | ||
| + | {{Info}}Secondary fire spins-up the barrel without firing.<br /> | ||
| + | {{Info}}Fires 4 bullets per unit of ammo used.<br /> | ||
| + | {{Pro}}10% faster firing speed.<br> | ||
| + | {{Pro}}Lowers damage vulnerability by 33% when spun up and health is less than 50% of max.<br /> | ||
| + | {{Con}}29% damage penalty.<br> | ||
| + | {{Con}}25% damage penalty '''against players'''.<br> | ||
| + | {{Con}}50% slower spin up time.<br> | ||
| + | {{Con}}60% slower move speed when spun-up.<br> | ||
| + | |- | ||
| + | | align="center" | [[File:Backpack Tomislav.png|135px]]<br> | ||
| + | <small>[[Primary]]</small><br> | ||
| + | '''[[Tomislav]]''' | ||
| + | | | ||
| + | {{Info}}Secondary fire deploys the barrel without firing.<br /> | ||
| + | {{Info}}Fires 4 bullets per unit of ammo used.<br /> | ||
| + | {{Pro}}20% faster spin up time.<br /> | ||
| + | {{Pro}}20% tighter bullet spread.<br /> | ||
| + | {{Pro}}Silent Killer: No spin-up sound.<br /> | ||
| + | {{Con}}20% slower firing speed.<br /> | ||
| + | | | ||
| + | {{Info}}Secondary fire deploys the barrel without firing.<br /> | ||
| + | {{Info}}Fires 4 bullets per unit of ammo used.<br /> | ||
| + | {{Pro}}Silent Killer: No spin-up sound.<br /> | ||
| + | {{Pro}}60% faster spin up time.<br> | ||
| + | {{Pro}}50% tighter bullet spread.<br> | ||
| + | {{Con}}30% damage penalty.<br> | ||
| + | {{Con}}25% damage penalty '''against players'''.<br> | ||
| + | {{Con}}20% slower firing speed.<br> | ||
| + | |- | ||
| + | | align="center" | [[File:Backpack Huo-Long Heater.png|135px]]<br> | ||
| + | <small>[[Primary]]</small><br> | ||
| + | '''[[Huo-Long Heater]]''' | ||
| + | | | ||
| + | {{Info}}Secondary fire deploys the barrel without firing.<br /> | ||
| + | {{Info}}Fires 4 bullets per unit of ammo used.<br /> | ||
| + | {{Pro}}Create a ring of flames while spun up.<br /> | ||
| + | {{Pro}}25% damage bonus against burning players.<br /> | ||
| + | {{Con}}10% damage penalty.<br /> | ||
| + | {{Con}}Consumes an additional 4 ammo per second while spun up.<br /> | ||
| + | | | ||
| + | {{Info}}Secondary fire deploys the barrel without firing.<br /> | ||
| + | {{Info}}Fires 8 bullets per unit of ammo used.<br /> | ||
| + | {{Pro}}Create a ring of flames while spun up.<br /> | ||
| + | {{Pro}}25% damage bonus against burning players.<br> | ||
| + | {{Pro}}50% faster firing speed.<br> | ||
| + | {{Pro}}60% faster spin up time.<br> | ||
| + | {{Con}}75% damage penalty.<br> | ||
| + | {{Con}}25% damage penalty '''against players'''.<br> | ||
| + | {{Con}}50% wider bullet spread.<br> | ||
| + | {{Con}}Cannot collect ammo from dispensers while active.<br> | ||
| + | |- | ||
| + | ! colspan="5" class="header" | Heavy Secondaries | ||
| + | |- | ||
| + | | align="center" | [[File:Backpack Shotgun.png|135px]]<br> | ||
| + | <small>[[Secondary]]</small><br> | ||
| + | '''[[Shotgun]]''' | ||
| + | | | ||
| + | {{Info}} Stock weapon. | ||
| + | | | ||
| + | {{Pro}} 200% larger clip size.<br> | ||
| + | {{Pro}} 20% damage bonus.<br> | ||
| + | {{Pro}} 60% shorter reload time.<br> | ||
| + | {{Pro}} 60% faster firing speed.<br> | ||
| + | |- | ||
| + | | align="center" | [[File:Backpack Sandvich.png|135px]]<br> | ||
| + | <small>[[Secondary]]</small><br> | ||
| + | '''[[Sandvich]]''' | ||
| + | | | ||
| + | {{Info}}With primary fire or taunt key, restores 300 health over about 4 seconds.<br /> | ||
| + | {{Info}}With secondary fire, throws it for another player to restore 50% health.<br /> | ||
| + | {{Info}}When thrown and then picked up, restores recharge bar.<br /> | ||
| + | {{Info}}If injured, after use it must recharge (over about 25.7 seconds or with any [[Pickups|health pickup]] when at full health) to be used again.<br /> | ||
| + | {{Info}}If your health is full, collecting any health pickup will completely fill the recharge bar.<br/> | ||
| + | | | ||
| + | {{Pro}}100% faster weapon deploy and holster speed.<br> | ||
| + | {{Info}}With primary fire or taunt key, restores 300 health over about 2 seconds.<br /> | ||
| + | {{Info}}With secondary fire, throws it for another player to restore 50% health.<br /> | ||
| + | {{Info}}When thrown and then picked up, restores recharge bar.<br /> | ||
| + | {{Info}}If injured, after use it must recharge (over about 25.7 seconds or with any [[Pickups|health pickup]] when at full health) to be used again.<br /> | ||
| + | {{Info}}If your health is full, collecting any health pickup will completely fill the recharge bar.<br/> | ||
| + | {{Info}}When weapon is active<br> | ||
| + | :{{Pro}}15% ammo regenerated per 5 seconds.<br> | ||
| − | + | |- | |
| + | | align="center" | [[File:Backpack Panic Attack.png|135px]]<br> | ||
| + | <small>[[Secondary]]</small><br> | ||
| + | '''[[Panic Attack]]''' | ||
| + | | | ||
| + | {{Pro}}50% more pellets per shot.<br> | ||
| + | {{Pro}}50% faster deploy speed.<br> | ||
| + | {{Pro}}Fires a fixed shot pattern.<br> | ||
| + | {{Con}}20% damage penalty.<br> | ||
| + | {{Con}}Successive shots become less accurate.<br> | ||
| + | | | ||
| + | {{Pro}}200% larger clip size.<br> | ||
| + | {{Pro}}50% more pellets per shot.<br> | ||
| + | {{Pro}}45% shorter reload time<br> | ||
| + | {{Pro}}80% faster firing speed<br> | ||
| + | {{Pro}}50% faster deploy speed.<br> | ||
| + | {{Pro}}Fires a fixed shot pattern.<br> | ||
| + | {{Con}}37% damage penalty<br> | ||
| + | {{Con}}25% damage penalty '''against players'''.<br> | ||
| + | {{Con}}50% wider pellet spread.<br> | ||
| + | {{Con}} Successive shots become less accurate.<br> | ||
| + | |- | ||
| + | | align="center" | [[File:Backpack Dalokohs Bar.png|135px]]<br> | ||
| + | <small>[[Secondary]]</small><br> | ||
| + | '''[[Dalokohs Bar]]''' | ||
| + | | | ||
| + | {{Info}}With primary fire or taunt key, restores 100 health over about 4 seconds<br /> | ||
| + | {{Info}}With secondary fire, throws it for another player to restore 20.5% health.<br /> | ||
| + | {{Info}}When thrown and then picked up, restores recharge bar.<br /> | ||
| + | {{Info}}Raises maximum health by 50 points (350 total) for 30 seconds.<br /> | ||
| + | {{Info}}If injured, after use it must recharge (over about 10 seconds) to be used again.<br /> | ||
| + | {{Info}}If your health is full, collecting any health pickup will completely fill the recharge bar. <br/> | ||
| + | {{Pro}}If used when player is at full health, grants 50 points of overheal.<br /> | ||
| + | | | ||
| + | {{Pro}}Passively increases max health by 50 points (350 total) on wearer.<br> | ||
| + | {{Pro}}100% weapon switch to speed.<br> | ||
| + | {{Info}}With primary fire or taunt key, restores 100 health over about 4 seconds<br /> | ||
| + | {{Info}}With secondary fire, throws it for another player to restore 20.5% health.<br /> | ||
| + | {{Info}}When thrown and then picked up, restores recharge bar.<br /> | ||
| + | {{Info}}Raises maximum health by 50 points (400 total) for 30 seconds.<br /> | ||
| + | {{Info}}If injured, after use it must recharge (over about 10 seconds) to be used again.<br /> | ||
| + | {{Info}}If your health is full, collecting any health pickup will completely fill the recharge bar. <br/> | ||
| + | {{Pro}}If used when player is at full health, grants 50 points of overheal.<br /> | ||
| + | |- | ||
| + | | align="center" | [[File:Backpack Family Business.png|135px]]<br> | ||
| + | <small>[[Secondary]]</small><br> | ||
| + | '''[[Family Business]]''' | ||
| + | | | ||
| + | {{Pro}}33% larger clip size.<br /> | ||
| + | {{Pro}}15% faster firing speed.<br /> | ||
| + | {{Con}}15% damage penalty.<br /> | ||
| + | | | ||
| + | {{Pro}}300% larger clip size.<br> | ||
| + | {{Pro}}8% damage bonus.<br> | ||
| + | {{Pro}}55% shorter reload time.<br> | ||
| + | {{Pro}}65% faster firing speed.<br> | ||
| + | {{Pro}}50% tighter pellet spread.<br> | ||
| + | |- | ||
| + | | align="center" | [[File:Backpack Buffalo Steak Sandvich.png|135px]]<br> | ||
| + | <small>[[Secondary]]</small><br> | ||
| + | '''[[Buffalo Steak Sandvich]]''' | ||
| + | | | ||
| + | {{Info}}With primary fire or taunt key, activate the effect after about 4 seconds.<br> | ||
| + | {{Info}}While under effect:<br/> | ||
| + | :{{Pro}}All damage dealt is [[Critical Hits#Mini-Crits|Mini-Crits]].<br/> | ||
| + | :{{Pro}} Grants 30% faster movement.<br/> | ||
| + | :{{Con}} Player can only use melee weapons.<br/> | ||
| + | :{{Con}} Damage taken is increased by 20%.<br/> | ||
| + | {{Info}}Effects last for 16 seconds.<br /> | ||
| + | {{Info}}With secondary fire, throws it for another player to restore 50% health.<br /> | ||
| + | {{Info}}When thrown and then picked up, restores recharge bar.<br /> | ||
| + | {{Info}}After use it must recharge (over about 25.7 seconds or with any health pickup when at full health) to be used again.<br /> | ||
| + | {{Info}}If your health is full, collecting any health pickup will completely fill the recharge bar.<br/> | ||
| + | | | ||
| + | {{Pro}}100% faster weapon deploy and holster speed.<br> | ||
| + | {{Info}}With primary fire or taunt key, activate the effect after about 2 seconds.<br> | ||
| + | {{Info}}While under effect:<br/> | ||
| + | :{{Pro}}All damage dealt is [[Critical Hits#Mini-Crits|Mini-Crits]].<br/> | ||
| + | :{{Pro}} Grants 30% faster movement.<br/> | ||
| + | :{{Con}} Player can only use melee weapons.<br/> | ||
| + | :{{Con}} Damage taken is increased by 20%.<br/> | ||
| + | {{Info}}Effects last for 16 seconds.<br /> | ||
| + | {{Info}}With secondary fire, throws it for another player to restore 50% health.<br /> | ||
| + | {{Info}}When thrown and then picked up, restores recharge bar.<br /> | ||
| + | {{Info}}After use it must recharge (over about 25.7 seconds or with any health pickup when at full health) to be used again.<br /> | ||
| + | |- | ||
| + | | align="center" | [[File:Backpack Second Banana.png|135px]]<br> | ||
| + | <small>[[Secondary]]</small><br> | ||
| + | '''[[Second Banana]]''' | ||
| + | | | ||
| + | {{Info}}With primary fire or taunt key, restores 200 health over about 4 seconds<br /> | ||
| + | {{Info}}With secondary fire, throws it for another player to restore 20.5% health.<br /> | ||
| + | {{Info}}When thrown and then picked up, restores recharge bar.<br /> | ||
| + | {{Info}}If injured, after use it must recharge (over about 10 seconds) to be used again.<br /> | ||
| + | {{Info}}If your health is full, collecting any health pickup will completely fill the recharge bar.<br/> | ||
| + | | | ||
| + | {{Info}}With primary fire or taunt key, restores 200 health over about 2 seconds<br /> | ||
| + | {{Info}}With secondary fire, throws it for another player to restore 20.5% health.<br /> | ||
| + | {{Info}}When thrown and then picked up, restores recharge bar.<br /> | ||
| + | {{Info}}If injured, after use it must recharge (over about 10 seconds) to be used again.<br /> | ||
| + | {{Info}}If your health is full, collecting any health pickup will completely fill the recharge bar.<br/> | ||
| + | {{Info}}When weapon is active<br> | ||
| + | :{{Pro}}5% faster movement speed on wearer.<br> | ||
| + | {{Con}}100% slower weapon switch to and switch from speed.<br> | ||
| + | |- | ||
| + | ! colspan="5" class="header" | Heavy Melees | ||
| + | |- | ||
| + | | align="center" | [[File:Backpack Fists.png|135px]]<br> | ||
| + | <small>[[Melee]]</small><br> | ||
| + | '''[[Fists]]''' | ||
| + | | | ||
| + | {{Info}}Stock weapon.<br> | ||
| + | | | ||
| + | {{Info}}No changes.<br> | ||
| + | |- | ||
| + | | align="center" | [[File:Backpack Killing Gloves of Boxing.png|135px]]<br> | ||
| + | <small>[[Melee]]</small><br> | ||
| + | '''[[Killing Gloves of Boxing]]''' | ||
| + | | | ||
| + | {{Pro}}On kill: guaranteed [[Critical hits]] on all weapons for 5 seconds.<br /> | ||
| + | {{Con}}20% slower swing speed.<br /> | ||
| + | | | ||
| + | {{Pro}}2% faster movement speed on wearer.<br> | ||
| + | {{Pro}}On kill: guaranteed [[Critical hits]] on all weapons for 5 seconds.<br /> | ||
| + | {{Con}}20% slower swing speed.<br /> | ||
| + | |- | ||
| + | | align="center" | [[File:Backpack Gloves of Running Urgently.png|135px]]<br> | ||
| + | <small>[[Melee]]</small><br> | ||
| + | '''[[Gloves of Running Urgently]]''' | ||
| + | | | ||
| + | {{Pro}}When weapon is active: 30% faster speed movement on wearer.<br /> | ||
| + | {{Con}}50% slower holster speed.<br /> | ||
| + | {{Con}}Maximum health is drained while item is active at a rate of -10 per second, to a minimum of 100.<br /> | ||
| + | {{Info}}Maximum health is gradually recovered while this weapon is not active. <br /> | ||
| + | | | ||
| + | {{Pro}}When weapon is active: 20% faster speed movement on wearer.<br /> | ||
| + | {{Con}}50% slower holster speed.<br /> | ||
| + | {{Con}}10% slower movement speed on wearer.<br> | ||
| + | {{Con}}Raised damage vulnerability by 50%.<br> | ||
| + | |- | ||
| + | | align="center" | [[File:Backpack Warrior's Spirit.png|135px]]<br> | ||
| + | <small>[[Melee]]</small><br> | ||
| + | '''[[Warrior's Spirit]]''' | ||
| + | | | ||
| + | {{Pro}}30% damage bonus.<br /> | ||
| + | {{Pro}}+50 health on kill.<br /> | ||
| + | {{Con}}While weapon is active: raises damage vulnerability by 30%<br /> | ||
| + | | | ||
| + | {{Pro}}30% damage bonus.<br /> | ||
| + | {{Pro}}+50 health on kill.<br /> | ||
| + | {{Info}}When weapon is active:<br> | ||
| + | :{{Pro}}Up to +7 health regenerated per second passively.<br> | ||
| + | :{{Con}}Raises damage vulnerability by 30%<br /> | ||
| + | |- | ||
| + | | align="center" | [[File:Backpack Fists of Steel.png|135px]]<br> | ||
| + | <small>[[Melee]]</small><br> | ||
| + | '''[[Fists of Steel]]''' | ||
| + | | | ||
| + | {{Pro}}While weapon is active: lowers ranged damage vulnerability by 40%<br /> | ||
| + | {{Con}}100% slower holster speed.<br /> | ||
| + | {{Con}}While weapon is active: raises melee damage vulnerability by 100%<br /> | ||
| + | {{Con}}40% smaller maximum overheal on wearer.<br /> | ||
| + | {{Con}}40% less healing from medic sources.<br /> | ||
| + | | | ||
| + | {{Info}} No changes. | ||
| + | |- | ||
| + | | align="center" | [[File:Backpack Eviction Notice.png|135px]]<br> | ||
| + | <small>[[Melee]]</small><br> | ||
| + | '''[[Eviction Notice]]''' | ||
| + | | | ||
| + | {{Pro}}40% faster firing speed.<br /> | ||
| + | {{Pro}}While weapon is active:15% faster movement speed.<br /> | ||
| + | {{Pro}}On hit: gain a 3 second speed boost.<br /> | ||
| + | {{Con}}60% damage penalty.<br /> | ||
| + | {{Con}}Maximum health is drained while item is active at a rate of -5 per second, to a minimum of 100.<br /> | ||
| + | {{Info}}Maximum health is gradually recovered while this weapon is not active. <br /> | ||
| + | | | ||
| + | {{Pro}}8% faster movement speed on wearer.<br> | ||
| + | {{Pro}}40% faster firing speed.<br /> | ||
| + | {{Con}}-100 max health.<br> | ||
| + | {{Con}}60% damage penalty.<br /> | ||
| + | |- | ||
| + | | align="center" | [[File:Backpack Holiday Punch.png|135px]]<br> | ||
| + | <small>[[Melee]]</small><br> | ||
| + | '''[[Holiday Punch]]''' | ||
| + | | | ||
| + | {{Pro}} Critical hit forces victim to laugh.<br /> | ||
| + | {{Pro}} Always critical hit from behind.<br /> | ||
| + | {{Pro}} On Hit: Force enemies to laugh who are also wearing this item.<br /> | ||
| + | {{Con}} Critical hits do no damage.<br /> | ||
| + | | | ||
| + | {{Info}}No changes.<br> | ||
| + | |} | ||
| − | + | ==== Engineer ==== | |
| + | {| class="wikitable grid collapsible" width="100%" | ||
| + | ! colspan="5" class="header" | Engineer Primaries | ||
| + | |- | ||
| + | ! class="header" width="15%" | Weapon | ||
| + | ! class="header" width="30%" | Stock Attributes | ||
| + | ! class="header" width="30%" | Zombie Escape Attributes | ||
| + | |- | ||
| + | | align="center" | [[File:Backpack Shotgun.png|135px]]<br> | ||
| + | <small>[[Primary]]</small><br> | ||
| + | '''[[Shotgun]]''' | ||
| + | | | ||
| + | {{Neutral}} Stock weapon.<br> | ||
| + | | | ||
| + | {{Pro}} 200% larger clip size.<br> | ||
| + | {{Pro}} 20% damage bonus.<br> | ||
| + | {{Pro}} 60% shorter reload time.<br> | ||
| + | {{Pro}} 60% faster firing speed.<br> | ||
| + | |- | ||
| + | | align="center" | [[File:Backpack Frontier Justice.png|135px]]<br> | ||
| + | <small>[[Primary]]</small><br> | ||
| + | '''[[Frontier Justice]]''' | ||
| + | | | ||
| + | {{Pro}}Stores 2 guaranteed critical shots for every Sentry Gun kill.<br /> | ||
| + | {{Pro}}Stores 1 guaranteed critical shot for every Sentry Gun kill assist.<br /> | ||
| + | {{Info}}Stored critical shots (up to 35) are granted only upon Sentry Gun destruction/demolition.<br /> | ||
| + | {{Con}}50% smaller clip size.<br /> | ||
| + | {{Con}}No random Critical hits.<br /> | ||
| + | {{Con}}Revenge crits are lost on death.<br/> | ||
| + | | | ||
| + | {{Pro}}Stores 2 guaranteed critical shots for every Sentry Gun kill.<br /> | ||
| + | {{Pro}}Stores 1 guaranteed critical shot for every Sentry Gun kill assist.<br /> | ||
| + | {{Info}}Stored critical shots (up to 35) are granted only upon Sentry Gun destruction/demolition.<br /> | ||
| + | {{Pro}}50% larger clip size.<br /> | ||
| + | {{Pro}}100% damage bonus.<br> | ||
| + | {{Pro}}45% shorter reload time.<br> | ||
| + | {{Pro}}50% faster firing speed.<br> | ||
| + | |- | ||
| + | | align="center" | [[File:Backpack Widowmaker.png|135px]]<br> | ||
| + | <small>[[Primary]]</small><br> | ||
| + | '''[[Widowmaker]]''' | ||
| + | | | ||
| + | {{Pro}}On hit: damage dealt is returned as ammo.<br /> | ||
| + | {{Pro}}10% damage bonus to the same target as your sentry.<br/> | ||
| + | {{Pro}}No reload necessary.<br /> | ||
| + | {{Con}}Uses metal as ammo.<br /> | ||
| + | {{Con}}Per Shot: -30 metal.<br /> | ||
| + | | | ||
| + | {{Pro}}On hit: damage dealt is returned as ammo.<br /> | ||
| + | {{Pro}}50% damage bonus to the same target as your sentry.<br/> | ||
| + | {{Pro}}40% faster firing speed.<br> | ||
| + | {{Pro}}35% tighter pellet spread.<br> | ||
| + | {{Pro}}No reload necessary.<br /> | ||
| + | {{Con}}20% damage penalty.<br> | ||
| + | {{Con}}Uses metal as ammo.<br /> | ||
| + | {{Con}}Per Shot: -50 metal.<br /> | ||
| + | {{Con}}50% slower Sentry firing speed.<br> | ||
| + | |- | ||
| + | | align="center" | [[File:Backpack Panic Attack.png|135px]]<br> | ||
| + | <small>[[Primary]]</small><br> | ||
| + | '''[[Panic Attack]]''' | ||
| + | | | ||
| + | {{Pro}}50% more pellets per shot.<br> | ||
| + | {{Pro}}50% faster deploy speed.<br> | ||
| + | {{Pro}}Fires a fixed shot pattern.<br> | ||
| + | {{Con}}20% damage penalty.<br> | ||
| + | {{Con}}Successive shots become less accurate.<br> | ||
| + | | | ||
| + | {{Pro}}200% larger clip size.<br> | ||
| + | {{Pro}}50% more pellets per shot.<br> | ||
| + | {{Pro}}45% shorter reload time<br> | ||
| + | {{Pro}}80% faster firing speed<br> | ||
| + | {{Pro}}50% faster deploy speed.<br> | ||
| + | {{Pro}}Fires a fixed shot pattern.<br> | ||
| + | {{Con}}37% damage penalty<br> | ||
| + | {{Con}}25% damage penalty '''against players'''.<br> | ||
| + | {{Con}}50% wider pellet spread.<br> | ||
| + | {{Con}}Successive shots become less accurate.<br> | ||
| + | |- | ||
| + | | align="center" | [[File:Backpack Pomson 6000.png|135px]]<br> | ||
| + | <small>[[Primary]]</small><br> | ||
| + | '''[[Pomson 6000]]''' | ||
| + | | | ||
| + | {{Info}}Shoots an electric projectile instead of shotgun pellets.<br /> | ||
| + | {{Pro}}Projectile cannot be deflected or destroyed.<br> | ||
| + | {{Pro}}On Hit: Victim loses up to 10% Medigun charge.<br /> | ||
| + | {{Pro}}On Hit: Victim loses up to 20% cloak.<br /> | ||
| + | {{Pro}}Does not require ammo (replaced with an ammo meter).<br /> | ||
| + | {{Con}}33% smaller clip size.<br /> | ||
| + | {{Con}}20% damage penalty against buildings.<br /> | ||
| + | {{Con}}2% longer reload time.<br> | ||
| + | | | ||
| + | {{Info}}Shoots an electric projectile instead of shotgun pellets.<br /> | ||
| + | {{Pro}}Projectile cannot be deflected or destroyed.<br> | ||
| + | {{Pro}}33% larger clip size.<br> | ||
| + | {{Pro}}25% faster firing speed.<br> | ||
| + | {{Pro}}On hit: 100% chance to slow down Zombies.<br> | ||
| + | {{Pro}}Projectile penetrates players and damage enemies behind them.<br> | ||
| + | {{Pro}}Does not require ammo (replaced with an ammo meter).<br /> | ||
| + | {{Pro}}50% Sentry Gun damage bonus.<br> | ||
| + | {{Con}}Deals no damage against non-player characters.<br> | ||
| + | {{Con}}2% longer reload time.<br> | ||
| + | |- | ||
| + | | align="center" | [[File:Backpack Rescue Ranger.png|135px]]<br> | ||
| + | <small>[[Primary]]</small><br> | ||
| + | '''[[Rescue Ranger]]''' | ||
| + | | | ||
| + | {{Pro}}Alt-Fire: Use 100 metal to pick up buildings from long range.<br /> | ||
| + | {{Pro}}Fires a special bolt that can repair friendly buildings at the cost of metal.<br /> | ||
| + | {{Pro}}4-to-1 health-to-metal ratio when repairing buildings.<br /> | ||
| + | {{Con}}34% smaller clip size.<br /> | ||
| + | {{Con}}50% smaller secondary ammo size.<br /> | ||
| + | {{Con}}User takes mini-crits on building pick up, and a few seconds after redeployment.<br /> | ||
| + | | | ||
| + | {{Pro}}Alt-Fire: Use 80 metal to pick up buildings from long range.<br /> | ||
| + | {{Pro}}Fires a special bolt that can repair friendly buildings at the cost of metal.<br /> | ||
| + | {{Pro}}4-to-1 health-to-metal ratio when repairing buildings.<br /> | ||
| + | {{Pro}}66% larger clip size.<br> | ||
| + | {{Pro}}50% damage bonus.<br> | ||
| + | {{Pro}}40% shorter reload time.<br> | ||
| + | {{Pro}}50% faster firing speed.<br> | ||
| + | {{Pro}}Projectile penetrates players and damage enemies behind them.<br> | ||
| + | {{Pro}}50% Sentry Gun damage bonus.<br> | ||
| + | {{Con}}User takes mini-crits on building pick up, and a few seconds after redeployment.<br /> | ||
| + | {{Con}}Deals no damage against non-player characters.<br> | ||
| + | |- | ||
| + | ! colspan="5" class="header" | Engineer Secondaries | ||
| + | |- | ||
| + | | align="center" | [[File:Backpack Pistol.png|135px]]<br> | ||
| + | <small>[[Secondary]]</small><br> | ||
| + | '''[[Pistol]]''' | ||
| + | | | ||
| + | {{Info}}Stock weapon.<br> | ||
| + | | | ||
| + | {{Pro}}300% larger clip size.<br/> | ||
| + | {{Pro}}28% damage bonus.<br/> | ||
| + | {{Pro}}33% faster firing speed.<br/> | ||
| + | {{Pro}}50% tighter bullet spread.<br/> | ||
| + | {{Con}}50% longer reload time.<br/> | ||
| + | |- | ||
| + | | align="center" | [[File:Backpack Wrangler.png|135px]]<br> | ||
| + | <small>[[Secondary]]</small><br> | ||
| + | '''[[Wrangler]]''' | ||
| + | | | ||
| + | {{Info}}Enables manual control of own Sentry Gun.<br /> | ||
| + | {{Pro}}The Sentry Gun gains double firing rate and a laser pointer to assist in aiming.<br /> | ||
| + | {{Pro}}The Sentry Gun gains a shield which blocks 66% of incoming damage.<br /> | ||
| + | {{Con}}Ammo and repair given to the Sentry Gun is reduced by 66% while shield is active.<br /> | ||
| + | {{Con}}Upon switching to another weapon or Engineer dying, the Sentry Gun remains shielded but deactivated for 3 seconds.<br /> | ||
| + | | | ||
| + | {{Info}}Enables manual control of own Sentry Gun.<br /> | ||
| + | {{Pro}}The Sentry Gun gains double firing rate and a laser pointer to assist in aiming.<br /> | ||
| + | {{Pro}}The Sentry Gun gains a shield which blocks 66% of incoming damage.<br /> | ||
| + | {{Pro}}20% faster Sentry Gun firing speed.<br> | ||
| + | {{Pro}}200% faster Sentry Gun construction speed.<br> | ||
| + | {{Pro}}200% larger Dispenser range.<br> | ||
| + | {{Con}}Ammo and repair given to the Sentry Gun is reduced by 66% while shield is active.<br /> | ||
| + | {{Con}}Upon switching to another weapon or the Engineer dying, the Sentry Gun remains shielded but deactivated for 3 seconds.<br /> | ||
| + | |- | ||
| + | | align="center" | [[File:Backpack Short Circuit.png|135px]]<br> | ||
| + | <small>[[Secondary]]</small><br> | ||
| + | '''[[Short Circuit]]''' | ||
| + | | | ||
| + | {{Neutral}} Replaces the pistol with a device capable of firing rapid zaps of electricity.<br /> | ||
| + | {{Pro}}No reload necessary.<br /> | ||
| + | {{Con}}Has limited range.<br /> | ||
| + | {{Con}}50% damage penalty.<br /> | ||
| + | {{Con}}93% damage penalty against buildings.<br /> | ||
| + | {{Con}}Uses metal as ammo.<br /> | ||
| + | {{Con}}Per Shot: –5 metal.<br /> | ||
| + | {{Con}}Cannot pick up buildings when active.<br /> | ||
| + | {{Con}}Cannot be crit-boosted.<br /> | ||
| + | {{Con}}No random critical hits.<br /> | ||
| + | {{Info}}Alt-Fire: | ||
| + | :{{Pro}}Launches a projectile-consuming energy ball. | ||
| + | :{{Con}}-65 metal per shot | ||
| + | | | ||
| + | {{Neutral}} Replaces the pistol with a device capable of firing rapid zaps of electricity.<br /> | ||
| + | {{Pro}}No reload necessary.<br /> | ||
| + | {{Pro}}66% damage bonus.<br> | ||
| + | {{Pro}}30% faster firing speed (primary fire only).<br> | ||
| + | {{Con}}Has limited range.<br /> | ||
| + | {{Con}}93% damage penalty against buildings.<br /> | ||
| + | {{Con}}Uses metal as ammo.<br /> | ||
| + | {{Con}}Per Shot: –5 metal.<br /> | ||
| + | {{Con}}Cannot pick up buildings when active.<br /> | ||
| + | {{Con}}Cannot be crit-boosted.<br /> | ||
| + | {{Info}}Alt-Fire: | ||
| + | :{{Pro}}Launches a projectile-consuming energy ball. | ||
| + | :{{Pro}}On hit: 100% chance to slow down enemy Zombies. | ||
| + | :{{Con}}-65 metal per shot | ||
| + | |- | ||
| + | ! colspan="5" class="header" | Engineer Melees | ||
| + | |- | ||
| + | | align="center" | [[File:Backpack Wrench.png|135px]]<br> | ||
| + | <small>[[Melee]]</small><br> | ||
| + | '''[[Wrench]]''' | ||
| + | | | ||
| + | {{Pro}}Hitting friendly buildings upgrades, repairs and rearms them.<br> | ||
| + | {{Pro}}Hitting friendly buildings during construction or redeployment speeds them up.<br> | ||
| + | {{Neutral}}Stock weapon.<br> | ||
| + | | | ||
| + | {{Pro}}Hitting friendly buildings upgrades, repairs and rearms them.<br> | ||
| + | {{Pro}}Hitting friendly buildings during construction or redeployment speeds them up.<br> | ||
| + | {{Info}}Replaces standard Sentry Gun with [[Combat Mini-Sentry Gun]].<br /> | ||
| + | :Compared to a level one Sentry: | ||
| + | ::{{Pro}}150% faster Sentry Gun construction speed. | ||
| + | ::{{Pro}}23% lower Sentry Gun construction cost (total cost of 100 metal). | ||
| + | ::{{Pro}}50% faster Sentry Gun firing speed. | ||
| + | ::{{Pro}}35% faster Sentry Gun rotation. | ||
| + | ::{{Pro}}Sentry Gun starts construction at 50% health. | ||
| + | ::{{Con}}33% less Sentry Gun health. | ||
| + | ::{{Con}}50% Sentry Gun damage penalty. | ||
| + | ::{{Con}}Sentry Gun cannot be upgraded. | ||
| + | {{Pro}}20% lower building construction cost.<br> | ||
| + | {{Pro}}12.5% Sentry Gun damage bonus.<br> | ||
| + | {{Pro}}50% faster Sentry Gun firing speed.<br> | ||
| + | {{Pro}}50% larger Sentry Gun target range.<br> | ||
| + | {{Pro}}20% faster Dispenser construction speed.<br> | ||
| + | {{Pro}}150% larger Dispenser range.<br> | ||
| + | {{Con}}110% longer Sentry Gun construction speed.<br> | ||
| + | {{Con}}Buildings are destroyed (without leaving any gibs) if the Engineer attempts to stand atop them.<br> | ||
| + | {{Info}}Sentry Guns start with full ammo assuming they were not hit during construction.<br> | ||
| + | |- | ||
| + | | align="center" | [[File:Backpack Gunslinger.png|135px]]<br> | ||
| + | <small>[[Melee]]</small><br> | ||
| + | '''[[Gunslinger]]''' | ||
| + | | | ||
| + | {{Pro}}Hitting friendly buildings upgrades, repairs and rearms them.<br> | ||
| + | {{Pro}}Hitting friendly buildings during construction or redeployment speeds them up.<br> | ||
| + | {{Info}}Replaces standard Sentry Gun with [[Combat Mini-Sentry Gun]].<br /> | ||
| + | :Compared to a level one Sentry: | ||
| + | ::{{Pro}}150% faster Sentry Gun construction speed. | ||
| + | ::{{Pro}}23% lower Sentry Gun construction cost (total cost of 100 metal). | ||
| + | ::{{Pro}}50% faster Sentry Gun firing speed. | ||
| + | ::{{Pro}}35% faster Sentry Gun rotation. | ||
| + | ::{{Pro}}Sentry Gun starts construction at 50% health. | ||
| + | ::{{Con}}33% less Sentry Gun health. | ||
| + | ::{{Con}}50% Sentry Gun damage penalty. | ||
| + | ::{{Con}}Sentry Gun cannot be upgraded. | ||
| + | {{Pro}}+25 max health on wearer.<br /> | ||
| + | {{Pro}}Guarantees a Critical hit on a third consecutive punch.<br /> | ||
| + | {{Con}}No random Critical hits.<br /> | ||
| + | | | ||
| + | {{Pro}}Hitting friendly buildings upgrades, repairs and rearms them.<br> | ||
| + | {{Pro}}Hitting friendly buildings during construction or redeployment speeds them up.<br> | ||
| + | {{Info}}Replaces standard Sentry Gun with [[Combat Mini-Sentry Gun]].<br /> | ||
| + | :Compared to a level one Sentry: | ||
| + | ::{{Pro}}150% faster Sentry Gun construction speed. | ||
| + | ::{{Pro}}23% lower Sentry Gun construction cost (total cost of 100 metal). | ||
| + | ::{{Pro}}50% faster Sentry Gun firing speed. | ||
| + | ::{{Pro}}35% faster Sentry Gun rotation. | ||
| + | ::{{Pro}}Sentry Gun starts construction at 50% health. | ||
| + | ::{{Con}}33% less Sentry Gun health. | ||
| + | ::{{Con}}50% Sentry Gun damage penalty. | ||
| + | ::{{Con}}Sentry Gun cannot be upgraded. | ||
| + | {{Pro}}+25 max health on wearer.<br /> | ||
| + | {{Pro}}42% Sentry Gun damage bonus.<br> | ||
| + | {{Pro}}60% faster Sentry Gun firing speed.<br> | ||
| + | {{Pro}}Guarantees a Critical hit on a third consecutive punch.<br /> | ||
| + | {{Con}}Buildings are destroyed (without leaving any gibs) if the Engineer attempts to stand atop them.<br> | ||
| + | {{Con}}Sentry Gun starts with 90% less ammo.<br> | ||
| + | |- | ||
| + | | align="center" | [[File:Backpack Southern Hospitality.png|135px]]<br> | ||
| + | <small>[[Melee]]</small><br> | ||
| + | '''[[Southern Hospitality]]''' | ||
| + | | | ||
| + | {{Pro}}Hitting friendly buildings upgrades, repairs and rearms them.<br> | ||
| + | {{Pro}}Hitting friendly buildings during construction or redeployment speeds them up.<br /> | ||
| + | {{Pro}}On hit: causes opponent to [[bleed]] for 5 seconds.<br /> | ||
| + | {{Con}}Raises fire damage vulnerability by 20%.<br /> | ||
| + | {{Con}}No random Critical hits.<br /> | ||
| + | | | ||
| + | {{Pro}}Hitting friendly buildings upgrades, repairs and rearms them.<br> | ||
| + | {{Pro}}Hitting friendly buildings during construction or redeployment speeds them up.<br> | ||
| + | {{Info}}Replaces standard Sentry Gun with [[Combat Mini-Sentry Gun]].<br /> | ||
| + | :Compared to a level one Sentry: | ||
| + | ::{{Pro}}150% faster Sentry Gun construction speed. | ||
| + | ::{{Pro}}23% lower Sentry Gun construction cost (total cost of 100 metal). | ||
| + | ::{{Pro}}50% faster Sentry Gun firing speed. | ||
| + | ::{{Pro}}35% faster Sentry Gun rotation. | ||
| + | ::{{Pro}}Sentry Gun starts construction at 50% health. | ||
| + | ::{{Con}}33% less Sentry Gun health. | ||
| + | ::{{Con}}50% Sentry Gun damage penalty. | ||
| + | ::{{Con}}Sentry Gun cannot be upgraded. | ||
| + | {{Pro}}On hit: causes opponent to [[bleed]] for 5 seconds.<br /> | ||
| + | {{Pro}}5% faster movement speed on wearer.<br> | ||
| + | {{Pro}}25% lower building construction cost (75 metal).<br> | ||
| + | {{Pro}}85% faster Sentry Gun construction speed.<br> | ||
| + | {{Pro}}75% faster Sentry Gun firing speed.<br> | ||
| + | {{Con}}20% slower swing speed.<br /> | ||
| + | {{Con}}Raises fire damage vulnerability by 20%.<br /> | ||
| + | {{Con}}75% lower building max health..<br> | ||
| + | {{Con}}Buildings are destroyed (without leaving any gibs) if the Engineer attempts to stand atop them.<br> | ||
| + | {{Con}}Sentry Guns start with 90% less ammo.<br> | ||
| + | |- | ||
| + | | align="center" | [[File:Backpack Jag.png|135px]]<br> | ||
| + | <small>[[Melee]]</small><br> | ||
| + | '''[[Jag]]''' | ||
| + | | | ||
| + | {{Pro}}Hitting friendly buildings upgrades, repairs and rearms them.<br> | ||
| + | {{Pro}}Hitting friendly buildings during construction or redeployment speeds them up.<br> | ||
| + | {{Pro}}Construction hit speed boost increased by 30%.<br /> | ||
| + | {{Pro}}15% faster firing speed.<br /> | ||
| + | {{Con}}25% damage penalty.<br /> | ||
| + | {{Con}}33% damage penalty against buildings.<br /> | ||
| + | {{Con}}20% slower repair rate.<br /> | ||
| + | | | ||
| + | {{Pro}}Hitting friendly buildings upgrades, repairs and rearms them.<br> | ||
| + | {{Pro}}Hitting friendly buildings during construction or redeployment speeds them up.<br> | ||
| + | {{Info}}Replaces standard Sentry Gun with [[Combat Mini-Sentry Gun]].<br /> | ||
| + | :Compared to a level one Sentry: | ||
| + | ::{{Pro}}150% faster Sentry Gun construction speed. | ||
| + | ::{{Pro}}23% lower Sentry Gun construction cost (total cost of 100 metal). | ||
| + | ::{{Pro}}50% faster Sentry Gun firing speed. | ||
| + | ::{{Pro}}35% faster Sentry Gun rotation. | ||
| + | ::{{Pro}}Sentry Gun starts construction at 50% health. | ||
| + | ::{{Con}}33% less Sentry Gun health. | ||
| + | ::{{Con}}50% Sentry Gun damage penalty. | ||
| + | ::{{Con}}Sentry Gun cannot be upgraded. | ||
| + | {{Pro}}20% faster swing speed.<br> | ||
| + | {{Pro}}Construction hit speed boost increased by 30%.<br /> | ||
| + | {{Pro}}55% faster Sentry Gun construction speed.<br> | ||
| + | {{Pro}}50% faster Sentry Gun firing speed.<br> | ||
| + | {{Con}}25% damage penalty.<br /> | ||
| + | {{Con}}20% slower repair rate.<br /> | ||
| + | {{Con}}40% higher building construction cost.<br> | ||
| + | {{Con}}Buildings are destroyed (without leaving any gibs) if the Engineer attempts to stand atop them.<br> | ||
| + | {{Con}}Sentry Guns start with 90% less ammo.<br> | ||
| + | |- | ||
| + | | align="center" | [[File:Backpack Eureka Effect.png|135px]]<br> | ||
| + | <small>[[Melee]]</small><br> | ||
| + | '''[[Eureka Effect]]''' | ||
| + | | | ||
| + | {{Pro}}Hitting friendly buildings upgrades, repairs and rearms them.<br> | ||
| + | {{Pro}}Hitting friendly buildings during construction or redeployment speeds them up.<br> | ||
| + | {{Pro}}Press reload key to either teleport to your spawn area or teleporter exit.<br> | ||
| + | {{Pro}}50% lower teleporter construction and upgrade cost.<br/> | ||
| + | {{Con}}Construction hit speed boost decreased by 50%.<br /> | ||
| + | {{Con}}20% less metal from Dispensers and Pickups.<br> | ||
| + | | | ||
| + | {{Pro}}Hitting friendly buildings upgrades, repairs and rearms them.<br> | ||
| + | {{Pro}}Hitting friendly buildings during construction or redeployment speeds them up.<br> | ||
| + | {{Info}}Replaces standard Sentry Gun with [[Combat Mini-Sentry Gun]].<br /> | ||
| + | :Compared to a level one Sentry: | ||
| + | ::{{Pro}}150% faster Sentry Gun construction speed. | ||
| + | ::{{Pro}}23% lower Sentry Gun construction cost (total cost of 100 metal). | ||
| + | ::{{Pro}}50% faster Sentry Gun firing speed. | ||
| + | ::{{Pro}}35% faster Sentry Gun rotation. | ||
| + | ::{{Pro}}Sentry Gun starts construction at 50% health. | ||
| + | ::{{Con}}33% less Sentry Gun health. | ||
| + | ::{{Con}}50% Sentry Gun damage penalty. | ||
| + | ::{{Con}}Sentry Gun cannot be upgraded. | ||
| + | {{Pro}}42% Sentry Gun damage bonus.<br> | ||
| + | {{Con}}50% slower swing speed.<br> | ||
| + | {{Con}}Construction hit speed boost decreased by 20%.<br /> | ||
| + | {{Con}}20% less metal from Dispensers and Pickups.<br> | ||
| + | {{Con}}60% slower Sentry Gun construction speed.<br> | ||
| + | {{Con}}Buildings are destroyed (without leaving any gibs) if the Engineer attempts to stand atop them.<br> | ||
| + | {{Info}}Sentry Guns start with full ammo assuming they were not hit during construction.<br> | ||
| + | |} | ||
| + | {| class="wikitable grid" style="text-align: center" width="75%" | ||
| + | |- | ||
| + | ! colspan="1" rowspan="2" class="header"|Melee | ||
| + | ! colspan="4" class="header"|Sentry Gun | ||
| + | ! colspan="4" class="header"|Dispenser | ||
| + | |- | ||
| + | ! colspan="1" class="header"|Cost | ||
| + | ! colspan="1" class="header"|DPS | ||
| + | ! colspan="1" class="header"|Health | ||
| + | ! colspan="1" class="header"|Deploy Time | ||
| + | ! colspan="1" class="header"|Cost | ||
| + | ! colspan="1" class="header"|HP/S | ||
| + | ! colspan="1" class="header"|Health | ||
| + | ! colspan="1" class="header"|Deploy Time | ||
| + | |- | ||
| + | ! Wrench | ||
| + | | | ||
| + | 80 | ||
| + | | | ||
| + | {{tooltip|52.74|Maximum fall-off}} / {{tooltip|99.99|Base damage}} / {{tooltip|122.21|Maximum ramp-up}} | ||
| + | | | ||
| + | 100 | ||
| + | | | ||
| + | 8.8s | ||
| + | | | ||
| + | 80 | ||
| + | | | ||
| + | 10/15/20 | ||
| + | | | ||
| + | 150/180/216 | ||
| + | | | ||
| + | 17s | ||
| + | |- | ||
| + | ! rowspawn "1"|Jag | ||
| + | | | ||
| + | 140 | ||
| + | | | ||
| + | {{tooltip|46.88|Maximum fall-off}} / {{tooltip|88.88|Base damage}} / {{tooltip|108.21|Maximum ramp-up}} | ||
| + | | | ||
| + | 100 | ||
| + | | | ||
| + | 1.85s | ||
| + | | | ||
| + | 140 | ||
| + | | | ||
| + | 10/15/20 | ||
| + | | | ||
| + | 150/180/216 | ||
| + | | | ||
| + | 21s | ||
| + | |- | ||
| + | ! rowspawn "1"|Eureka Effect | ||
| + | | | ||
| + | 100 | ||
| + | | | ||
| + | {{tooltip|33.69|Maximum fall-off}} / {{tooltip|63.88|Base damage}} / {{tooltip|77.77|Maximum ramp-up}} | ||
| + | | | ||
| + | 100 | ||
| + | | | ||
| + | 6.88s | ||
| + | | | ||
| + | 100 | ||
| + | | | ||
| + | 10/15/20 | ||
| + | | | ||
| + | 150/180/216 | ||
| + | | | ||
| + | 21s | ||
| + | |- | ||
| + | ! rowspawn "1"|Souther Hospitality | ||
| + | | | ||
| + | 25 | ||
| + | | | ||
| + | {{tooltip|93.76|Maximum fall-off}} / {{tooltip|177.76|Base damage}} / {{tooltip|216.42|Maximum ramp-up}} | ||
| + | | | ||
| + | 25 | ||
| + | | | ||
| + | 0.66s | ||
| + | | | ||
| + | 25 | ||
| + | | | ||
| + | 10/15/20 | ||
| + | | | ||
| + | 38/45/54 | ||
| + | | | ||
| + | 21s | ||
| + | |- | ||
| + | ! rowspawn "1"|Gunslinger | ||
| + | | | ||
| + | 100 | ||
| + | | | ||
| + | {{tooltip|67.39|Maximum fall-off}} / {{tooltip|127.76|Base damage}} / {{tooltip|155.55|Maximum ramp-up}} | ||
| + | | | ||
| + | 100 | ||
| + | | | ||
| + | 4.2s | ||
| + | | | ||
| + | 100 | ||
| + | | | ||
| + | 10/15/20 | ||
| + | | | ||
| + | 150/180/216 | ||
| + | | | ||
| + | 21s | ||
| + | |- | ||
| + | |} | ||
| − | + | ==== Medic ==== | |
| + | {| class="wikitable grid collapsible" width="100%" | ||
| + | ! colspan="5" class="header" | Medic Primaries | ||
| + | |- | ||
| + | ! class="header" width="15%" | Weapon | ||
| + | ! class="header" width="30%" | Edited Attributes | ||
| + | ! class="header" width="30%" | Zombie Escape Attributes | ||
| + | |- | ||
| + | | align="center" | [[File:Backpack Syringe Gun.png|135px]]<br> | ||
| + | <small>[[Primary]]</small><br> | ||
| + | '''[[Syringe Gun]]''' | ||
| + | | | ||
| + | {{Neutral}}Stock Weapon<br> | ||
| + | | | ||
| + | {{Pro}}150% damage bonus.<br> | ||
| + | |- | ||
| + | | align="center" | [[File:Backpack Blutsauger.png|135px]]<br> | ||
| + | <small>[[Primary]]</small><br> | ||
| + | '''[[Blutsauger]]''' | ||
| + | | | ||
| + | {{Pro}}On hit: heal +3 health points.<br/> | ||
| + | {{Con}}Health regeneration lowered by 2 HP/sec. (1–4 HP/sec)<br/> | ||
| + | | | ||
| + | {{Pro}}150% damage bonus.<br> | ||
| + | {{Pro}}On hit: heal +3 health points.<br/> | ||
| + | {{Pro}}On hit: coats enemies in Mad Milk between 1 and 4 seconds, depending on the number of hits.<br> | ||
| + | {{Con}}50% longer reload time.<br> | ||
| + | {{Con}}50% less healing from Medic sources.<br> | ||
| + | {{Con}}When weapon is active: Raises melee damage vulnerability by 50%.<br> | ||
| + | {{Con}}Health regeneration lowered by 2 HP/sec. (1–4 HP/sec)<br/> | ||
| + | |- | ||
| + | | align="center" | [[File:Backpack Crusader's Crossbow.png|135px]]<br> | ||
| + | <small>[[Primary]]</small><br> | ||
| + | '''[[Crusader's Crossbow]]''' | ||
| + | | | ||
| + | {{Info}}Fires special bolts that heal teammates and deal damage based on distance traveled.<br/> | ||
| + | :{{Pro}}280% damage bonus (point blank) to 650% damage bonus (long range) per bolt.<br/> | ||
| + | :{{Pro}}Heals allies +75 health (point blank) to +150 health (long range) per bolt.<br/> | ||
| + | {{Pro}}This weapon reloads automatically when not active.<br/> | ||
| + | {{Con}}97.5% smaller clip size.<br/> | ||
| + | {{Con}}No headshots.<br/> | ||
| + | {{Con}}75% smaller secondary ammo size.<br/> | ||
| + | | | ||
| + | {{Info}}Fires special bolts that heal teammates and deal damage based on distance traveled.<br/> | ||
| + | :{{Pro}}+280% damage (point blank) to +650% damage (long range) per bolt.<br/> | ||
| + | :{{Pro}}Heals allies 112 health (point blank) to 250 health (long range) per bolt.<br/> | ||
| + | {{Pro}}20% shorter reload time.<br/> | ||
| + | {{Pro}}50% faster Übercharge build rate.<br/> | ||
| + | {{Pro}}On hit:100% chance to slow down Zombies.<br/> | ||
| + | {{Pro}}Projectile penetrates players and damages enemies behind them.<br/> | ||
| + | {{Con}}87.5% smaller clip size.<br/> | ||
| + | {{Con}}25% slower overheal rate.<br/> | ||
| + | {{Con}}75% smaller secondary ammo size.<br/> | ||
| + | |- | ||
| + | | align="center" | [[File:Backpack Overdose.png|135px]]<br> | ||
| + | <small>[[Primary]]</small><br> | ||
| + | '''[[Overdose]]''' | ||
| + | | | ||
| + | {{Pro}}When active, ÜberCharge percentage increases movement speed by up to 20%.<br/> | ||
| + | {{Con}}15% damage penalty.<br/> | ||
| + | | | ||
| + | {{Pro}}When active, ÜberCharge percentage increases movement speed by up to 20%.<br/> | ||
| + | {{Pro}}135% damage bonus<br/> | ||
| + | {{Pro}}10% faster firing speed.<br/> | ||
| + | {{Con}}50% longer reload time.<br/> | ||
| + | {{Con}}When weapon is active: 11% slower movement speed on wearer.<br/> | ||
| + | |- | ||
| + | ! colspan="5" class="header" | Medic Secondaries | ||
| + | |- | ||
| + | | align="center" | [[File:Backpack Medi Gun.png|135px]]<br> | ||
| + | <small>[[Secondary]]</small><br> | ||
| + | '''[[Medi Gun]]''' | ||
| + | | | ||
| + | {{Info}}[[ÜberCharge]] grants Medic and patient 8 seconds of guaranteed invulnerability.<br/> | ||
| + | {{Pro}}Match the speed of any faster heal target.<br/> | ||
| + | {{Neutral}}Stock weapon. | ||
| + | | | ||
| + | {{Info}}[[ÜberCharge]] grants Medic and patient 4 seconds of guaranteed invulnerability.<br/> | ||
| + | {{Pro}}Match the speed of any faster heal target.<br/> | ||
| + | {{Pro}}25% faster Übercharge build rate.<br/> | ||
| + | {{Con}}50% shorter ÜberCharge duration.<br> | ||
| + | |- | ||
| + | | align="center" | [[File:Backpack Kritzkrieg.png|135px]]<br> | ||
| + | <small>[[Secondary]]</small><br> | ||
| + | '''[[Kritzkrieg]]''' | ||
| + | | | ||
| + | {{Info}}ÜberCharge grants patient 8 seconds of guaranteed [[Critical hits|critical]] damage.<br/> | ||
| + | {{Pro}}Match the speed of any faster heal target.<br/> | ||
| + | {{Pro}}25% faster Übercharge build rate.<br/> | ||
| + | | | ||
| + | {{Info}}ÜberCharge grants patient 6 seconds of guaranteed [[Critical hits|critical]] damage.<br/> | ||
| + | {{Pro}}75% faster Übercharge build rate.<br/> | ||
| + | {{Con}}25% shorter ÜberCharge duration.<br> | ||
| + | |- | ||
| + | | align="center" | [[File:Backpack Quick-Fix.png|135px]]<br> | ||
| + | <small>[[Secondary]]</small><br> | ||
| + | '''[[Quick-Fix]]''' | ||
| + | | | ||
| + | {{Info}}Über effect: Megaheal | ||
| + | :Heal rate increased 3x on heal target and Medic | ||
| + | :Heal target and Medic immune to stun and damage forces | ||
| + | {{Pro}}Heal rate increased 40%.<br/> | ||
| + | {{Pro}}10% faster Übercharge build rate.<br/> | ||
| + | {{Pro}}Match the speed of any faster heal target.<br/> | ||
| + | {{Pro}}Medic mirrors blast jump and shield charge of their heal target<br/> | ||
| + | {{Con}}While ÜberCharge is active, Medic and patient are not able to defend/capture a point or push the cart.<br/> | ||
| + | {{Con}}50% less max overheal.<br/> | ||
| + | | | ||
| + | {{Info}}Über effect: Megaheal | ||
| + | :Heal rate increased 3x on heal target.<br> | ||
| + | :Heal target and Medic immune to stun and damage forces<br> | ||
| + | {{Pro}}Heal rate increased 100%.<br/> | ||
| + | {{Pro}}50% faster Übercharge build rate.<br/> | ||
| + | {{Pro}}Match the speed of any faster heal target.<br/> | ||
| + | {{Con}}50% less max overheal.<br/> | ||
| + | |- | ||
| + | | align="center" | [[File:Backpack Vaccinator.png|135px]]<br> | ||
| + | <small>[[Secondary]]</small><br> | ||
| + | '''[[Vaccinator]]''' | ||
| + | | | ||
| + | {{Info}}Reload: Cycle through resist types.<br/> | ||
| + | :While healing, provides Medic and patient with constant 10% resistance to the selected damage type.<br/> | ||
| + | {{Info}}Übercharge provides a 2.5 second bubble of 75% resistance to a selected damage type and 100% crit resistance to that type to the Medic and patient.<br/> | ||
| + | {{Info}}Bubbles are consumed instantly upon activation.<br> | ||
| + | {{Pro}}Match the speed of any faster heal target.<br/> | ||
| + | {{Pro}}67% faster Übercharge build rate.<br/> | ||
| + | {{Con}}33% slower ÜberCharge build rate on overhealed patients.<br/> | ||
| + | {{Con}}66% slower overheal build rate.<br/> | ||
| + | {{Con}}Lacks any melee resistance.<br/> | ||
| + | | | ||
| + | {{Info}}Reload: Cycle through resist types.<br/> | ||
| + | :While healing, provides Medic and patient with constant 10% resistance to the selected damage type.<br/> | ||
| + | {{Info}}Übercharge provides a 2.5 second bubble of 75% resistance to a selected damage type and 100% crit resistance to that type to the Medic and patient.<br/> | ||
| + | {{Info}}Bubbles are consumed instantly upon activation.<br> | ||
| + | {{Pro}}67% faster Übercharge build rate.<br/> | ||
| + | {{Pro}}50% faster overheal build rate.<br/> | ||
| + | {{Pro}}25% more max overheal.<br> | ||
| + | {{Pro}}25% slower overheal decay rate.<br> | ||
| + | {{Con}}33% slower ÜberCharge build rate on overhealed patients.<br/> | ||
| + | {{Con}}Lacks any melee resistance.<br/> | ||
| + | |- | ||
| + | ! colspan="5" class="header" | Medic Melees | ||
| + | |- | ||
| + | | align="center" | [[File:Backpack Bonesaw.png|135px]]<br> | ||
| + | <small>[[Melee]]</small><br> | ||
| + | '''[[Bonesaw]]''' | ||
| + | | | ||
| + | {{Info}}Stock weapon.<br> | ||
| + | | | ||
| + | {{Pro}}When weapon is active: 3% faster movement speed on wearer.<br> | ||
| + | |- | ||
| + | | align="center" | [[File:Backpack Vita-Saw.png|135px]]<br> | ||
| + | <small>[[Melee]]</small><br> | ||
| + | '''[[Vita-Saw]]''' | ||
| + | | | ||
| + | {{Pro}}A percentage of the Medic's ÜberCharge level is retained on death, based on the number of organs harvested (15% per). Total ÜberCharge retained on spawn caps at 60%.<br/> | ||
| + | {{Con}}-10 max health on wearer.<br/> | ||
| + | | | ||
| + | {{Pro}}33% faster Übercharge build rate.<br/> | ||
| + | {{Pro}}+1 sec longer ÜberCharge duration.<br> | ||
| + | |- | ||
| + | | align="center" | [[File:Backpack Solemn Vow.png|135px]]<br> | ||
| + | <small>[[Melee]]</small><br> | ||
| + | '''[[Solemn Vow]]''' | ||
| + | | | ||
| + | {{Pro}}Allows the Medic to see an enemy's health.<br/> | ||
| + | {{Con}}10% slower swing speed<br/> | ||
| + | | | ||
| + | {{Pro}}Allows the Medic to see an enemy's health.<br/> | ||
| + | {{Pro}}Increases Medigun heal rate by 20%.<br> | ||
| + | |- | ||
| + | | align="center" | [[File:Backpack Amputator.png|135px]]<br> | ||
| + | <small>[[Melee]]</small><br> | ||
| + | '''[[Amputator]]''' | ||
| + | | | ||
| + | {{Pro}}When active: +3 health regenerated per second passively on wearer.<br/> | ||
| + | {{Pro}}On taunt: Applies a healing effect to all nearby teammates. | ||
| + | :{{Info}}Heals allies +25 health per second up to +75 health per second (within the 4 second taunt interval). | ||
| + | {{Con}}20% damage penalty.<br/> | ||
| + | | | ||
| + | {{Pro}}When active: +3 health regenerated per second passively on wearer.<br/> | ||
| + | {{Pro}}On taunt: Applies a healing effect to all nearby teammates. | ||
| + | :{{Info}}Heals allies +25 health per second up to +75 health per second (within the 4 second taunt interval). | ||
| + | {{Con}}20% damage penalty.<br/> | ||
| + | |- | ||
| + | | align="center" | [[File:Backpack Ubersaw.png|135px]]<br> | ||
| + | <small>[[Melee]]</small><br> | ||
| + | '''[[Ubersaw]]''' | ||
| + | | | ||
| + | {{Pro}}On Hit: 25% ÜberCharge added.<br/> | ||
| + | {{Con}}20% slower swing speed.<br/> | ||
| + | | | ||
| + | {{Pro}}On Hit: 50% ÜberCharge added.<br/> | ||
| + | {{Con}}100% slower swing speed.<br/> | ||
| + | |- | ||
| + | |} | ||
| − | ''' | + | ==== Sniper ==== |
| + | {| class="wikitable grid collapsible" width="100%" | ||
| + | ! colspan="5" class="header" | Sniper Primaries | ||
| + | |- | ||
| + | ! class="header" width="15%" | Weapon | ||
| + | ! class="header" width="30%" | Base Game Attributes | ||
| + | ! class="header" width="30%" | Zombie Escape Attributes | ||
| + | |- | ||
| + | | align="center" | [[File:Backpack Sniper Rifle.png|135px]]<br> | ||
| + | <small>[[Primary]]</small><br> | ||
| + | '''[[Sniper Rifle]]''' | ||
| + | | | ||
| + | {{Info}}Stock weapon.<br> | ||
| + | {{Info}}Charges while zoomed.<br/> | ||
| + | {{Pro}}[[Critical hits]] are guaranteed for headshots.<br/> | ||
| + | {{Con}}Can only headshot 0.2 seconds after scoping in.<br> | ||
| + | {{Con}}No random critical hits.<br/> | ||
| + | | | ||
| + | {{Info}}Charges while zoomed.<br/> | ||
| + | {{Info}}Charging has no additional effect on headshot damage.<br/> | ||
| + | {{Pro}}[[Critical hits]] are guaranteed for headshots.<br/> | ||
| + | {{Pro}}Upon a successful headshot, enemy is knocked back.<br/> | ||
| + | {{Pro}}Headshot damage increases as number of BLU members decreases.<br/> | ||
| + | {{Pro}}350% damage bonus (225 uncharged, 675 full charge).<br/> | ||
| + | {{Pro}}33.3% additional damage bonus on headshots (on uncharged shots).<br/> | ||
| + | {{Con}}Can only headshot 0.2 seconds after scoping in.<br/> | ||
| + | {{Con}}66% damage penalty on body shots (75 uncharged, 225 full charge).<br/> | ||
| + | |- | ||
| + | | align="center" | [[File:Backpack Sydney Sleeper.png|135px]]<br> | ||
| + | <small>[[Primary]]</small><br> | ||
| + | '''[[Sydney Sleeper]]''' | ||
| + | | | ||
| + | {{Info}}Charges while zoomed.<br/> | ||
| + | {{Pro}}On scoped hit, applies [[Jarate]] effect to the target for 2 to 5 seconds based on amount charged.<br/> | ||
| + | {{Pro}}25% increase in charge rate.<br/> | ||
| + | {{Pro}}Nature's Call: Scoped headshots always mini-crit and reduce the remaining cooldown of Jarate by 1 second.<br/> | ||
| + | {{Pro}}Scoped shots extinguish flames on wielder and allied players.<br/> | ||
| + | {{Con}}[[Headshots]] do not crit.<br/> | ||
| + | {{Con}}Can only headshot 0.15 seconds after scoping in.<br/> | ||
| + | {{Con}}No random critical hits.<br/> | ||
| + | | | ||
| + | {{Info}}Charges while zoomed.<br/> | ||
| + | {{Pro}}On scoped hit, applies [[Jarate]] effect to the target for 2 to 5 seconds based on amount charged.<br/> | ||
| + | {{Pro}}Nature's Call: Scoped headshots always mini-crit and reduce the remaining cooldown of Jarate by 1 second.<br/> | ||
| + | {{Pro}}Scoped shots extinguish flames on wielder and allied players.<br/> | ||
| + | {{Pro}}125% damage bonus (112.5 uncharged, 337.5 full charge).<br/> | ||
| + | {{Pro}}97% additional damage bonus on headshots(300 uncharged, 900 full charge).<br/> | ||
| + | {{Pro}}50% shorter reload time.<br/> | ||
| + | {{Pro}}55% decrease in charge time.<br/> | ||
| + | {{Con}}[[Headshots]] do not crit.<br/> | ||
| + | {{Con}}33.3% damage penalty on body shots (75 uncharged, 226 full charge) | ||
| + | |- | ||
| + | | align="center" | [[File:Backpack Machina.png|135px]]<br> | ||
| + | <small>[[Primary]]</small><br> | ||
| + | '''[[Machina]]''' | ||
| + | | | ||
| + | {{Info}}Charges while zoomed.<br/> | ||
| + | {{Pro}}[[Critical hits]] are guaranteed for headshots.<br/> | ||
| + | {{Pro}}15% damage bonus on fully charged shots.<br/> | ||
| + | {{Pro}}Fully charged shots penetrate players and damage enemies behind them.<br/> | ||
| + | {{Con}}Only fires when zoomed.<br/> | ||
| + | {{Con}}Shots leave a bright, easily traceable team-colored line behind them.<br/> | ||
| + | {{Con}}No random critical hits.<br/> | ||
| + | | | ||
| + | {{Info}}Charges while zoomed.<br/> | ||
| + | {{Info}}Charging has no additional effect on headshot damage.<br/> | ||
| + | {{Pro}}[[Critical hits]] are guaranteed for headshots.<br/> | ||
| + | {{Pro}}Upon a successful headshot, enemy is knocked back.<br/> | ||
| + | {{Pro}}Headshot damage increases as number of BLU members decreases.<br/> | ||
| + | {{Pro}}580% damage bonus (340 uncharged, 1020 full charge).<br/> | ||
| + | {{Pro}}76% damage bonus on fully charged shots (1530).<br/> | ||
| + | {{Pro}}66% damage bonus '''against players''' (566 uncharged, 3000 full charge).<br/> | ||
| + | {{Pro}}5% additional damage bonus on headshots (On uncharged shots with all other pros applied).<br/> | ||
| + | {{Pro}}Fully charged shots penetrate players and damage enemies behind them.<br/> | ||
| + | {{Con}}50% damage penalty on bodyshots (283 uncharged, 1500 full charge).<br/> | ||
| + | {{Con}}100% damage penalty against Non-Player Characters.<br/> | ||
| + | {{Con}}50% increase in charge time.<br/> | ||
| + | {{Con}}300% slower weapon deploy speed.<br/> | ||
| + | {{Con}}100% slower weapon holster speed.<br/> | ||
| + | {{Con}}When weapon is active:6.7% slower movement speed on wearer.<br/> | ||
| + | {{Con}}Only fires when zoomed.<br/> | ||
| + | {{Con}}Shots leave a bright, easily traceable team-colored line behind them.<br/> | ||
| + | |- | ||
| + | | align="center" | [[File:Backpack Bazaar Bargain.png|135px]]<br> | ||
| + | <small>[[Primary]]</small><br> | ||
| + | '''[[Bazaar Bargain]]''' | ||
| + | | | ||
| + | {{Info}}Charges while zoomed.<br/> | ||
| + | {{Pro}}[[Critical hits]] are guaranteed for headshots.<br/> | ||
| + | {{Pro}}Each scoped headshot kill increases the weapon's charge rate by 25% up to 200% (100% faster).<br/> | ||
| + | {{Con}}No random critical hits.<br/> | ||
| + | {{Con}}50% increase in charge time.<br/> | ||
| + | | | ||
| + | {{Info}}Charges while zoomed.<br/> | ||
| + | {{Info}}Charging has no additional effect on headshot damage.<br/> | ||
| + | {{Pro}}[[Critical hits]] are guaranteed for headshots.<br/> | ||
| + | {{Pro}}Upon a successful headshot, enemy is knocked back.<br/> | ||
| + | {{Pro}}Headshot damage increases the more of user's teammates die.<br/> | ||
| + | {{Pro}}Each scoped headshot kill increases the weapon's charge rate by 25% up to 200% (100% faster).<br/> | ||
| + | {{Pro}}29900% additional damage bonus on headshots (1200).<br/> | ||
| + | {{Pro}}2400% maximum charge damage.<br/> | ||
| + | {{Con}}92% damage penalty (5 base).<br/> | ||
| + | {{Con}}100% damage penalty on bodyshots (0).<br/> | ||
| + | {{Con}}50% increase in charge time.<br/> | ||
| + | |- | ||
| + | | align="center" | [[File:Backpack Hitman's Heatmaker.png|135px]]<br> | ||
| + | <small>[[Primary]]</small><br> | ||
| + | '''[[Hitman's Heatmaker]]''' | ||
| + | | | ||
| + | {{Info}}Charges while zoomed.<br/> | ||
| + | {{Info}}Shots are more quiet.<br/> | ||
| + | {{Pro}}[[Critical hits]] are guaranteed for headshots.<br/> | ||
| + | {{Pro}}Gain Focus on kills and assists.<br/> | ||
| + | {{Pro}}Press 'Reload' to activate focus.<br/> | ||
| + | {{Info}}When Focus is active:<br/> | ||
| + | :{{Info}}Doesn't unscope between shots.<br/> | ||
| + | :{{Pro}}25% decrease in charge time.<br/> | ||
| + | :{{Con}}Shots leave a bright, easily traceable team-colored line behind them.<br/> | ||
| + | {{Con}}20% damage penalty on body shot.<br/> | ||
| + | {{Con}}No random critical hits.<br/> | ||
| + | {{Info}}Headshot kills cause decapitation.<br/> | ||
| + | | | ||
| + | {{Info}}Charges while zoomed.<br/> | ||
| + | {{Info}}Charging has no additional effect on headshot damage.<br/> | ||
| + | {{Pro}}[[Critical hits]] are guaranteed for headshots.<br/> | ||
| + | {{Pro}}Upon a successful headshot, enemy is knocked back.<br/> | ||
| + | {{Pro}}Headshot damage increases as number of BLU members decreases.<br/> | ||
| + | {{Pro}}Shots are more quiet.<br/> | ||
| + | {{Pro}}195% damage bonus (147 uncharged, 441 fully charged)<br/> | ||
| + | {{Pro}}102% additional damage bonus on head shots (600, assuming the player damage penalty).<br/> | ||
| + | {{Pro}}30% shorter reload time.<br/> | ||
| + | {{Pro}}Gain Focus on kills and assists.<br/> | ||
| + | {{Pro}}Press 'Reload' to activate focus.<br/> | ||
| + | {{Info}}When Focus is active:<br/> | ||
| + | :{{Info}}Doesn't unscope between shots.<br/> | ||
| + | :{{Pro}}25% decrease in charge time.<br/> | ||
| + | :{{Con}}Shots leave a bright, easily traceable team-colored line behind them.<br/> | ||
| + | {{Con}}33.3% damage penalty '''against players''' (98 uncharged, 295 fully charged).<br/> | ||
| + | {{Con}}40% damage penalty on body shots (60 uncharged, 180 fully charged).<br/> | ||
| + | |- | ||
| + | | align="center" | [[File:Backpack Classic.png|135px]]<br> | ||
| + | <small>[[Primary]]</small><br> | ||
| + | '''[[Classic]]''' | ||
| + | | | ||
| + | {{Info}}Charged shots will [[gib]] victims.<br/> | ||
| + | {{Info}}Does not automatically start charging when zoomed.<br/> | ||
| + | {{Info}}Hold down fire button to charge, release to fire.<br/> | ||
| + | {{Info}}Doesn't unscope between shots.<br/> | ||
| + | {{Pro}}[[Critical hits]] are guaranteed for headshots.<br/> | ||
| + | {{Pro}}Can charge without zooming.<br /> | ||
| + | {{Con}}Cannot headshot unless fully charged.<br /> | ||
| + | {{Con}}10% damage penalty on body shot.<br/> | ||
| + | {{Con}}Shots leave a dim, clear line behind them.<br/> | ||
| + | {{Con}}No random critical hits.<br/> | ||
| + | {{Info}}Charged shots will [[gib]] victims.<br/> | ||
| + | | | ||
| + | {{Info}}Charged shots will [[gib]] victims.<br/> | ||
| + | {{Info}}Does not automatically start charging when zoomed.<br/> | ||
| + | {{Info}}Hold down fire button to charge, release to fire.<br/> | ||
| + | {{Pro}}[[Critical hits]] are guaranteed for headshots.<br/> | ||
| + | {{Pro}}Upon a successful headshot, enemy is knocked back.<br/> | ||
| + | {{Pro}}Headshot damage increases as number of BLU members decreases.<br/> | ||
| + | {{Pro}}Can charge without zooming.<br /> | ||
| + | {{Pro}}300% damage bonus (200 uncharged, 600 fully charged).<br/> | ||
| + | {{Pro}}33.5% damage bonus '''against players''' (267 un charged, 801 fully charged).<br/> | ||
| + | {{Pro}}50% additional bonus damage on head shots (1200, requires a full charge)<br/> | ||
| + | {{Pro}}100% decrease in charge time.<br/> | ||
| + | {{Pro}}No movement speed penalty while charging.<br/> | ||
| + | {{Pro}}Can charge while mid-air.<br/> | ||
| + | {{Pro}}Can jump while charging.<br/> | ||
| + | {{Con}}73% damage penalty on body shots (75 uncharged, 226 fully charged).<br/> | ||
| + | {{Con}}Cannot headshot unless fully charged.<br /> | ||
| + | {{Con}}Shots leave a dim, clear line behind them.<br/> | ||
| + | |- | ||
| + | | align="center" | [[File:Backpack Huntsman.png|135px]]<br> | ||
| + | <small>[[Primary]]</small><br> | ||
| + | '''[[Huntsman]]''' | ||
| + | | | ||
| + | {{Info}}Bullets replaced with an arrow projectile.<br/> | ||
| + | {{Info}}Hold primary fire to draw (and charge) the arrow; press secondary fire to retract the arrow.<br/> | ||
| + | {{Pro}}[[Critical hits]] are guaranteed for headshots.<br/> | ||
| + | {{Pro}}No laser pointer indicator.<br/> | ||
| + | {{Pro}}Arrows can be fired mid-air.<br/> | ||
| + | {{Pro}}Friendly [[Pyro]]s can light arrows to add [[fire]] damage.<br/> | ||
| + | {{Pro}}70% decrease in charge time.<br/> | ||
| + | {{Pro}}96% faster charging movement speed (total of 53% movement speed while charging)<br/> | ||
| + | {{Con}}20% less maximum charge damage.<br/> | ||
| + | :{{Info}}Base damage unchanged. | ||
| + | {{Con}}48% smaller secondary ammo size.<br/> | ||
| + | {{Con}}No random critical hits.<br/> | ||
| + | {{Con}}Arrows can be [[Compression blast|reflected]], [[Deflector|shot down]], and [[Short Circuit|vaporized]].<br/> | ||
| + | {{Con}}Arrows lose their accuracy if the bow is drawn for more than 5 seconds.<br/> | ||
| + | {{Info}}Arrows can pin enemies to a wall upon being killed (purely cosmetic feature).<br/> | ||
| + | | | ||
| + | {{Info}}Bullets replaced with an arrow projectile.<br/> | ||
| + | {{Info}}Hold primary fire to draw (and charge) the arrow; press secondary fire to retract the arrow.<br/> | ||
| + | {{Info}}Charging has no additional effect on headshot damage.<br/> | ||
| + | {{Pro}}[[Critical hits]] are guaranteed for headshots.<br/> | ||
| + | {{Pro}}Upon a successful headshot, enemy is knocked back.<br/> | ||
| + | {{Pro}}Headshot damage increases as number of BLU members decreases.<br/> | ||
| + | {{Pro}}240% damage bonus (170 uncharged, 510 fully charged).<br/> | ||
| + | {{Pro}}75% additional damage bonus on headshots(900).<br/> | ||
| + | {{Pro}}20% shorter reload time.<br/> | ||
| + | {{Pro}}No laser pointer indicator.<br/> | ||
| + | {{Pro}}Arrows can be fired mid-air.<br/> | ||
| + | {{Pro}}Friendly [[Pyro]]s can light arrows to add [[fire]] damage.<br/> | ||
| + | {{Pro}}On hit: Inflicts bleed for 5 seconds.<br/> | ||
| + | {{Pro}}70% decrease in charge time.<br/> | ||
| + | {{Pro}}96% faster charging movement speed (total of 53% movement speed while charging)<br/> | ||
| + | {{Con}}33.3% damage penalty on bodyshots (114 uncharged, 268 fully charged).<br/> | ||
| + | {{Con}}20% less maximum charge damage.<br/> | ||
| + | {{Con}}Arrows lose their accuracy if the bow is drawn for more than 5 seconds.<br/> | ||
| + | {{Con}}Deals no damage against Non-Player Characters. <br/> | ||
| + | {{Info}}Arrows can pin enemies to a wall upon being killed (purely cosmetic feature).<br/> | ||
| + | |- | ||
| + | ! colspan="5" class="header" | Sniper Secondaries | ||
| + | |- | ||
| + | | align="center" | [[File:Backpack Submachine Gun.png|135px]]<br> | ||
| + | <small>[[Secondary]]</small><br> | ||
| + | '''[[Submachine Gun]]''' | ||
| + | | | ||
| + | {{Info}}Stock weapon.<br> | ||
| + | | | ||
| + | {{Pro}}100% larger clip size.<br> | ||
| + | {{Pro}}180% damage bonus.<br> | ||
| + | {{Pro}}20% faster firing speed.<br> | ||
| + | {{Con}}100% longer reload time.<br> | ||
| + | |- | ||
| + | | align="center" | [[File:Backpack Jarate.png|135px]]<br> | ||
| + | <small>[[Secondary]]</small><br> | ||
| + | '''[[Jarate]]''' | ||
| + | | | ||
| + | {{Pro}}Doused enemies take [[Critical hits#Mini-crits|mini-crits]] on hit.<br/> | ||
| + | {{Pro}}Partially nullifies [[cloak]] on enemy Spies.<br/> | ||
| + | {{Pro}}Extinguishes [[Fire|flames]] on wielder and allied players.<br/> | ||
| + | {{Pro}}20% increase in recharge rate when you extinguish an ally.<br/> | ||
| + | {{Con}}Enemy [[Pyro]]s can reflect Jarate.<br/> | ||
| + | {{Info}}Has a 20 second recharge.<br/> | ||
| + | | | ||
| + | {{Pro}}Doused enemies take [[Critical hits#Mini-crits|mini-crits]] on hit.<br/> | ||
| + | {{Pro}}Doused enemies experience a strong slow-down effect.<br> | ||
| + | {{Pro}}Partially nullifies [[cloak]] on enemy Spies.<br/> | ||
| + | {{Pro}}Extinguishes [[Fire|flames]] on wielder and allied players.<br/> | ||
| + | {{Pro}}20% increase in recharge rate when you extinguish an ally.<br/> | ||
| + | {{Con}}Enemy [[Pyro]]s can reflect Jarate.<br/> | ||
| + | {{Info}}Has a 60 second recharge.<br/> | ||
| + | |- | ||
| + | | align="center" | [[File:Backpack Razorback.png|135px]]<br> | ||
| + | <small>[[Secondary]]</small><br> | ||
| + | '''[[Razorback]]''' | ||
| + | | | ||
| + | {{Pro}}Nullifies a single [[backstab]] attempt, temporarily "shocking" the [[Spy]], preventing him from switching weapons or attacking (Spy can still cloak).<br/> | ||
| + | {{Con}}100% less overheal.<br/> | ||
| + | {{Info}}Regenerates after 30 seconds.<br/> | ||
| + | {{Info}}Grants its ability passively; does not need to be activated.<br/> | ||
| + | | | ||
| + | {{Info}}No changes.<br> | ||
| + | |- | ||
| + | | align="center" | [[File:Backpack Darwin's Danger Shield.png|135px]]<br> | ||
| + | <small>[[Secondary]]</small><br> | ||
| + | '''[[Darwin's Danger Shield]]''' | ||
| + | | | ||
| + | {{Pro}}Lowers fire damage vulnerability by 50%.<br/> | ||
| + | {{Pro}}The wearer is immune to the effects of afterburn.<br/> | ||
| + | {{Info}}Grants its ability passively; does not need to be activated.<br/> | ||
| + | | | ||
| + | {{Info}}No changes.<br> | ||
| + | |- | ||
| + | | align="center" | [[File:Backpack Cozy Camper.png|135px]]<br> | ||
| + | <small>[[Secondary]]</small><br> | ||
| + | '''[[Cozy Camper]]''' | ||
| + | | | ||
| + | {{Pro}}No flinching when aiming and primary weapon is fully charged.<br/> | ||
| + | {{Pro}}Knockback reduced by 20% when aiming.<br/> | ||
| + | {{Pro}}Up to +4 health regenerated per second passively.<br/> | ||
| + | {{Info}}Grants its ability passively; does not need to be activated.<br/> | ||
| + | | | ||
| + | {{Info}}No changes.<br> | ||
| + | |- | ||
| + | | align="center" | [[File:Backpack Cleaner's Carbine.png|135px]]<br> | ||
| + | <small>[[Secondary]]</small><br> | ||
| + | '''[[Cleaner's Carbine]]''' | ||
| + | | | ||
| + | {{Pro}}Dealing damage charges a "Crikey" meter.<br/> | ||
| + | {{Pro}}Alt Fire When Charged: Mini-crits for 8 seconds. | ||
| + | :{{Info}}Mini-crits apply to all weapons. | ||
| + | {{Con}}20% smaller clip size. <br/> | ||
| + | {{Con}}25% slower firing speed. <br/> | ||
| + | {{Con}}No random critical hits.<br/> | ||
| + | | | ||
| + | {{Pro}}Dealing damage charges a "Crikey" meter.<br/> | ||
| + | {{Pro}}Alt Fire When Charged: Mini-crits for 8 seconds.<br> | ||
| + | :{{Info}}Mini-crits apply to all weapons.<br> | ||
| + | {{Pro}}320% damage bonus.<br> | ||
| + | {{Con}}50% longer reload time.<br> | ||
| + | {{Con}}20% slower firing speed.<br> | ||
| + | {{Con}}25% wider bullet spread.<br> | ||
| + | |- | ||
| + | ! colspan="5" class="header" | Sniper Melees | ||
| + | |- | ||
| + | | align="center" | [[File:Backpack Kukri.png|135px]]<br> | ||
| + | <small>[[Melee]]</small><br> | ||
| + | '''[[Kukri]]''' | ||
| + | | | ||
| + | {{Info}}Stock weapon.<br> | ||
| + | | | ||
| + | {{Neutral}}No changes.<br> | ||
| + | |- | ||
| + | | align="center" | [[File:Backpack Bushwacka.png|135px]]<br> | ||
| + | <small>[[Melee]]</small><br> | ||
| + | '''[[Bushwhacka]]''' | ||
| + | | | ||
| + | {{Pro}}Crits whenever it would normally mini-crit.<br/> | ||
| + | {{Con}}Raises damage vulnerability by 20% when active.<br/> | ||
| + | {{Con}}No random crits.<br/> | ||
| + | | | ||
| + | {{Neutral}}No changes.<br> | ||
| + | |- | ||
| + | | align="center" | [[File:Backpack Tribalman's Shiv.png|135px]]<br> | ||
| + | <small>[[Melee]]</small><br> | ||
| + | '''[[Tribalman's Shiv]]''' | ||
| + | | | ||
| + | {{Pro}}On hit: causes [[bleeding|bleed]] for 6 seconds.<br/> | ||
| + | {{Con}}50% damage penalty.<br/> | ||
| + | | | ||
| + | {{Neutral}}No changes.<br> | ||
| + | |- | ||
| + | | align="center" | [[File:Backpack Shahanshah.png|135px]]<br> | ||
| + | <small>[[Melee]]</small><br> | ||
| + | '''[[Shahanshah]]''' | ||
| + | | | ||
| + | {{Pro}}25% damage bonus when health is less than 50% of max.<br/> | ||
| + | {{Con}}25% damage penalty when health is more than or equal to 50% of max.<br/> | ||
| + | | | ||
| + | {{Neutral}}No changes<br> | ||
| + | |- | ||
| + | |} | ||
| + | {| class="wikitable grid" style="text-align: center" width="50%" | ||
| + | |- | ||
| + | ! colspan="1" rowspan="2" class="header"|Rifle Damages | ||
| + | ! colspan="2" class="header"|Bodyshot | ||
| + | ! colspan="2" class="header"|Headshot | ||
| + | |- | ||
| + | ! width="20%" class="header"|0% | ||
| + | ! width="20%" class="header"|100% | ||
| + | ! width="20%" class="header"|0% | ||
| + | ! width="20%" class="header"|100% | ||
| + | |- | ||
| + | ! rowspawn "1"|Sniper Rifle | ||
| + | | | ||
| + | 75 | ||
| + | | | ||
| + | 225 | ||
| + | | | ||
| + | 900 | ||
| + | | | ||
| + | 900 | ||
| + | |- | ||
| + | ! rowspawn "1"|Hitman's Hitmaker | ||
| + | | | ||
| + | 60 | ||
| + | | | ||
| + | 180 | ||
| + | | | ||
| + | 600 | ||
| + | | | ||
| + | 600 | ||
| + | |- | ||
| + | ! rowspawn "1"|Huntsman | ||
| + | | | ||
| + | 114 | ||
| + | | | ||
| + | 268 | ||
| + | | | ||
| + | 900 | ||
| + | | | ||
| + | 900 | ||
| + | |- | ||
| + | ! rowspawn "1"|Machina | ||
| + | | | ||
| + | 283 | ||
| + | | | ||
| + | 1500 | ||
| + | | | ||
| + | 1700 | ||
| + | | | ||
| + | 1700 | ||
| + | |- | ||
| + | ! rowspawn "1"|Sydney Sleeper | ||
| + | | | ||
| + | 75 | ||
| + | | | ||
| + | 226 | ||
| + | | | ||
| + | 300 | ||
| + | | | ||
| + | 900 | ||
| + | |- | ||
| + | ! rowspawn "1"|Classic | ||
| + | | | ||
| + | 70 | ||
| + | | | ||
| + | 210 | ||
| + | | | ||
| + | 267 | ||
| + | | | ||
| + | 1200 | ||
| + | |- | ||
| + | ! rowspawn "1"|Bazaar Bargain | ||
| + | | | ||
| + | 0 | ||
| + | | | ||
| + | 0 | ||
| + | | | ||
| + | 1200 | ||
| + | | | ||
| + | 1200 | ||
| + | |- | ||
| + | |} | ||
| − | + | ==== Spy ==== | |
| + | {| class="wikitable grid collapsible" width="100%" | ||
| + | ! colspan="5" class="header" | Spy Primaries | ||
| + | |- | ||
| + | ! class="header" width="15%" | Weapon | ||
| + | ! class="header" width="30%" | Base Game Attributes | ||
| + | ! class="header" width="30%" | Zombie Escape Attributes | ||
| + | |- | ||
| + | | align="center" | [[File:Backpack Revolver.png|135px]]<br> | ||
| + | <small>[[Primary]]</small><br> | ||
| + | '''[[Revolver]]''' | ||
| + | | | ||
| + | {{Neutral}}Stock weapon.<br/> | ||
| + | | | ||
| + | {{Pro}}200% larger clip size.<br/> | ||
| + | {{Pro}}75% faster firing speed.<br/> | ||
| + | {{Pro}}20% tighter bullet spread.<br/> | ||
| + | {{Con}}15% damage penalty.<br/> | ||
| + | |- | ||
| + | | align="center" | [[File:Backpack Ambassador.png|135px]]<br> | ||
| + | <small>[[Primary]]</small><br> | ||
| + | '''[[Ambassador]]''' | ||
| + | | | ||
| + | {{Pro}}[[Critical hits]] are guaranteed for headshots.<br/> | ||
| + | {{Con}}Accuracy decreases after initial shot. Has a short 1 second cooldown during which it never crits.<br/> | ||
| + | {{Con}}15% damage penalty.<br/> | ||
| + | {{Con}}20% slower firing speed.<br/> | ||
| + | {{Con}}No random critical hits.<br/> | ||
| + | {{Con}}Critical damage is affected by range.<br/> | ||
| + | | | ||
| + | {{Pro}}[[Critical hits]] are guaranteed for headshots.<br/> | ||
| + | {{Pro}}235% damage bonus.<br/> | ||
| + | {{Pro}}On headshot: 100% to slows down zombies.<br/> | ||
| + | {{Pro}}Shots penetrate players and damage enemies behind them.<br/> | ||
| + | {{Con}}25% longer reload time.<br/> | ||
| + | {{Con}}20% slower firing speed.<br/> | ||
| + | {{Con}}Accuracy decreases after initial shot. Has a short 1 second cooldown during which it never crits.<br/> | ||
| − | + | {{Con}}Critical damage is affected by range.<br/> | |
| + | |- | ||
| + | | align="center" | [[File:Backpack L'Etranger.png|135px]]<br> | ||
| + | <small>[[Primary]]</small><br> | ||
| + | '''[[L'Etranger]]''' | ||
| + | | | ||
| + | {{Pro}}40% longer cloak duration<br/> | ||
| + | {{Pro}}On hit: adds 15% charge to cloak.<br/> | ||
| + | {{Con}}20% damage penalty.<br/> | ||
| + | | | ||
| + | {{Pro}}25% shorter reload time.<br/> | ||
| + | {{Pro}}85% faster firing speed.<br/> | ||
| + | {{Pro}}40% longer cloak duration.<br/> | ||
| + | {{Pro}}On hit: adds 15% charge to cloak.<br/> | ||
| + | {{Con}}7% damage penalty.<br/> | ||
| + | |- | ||
| + | | align="center" | [[File:Backpack Enforcer.png|135px]]<br> | ||
| + | <small>[[Primary]]</small><br> | ||
| + | '''[[Enforcer]]''' | ||
| + | | | ||
| + | {{Pro}}20% damage bonus while disguised.<br/> | ||
| + | {{Pro}}Attacks pierce damage resistance effects and bonuses.<br/> | ||
| + | {{Con}}20% slower firing speed.<br/> | ||
| + | {{Con}}No random critical hits.<br/> | ||
| + | | | ||
| + | {{Pro}}100% larger clip size.<br/> | ||
| + | {{Pro}}67% damage bonus.<br/> | ||
| + | {{Pro}}750% damage bonus while disguised.<br/> | ||
| + | {{Pro}}50% faster firing speed.<br/> | ||
| + | {{Pro}}Attacks pierce damage resistance effects and bonuses.<br/> | ||
| + | |- | ||
| + | | align="center" | [[File:Backpack Diamondback.png|135px]]<br> | ||
| + | <small>[[Primary]]</small><br> | ||
| + | '''[[Diamondback]]''' | ||
| + | | | ||
| + | {{Pro}}Earns 1 [[Critical hits|crit]] shot for each backstab kill and each building destroyed with a Sapper attached (can hold up to 35).<br/> | ||
| + | {{Con}}–15% damage penalty.<br/> | ||
| + | {{Con}}No random critical hits.<br/> | ||
| + | | | ||
| + | {{Pro}}Earns 1 [[Critical hits|crit]] shot for each backstab kill (can hold up to 35).<br/> | ||
| + | {{Pro}}200% larger clip size.<br/> | ||
| + | {{Pro}}300% more bullets per shot.<br/> | ||
| + | {{Pro}}65% faster firing speed.<br/> | ||
| + | {{Pro}}On kill: grants 13 seconds of guaranteed critical hits for all weapons.<br/> | ||
| + | {{Con}}74% damage penalty.<br/> | ||
| + | {{Con}}60% wider bullet spread.<br/> | ||
| + | {{Con}}6% slower movement speed of wearer.<br/> | ||
| + | {{Con}}Wearer cannot disguise.<br/> | ||
| + | |- | ||
| + | ! colspan="5" class="header" | Spy Secondaries | ||
| + | |- | ||
| + | | align="center" | [[File:Backpack Red-Tape Recorder.png|135px]]<br> | ||
| + | <small>[[Secondary]]</small><br> | ||
| + | '''[[Red-Tape Recorder]]''' | ||
| + | | | ||
| + | {{Info}}Disables enemy Engineer buildings.<br/> | ||
| + | {{Pro}}Reverses enemy building construction.<br/> | ||
| + | {{Pro}}Removes metal inside Dispensers during deconstruction.<br/> | ||
| + | {{Con}}Does not damage buildings.<br/> | ||
| + | {{Con}}Takes longer than the stock Sapper to nullify an Engineer building.<br/> | ||
| + | | | ||
| + | {{Info}}Disables enemy Engineer buildings.<br/> | ||
| + | {{Pro}}Reverses enemy building construction.<br/> | ||
| + | {{Pro}}Removes metal inside Dispensers during deconstruction.<br/> | ||
| + | {{Con}}Does not damage buildings.<br/> | ||
| + | {{Info}}When weapon is active:<br/> | ||
| + | :{{Pro}}Up to +4 health regenerated per second passively.<br/> | ||
| + | :{{Con}}Raises damage vulnerability by 20% on wearer.<br/> | ||
| + | |- | ||
| + | | align="center" | [[File:Backpack Sapper.png|135px]]<br> | ||
| + | <small>[[Secondary]]</small><br> | ||
| + | '''[[Sapper]]''' | ||
| + | | | ||
| + | {{Info}}Stock weapon.<br/> | ||
| + | {{Info}}Disables and slowly destroys enemy Engineer [[buildings]].<br/> | ||
| + | | | ||
| + | {{Info}}Stock weapon.<br/> | ||
| + | {{Info}}Disables and slowly destroys enemy Engineer [[buildings]].<br/> | ||
| + | {{Info}}When weapon is active:<br/> | ||
| + | :{{Pro}}2% faster movement speed on wearer.<br/> | ||
| + | :{{Con}}Raises damage vulnerability by 20% on wearer.<br/> | ||
| + | |- | ||
| + | ! colspan="5" class="header" | Spy Melees | ||
| + | |- | ||
| + | | align="center" | [[File:Backpack Knife.png|135px]]<br> | ||
| + | <small>[[Melee]]</small><br> | ||
| + | '''[[Knife]]''' | ||
| + | | | ||
| + | {{Info}}Stock weapon<br/> | ||
| + | | | ||
| + | {{Pro}}Upon a successful backstab, spy instantly becomes ÜberCharged and gains a speed boost.<br/> | ||
| + | {{Pro}}Victims do not make any noise when dying.<br/> | ||
| + | |- | ||
| + | | align="center" | [[File:Backpack Big Earner.png|135px]]<br> | ||
| + | <small>[[Melee]]</small><br> | ||
| + | '''[[Big Earner]]''' | ||
| + | | | ||
| + | {{Pro}}Upon a kill, the Spy gains 30% of his cloak meter.<br/> | ||
| + | {{Pro}}Gain a 3 second speed boost on kill.<br/> | ||
| + | {{Con}}–25 max health on wearer.<br/> | ||
| + | | | ||
| + | {{Pro}}Upon a successful backstab, spy instantly becomes ÜberCharged and gains a speed boost.<br/> | ||
| + | {{Pro}}Upon a kill, the Spy gains 30% of his cloak meter.<br/> | ||
| + | {{Pro}}Gain a 3 second speed boost on kill.<br/> | ||
| + | {{Pro}}On hit: adds 10% charge to cloak.<br/> | ||
| + | {{Con}}–25 max health on wearer.<br/> | ||
| + | {{Con}}User takes mini-crits when weapon is active, and for 3 seconds after switching away.<br/> | ||
| + | |- | ||
| + | | align="center" | [[File:Backpack Spy-cicle.png|135px]]<br> | ||
| + | <small>[[Melee]]</small><br> | ||
| + | '''[[Spy-cicle]]''' | ||
| + | | | ||
| + | {{Pro}}On Hit by Fire: Fireproof for 1 second and afterburn immunity for 10 seconds.<br/> | ||
| + | {{Con}}Backstab turns victim to ice.<br/> | ||
| + | {{Con}}Melts in fire, regenerates in 15 seconds and by picking up ammo.<br/> | ||
| + | | | ||
| + | {{Pro}}Upon a successful backstab, spy instantly becomes ÜberCharged and gains a speed boost.<br/> | ||
| + | {{Pro}}On Hit by Fire: Fireproof for 1 second and afterburn immunity for 10 seconds.<br/> | ||
| + | {{Pro}}This weapon features a 50% increased melee range.<br/> | ||
| + | {{Pro}}On hit: slows down enemies by 35%.<br/> | ||
| + | {{Con}}Backstab turns victim to ice.<br/> | ||
| + | {{Con}}Melts in fire, regenerates in 15 seconds and by picking up ammo.<br/> | ||
| + | {{Con}}100% slower swing speed.<br/> | ||
| + | |- | ||
| + | | align="center" | [[File:Backpack Conniver's Kunai.png|135px]]<br> | ||
| + | <small>[[Melee]]</small><br> | ||
| + | '''[[Conniver's Kunai]]''' | ||
| + | | | ||
| + | {{Pro}}On Backstab: Absorbs the health from your victim (minimum gain of 75 health points). Can overheal up to 300% of Spy's (reduced) health, i.e. up to 210 health points.<br/> | ||
| + | {{Con}}–55 max health on wearer.<br/> | ||
| + | | | ||
| + | {{Pro}}On Backstab: Gain a speedboost<br/> | ||
| + | {{Pro}}On Backstab: Absorbs the health from your victim (minimum gain of 75 health points). Can overheal up to 105% of Spy's (reduced) health, i.e. up to 300 health points.<br/> | ||
| + | {{Con}}–55 max health on wearer (145 health).<br/> | ||
| + | |- | ||
| + | | align="center" | [[File:Backpack Your Eternal Reward.png|135px]]<br> | ||
| + | <small>[[Melee]]</small><br> | ||
| + | '''[[Your Eternal Reward]]''' | ||
| + | | | ||
| + | {{Pro}}Upon a successful backstab, the Spy instantly disguises as the backstab victim.<br/> | ||
| + | {{Pro}}Victims do not make any noise when dying.<br/> | ||
| + | {{Pro}}Victims' bodies disappear after being stabbed.<br/> | ||
| + | {{Pro}}If backstabbed, victims' death will not be shown in the killfeed for other enemies.<br/> | ||
| + | {{Con}}33% quicker cloak drain rate.<br/> | ||
| + | {{Con}}Normal disguises require (and consume) a full cloak meter.<br/> | ||
| + | | | ||
| + | {{Pro}}Upon a successful backstab, the Spy instantly disguises as the backstab victim.<br/> | ||
| + | {{Pro}}Victims do not make any noise when dying.<br/> | ||
| + | {{Pro}}Victims' bodies disappear after being stabbed.<br/> | ||
| + | {{Pro}}66% damage bonus '''against players'''.<br/> | ||
| + | {{Con}}33% quicker cloak drain rate.<br/> | ||
| + | {{Con}}Normal disguises require (and consume) a full cloak meter.<br/> | ||
| + | |- | ||
| + | ! colspan="5" class="header" | Spy Watches | ||
| + | |- | ||
| + | | align="center" | [[File:Backpack Cloak and Dagger.png|135px]]<br> | ||
| + | <small>[[PDA]]</small><br> | ||
| + | '''[[Cloak and Dagger]]''' | ||
| + | | | ||
| + | '''Cloak type:''' Motion sensitive<br/> | ||
| + | {{Pro}}Raises damage resistance by 20%.<br/> | ||
| + | {{Pro}}While standing still, cloaks Spy indefinitely and slowly refills cloak meter .<br/> | ||
| + | {{Pro}}100% increase in cloak recharge rate.<br/> | ||
| + | {{Con}}Cloak meter can not be refilled by ammo boxes while invisible.<br/> | ||
| + | {{Con}}35% less cloak meter from ammo boxes.<br/> | ||
| + | {{Info}}Cloak consumption rate varies depending on the type of movement you use.<br/> | ||
| + | {{Info}}User can still stay partially cloaked once the cloak meter runs out.<br/> | ||
| + | | | ||
| + | '''Cloak type:''' Motion sensitive<br/> | ||
| + | {{Pro}}Increases max health by 25 on wearer.<br/> | ||
| + | {{Con}}Cloak meter can not be refilled by ammo boxes while invisible.<br/> | ||
| + | {{Con}}Cannot attack while invisible.<br/> | ||
| + | {{Con}}100% quicker cloak drain rate.<br/> | ||
| + | {{Con}}Bumping into enemies partially reveals the Spy's outline.<br/> | ||
| + | {{Info}}Cloak consumption rate varies depending on the type of movement you use.<br/> | ||
| + | {{Info}}User can still stay partially cloaked once the cloak meter runs out.<br/> | ||
| + | |- | ||
| + | | align="center" | [[File:Backpack Invis Watch.png|135px]]<br> | ||
| + | <small>[[PDA]]</small><br> | ||
| + | '''[[Invis Watch]]''' | ||
| + | | | ||
| + | '''Cloak type:''' Timed<br/> | ||
| + | {{Info}}Cloaks Spy for 10 seconds.<br/> | ||
| + | {{Info}}Cloak meter can be refilled from ammo sources.<br/> | ||
| + | {{Pro}}Raises damage resistance by 20%.<br/> | ||
| + | {{Con}}Cannot attack while invisible.<br/> | ||
| + | {{Con}}Bumping into enemies partially reveals the Spy's outline.<br/> | ||
| + | | | ||
| + | '''Cloak type:''' Timed<br/> | ||
| + | {{Info}}Cloaks Spy for 10 seconds.<br/> | ||
| + | {{Info}}Cloak meter can be refilled from ammo sources.<br/> | ||
| + | {{Con}}Cannot attack while invisible.<br/> | ||
| + | {{Con}}Cloak meter can not be refilled by ammo boxes while invisible.<br/> | ||
| + | |- | ||
| + | | align="center" | [[File:Backpack Dead Ringer.png|135px]]<br> | ||
| + | <small>[[PDA]]</small><br> | ||
| + | '''[[Dead Ringer]]''' | ||
| + | | | ||
| + | '''Cloak type:''' Feign death<br/> | ||
| + | {{Info}}Cloaks Spy for 7 seconds upon receiving damage, dropping a fake corpse.<br/> | ||
| + | {{Pro}}Reduces initial damage by 75%, then upcoming damage by 65% to 20% after 3 seconds.<br/> | ||
| + | {{Pro}}50% faster cloak recharge rate.<br/> | ||
| + | {{Pro}}40% longer cloak duration.<br/> | ||
| + | {{Pro}}Grants a 3 second speed boost upon receiving damage.<br/> | ||
| + | {{Pro}}Feign Death stealth has no bump shimmer for 3 seconds.<br/> | ||
| + | {{Con}}Ammo kits and dispensers do not refill the Spy's cloak meter.<br/> | ||
| + | {{Con}}Has a loud, distinctive decloak sound.<br/> | ||
| + | {{Con}}Triggering feign death will lower the cloak meter to 50%.<br/> | ||
| + | {{Con}}Cloak meter must be fully charged to use.<br/> | ||
| + | | | ||
| + | '''Cloak type:''' Feign death<br/> | ||
| + | {{Info}}Cloaks Spy for 4 seconds upon receiving damage, dropping a fake corpse.<br/> | ||
| + | {{Pro}}Reduces initial damage by 75%, then upcoming damage by 65% to 20% after 3 seconds.<br/> | ||
| + | {{Pro}}40% longer cloak duration.<br/> | ||
| + | {{Pro}}Grants a 3 second speed boost upon receiving damage.<br/> | ||
| + | {{Pro}}Feign Death stealth has no bump shimmer for 3 seconds.<br/> | ||
| + | {{Con}}200% quicker cloak drain rate.<br/> | ||
| + | {{Con}}Ammo kits and dispensers do not refill the Spy's cloak meter.<br/> | ||
| + | {{Con}}Has a loud, distinctive decloak sound.<br/> | ||
| + | {{Con}}Triggering feign death will lower the cloak meter to 50%.<br/> | ||
| + | {{Con}}Cloak meter must be fully charged to use.<br/> | ||
| + | |} | ||
| − | ''' | + | ==Environmental hazards== |
| + | [[File:Zombie escape blade out.wav]] | ||
| + | ==Maps== | ||
| + | {| class="wikitable grid collapsible" width="50%" style="text-align:center" | ||
| + | ! class="header" width="20%" | Map name | ||
| + | ! class="header" width="20%" | Port? | ||
| + | ! class="header" width="20%" | Stages? | ||
| + | ! class="header" width="20%" | Has Items? | ||
| + | ! class="header" width="20%" | Has Bosses? | ||
| + | |- | ||
| + | |[[File:User Lolimsogreat21 Ze a e s t h e t i c p3.png|ze_A_E_S_T_H_E_T_I_C_p3|175px]]<br>''A_E_S_T_H_E_T_I_C_p3'' | ||
| + | |'''{{font colour|red|CSS Port}}''' | ||
| + | |Single | ||
| + | | Gondola<br> King Gondola <br> | ||
| + | | All-Seeing-Eye | ||
| + | |- | ||
| + | |[[File:User Lolimsogreat21 Ze bathroom.png|ze_bathroom_skial_8|175px]]<br>''bathroom_8'' | ||
| + | |'''{{font colour|red|CSS Port}}''' | ||
| + | |Two | ||
| + | |No | ||
| + | |Rubber Ducky<br> Sponge | ||
| + | |- | ||
| + | |[[File:User Lolimsogreat21 Ze best korea.png|ze_best_korea_skial_4|175px]]<br>''best_korea_4'' | ||
| + | |'''{{font colour|red|CSS Port}}''' | ||
| + | |Three | ||
| + | | North Korean Soldier<br>Suicide Bomber | ||
| + | | Baby Kim Jong Un | ||
| + | |- | ||
| + | |[[File:User Lolimsogreat21 Ze bowser in the fire sea.png|ze_bowser_in_the_fire_sea_skial_6|175px]]<br>''bowser_in_the_fire_sea_6'' | ||
| + | |'''{{font colour|red|CSS Port}}''' | ||
| + | |Four | ||
| + | | No | ||
| + | | Bowser | ||
| + | |- | ||
| + | |[[File:User Lolimsogreat21 Ze djinn.png|ze_djinn_skial_2|175px]]<br>''djinn_2'' | ||
| + | |'''{{font colour|red|CSS Port}}''' | ||
| + | |Single | ||
| + | |- | ||
| + | |[[File:User Lolimsogeat21 Ze ffvii cosmo canyon.png|ze_ffvii_cosmo_canyon_b1|175px]]<br>''ffvii_cosmo_canyon_b1'' | ||
| + | |'''{{font colour|red|CSS Port}}''' | ||
| + | |Four plus ZM Mode | ||
| + | |- | ||
| + | |[[File:User Lolimsogreat21 Ze ffvii mako reactor v6.png|ze_ffvii_mako_reactor_v6_b5|175px]]<br>''ffvii_mako_reactor_v6_b5'' | ||
| + | |'''{{font colour|red|CSS Port}}''' | ||
| + | |Five difficulties plus ZM Mode | ||
| + | |- | ||
| + | |[[File:User Lolimsogreat21 Ze frostdrake tower.png|ze_frostdrake_tower_skial_3|175px]]<br>''frostdrake_tower_3'' | ||
| + | |'''{{font colour|red|CSS Port}}''' | ||
| + | |Single | ||
| + | |- | ||
| + | |[[File:User Lolimsogreat21 Ze krusty krab2.png|ze_krusty_krab_skial_4|175px]]<br>''krusty_krab_4'' | ||
| + | |'''{{font colour|green|TF2 Original}}''' | ||
| + | |- | ||
| + | |[[File:User Lolimsogreat21 Ze l0v0l.png|ze_l0v0l_v1|175px]]<br>''l0v0l'' | ||
| + | |'''{{font colour|red|CSS Port}}''' | ||
| + | |Three plus Bonus stage | ||
| + | |- | ||
| + | |[[File:User Lolimsogeat21 Ze minecraft adventure.png|ze_minecraft_adventure_skial_6|175px]]<br>''minecraft_adventure_6'' | ||
| + | |'''{{font colour|red|CSS Port}}''' | ||
| + | |Three | ||
| + | |- | ||
| + | |[[File:User Lolimsogreat21 Ze pirates port royal.png|ze_pirates_port_royal_12|175px]]<br>''pirates_port_royal_12'' | ||
| + | |'''{{font colour|red|CSS Port}}''' | ||
| + | |Six | ||
| + | |- | ||
| + | |[[File:User Lolimsogreat21 Ze portal story.png|ze_portal_story_skial_6|175px]]<br>''portal_story_6'' | ||
| + | |'''{{font colour|red|CSS Port}}''' | ||
| + | |Single | ||
| + | |- | ||
| + | |[[File:User Lolimsogreat21 Ze quicksand v1.png|ze_quicksand_v1e|175px]]<br>''quicksand_v1e'' | ||
| + | |'''{{font colour|green|TF2 Original}}''' | ||
| + | |Four plus [[Bumper Cars|Bumper Car]] stage | ||
| + | |- | ||
| + | |[[File:User Lolimsogreat21 Ze randomizer.png|ze_randomizer_b2|175px]]<br>''randomizer_b2'' | ||
| + | |'''{{font colour|red|CSS Port}}''' | ||
| + | |- | ||
| + | |[[File:User Lolimsogreat21 Ze rush b.png|ze_rush_b_skial_6|175px]]<br>''rush_b_6'' | ||
| + | |'''{{font colour|red|CSS Port}}''' | ||
| + | |Single | ||
| + | |- | ||
| + | |[[File:User Lolimsogreat21 Ze santassination.png|ze_santassination_s4|175px]]<br>''santassination_s4'' | ||
| + | |'''{{font colour|red|CSS Port}}''' | ||
| + | |Four plus the Truth | ||
| + | | Raindeer, Elf<br> Bender, Baby<br> Bipedal Present, Beaver<br> | ||
| + | | Slim Santa<br> Fat Santa<br> Socrates<br> | ||
| + | |- | ||
| + | |[[File:User Lolimsogreat21 Ze scp.png|ze_scp_skial_4|175px]]<br>''scp_4'' | ||
| + | |'''{{font colour|red|CSS Port}}''' | ||
| + | |- | ||
| + | |[[File:User Lolimsogreat21 Ze shroomforest.png|ze_shroomforest_skial_7|175px]]<br>''shroomforest_7'' | ||
| + | |'''{{font colour|red|CSS Port}}''' | ||
| + | | | ||
| + | |- | ||
| + | |[[File:User Lolimsogreat21 Ze squid game.png|ze_squid_game_skial_6|175px]]<br>''squid_game_6'' | ||
| + | |'''{{font colour|red|CSS Port}}''' | ||
| + | | Single | ||
| + | |- | ||
| + | |[[File:User Lolimsogreat21 Ze surf froyo.png|ze_surf_froyo_b3|175px]]<br>''surf_froyo_b3'' | ||
| + | |'''{{font colour|red|CSS Port}}''' | ||
| + | |- | ||
| + | |} | ||
| − | + | ==Gallery== | |
| + | ===Bosses=== | ||
| + | <gallery> | ||
| + | File:User Lolimsogreat21 Ze Bathroom Rubber Ducky.png|Rubber Ducky. | ||
| + | File:User Lolimsogreat21 Ze Bathroom Sponge.png|Sponge. | ||
| + | File:User Lolimsogreat21 Ze Best Korea Baby King Jong Un.png|Baby King Jong Un. | ||
| + | File:User Lolimsogreat21 Ze Bowser in the fire Bowser.png|Bowser. | ||
| + | File:User Lolimsogreat21 Ze Santassination Socrates.png|Socrates. | ||
| + | File:User Lolimsogreat21 Ze Santassination Slim Santa.png|Slim Santa. | ||
| + | File:User Lolimsogreat21 Ze Santassination Fat santa.png|Fat Santa. | ||
| + | </gallery> | ||
| + | ===NPCs=== | ||
| + | <gallery> | ||
| + | File:User Lolimsogreat21 Ze Aesthetic Gondola.png|Gondola. | ||
| + | File:User Lolimsogreat21 Ze Aesthetic King Gondola.png|King Gondola. | ||
| + | File:User Lolimsogreat21 Ze Best Korea Suicide bomber.png|Suicide Bomber. | ||
| + | File:User Lolimsogreat21 Ze Best Korea North Korean Soldier.png|North Korean Soldier | ||
| + | File:User Lolimsogreat21 Ze Santassination Present.png|Bipedal Present. | ||
| + | File:User Lolimsogreat21 Ze santassination Baby.png|Baby. | ||
| + | File:User Lolimsogreat21 Ze Santassination Elf.png|Elf. | ||
| + | File:User Lolimsogreat21 Ze Santassination Raindeer.png|Raindeer. | ||
| + | File:User Lolimsogreat21 Ze Santassination Bender.png|Bender. | ||
| + | File:User Lolimsogreat21 Ze Santassination Beaver.png|Beaver. | ||
| + | </gallery> | ||
| − | + | {{Mod Nav}} | |
| − | |||
| − | |||
| − | |||
| − | |||
| − | |||
| − | |||
| − | |||
| − | |||
| − | |||
| − | |||
| − | |||
| − | |||
| − | |||
| − | |||
| − | |||
| − | |||
| − | |||
| − | |||
| − | |||
| − | |||
| − | |||
| − | |||
| − | |||
| − | |||
| − | |||
| − | |||
| − | |||
| − | |||
| − | |||
| − | |||
| − | |||
| − | |||
| − | |||
| − | |||
| − | |||
| − | |||
| − | |||
| − | |||
| − | |||
| − | |||
| − | |||
| − | |||
| − | |||
| − | |||
| − | |||
| − | |||
| − | |||
| − | |||
| − | |||
| − | |||
| − | |||
| − | |||
| − | |||
| − | |||
| − | |||
| − | |||
| − | |||
| − | |||
| − | |||
| − | |||
| − | |||
| − | |||
| − | |||
| − | |||
| − | |||
| − | |||
| − | |||
| − | |||
| − | |||
| − | |||
| − | |||
| − | |||
| − | |||
| − | |||
| − | |||
| − | |||
| − | |||
| − | |||
| − | |||
| − | |||
| − | |||
| − | |||
| − | |||
| − | |||
| − | |||
Latest revision as of 15:13, 25 January 2025
| “ | Move, move, move!
Click to listen
— The Engineer running from zombies
|
” |
Zombie Escape, not to be confused with Zombie Survival or Zombie Fortress, is a Community gameplay modification of Zombie Mod.
Zombie Escape, as the name implies, is a mod where you escape from zombies.
Contents
Gameplay
The gameplay is a simple start-to-finish race between spawn and the final holdout, where the map makes up a reason to kill players that have not yet escaped (as most maps have a simple story). After setup (the survivors' headstart), two players are chosen as the alpha zombies, incredibly resilient players with huge health pools (often referred to as simply alphas). The goal of an alpha is to kill all the runners without getting killed themselves. Runners, when infected, turn into zombies. Zombies, similarly to alphas, have an enormous health pool compared to their living counterparts. They only receive half health, however, as they are expendable and can respawn an unlimited amount of times.
There are two ways to finish the round: One is to get through the race, holding out at places that require players to wait (mostly doors opening and vehicles waiting to move), and the second is to kill the alphas. The latter is much harder due to the large amount of health alphas have, and as such should be only focused on as a secondary goal.
Gameplay Changes
A list of changes that affect gameplay:
- There is no standard gameplay objective.
- The round ends with a BLU team victory if all RED team members are dead at the same time.
- The round ends with a RED team victory if all players are on the RED team.
- The player's max ammo is infinite, but the clip is not; no weapons run out of ammunition, but still have to reload (this excludes weapons that draw from the Engineer's metal supply).
- Players on the BLU team have a cross permanently above their head, only visible to the RED team.
- Upon being killed or general death, BLU team members are automatically assigned to the RED team.
- Being killed by a zombie does not kill the player per-se; the player is immediately assigned to the RED team, without any respawn time and without producing a ragdoll.
- RED team members automatically have their class's Voodoo-Cursed Soul equipped. The Voodoo-Cursed Soul displays as Level 0 on inspection.
- Players on the RED team have an increased amount of health (commonly between 8000 and 12000) and take an increased amount of knockback.
- Any weapons with projectiles that do not function as their primary fire, such as the Sandman's baseball, are removed.
- Scouts are no longer able to double jump. Whether the Atomizer allows the Scout to double jump again varies between different Zombie Escape plugins.
- Engineers do not drain metal under any circumstance, except when shooting with the Widowmaker or Short Circuit. If metal is spent by the Engineer, they can still replenish their ammo supply with conventional methods, such as medium ammo pickups dropped by dead players or with a Dispenser; nonetheless, metal slowly regenerates on its own.
- Engineers can only build Combat Mini-Sentry Guns, regardless of what melee weapon they are using. There can also be only four or five Mini-Sentry Guns deployed at one time, depending on the map.
- Some classes have a limit of only 6 at a time for survivors. Which classes specifically heavily depends on the plugin/server, but the Scout is most commonly limited.
Weapon Rebalances
Scout
| Scout Primaries | ||||
|---|---|---|---|---|
| Weapon | Vanilla Attributes | Zombie Escape Attributes | ||
 |
|
| ||
 |
|
| ||
 |
|
| ||
 |
|
| ||
 |
|
| ||
 |
|
| ||
| Scout Secondaries | ||||
 |
|
| ||
 |
|
| ||
 |
|
| ||
 |
|
| ||
 |
|
| ||
 |
|
| ||
 |
|
| ||
| Scout Melees | ||||
 |
|
| ||
 |
|
| ||
 |
|
| ||
 |
|
| ||
 |
|
| ||
 |
|
| ||
 |
|
| ||
 |
|
| ||
Soldier
| Soldier Primaries | ||||
|---|---|---|---|---|
| Weapon | Base Game Attributes | Zombie Escape Attributes | ||
 |
|
| ||
 |
|
| ||
 |
|
| ||
 |
|
| ||
 |
|
| ||
 |
|
| ||
 |
|
| ||
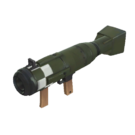 |
|
| ||
| Soldier Secondaries | ||||
 |
|
| ||
 |
|
| ||
 |
|
| ||
 |
|
| ||
 |
|
| ||
 |
|
| ||
 |
|
| ||
 |
|
| ||
 |
|
| ||
 |
|
| ||
| Soldier Melees | ||||
 |
|
| ||
 |
|
| ||
 |
|
| ||
 |
|
| ||
 |
|
| ||
 |
|
| ||
 |
|
| ||
Pyro
| Pyro Primaries | ||||
|---|---|---|---|---|
| Weapon | Edited Attributes | Zombie Escape Attributes | ||
 |
|
| ||
 |
|
| ||
 |
|
| ||
 |
|
| ||
 |
|
| ||
| Pyro Secondaries | ||||
 |
|
| ||
 |
|
| ||
 |
|
| ||
 |
|
| ||
 |
|
| ||
 |
|
| ||
 |
|
| ||
 |
|
| ||
 |
|
| ||
| Pyro Melees | ||||
 |
|
|||
 |
|
| ||
 |
|
| ||
 |
|
| ||
 |
|
| ||
 |
|
| ||
 |
|
| ||
 |
|
| ||
 |
|
| ||
Demoman
Heavy
| Heavy Primaries | ||||
|---|---|---|---|---|
| Weapon | Edited Attributes | Zombie Escape Attributes | ||
 |
|
| ||
 |
|
| ||
 |
|
| ||
 |
|
| ||
 |
|
| ||
| Heavy Secondaries | ||||
 |
|
| ||
 |
|
| ||
 |
|
| ||
 |
|
| ||
 |
|
| ||
 |
|
| ||
 |
|
| ||
| Heavy Melees | ||||
 |
|
| ||
 |
|
| ||
 |
|
| ||
 |
|
| ||
 |
|
| ||
 |
|
| ||
 |
|
| ||
Engineer
| Engineer Primaries | ||||
|---|---|---|---|---|
| Weapon | Stock Attributes | Zombie Escape Attributes | ||
 |
|
| ||
 |
|
| ||
 |
|
| ||
 |
|
| ||
 |
|
| ||
 |
|
| ||
| Engineer Secondaries | ||||
 |
|
| ||
 |
|
| ||
 |
|
| ||
| Engineer Melees | ||||
 |
|
| ||
 |
|
| ||
 |
|
| ||
 |
|
| ||
 |
|
| ||
| Melee | Sentry Gun | Dispenser | ||||||
|---|---|---|---|---|---|---|---|---|
| Cost | DPS | Health | Deploy Time | Cost | HP/S | Health | Deploy Time | |
| Wrench |
80 |
52.74 / 99.99 / 122.21 |
100 |
8.8s |
80 |
10/15/20 |
150/180/216 |
17s |
| Jag |
140 |
46.88 / 88.88 / 108.21 |
100 |
1.85s |
140 |
10/15/20 |
150/180/216 |
21s |
| Eureka Effect |
100 |
33.69 / 63.88 / 77.77 |
100 |
6.88s |
100 |
10/15/20 |
150/180/216 |
21s |
| Souther Hospitality |
25 |
93.76 / 177.76 / 216.42 |
25 |
0.66s |
25 |
10/15/20 |
38/45/54 |
21s |
| Gunslinger |
100 |
67.39 / 127.76 / 155.55 |
100 |
4.2s |
100 |
10/15/20 |
150/180/216 |
21s |
Medic
| Medic Primaries | ||||
|---|---|---|---|---|
| Weapon | Edited Attributes | Zombie Escape Attributes | ||
 |
|
| ||
 |
|
| ||
 |
|
| ||
 |
|
| ||
| Medic Secondaries | ||||
 |
|
| ||
 |
|
| ||
 |
|
| ||
 |
|
| ||
| Medic Melees | ||||
 |
|
| ||
 |
|
| ||
 |
|
| ||
 |
|
| ||
 |
|
| ||
Sniper
| Sniper Primaries | ||||
|---|---|---|---|---|
| Weapon | Base Game Attributes | Zombie Escape Attributes | ||
 |
|
| ||
 |
|
| ||
 |
|
| ||
 |
|
| ||
 |
|
| ||
 |
|
| ||
 |
|
| ||
| Sniper Secondaries | ||||
 |
|
| ||
 |
|
| ||
 |
|
| ||
 |
|
| ||
 |
|
| ||
 |
|
| ||
| Sniper Melees | ||||
 |
|
| ||
 |
|
| ||
 |
|
| ||
 |
|
| ||
| Rifle Damages | Bodyshot | Headshot | ||
|---|---|---|---|---|
| 0% | 100% | 0% | 100% | |
| Sniper Rifle |
75 |
225 |
900 |
900 |
| Hitman's Hitmaker |
60 |
180 |
600 |
600 |
| Huntsman |
114 |
268 |
900 |
900 |
| Machina |
283 |
1500 |
1700 |
1700 |
| Sydney Sleeper |
75 |
226 |
300 |
900 |
| Classic |
70 |
210 |
267 |
1200 |
| Bazaar Bargain |
0 |
0 |
1200 |
1200 |
Spy
| Spy Primaries | ||||
|---|---|---|---|---|
| Weapon | Base Game Attributes | Zombie Escape Attributes | ||
 |
|
| ||
 |
|
| ||
 |
|
| ||
 |
|
| ||
 |
|
| ||
| Spy Secondaries | ||||
 |
|
| ||
 |
|
| ||
| Spy Melees | ||||
 |
|
| ||
 |
|
| ||
 |
|
| ||
 |
|
| ||
 |
|
| ||
| Spy Watches | ||||
 |
Cloak type: Motion sensitive |
Cloak type: Motion sensitive | ||
 |
Cloak type: Timed |
Cloak type: Timed | ||
 |
Cloak type: Feign death |
Cloak type: Feign death | ||
Environmental hazards
Maps
| Map name | Port? | Stages? | Has Items? | Has Bosses? |
|---|---|---|---|---|
 A_E_S_T_H_E_T_I_C_p3 |
CSS Port | Single | Gondola King Gondola |
All-Seeing-Eye |
 bathroom_8 |
CSS Port | Two | No | Rubber Ducky Sponge |
 best_korea_4 |
CSS Port | Three | North Korean Soldier Suicide Bomber |
Baby Kim Jong Un |
 bowser_in_the_fire_sea_6 |
CSS Port | Four | No | Bowser |
 djinn_2 |
CSS Port | Single | ||
 ffvii_cosmo_canyon_b1 |
CSS Port | Four plus ZM Mode | ||
 ffvii_mako_reactor_v6_b5 |
CSS Port | Five difficulties plus ZM Mode | ||
 frostdrake_tower_3 |
CSS Port | Single | ||
 krusty_krab_4 |
TF2 Original | |||
 l0v0l |
CSS Port | Three plus Bonus stage | ||
 minecraft_adventure_6 |
CSS Port | Three | ||
 pirates_port_royal_12 |
CSS Port | Six | ||
 portal_story_6 |
CSS Port | Single | ||
 quicksand_v1e |
TF2 Original | Four plus Bumper Car stage | ||
 randomizer_b2 |
CSS Port | |||
 rush_b_6 |
CSS Port | Single | ||
 santassination_s4 |
CSS Port | Four plus the Truth | Raindeer, Elf Bender, Baby Bipedal Present, Beaver |
Slim Santa Fat Santa Socrates |
 scp_4 |
CSS Port | |||
 shroomforest_7 |
CSS Port | |||
 squid_game_6 |
CSS Port | Single | ||
 surf_froyo_b3 |
CSS Port |
Gallery
Bosses
NPCs
| |||||
