Difference between revisions of "User:Lolimsogreat21/Sandbox2"
m (Chnaged gas passer) |
m (Improving consistency and order of attributes.) |
||
| (10 intermediate revisions by the same user not shown) | |||
| Line 43: | Line 43: | ||
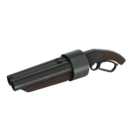
{{Neutral}} Stock Weapon.<br/> | {{Neutral}} Stock Weapon.<br/> | ||
| | | | ||
| − | {{Pro}} | + | {{Pro}}200% larger clip size.<br/> |
| + | {{Pro}}88% damage bonus.<br/> | ||
| + | {{Pro}}65% shorter reload time.<br/> | ||
{{Pro}}60% faster firing speed.<br/> | {{Pro}}60% faster firing speed.<br/> | ||
| − | |||
| − | |||
|- | |- | ||
| align="center" | [[File:Backpack Force-A-Nature.png|135px]]<br> | | align="center" | [[File:Backpack Force-A-Nature.png|135px]]<br> | ||
| Line 53: | Line 53: | ||
| | | | ||
{{Pro}}On hit: applies a [[knockback]] effect that propels enemies backwards and the user in the opposite direction (if airborne). This allows the user to perform a [[Jumping#Force_Jump|Force Jump]] and to horizontally prolong any other [[Jumping#Scout_Jumps|jumping technique]].<br/> | {{Pro}}On hit: applies a [[knockback]] effect that propels enemies backwards and the user in the opposite direction (if airborne). This allows the user to perform a [[Jumping#Force_Jump|Force Jump]] and to horizontally prolong any other [[Jumping#Scout_Jumps|jumping technique]].<br/> | ||
| + | {{Pro}}20% more pellets per shot.<br/> | ||
{{Pro}}50% faster firing speed.<br/> | {{Pro}}50% faster firing speed.<br/> | ||
| − | {{Pro}} | + | {{Pro}}This weapon reloads its entire clip at once.<br> |
{{Con}}66% smaller clip size.<br/> | {{Con}}66% smaller clip size.<br/> | ||
| − | {{Con}}10% | + | {{Con}}10% damage penalty per pellet.<br/> |
{{Con}}If one shot is unused before reloading, it is lost.<br/> | {{Con}}If one shot is unused before reloading, it is lost.<br/> | ||
| − | |||
| | | | ||
{{Pro}}100% larger clip size.<br> | {{Pro}}100% larger clip size.<br> | ||
| + | {{Pro}}100% damage bonus '''(against players)'''.<br> | ||
| + | {{Pro}}20% more pellets per shot.<br> | ||
{{Pro}}73% faster firing speed.<br> | {{Pro}}73% faster firing speed.<br> | ||
| − | {{Pro}} | + | {{Pro}}This weapon reloads its entire clip at once.<br> |
| − | |||
{{Con}}12% damage penalty.<br> | {{Con}}12% damage penalty.<br> | ||
| − | {{Con}} | + | {{Con}}25% longer reload time.<br> |
| − | {{Con}} | + | {{Con}}100% wider pellet spread.<br> |
| − | {{Con}} | + | {{Con}}Successive shots become less accurate.<br> |
| + | {{Con}}If one shot is unused before reloading, it is lost.<br/> | ||
| + | {{Con}}While weapon is active: 8% slower movement speed on wearer.<br> | ||
{{Con}}Disabled knockback on user.<br> | {{Con}}Disabled knockback on user.<br> | ||
| − | |||
|- | |- | ||
| align="center" | [[File:Backpack Shortstop.png|135px]]<br> | | align="center" | [[File:Backpack Shortstop.png|135px]]<br> | ||
| Line 75: | Line 77: | ||
'''[[Shortstop]]''' | '''[[Shortstop]]''' | ||
| | | | ||
| + | {{Pro}}100% damage bonus per pellet.<br> | ||
{{Pro}}42.4% faster firing speed.<br> | {{Pro}}42.4% faster firing speed.<br> | ||
| − | {{Pro}}40% | + | {{Pro}}40% tighter pellet spread.<br> |
| − | {{Pro}} | + | {{Pro}}This weapon reloads its entire clip at once.<br> |
{{Pro}}Alt-Fire: does a shove that pushes enemies.<br> | {{Pro}}Alt-Fire: does a shove that pushes enemies.<br> | ||
{{Con}}33% smaller clip size.<br> | {{Con}}33% smaller clip size.<br> | ||
{{Con}}60% pellets per shot.<br> | {{Con}}60% pellets per shot.<br> | ||
| + | {{Con}}50% longer reload time.<br> | ||
{{Con}}25% less ramp-up.<br> | {{Con}}25% less ramp-up.<br> | ||
| − | {{Con}}20% | + | {{Con}}20% more knockback from all damage sources.<br> |
| − | {{Con}} | + | {{Con}}If one shot is unused before reloading, it is lost.<br/> |
| − | |||
| | | | ||
{{Pro}}100% larger clip size.<br> | {{Pro}}100% larger clip size.<br> | ||
| + | {{Pro}}25% damage bonus '''(against players)'''.<br> | ||
| + | {{Pro}}25% more pellets per shot.<br> | ||
{{Pro}}50% faster firing speed.<br> | {{Pro}}50% faster firing speed.<br> | ||
| − | {{Pro}} | + | {{Pro}}This weapon reloads its entire clip at once.<br> |
| − | + | {{Con}}18% damage penalty.<br> | |
| − | {{Con}} | + | {{Con}}50% longer reload time.<br> |
| − | {{Con}}50% | + | {{Con}}If one shot is unused before reloading, it is lost.<br/> |
| − | {{ | ||
|- | |- | ||
| align="center" | [[File:Backpack_Soda_Popper.png|135px]]<br> | | align="center" | [[File:Backpack_Soda_Popper.png|135px]]<br> | ||
| Line 98: | Line 102: | ||
'''[[Soda Popper]]''' | '''[[Soda Popper]]''' | ||
| | | | ||
| + | {{Pro}}On hit:Build Hype.<br> | ||
| + | {{Pro}}Activate Hype to sextuple jump.<br> | ||
| + | {{Pro}}25% shorter reload time.<br> | ||
{{Pro}}50% faster firing speed.<br> | {{Pro}}50% faster firing speed.<br> | ||
| − | {{Pro | + | {{Pro}}This weapon reloads its entire clip at once.<br> |
| − | + | {{Con}}66% smaller clip size.<br> | |
| − | |||
| − | |||
| − | |||
| − | {{ | ||
| | | | ||
{{Pro}}100% larger clip size.<br> | {{Pro}}100% larger clip size.<br> | ||
{{Pro}}75% faster firing speed.<br> | {{Pro}}75% faster firing speed.<br> | ||
| − | {{Pro}} | + | {{Pro}}50% faster deploy and holster speed.<br> |
| − | |||
| − | |||
{{Pro}}[[Critical hits|Crits]] whenever it would normally [[Critical hits#Mini-Crits|mini-crit]].<br> | {{Pro}}[[Critical hits|Crits]] whenever it would normally [[Critical hits#Mini-Crits|mini-crit]].<br> | ||
| − | {{ | + | {{Pro}}On kill: 100% chance to inflict critical hits for 5 seconds.<br> |
| + | {{Pro}}This weapon reloads its entire clip at once.<br> | ||
{{Con}}19% damage penalty.<br> | {{Con}}19% damage penalty.<br> | ||
| − | {{Con}}50% | + | {{Con}}50% longer reload time.<br> |
| + | {{Con}}Critical damage is affected by range.<br> | ||
| + | {{Con}}If one shot is unused before reloading, it is lost.<br/> | ||
{{Con}}Hype is disabled.<br> | {{Con}}Hype is disabled.<br> | ||
| − | |||
|- | |- | ||
| align="center" | [[File:Backpack Baby Face's Blaster.png|135px]]<br> | | align="center" | [[File:Backpack Baby Face's Blaster.png|135px]]<br> | ||
| Line 130: | Line 133: | ||
| | | | ||
{{Pro}}On hit: builds Boost.<br/> | {{Pro}}On hit: builds Boost.<br/> | ||
| + | {{Pro}}5% damage bonus.<br/> | ||
| + | {{Pro}}65% shorter reload time.<br/> | ||
{{Pro}}60% faster firing speed.<br/> | {{Pro}}60% faster firing speed.<br/> | ||
| − | + | {{Pro}}25% tighter pellet spread<br/> | |
| − | + | {{Pro}}Disabled fall damage on wearer.<br/> | |
| − | {{Pro}}25% | + | {{Con}}19.5% slower movement speed on wearer.<br/> |
| − | {{Pro}} | ||
| − | {{Con}}19.5% slower | ||
{{Con}}Boost reduced from 173% to 116%.<br/> | {{Con}}Boost reduced from 173% to 116%.<br/> | ||
| − | {{Con}}Boost reduced on air | + | {{Con}}Boost reduced on air jumps.<br/> |
{{Con}}Boost reduced when hit.<br/> | {{Con}}Boost reduced when hit.<br/> | ||
|- | |- | ||
| Line 146: | Line 149: | ||
{{Pro}}Minicrits targets when fired at their back from close range.<br> | {{Pro}}Minicrits targets when fired at their back from close range.<br> | ||
{{Con}}34% smaller clip size.<br/> | {{Con}}34% smaller clip size.<br/> | ||
| + | {{Con}}20% wider pellet spread.<br/> | ||
{{Con}}No random critical hits.<br/> | {{Con}}No random critical hits.<br/> | ||
| − | |||
| | | | ||
| − | {{Pro}}100% larger clip | + | {{Pro}}Mini-crits targets when fired at their back from close range.<br/> |
| + | {{Pro}}100% larger clip size.<br/> | ||
| + | {{Pro}}25% damage bonus '''(against players)'''.<br/> | ||
| + | {{Pro}}50% more pellets per shot.<br/> | ||
| + | {{Pro}}60% shorter reload time.<br/> | ||
{{Pro}}55% faster firing speed.<br/> | {{Pro}}55% faster firing speed.<br/> | ||
| − | |||
| − | |||
| − | |||
{{Con}}15% damage penalty.<br/> | {{Con}}15% damage penalty.<br/> | ||
| − | {{Con}} | + | {{Con}}50% wider pellet spread.<br/> |
|- | |- | ||
! colspan="5" class="header" | Scout Secondaries | ! colspan="5" class="header" | Scout Secondaries | ||
| Line 168: | Line 172: | ||
{{Pro}}27.5% damage bonus.<br/> | {{Pro}}27.5% damage bonus.<br/> | ||
{{Pro}}33% faster firing speed.<br/> | {{Pro}}33% faster firing speed.<br/> | ||
| − | {{Pro}}50% | + | {{Pro}}50% tighter bullet spread.<br/> |
| − | {{Con}}50% | + | {{Con}}50% longer reload time.<br/> |
|- | |- | ||
| align="center" | [[File:Backpack Bonk! Atomic Punch.png|135px]]<br> | | align="center" | [[File:Backpack Bonk! Atomic Punch.png|135px]]<br> | ||
| Line 175: | Line 179: | ||
'''[[Bonk! Atomic Punch]]''' | '''[[Bonk! Atomic Punch]]''' | ||
| | | | ||
| − | {{Neutral}} When used, the player is immune to all damage, but is unable to attack | + | {{Neutral}} When used, the player is immune to all damage, but is unable to attack and is still vulnerable to knockback.<br/> |
| − | {{Neutral}} After the effect wears off, the user | + | {{Neutral}} After the effect wears off, the user is subjected to a slowdown effect that lasts for 5 seconds and is based on the damage absorbed; scaling from 25% at low damage to 50% at 200+ damage.<br/> |
| − | {{Neutral}}The invulnerability effect lasts for 8 seconds and | + | {{Neutral}}The invulnerability effect lasts for 8 seconds and has a 22 seconds cooldown before it can be used again.<br/> |
| | | | ||
| − | {{Neutral}} When used, the player is immune to all damage, but is unable to attack | + | {{Neutral}} When used, the player is immune to all damage, but is unable to attack and is still vulnerable to knockback.<br/> |
| − | {{Neutral}} After the effect wears off, the user | + | {{Neutral}} After the effect wears off, the user is subjected to a slowdown effect that lasts for 5 seconds and is based on the damage absorbed; scaling from 25% at low damage to 50% at 200+ damage.<br/> |
| − | {{Neutral}}The invulnerability effect lasts for 8 seconds and | + | {{Neutral}}The invulnerability effect lasts for 8 seconds and has a 30 seconds cooldown before it can be used again.<br/> |
| − | {{Pro}} | + | {{Pro}}On consumption: grants a 20% speed boost to all nearby teammates that lasts for 8 seconds.. <br/> |
|- | |- | ||
| align="center" | [[File:Backpack Winger.png|135px]]<br> | | align="center" | [[File:Backpack Winger.png|135px]]<br> | ||
| Line 188: | Line 192: | ||
'''[[Winger]]''' | '''[[Winger]]''' | ||
| | | | ||
| − | {{Pro}}15% | + | {{Pro}}15% damage bonus.<br/> |
| − | {{Pro}} | + | {{Pro}}When weapon is active: 25% higher jump height.<br/> |
{{Con}}60% smaller clip size.<br/> | {{Con}}60% smaller clip size.<br/> | ||
| | | | ||
{{Pro}}100% larger clip size.<br/> | {{Pro}}100% larger clip size.<br/> | ||
| − | {{Pro}}57 | + | {{Pro}}57% damage bonus.<br/> |
{{Pro}}33% faster firing speed.<br/> | {{Pro}}33% faster firing speed.<br/> | ||
| − | {{Pro}}37.5% | + | {{Pro}}37.5% tighter bullet spread.<br/> |
| − | {{Pro}}25% faster deploy | + | {{Pro}}25% faster deploy and holster speed.<br/> |
| − | + | {{Con}}25% longer reload time.<br/> | |
| − | {{ | ||
{{Con}}Disabled extra jump height.<br/> | {{Con}}Disabled extra jump height.<br/> | ||
|- | |- | ||
| Line 209: | Line 212: | ||
{{Con}}25% smaller clip size.<br/> | {{Con}}25% smaller clip size.<br/> | ||
| | | | ||
| + | {{Pro}}On Hit: Gain up to +3 health.<br/> | ||
{{Pro}}200% larger clip size.<br/> | {{Pro}}200% larger clip size.<br/> | ||
{{Pro}}15% damage bonus.<br/> | {{Pro}}15% damage bonus.<br/> | ||
{{Pro}}45% faster firing speed.<br/> | {{Pro}}45% faster firing speed.<br/> | ||
| − | {{Pro}}17% | + | {{Pro}}17% tighter pellet spread.<br/> |
| − | + | {{Con}}50% longer reload time.<br/> | |
| − | {{Con}}50% | ||
|- | |- | ||
| align="center" | [[File:Backpack Mad Milk.png|135px]]<br> | | align="center" | [[File:Backpack Mad Milk.png|135px]]<br> | ||
| Line 229: | Line 232: | ||
{{Pro}}Any damage (except afterburn) done to enemies covered in milk restores 60% of the damage dealt to the attacking player's health.<br/> | {{Pro}}Any damage (except afterburn) done to enemies covered in milk restores 60% of the damage dealt to the attacking player's health.<br/> | ||
{{Pro}}Partially nullifies Cloak on enemy Spies.<br/> | {{Pro}}Partially nullifies Cloak on enemy Spies.<br/> | ||
| − | {{Pro}}Extinguishes | + | {{Pro}}Extinguishes flames on wielder and allied players.<br/> |
{{Pro}}20% decrease in recharge time when you extinguish an allied player.<br/> | {{Pro}}20% decrease in recharge time when you extinguish an allied player.<br/> | ||
| − | {{Neutral}}Has a 20 | + | {{Neutral}}Has a 20 second recharge time.<br/> |
|- | |- | ||
| align="center" | [[File:Backpack Crit-a-Cola.png|135px]]<br> | | align="center" | [[File:Backpack Crit-a-Cola.png|135px]]<br> | ||
| Line 237: | Line 240: | ||
'''[[Crit-a-Cola]]''' | '''[[Crit-a-Cola]]''' | ||
| | | | ||
| − | {{Neutral}} | + | {{Neutral}}When consumed, user receives the following effects:<br/> |
:{{Pro}}Guaranteed Mini-Crits.<br/> | :{{Pro}}Guaranteed Mini-Crits.<br/> | ||
:{{Con}}Making any attack while under the effect causes a 5-second Marked-For-Death debuff.<br/> | :{{Con}}Making any attack while under the effect causes a 5-second Marked-For-Death debuff.<br/> | ||
{{Neutral}}The mini-crit boost effect lasts for 8 seconds and then has to recharge for about 22 seconds in order to be used again.<br/> | {{Neutral}}The mini-crit boost effect lasts for 8 seconds and then has to recharge for about 22 seconds in order to be used again.<br/> | ||
| | | | ||
| − | {{Neutral}} | + | {{Neutral}}When consumed, user receives the following effects:<br/> |
:{{Pro}}Guaranteed Mini-Crits.<br/> | :{{Pro}}Guaranteed Mini-Crits.<br/> | ||
:{{Con}}Making any attack while under the effect causes a 5-second Marked-For-Death debuff.<br/> | :{{Con}}Making any attack while under the effect causes a 5-second Marked-For-Death debuff.<br/> | ||
| − | {{Neutral}}The mini-crit boost effect lasts for 8 seconds and then has to recharge for about | + | {{Neutral}}The mini-crit boost effect lasts for 8 seconds and then has to recharge for about 15 seconds in order to be used again.<br/> |
| − | {{Pro}}100% faster holster | + | {{Pro}}100% faster holster and deploy speed. |
| − | |||
|- | |- | ||
| align="center" | [[File:Backpack Flying Guillotine.png|135px]]<br> | | align="center" | [[File:Backpack Flying Guillotine.png|135px]]<br> | ||
| Line 254: | Line 256: | ||
| | | | ||
{{Neutral}}Can be thrown to damage enemies. Recharges after 6 seconds.<br/> | {{Neutral}}Can be thrown to damage enemies. Recharges after 6 seconds.<br/> | ||
| − | {{Pro}}On hit: | + | {{Pro}}On hit: inflicts bleed for 8 seconds and deals 50 damage.<br/> |
| − | {{Pro}}Long-distance hit reduces | + | {{Pro}}Long-distance hit reduces recharge time by 1.5 seconds.<br/> |
{{Con}}No random Critical Hits.<br/> | {{Con}}No random Critical Hits.<br/> | ||
{{Con}}Cannot be picked up after being thrown.<br/> | {{Con}}Cannot be picked up after being thrown.<br/> | ||
| Line 261: | Line 263: | ||
{{Neutral}}Can be thrown to damage enemies and mark zombies for death. Recharges after 6 seconds.<br/> | {{Neutral}}Can be thrown to damage enemies and mark zombies for death. Recharges after 6 seconds.<br/> | ||
{{Pro}}On hit: one target at a time is marked for death, causing all damage taken to be mini-crits for 15 seconds.<br/> | {{Pro}}On hit: one target at a time is marked for death, causing all damage taken to be mini-crits for 15 seconds.<br/> | ||
| − | {{Pro}}On hit: | + | {{Pro}}On hit: inflicts bleed for 8 seconds and deals 111 damage.<br/> |
| − | {{Pro}}Long-distance hit reduces | + | {{Pro}}Long-distance hit reduces recharge time by 1.5 second.<br/> |
| + | {{Pro}}100% bleed damage bonus.<br/> | ||
{{Con}}Cannot be picked up after being thrown.<br/> | {{Con}}Cannot be picked up after being thrown.<br/> | ||
|- | |- | ||
| Line 279: | Line 282: | ||
'''[[Sandman]]''' | '''[[Sandman]]''' | ||
| | | | ||
| − | {{Pro}}Alt Fire: Launches a baseball that slows the enemy between 1–7 seconds, depending on distance. The baseball | + | {{Pro}}Alt Fire: Launches a baseball that slows the enemy between 1–7 seconds, depending on distance. The baseball recharges over 10 seconds, can be picked up from the ground after launch, or can be replenished from a resupply cabinet.<br> |
| − | {{Con}} | + | {{Con}}-15 max health on wearer.<br> |
| | | | ||
| − | {{Pro}}Alt Fire: Launches a baseball that slows the enemy | + | {{Pro}}Alt Fire: Launches a baseball that slows the enemy between 1–7 seconds, depending on distance. The baseball recharges over 10 seconds, can be picked up from the ground after launch, or can be replenished from a resupply cabinet.<br> |
| − | {{Pro}} +2 max balls (3 total balls).<br> | + | {{Pro}} +2 max balls on wearer (3 total balls).<br> |
| − | {{Con}} | + | {{Con}}-15 max health on wearer.<br> |
{{Con}}100% slower swing speed.<br> | {{Con}}100% slower swing speed.<br> | ||
{{Con}} Each ball recharges one after the other (not all at the same time).<br> | {{Con}} Each ball recharges one after the other (not all at the same time).<br> | ||
| Line 292: | Line 295: | ||
'''[[Atomizer]]''' | '''[[Atomizer]]''' | ||
| | | | ||
| − | {{Pro}} | + | {{Pro}}When weapon is active: +1 extra air jump on wearer.<br> |
| − | {{Pro}} | + | {{Pro}}Guaranteed mini crits while the user is airborne.<br> |
| − | {{Con}}15% | + | {{Con}}15% damage penalty.<br> |
| − | {{Con}}50% deploy | + | {{Con}}50% slower deploy speed.<br> |
| | | | ||
{{Neutral}}When weapon is active:<br> | {{Neutral}}When weapon is active:<br> | ||
| − | :{{Pro}} | + | :{{Pro}}3% faster movement speed on wearer.<br> |
| − | :{{Con}} | + | :{{Con}}Up to -3 health drained per second.<br> |
| − | {{Pro}} | + | {{Pro}}Guaranteed mini crits while the user is airborne.<br> |
| − | {{Con}} | + | {{Con}}15% damage penalty '''against players'''<br> |
| − | {{Con}} | + | {{Con}}100% slower swing speed.<br> |
{{Con}}Does not grant an extra jump while deployed<br> | {{Con}}Does not grant an extra jump while deployed<br> | ||
|- | |- | ||
| Line 309: | Line 312: | ||
'''[[Sun-on-a-Stick]]''' | '''[[Sun-on-a-Stick]]''' | ||
| | | | ||
| − | {{Pro}} | + | {{Pro}}Guaranteed crits on burning players.<br> |
| − | {{Pro}} | + | {{Pro}}When weapon is active: lowers fire damage vulnerability by 25% on wearer.<br> |
| − | {{Con}}25% | + | {{Con}}25% damage penalty.<br> |
| | | | ||
| − | {{Pro}}20% faster | + | {{Pro}}20% faster universal deploy and holster speed on wearer.<br> |
| − | {{Con}}100% | + | {{Con}}100% damage penalty.<br> |
|- | |- | ||
| align="center" | [[File:Backpack Wrap Assassin.png|135px]]<br> | | align="center" | [[File:Backpack Wrap Assassin.png|135px]]<br> | ||
| Line 320: | Line 323: | ||
'''[[Wrap Assassin]]''' | '''[[Wrap Assassin]]''' | ||
| | | | ||
| − | {{Pro}}Alt-Fire: Launches a festive ornament that shatters causing bleeding on direct hit and explodes hurting everyone close to the explosion. The Bauble | + | {{Pro}}Alt-Fire: Launches a festive ornament that shatters causing bleeding on direct hit and explodes hurting everyone close to the explosion. The Bauble recharges over 7.5 seconds.<br> |
| − | {{Pro}} | + | {{Pro}}Guaranteed crits on long range hits.<br> |
| + | {{Con}}65% damage penalty.<br> | ||
{{Con}}25% increase in ball recharge rate.<br> | {{Con}}25% increase in ball recharge rate.<br> | ||
| − | |||
| | | | ||
| − | {{Pro}}Alt-Fire: Launches a festive ornament that shatters causing bleeding | + | {{Pro}}Alt-Fire: Launches a festive ornament that shatters causing bleeding on direct hit and explodes hurting everyone close to the explosion. The Bauble recharges over 15 seconds.<br> |
| − | {{Pro}} | + | {{Pro}} On direct hit: decreases enemy movement speed by 40% for 1.5 seconds.<br> |
| − | {{Pro}}+1 max ball (2 total balls).<br> | + | {{Pro}}+1 max ball on wearer (2 total balls).<br> |
| − | {{ | + | {{Pro}}Guaranteed crits on long range hits.<br> |
| − | + | {{Con}}75% damage penalty.<br> | |
| + | {{Con}}100% slower swing speed.<br> | ||
| + | {{Con}}50% decrease in ball recharge rate.<br> | ||
| + | {{Con}}When weapon is active: 3% slower movement speed on wearer.<br> | ||
{{Con}} Each ball recharges one after the other (not all at the same time).<br> | {{Con}} Each ball recharges one after the other (not all at the same time).<br> | ||
| − | |||
| − | |||
| − | |||
|- | |- | ||
| align="center" | [[File:Backpack Fan O'War.png|135px]]<br> | | align="center" | [[File:Backpack Fan O'War.png|135px]]<br> | ||
<small>[[Melee]]</small><br> | <small>[[Melee]]</small><br> | ||
| − | '''[[Fan | + | '''[[Fan O'War]]''' |
| | | | ||
{{Pro}}On hit: one target at a time is marked for death, causing all damage taken to be mini-crits for 15 seconds.<br> | {{Pro}}On hit: one target at a time is marked for death, causing all damage taken to be mini-crits for 15 seconds.<br> | ||
{{Pro}}Crits whenever it would normally mini-crit.<br> | {{Pro}}Crits whenever it would normally mini-crit.<br> | ||
| − | {{Con}} | + | {{Con}}75% damage penalty.<br> |
| | | | ||
{{Neutral}} No changes. | {{Neutral}} No changes. | ||
| Line 350: | Line 353: | ||
| | | | ||
{{Pro}}A small health pack is dropped when the player kills an enemy, regardless of what weapon the player was using in order to kill the enemy.<br> | {{Pro}}A small health pack is dropped when the player kills an enemy, regardless of what weapon the player was using in order to kill the enemy.<br> | ||
| − | {{Con}}25% | + | {{Con}}Raises explosive damage vulnerability by 25% on wearer.<br> |
| | | | ||
| − | {{ | + | {{Pro}}When weapon is active: Up to +3 health regenerated per second.<br> |
| − | + | {{Pro}}On hit: restores up to +50 health. <br> | |
| − | {{Pro}}On hit: | ||
{{Pro}}A small health pack is dropped when the player kills a zombie with the Candy Cane.<br> | {{Pro}}A small health pack is dropped when the player kills a zombie with the Candy Cane.<br> | ||
| − | {{Con}}25% | + | {{Con}}Raises explosive damage vulnerability by 25% on wearer.<br> |
| − | {{Con}} | + | {{Con}}User takes mini-crits when weapon is active, and for 3 seconds after switching away.<br> |
|- | |- | ||
| align="center" | [[File:Backpack Boston Basher.png|135px]]<br> | | align="center" | [[File:Backpack Boston Basher.png|135px]]<br> | ||
| Line 363: | Line 365: | ||
'''[[Boston Basher]]''' | '''[[Boston Basher]]''' | ||
| | | | ||
| − | {{Pro}}On hit: | + | {{Pro}}On hit: inflicts bleed to enemy for 5 seconds.<br> |
| − | {{Con}}On miss | + | {{Con}}On miss: inflicts self-damage and bleed to the wearer for 5 seconds.<br> |
| | | | ||
| − | {{Pro}}On hit: | + | {{Pro}}On hit: inflicts bleed to enemy for 5 seconds.<br> |
| − | {{Con}}25% | + | {{Con}}25% damage penalty.<br> |
|} | |} | ||
| Line 384: | Line 386: | ||
{{Neutral}} Stock weapon. | {{Neutral}} Stock weapon. | ||
| | | | ||
| − | {{Pro}} | + | {{Pro}}171% damage bonus.<br> |
| − | {{Pro}} | + | {{Pro}}25% shorter reload time.<br> |
| − | {{Con}}50% | + | {{Con}}50% damage penalty '''against players'''.<br> |
{{Con}}Disabled self-knockback<br> | {{Con}}Disabled self-knockback<br> | ||
|- | |- | ||
| Line 393: | Line 395: | ||
'''[[Direct Hit]]''' | '''[[Direct Hit]]''' | ||
| | | | ||
| − | {{Pro}} | + | {{Pro}}25% damage penalty.<br> |
| − | {{Pro}} | + | {{Pro}}80% faster projectile speed.<br> |
{{Pro}}Guarantees mini-crit damage on opponents sent airborne by an explosion, [[Grappling Hook|grapple hook]], or enemy attack.<br> | {{Pro}}Guarantees mini-crit damage on opponents sent airborne by an explosion, [[Grappling Hook|grapple hook]], or enemy attack.<br> | ||
{{Con}}70% smaller splash damage radius.<br> | {{Con}}70% smaller splash damage radius.<br> | ||
| | | | ||
| − | {{Pro}} | + | {{Pro}}204% damage bonus.<br> |
| − | {{Pro}} | + | {{Pro}}100% faster projectile speed.<br> |
| − | {{Pro}} | + | {{Pro}}25% shorter reload time.<br> |
{{Pro}}Guarantees mini-crit damage on opponents sent airborne by an explosion, grapple hook, or enemy attack.<br> | {{Pro}}Guarantees mini-crit damage on opponents sent airborne by an explosion, grapple hook, or enemy attack.<br> | ||
{{Pro}}Applies a strong downwards force on hit.<br> | {{Pro}}Applies a strong downwards force on hit.<br> | ||
| − | {{Con}}25% | + | {{Con}}-25 max health on wearer.<br> |
| + | {{Con}}25% damage penalty '''against players'''.<br> | ||
{{Con}}70% smaller splash damage radius.<br> | {{Con}}70% smaller splash damage radius.<br> | ||
| − | {{Con}} | + | {{Con}}100% more self damage from blast jumping.<br> |
| − | |||
{{Con}}Disabled self-knockback.<br> | {{Con}}Disabled self-knockback.<br> | ||
|- | |- | ||
| Line 413: | Line 415: | ||
'''[[Black Box]]''' | '''[[Black Box]]''' | ||
| | | | ||
| − | On hit: restores up to 20 health | + | {{Pro}}On hit: restores up to +20 health.<br> |
| − | {{Con}} | + | {{Con}}25% smaller clip size.<br> |
| | | | ||
| − | {{Pro}}25% | + | {{Pro}}144% damage bonus.<br> |
| + | {{Pro}}Up to 20% damage bonus as rage increases.<br> | ||
| + | {{Pro}}25% shorter reload time.<br> | ||
| + | {{Pro}}On hit: restores up to +20 health.<br> | ||
{{Pro}}34% longer banner duration.<br> | {{Pro}}34% longer banner duration.<br> | ||
| − | {{ | + | {{Con}}25% smaller clip size.<br> |
| − | + | {{Con}}50% damage penalty '''against players'''.<br> | |
| − | |||
| − | {{Con}}50% | ||
{{Con}}15% slower firing speed.<br> | {{Con}}15% slower firing speed.<br> | ||
| − | |||
{{Con}}Disabled self-knockback.<br> | {{Con}}Disabled self-knockback.<br> | ||
|- | |- | ||
| Line 432: | Line 434: | ||
{{Pro}}+200% max primary ammo on wearer.<br> | {{Pro}}+200% max primary ammo on wearer.<br> | ||
{{Pro}} No self inflicted blast damage taken.<br> | {{Pro}} No self inflicted blast damage taken.<br> | ||
| − | {{Con}} | + | {{Con}} 100% damage penalty.<br> |
{{Con}} No random critical hits.<br> | {{Con}} No random critical hits.<br> | ||
{{Con}} Unable to carry the intelligence and the PASS Time JACK.<br> | {{Con}} Unable to carry the intelligence and the PASS Time JACK.<br> | ||
| | | | ||
| + | {{Pro}}1011% damage bonus.<br> | ||
{{Pro}}25% larger splash damage radius.<br> | {{Pro}}25% larger splash damage radius.<br> | ||
| − | + | {{Pro}}On direct hit: decreases enemy movement speed by 40% for 3 seconds.<br> | |
| − | {{Pro}}On | ||
| − | |||
| − | |||
{{Con}}75% smaller clip size.<br> | {{Con}}75% smaller clip size.<br> | ||
| − | + | {{Con}}50% damage penalty '''against players'''.<br> | |
| − | |||
| − | |||
{{Con}}50% slower projectile speed.<br> | {{Con}}50% slower projectile speed.<br> | ||
| + | {{Con}}63% longer reload time.<br> | ||
| + | {{Con}}337% slower firing speed.<br> | ||
{{Con}}150% slower deploy and holster speed.<br> | {{Con}}150% slower deploy and holster speed.<br> | ||
| − | {{Con}} | + | {{Con}}When weapon is active: 20% slower movement speed on wearer.<br> |
| + | {{Con}}200% more self damage from blast jumping.<br> | ||
{{Con}}Disabled self-knockback.<br> | {{Con}}Disabled self-knockback.<br> | ||
|- | |- | ||
| Line 454: | Line 455: | ||
'''[[Liberty Launcher]]''' | '''[[Liberty Launcher]]''' | ||
| | | | ||
| − | + | {{Pro}}25% larger clip size.<br> | |
| − | {{Pro}} | + | {{Pro}}40% faster projectile speed.<br> |
| − | {{Pro}} | + | {{Pro}}25% less self damage from blast jumping.<br> |
| − | {{Con}} | + | {{Con}}25% damage penalty.<br> |
| | | | ||
{{Pro}}25% larger clip size.<br> | {{Pro}}25% larger clip size.<br> | ||
| + | {{Pro}}204% damage bonus.<br> | ||
{{Pro}}40% faster projectile speed.<br> | {{Pro}}40% faster projectile speed.<br> | ||
| − | {{Pro}} | + | {{Pro}}25% less self damage from blast jumping.<br> |
{{Pro}}1 point of [[Upgrade Station#Primary|Rocket Specialist]].<br> | {{Pro}}1 point of [[Upgrade Station#Primary|Rocket Specialist]].<br> | ||
:{{Pro}}15% faster projectile speed.<br> | :{{Pro}}15% faster projectile speed.<br> | ||
| − | :{{Pro}}On direct hits:rocket does maximum damage, stuns target, and blast radius increased | + | :{{Pro}}On direct hits:rocket does maximum damage, stuns target, and blast radius increased by 15%.<br> |
| − | {{ | + | {{Con}}50% damage penalty '''against players'''.<br> |
| − | {{Con}} | + | {{Con}}25% longer reload time.<br> |
{{Con}}15% slower firing speed.<br> | {{Con}}15% slower firing speed.<br> | ||
| − | |||
|- | |- | ||
| align="center" | [[File:Backpack Cow Mangler 5000.png|135px]]<br> | | align="center" | [[File:Backpack Cow Mangler 5000.png|135px]]<br> | ||
| Line 474: | Line 475: | ||
'''[[Cow Mangler 5000]]''' | '''[[Cow Mangler 5000]]''' | ||
| | | | ||
| − | {{ | + | {{Pro}}Does not use ammo (replaced with an ammo meter).<br> |
| − | {{Con}} | + | {{Con}}80% damage penalty against buildings.<br> |
| − | + | {{Con}}Mini-crits whenever it would normally crit.<br> | |
| − | {{Con}} | + | {{Con}}No random critical hits.<br> |
{{Neutral}}Secondary fire is a charged shot that:<br> | {{Neutral}}Secondary fire is a charged shot that:<br> | ||
| − | :{{Pro}} | + | :{{Pro}} Guarantees mini-crits on players<br> |
:{{Pro}} Causes enemies to suffer afterburn for 6 seconds.<br> | :{{Pro}} Causes enemies to suffer afterburn for 6 seconds.<br> | ||
:{{Pro}} Disables buildings for 4 seconds.<br> | :{{Pro}} Disables buildings for 4 seconds.<br> | ||
| Line 485: | Line 486: | ||
:{{Con}} Cannot be used unless ammo meter is full.<br> | :{{Con}} Cannot be used unless ammo meter is full.<br> | ||
| | | | ||
| − | {{ | + | {{Pro}}155% damage bonus.<br> |
| + | {{Pro}}Up to 20% damage bonus as rage increases.<br> | ||
| + | {{Pro}}Does not use ammo (replaced with an ammo meter).<br> | ||
{{Pro}}67% longer banner duration.<br> | {{Pro}}67% longer banner duration.<br> | ||
| − | |||
| − | |||
{{Neutral}}Secondary fire is a charged shot that:<br> | {{Neutral}}Secondary fire is a charged shot that:<br> | ||
| − | :{{Pro}} | + | :{{Pro}} Guarantees mini-crits on players<br> |
:{{Pro}} Causes enemies to suffer afterburn for 6 seconds.<br> | :{{Pro}} Causes enemies to suffer afterburn for 6 seconds.<br> | ||
:{{Pro}} Disables buildings for 4 seconds.<br> | :{{Pro}} Disables buildings for 4 seconds.<br> | ||
:{{Con}} Empties entire ammo meter.<br> | :{{Con}} Empties entire ammo meter.<br> | ||
:{{Con}} Cannot be used unless ammo meter is full.<br> | :{{Con}} Cannot be used unless ammo meter is full.<br> | ||
| − | {{Con}}50% | + | {{Con}}50% damage penalty '''against players'''.<br> |
{{Con}}15% slower firing speed.<br> | {{Con}}15% slower firing speed.<br> | ||
| − | {{Con}} | + | {{Con}}Mini-crits whenever it would normally crit.<br> |
{{Con}}Disabled self-knockback.<br> | {{Con}}Disabled self-knockback.<br> | ||
|- | |- | ||
| Line 504: | Line 505: | ||
'''[[Beggar's Bazooka]]''' | '''[[Beggar's Bazooka]]''' | ||
| | | | ||
| − | Hold Fire to load up to three rockets.<br> | + | {{Neutral}}Hold Fire to load up to three rockets.<br> |
| − | :{{Pro}} Release Fire to unleash the barrage at 223% | + | :{{Pro}} Release Fire to unleash the barrage at 223% faster firing speed.<br> |
:{{Con}} +3 degrees random projectile deviation.<br> | :{{Con}} +3 degrees random projectile deviation.<br> | ||
:{{Con}} Overloading the chamber will cause a misfire.<br> | :{{Con}} Overloading the chamber will cause a misfire.<br> | ||
| − | + | {{Con}}20% smaller splash damage radius.<br> | |
| − | + | {{Con}}30% longer reload time.<br> | |
| − | {{Con}} | + | {{Con}} Cannot collect ammo from dispensers while active.<br> |
| | | | ||
| + | {{Pro}}100% damage bonus.<br> | ||
{{Neutral}}Hold Fire to load up to three rockets.<br> | {{Neutral}}Hold Fire to load up to three rockets.<br> | ||
| − | :{{Pro}} Release Fire to unleash the barrage at 180.7% | + | :{{Pro}} Release Fire to unleash the barrage at 180.7% faster firing speed.<br> |
:{{Con}} +1.5 degrees random projectile deviation.<br> | :{{Con}} +1.5 degrees random projectile deviation.<br> | ||
:{{Con}} Overloading the chamber will cause a misfire.<br> | :{{Con}} Overloading the chamber will cause a misfire.<br> | ||
| − | + | {{Con}}50% damage penalty '''against players'''<br> | |
| − | + | {{Con}}20% smaller splash damage radius.<br> | |
| − | + | {{Con}}30% longer reload time.<br> | |
| − | |||
| − | {{Con}}30% | ||
{{Con}}15% slower firing speed,<br> | {{Con}}15% slower firing speed,<br> | ||
| − | {{Con}} | + | {{Con}}Cannot collect ammo from dispensers while active.<br> |
{{Con}}Disabled self-knockback.<br> | {{Con}}Disabled self-knockback.<br> | ||
|- | |- | ||
| Line 529: | Line 529: | ||
'''[[Air Strike]]''' | '''[[Air Strike]]''' | ||
| | | | ||
| − | {{Pro}} | + | {{Pro}}185% faster firing speed while blast jumping.<br> |
| − | {{Pro}} | + | {{Pro}}On kill: +1 larger clip size ( Up to 4).<br> |
| − | {{Pro}} | + | {{Pro}}15% less self-damage from blast jumping.<br> |
{{Con}}15% damage penalty.<br> | {{Con}}15% damage penalty.<br> | ||
{{Con}}10% smaller splash damage radius radius.<br> | {{Con}}10% smaller splash damage radius radius.<br> | ||
{{Con}}20% smaller splash damage radius while blast jumping.<br> | {{Con}}20% smaller splash damage radius while blast jumping.<br> | ||
| | | | ||
| − | {{Pro}}134% | + | {{Pro}}134% damage bonus.<br> |
| − | |||
{{Pro}}40% faster projectile speed.<br> | {{Pro}}40% faster projectile speed.<br> | ||
| − | {{Pro}} | + | {{Pro}}On kill: +1 larger clip size ( Up to 4).<br> |
| + | {{Pro}}15% less self-damage from blast jumping.<br> | ||
{{Pro}}1 point of [[Upgrade Station#Primary|Rocket Specialist]].<br> | {{Pro}}1 point of [[Upgrade Station#Primary|Rocket Specialist]].<br> | ||
:{{Pro}}15% faster projectile speed.<br> | :{{Pro}}15% faster projectile speed.<br> | ||
:{{Pro}}On direct hits:rocket does maximum damage, stuns target, and blast radius increased +15%.<br> | :{{Pro}}On direct hits:rocket does maximum damage, stuns target, and blast radius increased +15%.<br> | ||
{{Neutral}}Hold Fire to load up to four rockets.<br> | {{Neutral}}Hold Fire to load up to four rockets.<br> | ||
| − | :{{Pro}} Release Fire to unleash the barrage at | + | :{{Pro}} Release Fire to unleash the barrage at 180% increased fire rate.<br> |
:{{Con}} +1 degrees random projectile deviation.<br> | :{{Con}} +1 degrees random projectile deviation.<br> | ||
| − | + | {{Con}}50% damage penalty '''against players'''.<br> | |
| − | + | {{Con}}50% longer reload time.<br> | |
| − | {{Con}} | + | {{Con}}10% smaller splash damage radius.<br> |
| − | {{Con}} | + | {{Con}}Cannot collect ammo from dispensers while active.<br> |
{{Con}}Disabled self-knockback.<br> | {{Con}}Disabled self-knockback.<br> | ||
|- | |- | ||
| Line 561: | Line 561: | ||
| | | | ||
{{Pro}}200% larger clip size.<br> | {{Pro}}200% larger clip size.<br> | ||
| + | {{Pro}}20% damage bonus.<br> | ||
| + | {{Pro}}60% shorter reload time.<br> | ||
{{Pro}}60% faster firing speed.<br> | {{Pro}}60% faster firing speed.<br> | ||
| − | |||
| − | |||
|- | |- | ||
| align="center" | [[File:Backpack Buff Banner.png|135px]]<br> | | align="center" | [[File:Backpack Buff Banner.png|135px]]<br> | ||
| Line 570: | Line 570: | ||
| | | | ||
{{Neutral}}Charges a rage meter with damage dealt — takes 600 damage to fully charge rage meter.<br> | {{Neutral}}Charges a rage meter with damage dealt — takes 600 damage to fully charge rage meter.<br> | ||
| − | {{Pro}} | + | {{Pro}}While the buff is active, for 10 seconds the user and nearby teammates receive: guaranteed Mini-Crits.<br> |
| | | | ||
{{Neutral}}Charges a rage meter with damage dealt — takes 600 damage to fully charge rage meter.<br> | {{Neutral}}Charges a rage meter with damage dealt — takes 600 damage to fully charge rage meter.<br> | ||
| − | {{Pro}} | + | {{Pro}}While the buff is active, for 15 seconds the user and nearby teammates receive: guaranteed Mini-Crits.<br> |
{{Pro}}50% longer banner duration.<br> | {{Pro}}50% longer banner duration.<br> | ||
| − | {{Con}} | + | {{Con}}15% longer banner activation time.<br> |
|- | |- | ||
| align="center" | [[File:Backpack Battalion's Backup.png|135px]]<br> | | align="center" | [[File:Backpack Battalion's Backup.png|135px]]<br> | ||
| Line 582: | Line 582: | ||
| | | | ||
{{Neutral}} Charges a rage meter with damage dealt — takes 600 damage to fully charge rage meter.<br> | {{Neutral}} Charges a rage meter with damage dealt — takes 600 damage to fully charge rage meter.<br> | ||
| − | {{Pro}} | + | {{Pro}}While the buff is active, for 10 seconds the user and nearby teammates receive:<br> |
:{{Pro}}Immunity to Critical damage.<br> | :{{Pro}}Immunity to Critical damage.<br> | ||
| − | :{{Pro}} | + | :{{Pro}}Lowers damage vulnerability by 35%.<br> |
| − | :{{Pro}} | + | :{{Pro}}Lowers Sentry Gun damage vulnerability by 50% (does not stack with previous resistance).<br> |
| − | {{Pro}} | + | {{Pro}}+20 max health on wearer.<br> |
| | | | ||
{{Neutral}} Charges a rage meter with damage dealt — takes 600 damage to fully charge rage meter.<br> | {{Neutral}} Charges a rage meter with damage dealt — takes 600 damage to fully charge rage meter.<br> | ||
| − | {{Pro}} | + | {{Pro}}While the buff is active, for 15 seconds the user and nearby teammates receive:<br> |
:{{Pro}}Immunity to Critical damage.<br> | :{{Pro}}Immunity to Critical damage.<br> | ||
| − | :{{Pro}} | + | :{{Pro}}Lowers damage vulnerability by 35%.<br> |
| − | :{{Pro}} | + | :{{Pro}}Lowers Sentry Gun damage vulnerability by 50% (does not stack with previous resistance).<br> |
| − | {{Pro}} | + | {{Pro}}+20 max health on wearer.<br> |
{{Pro}}50% longer banner duration.<br> | {{Pro}}50% longer banner duration.<br> | ||
|- | |- | ||
| Line 600: | Line 600: | ||
'''[[Concheror]]''' | '''[[Concheror]]''' | ||
| | | | ||
| − | {{Neutral}} Charges its rage meter with damage dealt — takes 480 damage to fully charge rage meter.<br> | + | {{Neutral}}Charges its rage meter with damage dealt — takes 480 damage to fully charge rage meter.<br> |
| − | {{Pro}} While the buff is active, for 10 seconds the user and nearby teammates:<br> | + | {{Pro}}While the buff is active, for 10 seconds the user and nearby teammates:<br> |
| − | :{{Pro}} | + | :{{Pro}}Between 25% and 40% faster movement speed.<br> |
| − | :{{Pro}} | + | :{{Pro}}On hit: restores 35% of the damage dealt as health.<br> |
| − | {{Pro}} | + | {{Pro}}Up to +4 health regenerated per second passively.<br> |
| | | | ||
| − | {{Neutral}} Charges its rage meter with damage dealt — takes 480 damage to fully charge rage meter.<br> | + | {{Neutral}}Charges its rage meter with damage dealt — takes 480 damage to fully charge rage meter.<br> |
| − | {{Pro}} While the buff is active, for | + | {{Pro}} While the buff is active, for 15 seconds the user and nearby teammates receive:<br> |
| − | :{{Pro}} | + | :{{Pro}}Between 25% and 40% faster movement speed.<br> |
| − | :{{Pro}} | + | :{{Pro}}On hit: restores 35% of the damage dealt as health.<br> |
| − | {{Pro}} | + | {{Pro}}Up to +4 health regenerated per second passively.<br> |
{{Pro}}50% longer banner duration.<br> | {{Pro}}50% longer banner duration.<br> | ||
| − | {{Con}} | + | {{Con}}15% longer banner activation time.<br> |
|- | |- | ||
| align="center" | [[File:Backpack Mantreads.png|135px]]<br> | | align="center" | [[File:Backpack Mantreads.png|135px]]<br> | ||
| Line 618: | Line 618: | ||
'''[[Mantreads]]''' | '''[[Mantreads]]''' | ||
| | | | ||
| − | {{Pro}} | + | {{Pro}} 75% reduction in push force taken from enemy damage.<br> |
{{Pro}} Deals 3x falling damage to the player you land on.<br> | {{Pro}} Deals 3x falling damage to the player you land on.<br> | ||
| − | {{Pro}} | + | {{Pro}} Lowers airblast vulnerability by 75%<br> |
| − | {{Pro}} | + | {{Pro}} 200% increased air control when blast jumping.<br> |
{{Neutral}} Grants its abilities passively, does not need to be selected first in order to apply the ability.<br> | {{Neutral}} Grants its abilities passively, does not need to be selected first in order to apply the ability.<br> | ||
| | | | ||
| Line 631: | Line 631: | ||
| | | | ||
{{Neutral}} Shoots an electric projectile instead of shotgun pellets.<br> | {{Neutral}} Shoots an electric projectile instead of shotgun pellets.<br> | ||
| + | {{Pro}} Projectiles penetrate players and damage enemies behind them.<br> | ||
{{Pro}} Does not use ammo (replaced with an ammo meter).<br> | {{Pro}} Does not use ammo (replaced with an ammo meter).<br> | ||
| − | |||
{{Pro}} Projectiles cannot be deflected.<br> | {{Pro}} Projectiles cannot be deflected.<br> | ||
| − | {{Con}} | + | {{Con}} 33% smaller clip size.<br> |
| − | {{Con}} | + | {{Con}} 28% slower firing speed.<br> |
| + | {{Con}} 20% damage penalty against buildings.<br> | ||
| | | | ||
{{Neutral}} Shoots an electric projectile instead of shotgun pellets.<br> | {{Neutral}} Shoots an electric projectile instead of shotgun pellets.<br> | ||
| + | {{Pro}}33% larger clip size.<br> | ||
| + | {{Pro}}130% damage bonus '''against players'''.<br> | ||
| + | {{Pro}}35% faster firing speed.<br> | ||
| + | {{Pro}}25% shorter reload time.<br> | ||
| + | {{Pro}} Projectiles penetrate players and damage enemies behind them.<br> | ||
{{Pro}} Does not use ammo (replaced with an ammo meter).<br> | {{Pro}} Does not use ammo (replaced with an ammo meter).<br> | ||
| − | |||
{{Pro}} Projectiles cannot be deflected.<br> | {{Pro}} Projectiles cannot be deflected.<br> | ||
| − | |||
| − | |||
| − | |||
| − | |||
{{Con}} Deals only 20% damage to buildings.<br> | {{Con}} Deals only 20% damage to buildings.<br> | ||
| − | {{Con}} | + | {{Con}} Deals no damage against NPCs.<br> |
|- | |- | ||
| align="center" | [[File:Backpack Reserve Shooter.png|135px]]<br> | | align="center" | [[File:Backpack Reserve Shooter.png|135px]]<br> | ||
| Line 652: | Line 653: | ||
'''[[Reserve Shooter]]''' | '''[[Reserve Shooter]]''' | ||
| | | | ||
| − | {{Pro}} 20% faster | + | {{Pro}}20% faster deploy speed.<br> |
| − | {{Pro}} 15% faster | + | {{Pro}}15% faster holster speed.<br> |
| − | {{Pro}} | + | {{Pro}}Guaranteed mini-crits targets that are blast jumping, knocked back, launched by a Thermal Thruster stomp, or using the grapple hook.<br> |
:{{Neutral}} Mini-crits only take affect within 5 seconds of deploying this weapon.<br> | :{{Neutral}} Mini-crits only take affect within 5 seconds of deploying this weapon.<br> | ||
| − | {{Con}} | + | {{Con}}34% smaller clip size<br> |
| | | | ||
{{Pro}}100% larger clip size.<br> | {{Pro}}100% larger clip size.<br> | ||
| − | {{Pro}} 20% faster | + | {{Pro}}20% damage bonus.<br> |
| + | {{Pro}}60% shorter reload time.<br> | ||
| + | {{Pro}}60% faster firing speed.<br> | ||
| + | {{Pro}}40% tighter pellet spread.<br> | ||
| + | {{Pro}}20% faster deploy speed.<br> | ||
{{Pro}} Mini-crits targets that are blast jumping, knocked back, launched by a Thermal Thruster stomp, or using the grapple hook.<br> | {{Pro}} Mini-crits targets that are blast jumping, knocked back, launched by a Thermal Thruster stomp, or using the grapple hook.<br> | ||
:{{Neutral}} Mini-crits only take affect within 5 seconds of deploying this weapon.<br> | :{{Neutral}} Mini-crits only take affect within 5 seconds of deploying this weapon.<br> | ||
| − | |||
| − | |||
| − | |||
| − | |||
| − | |||
|- | |- | ||
| align="center" | [[File:Backpack Panic Attack.png|135px]]<br> | | align="center" | [[File:Backpack Panic Attack.png|135px]]<br> | ||
| Line 672: | Line 672: | ||
'''[[Panic Attack]]''' | '''[[Panic Attack]]''' | ||
| | | | ||
| − | {{Pro}} | + | {{Pro}}50% more pellets per shot.<br> |
| − | {{Pro}} | + | {{Pro}}50% faster deploy speed.<br> |
| − | {{Pro}} Fires a fixed shot pattern.<br> | + | {{Pro}}Fires a fixed shot pattern.<br> |
| − | {{Con}} | + | {{Con}}20% damage penalty.<br> |
| − | {{Con}} Successive shots become less accurate.<br> | + | {{Con}}Successive shots become less accurate.<br> |
| | | | ||
{{Pro}}200% larger clip size.<br> | {{Pro}}200% larger clip size.<br> | ||
| − | {{Pro}} | + | {{Pro}}25% damage bonus '''against players'''.<br> |
| − | {{Pro}} | + | {{Pro}}50% more pellets per shot.<br> |
| + | {{Pro}}45% shorter reload time<br> | ||
{{Pro}}80% faster firing speed<br> | {{Pro}}80% faster firing speed<br> | ||
| − | {{Pro}} | + | {{Pro}}50% faster deploy speed.<br> |
| − | + | {{Pro}}Fires a fixed shot pattern.<br> | |
| − | {{Pro}} Fires a fixed shot pattern.<br> | ||
{{Con}}37% damage penalty<br> | {{Con}}37% damage penalty<br> | ||
| − | {{Con}}50% | + | {{Con}}50% wider pellet spread.<br> |
{{Con}} Successive shots become less accurate.<br> | {{Con}} Successive shots become less accurate.<br> | ||
|- | |- | ||
| Line 693: | Line 693: | ||
'''[[Gunboats]]''' | '''[[Gunboats]]''' | ||
| | | | ||
| − | {{Pro}} | + | {{Pro}}Lowers explosive self-damage vulnerability by 60%<br> |
:{{Neutral}} This doesn't affect fall damage.<br> | :{{Neutral}} This doesn't affect fall damage.<br> | ||
:{{Neutral}} Grants its abilities passively, does not need to be selected first in order to apply the ability<br>. | :{{Neutral}} Grants its abilities passively, does not need to be selected first in order to apply the ability<br>. | ||
| | | | ||
| − | {{Pro}} | + | {{Pro}}Lowers explosive self-damage vulnerability by 60%<br> |
:{{Neutral}} This doesn't affect fall damage.<br> | :{{Neutral}} This doesn't affect fall damage.<br> | ||
:{{Neutral}} Grants its abilities passively, does not need to be selected first in order to apply the ability.<br> | :{{Neutral}} Grants its abilities passively, does not need to be selected first in order to apply the ability.<br> | ||
| − | {{Pro}} Wearer receives | + | {{Pro}} Wearer receives an unmodified stock shotgun.<br> |
|- | |- | ||
| align="center" | [[File:Backpack B.A.S.E. Jumper.png|135px]]<br> | | align="center" | [[File:Backpack B.A.S.E. Jumper.png|135px]]<br> | ||
| Line 706: | Line 706: | ||
'''[[Base Jumper]]''' | '''[[Base Jumper]]''' | ||
| | | | ||
| − | {{Neutral}} Allows player to activate a parachute whilst midair, slowing their descent.<br> | + | {{Neutral}} Allows player to activate a parachute whilst midair, slowing down their descent.<br> |
| + | {{Pro}}Parachute can be deactivated at any time.<br> | ||
| + | {{Con}}Once deactivated, parachute cannot be activated again until the user has touched the ground. | ||
| | | | ||
{{c|No|Weapon is banned.}}<br> | {{c|No|Weapon is banned.}}<br> | ||
| Line 726: | Line 728: | ||
{{Neutral}} When weapon is active:<br> | {{Neutral}} When weapon is active:<br> | ||
{{Pro}} Damage increase as user's remaining health decreases.<br> | {{Pro}} Damage increase as user's remaining health decreases.<br> | ||
| − | {{Con}} | + | {{Con}} 90% less healing from Medic sources.<br> |
| | | | ||
{{Neutral}} No changes. | {{Neutral}} No changes. | ||
| Line 734: | Line 736: | ||
'''[[Market Gardener]]''' | '''[[Market Gardener]]''' | ||
| | | | ||
| − | {{Pro}} | + | {{Pro}} Guaranteed critical hits while wielder is rocket jumping.<br> |
| − | {{Con}} 20% slower | + | {{Con}} 20% slower swing speed.<br> |
{{Con}} No random critical hits.<br> | {{Con}} No random critical hits.<br> | ||
| | | | ||
| Line 745: | Line 747: | ||
| | | | ||
{{Pro}} Increases user's capture rate by 1 for points and carts.<br> | {{Pro}} Increases user's capture rate by 1 for points and carts.<br> | ||
| − | {{Con}} Raises bullet vulnerability by 10%.<br> | + | {{Con}} Raises bullet damage vulnerability by 10%.<br> |
| | | | ||
{{Pro}} Increases user's capture rate by 1 for points and carts.<br> | {{Pro}} Increases user's capture rate by 1 for points and carts.<br> | ||
| Line 751: | Line 753: | ||
:{{Pro}}10% faster movement speed.<br> | :{{Pro}}10% faster movement speed.<br> | ||
:{{Con}}Raised damage vulnerability by 20%.<br> | :{{Con}}Raised damage vulnerability by 20%.<br> | ||
| − | {{Con}} Raises bullet vulnerability by 10%.<br> | + | {{Con}} Raises bullet damage vulnerability by 10%.<br> |
|- | |- | ||
| align="center" | [[File:Backpack Half-Zatoichi.png|135px]]<br> | | align="center" | [[File:Backpack Half-Zatoichi.png|135px]]<br> | ||
| Line 759: | Line 761: | ||
{{Pro}} 50% longer melee range.<br> | {{Pro}} 50% longer melee range.<br> | ||
{{Pro}} On kill: heals 50% of user's base health.<br> | {{Pro}} On kill: heals 50% of user's base health.<br> | ||
| + | {{Pro}} Returned health can overheal.<br> | ||
| + | {{Con}} 75% slower deploy and holster speed.<br> | ||
| + | {{Con}} This weapon is Honorbound and once drawn will be holstered for -50 HP unless it kills.<br> | ||
{{Con}} No random critical hits.<br> | {{Con}} No random critical hits.<br> | ||
| − | |||
| − | |||
{{Neutral}} A single successful hit will kill an enemy wielding the same weapon.<br> | {{Neutral}} A single successful hit will kill an enemy wielding the same weapon.<br> | ||
| | | | ||
| Line 774: | Line 777: | ||
| | | | ||
{{Pro}} 70% longer melee range.<br> | {{Pro}} 70% longer melee range.<br> | ||
| − | {{Pro}} On | + | {{Pro}} On hitting an ally: boosts player's speed for 3 seconds and boosts ally's speed for 2 seconds.<br> |
| − | {{Con}} | + | {{Con}} 25% damage penalty.<br> |
| | | | ||
{{Pro}} 70% longer melee range.<br> | {{Pro}} 70% longer melee range.<br> | ||
| − | {{Con}}25% slower | + | {{Con}} 25% slower swing speed.<br> |
|- | |- | ||
| align="center" | [[File:Backpack Escape Plan.png|135px]]<br> | | align="center" | [[File:Backpack Escape Plan.png|135px]]<br> | ||
| Line 787: | Line 790: | ||
{{Pro}} Movement speed increase as user's remaining health decreases. (Up to 128%).<br> | {{Pro}} Movement speed increase as user's remaining health decreases. (Up to 128%).<br> | ||
{{Con}} User takes mini-crits when weapon is active, and for 3 seconds after switching away.<br> | {{Con}} User takes mini-crits when weapon is active, and for 3 seconds after switching away.<br> | ||
| − | {{Con}} | + | {{Con}} 90% less healing from Medic sources.<br> |
| | | | ||
{{Neutral}} When weapon is active:<br> | {{Neutral}} When weapon is active:<br> | ||
| Line 793: | Line 796: | ||
{{Con}} 28% slower move speed.<br> | {{Con}} 28% slower move speed.<br> | ||
{{Con}} User takes mini-crits when weapon is active, and for 3 seconds after switching away.<br> | {{Con}} User takes mini-crits when weapon is active, and for 3 seconds after switching away.<br> | ||
| − | {{Con}} | + | {{Con}} 90% less healing from Medic sources.<br> |
|} | |} | ||
| Line 810: | Line 813: | ||
{{Neutral}} Stock weapon<br> | {{Neutral}} Stock weapon<br> | ||
| | | | ||
| + | {{Pro}}On hit:100% chance to slow down target.<br> | ||
| + | {{Con}}50% slower repressurization rate on Alt-Fire.<br> | ||
{{Con}}Airblast costs 50% more ammo to fire (30 instead of 20).<br> | {{Con}}Airblast costs 50% more ammo to fire (30 instead of 20).<br> | ||
| − | + | {{Con}}Zombies accumulate gradual Airblast resistance with each usage (resets after 10 seconds).<br> | |
| − | {{Con}} Zombies accumulate Airblast resistance with each usage (resets after 10 seconds).<br> | ||
|- | |- | ||
| align="center" | [[File:Backpack Backburner.png|135px]]<br> | | align="center" | [[File:Backpack Backburner.png|135px]]<br> | ||
| Line 818: | Line 822: | ||
'''[[Backburner]]''' | '''[[Backburner]]''' | ||
| | | | ||
| − | {{Pro}} Guarantees Critical hits when attacking from behind.<br> | + | {{Pro}}Guarantees Critical hits when attacking from behind.<br> |
| − | {{Con}} Airblasts cost 150% more ammo to fire (50 instead of 20).<br> | + | {{Con}}Airblasts cost 150% more ammo to fire (50 instead of 20).<br> |
| − | {{Con}} No random critical hits.<br> | + | {{Con}}No random critical hits.<br> |
| | | | ||
| − | {{Pro}} Guarantees Critical hits when attacking from behind.<br> | + | {{Pro}}Guarantees Critical hits when attacking from behind.<br> |
| − | {{Pro}} | + | {{Pro}}On hit:100% chance to slow down target.<br> |
| − | + | {{Pro}}200% greater Airblast push force.<br> | |
| − | + | {{Con}}50% slower repressurization rate on Alt-Fire.<br> | |
| + | {{Con}}When weapon is active:100% less metal from Dispensers and Pickups.<br> | ||
{{Con}}Airblast costs 350% more ammo to fire (80 instead of 20).<br> | {{Con}}Airblast costs 350% more ammo to fire (80 instead of 20).<br> | ||
| − | + | {{Con}} Zombies accumulate gradual Airblast resistance with each usage (resets after 10 seconds).<br> | |
| − | {{Con}} Zombies accumulate Airblast resistance with each usage (resets after 10 seconds).<br> | ||
|- | |- | ||
| align="center" | [[File:Backpack Degreaser.png|135px]]<br> | | align="center" | [[File:Backpack Degreaser.png|135px]]<br> | ||
| Line 834: | Line 838: | ||
'''[[Degreaser]]''' | '''[[Degreaser]]''' | ||
| | | | ||
| − | {{Pro}} | + | {{Pro}}60% faster deploy speed.<br> |
| − | {{Pro}} | + | {{Pro}}30% faster holster speed.<br> |
| − | {{Con}} Airblasts cost 25% more ammo to fire (25 instead of 20).<br> | + | {{Con}}Airblasts cost 25% more ammo to fire (25 instead of 20).<br> |
| − | {{Con}} | + | {{Con}}66% afterburn damage penalty.<br> |
| | | | ||
| − | {{Pro}} | + | {{Pro}}60% faster deploy speed.<br> |
| − | {{Pro}} | + | {{Pro}}30% faster holster speed.<br> |
| − | {{Con}} | + | {{Pro}}On hit:100% chance to slow down target.<br> |
| + | {{Con}}66% afterburn damage penalty.<br> | ||
| + | {{Con}}50% slower repressurization rate on Alt-Fire.<br> | ||
{{Con}}Airblast costs 100% more ammo to fire (40 instead of 20).<br> | {{Con}}Airblast costs 100% more ammo to fire (40 instead of 20).<br> | ||
| − | + | {{Con}}Zombies accumulate gradual Airblast resistance with each usage (resets after 10 seconds).<br> | |
| − | {{Con}} Zombies accumulate Airblast resistance with each usage (resets after 10 seconds).<br> | ||
|- | |- | ||
| align="center" | [[File:Backpack Phlogistinator.png|135px]]<br> | | align="center" | [[File:Backpack Phlogistinator.png|135px]]<br> | ||
| Line 850: | Line 855: | ||
'''[[Phlogistinator]]''' | '''[[Phlogistinator]]''' | ||
| | | | ||
| − | {{Pro}} Upon dealing 300 fire damage, secondary fire initiates 'Mmmph', which gives guaranteed Critical hits over a short period of time. No damage and knockback is taken during the taunt.<br> | + | {{Pro}}Upon dealing 300 fire damage, secondary fire initiates 'Mmmph', which gives guaranteed Critical hits over a short period of time. No damage and knockback is taken during the taunt.<br> |
| − | {{Con}} Cannot fire blasts of compressed air.<br> | + | {{Con}}Cannot fire blasts of compressed air.<br> |
| − | {{Con}} No random critical hits.<br> | + | {{Con}}No random critical hits.<br> |
| | | | ||
| − | {{Pro}} Upon dealing 300 fire damage, secondary fire initiates 'Mmmph', which gives guaranteed Critical hits over a short period of time. No damage and knockback is taken during the taunt.<br> | + | {{Pro}}Upon dealing 300 fire damage, secondary fire initiates 'Mmmph', which gives guaranteed Critical hits over a short period of time. No damage and knockback is taken during the taunt.<br> |
{{Pro}}10% damage bonus.<br> | {{Pro}}10% damage bonus.<br> | ||
| − | {{Pro}}10% longer range.<br> | + | {{Pro}}10% longer flamethrower range.<br> |
{{Pro}}300% larger flame hitbox.<br> | {{Pro}}300% larger flame hitbox.<br> | ||
| − | {{Con}} Cannot fire blasts of compressed air.<br> | + | {{Pro}}On hit:100% chance to slow down target.<br> |
| − | {{Con}} Zombies accumulate Airblast resistance with each usage (resets after 10 seconds).<br> | + | {{Con}}Cannot fire blasts of compressed air.<br> |
| + | {{Con}}Zombies accumulate gradual Airblast resistance with each usage (resets after 10 seconds).<br> | ||
|- | |- | ||
| align="center" | [[File:Backpack Dragon's Fury.png|135px]]<br> | | align="center" | [[File:Backpack Dragon's Fury.png|135px]]<br> | ||
| Line 867: | Line 873: | ||
{{Neutral}}A single-shot flamethrower that launches a fast moving projectile that briefly ignites enemies.<br> | {{Neutral}}A single-shot flamethrower that launches a fast moving projectile that briefly ignites enemies.<br> | ||
{{Neutral}}Uses a shared pressure tank for Primary Fire and Alt-Fire.<br> | {{Neutral}}Uses a shared pressure tank for Primary Fire and Alt-Fire.<br> | ||
| − | {{Pro}} | + | {{Pro}}300% damage bonus to burning players.<br> |
:{{Neutral}}Bonus damage against a burning target requires the fireball's center to make contact with the target's hitbox.<br> | :{{Neutral}}Bonus damage against a burning target requires the fireball's center to make contact with the target's hitbox.<br> | ||
| − | {{Pro}} | + | {{Pro}}50% faster repressurization rate on hit.<br> |
| − | {{Pro}}40% longer range.<br> | + | {{Pro}}40% longer flamethrower range.<br> |
| − | {{Con}} | + | {{Con}}50% slower repressurization rate on Alt-Fire.<br> |
| − | {{Con}} No random critical hits.<br> | + | {{Con}}No random critical hits.<br> |
| | | | ||
{{Neutral}}A single-shot flamethrower that launches a fast moving projectile that briefly ignites enemies.<br> | {{Neutral}}A single-shot flamethrower that launches a fast moving projectile that briefly ignites enemies.<br> | ||
{{Neutral}}Uses a shared pressure tank for Primary Fire and Alt-Fire.<br> | {{Neutral}}Uses a shared pressure tank for Primary Fire and Alt-Fire.<br> | ||
| − | {{Pro}} | + | {{Pro}}300% damage bonus to burning players.<br> |
| − | {{Pro}} | + | {{Pro}}50% faster repressurization rate on hit.<br> |
| − | {{Pro}}40% longer range.<br> | + | {{Pro}}40% longer flamethrower range.<br> |
| − | {{Pro}}On hit: | + | {{Pro}}On hit:100% chance to slow down target.<br> |
| − | {{Con}} | + | {{Con}}50% slower repressurization rate on Alt-Fire.<br> |
| − | {{Con}} Zombies accumulate Airblast resistance with each usage (resets after 10 seconds).<br> | + | {{Con}}Zombies accumulate gradual Airblast resistance with each usage (resets after 10 seconds).<br> |
|- | |- | ||
! colspan="5" class="header" | Pyro Secondaries | ! colspan="5" class="header" | Pyro Secondaries | ||
| Line 892: | Line 898: | ||
| | | | ||
{{Pro}}200% larger clip size.<br> | {{Pro}}200% larger clip size.<br> | ||
| + | {{Pro}}20% damage bonus.<br> | ||
| + | {{Pro}}60% shorter reload time.<br> | ||
{{Pro}}60% faster firing speed.<br> | {{Pro}}60% faster firing speed.<br> | ||
| − | |||
| − | |||
|- | |- | ||
| align="center" | [[File:Backpack Flare Gun.png|135px]]<br> | | align="center" | [[File:Backpack Flare Gun.png|135px]]<br> | ||
| Line 900: | Line 906: | ||
'''[[Flare Gun]]''' | '''[[Flare Gun]]''' | ||
| | | | ||
| − | {{Neutral}} | + | {{Neutral}}Fires an accurate flare projectile that sets targets on fire instead of bullets.<br> |
| − | |||
{{Pro}} Guarantees Critical damage on burning targets.<br> | {{Pro}} Guarantees Critical damage on burning targets.<br> | ||
| + | {{Pro}} This weapon will reload automatically when not active.<br> | ||
{{Pro}} Can be fired into water to damage enemies (no afterburn will be applied).<br> | {{Pro}} Can be fired into water to damage enemies (no afterburn will be applied).<br> | ||
| | | | ||
| − | {{Neutral}} | + | {{Neutral}}Fires an accurate flare projectile that sets targets on fire instead of bullets.<br> |
| − | |||
| − | |||
| − | |||
| − | |||
{{Pro}}700% damage bonus.<br> | {{Pro}}700% damage bonus.<br> | ||
| + | {{Pro}}25% shorter reload time.<br> | ||
| + | {{Pro}}Guaranteed critical hits on burning targets.<br> | ||
| + | {{Pro}}This weapon will reload automatically when not active.<br> | ||
{{Pro}}Applies a strong downwards force on hit.<br> | {{Pro}}Applies a strong downwards force on hit.<br> | ||
| + | {{Pro}}Can be fired into water to damage enemies (no afterburn will be applied).<br> | ||
{{Con}}58% damage penalty '''against players'''.<br> | {{Con}}58% damage penalty '''against players'''.<br> | ||
|- | |- | ||
| Line 918: | Line 924: | ||
'''[[Detonator]]''' | '''[[Detonator]]''' | ||
| | | | ||
| − | {{Neutral}} | + | {{Neutral}}Fires an accurate flare projectile that sets targets on fire instead of bullets.<br> |
| − | {{ | + | {{Pro}} Alt-fire: detonates flare in flight, creating a small explosion which ignites nearby players, but does less damage than a normal hit. The knockback can be used to flare jump.<br> |
{{Neutral}} Flares detonate on impact, with a greatly reduced explosion radius.<br> | {{Neutral}} Flares detonate on impact, with a greatly reduced explosion radius.<br> | ||
{{Neutral}} On detonation flare destroys enemy sticky bombs.<br> | {{Neutral}} On detonation flare destroys enemy sticky bombs.<br> | ||
| Line 1,390: | Line 1,396: | ||
{{Con}} Stickybombs have 0.8 second longer priming time.<br> | {{Con}} Stickybombs have 0.8 second longer priming time.<br> | ||
| | | | ||
| − | {{Neutral}}Stickies are visible through walls and any obstacle, and can be selectively detonated by aiming at them and pressing the secondary fire button. | + | {{Neutral}}Stickies are visible through walls and any obstacle, and can be selectively detonated by aiming at them and pressing the secondary fire button.<br> |
{{Pro}}25 Max health on wearer.<br> | {{Pro}}25 Max health on wearer.<br> | ||
{{Pro}}25% Faster reload time.<br> | {{Pro}}25% Faster reload time.<br> | ||
| Line 1,418: | Line 1,424: | ||
{{Pro}} Max charge time decreased by 70%.<br> | {{Pro}} Max charge time decreased by 70%.<br> | ||
{{Pro}}Up to +170% damage based on charge.<br> | {{Pro}}Up to +170% damage based on charge.<br> | ||
| − | {{Pro}} -0.2 sec faster bomb arm time. | + | {{Pro}} -0.2 sec faster bomb arm time.<br> |
{{Pro}}On hit: Stun zombies for 3 seconds.<br> | {{Pro}}On hit: Stun zombies for 3 seconds.<br> | ||
{{Con}}25% damage penalty '''against players'''.<br> | {{Con}}25% damage penalty '''against players'''.<br> | ||
| Line 2,306: | Line 2,312: | ||
{{Pro}}50% Ubercharge build rate.<br/> | {{Pro}}50% Ubercharge build rate.<br/> | ||
{{Pro}}25% Overheal build rate.<br/> | {{Pro}}25% Overheal build rate.<br/> | ||
| + | {{Pro}} Projectile penetrates players.<br/> | ||
| + | {{Pro}}On hit:Slows down enemy players.<br/> | ||
{{Con}}-97.5% clip size.<br/> | {{Con}}-97.5% clip size.<br/> | ||
|- | |- | ||
Latest revision as of 03:03, 18 January 2025
| “ | Move, move, move!
Click to listen
— The Engineer running from zombies
|
” |
Zombie Escape, not to be confused with Zombie Survival or Zombie Fortress, is a Community gameplay modification of Zombie Mod.
Zombie Escape, as the name implies, is a mod where you escape from zombies.
Contents
Gameplay
The gameplay is a simple start-to-finish race between spawn and the final holdout, where the map makes up a reason to kill players that have not yet escaped (as most maps have a simple story). After setup (the survivors' headstart), two players are chosen as the alpha zombies, incredibly resilient players with huge health pools (often referred to as simply alphas). The goal of an alpha is to kill all the runners without getting killed themselves. Runners, when infected, turn into zombies. Zombies, similarly to alphas, have an enormous health pool compared to their living counterparts. They only receive half health, however, as they are expendable and can respawn an unlimited amount of times.
There are two ways to finish the round: One is to get through the race, holding out at places that require players to wait (mostly doors opening and vehicles waiting to move), and the second is to kill the alphas. The latter is much harder due to the large amount of health alphas have, and as such should be only focused on as a secondary goal.
Gameplay Changes
A list of changes that affect gameplay:
- There is no standard gameplay objective.
- The round ends with a BLU team victory if all RED team members are dead at the same time.
- The round ends with a RED team victory if all players are on the RED team.
- The player's max ammo is infinite, but the clip is not; no weapons run out of ammunition, but still have to reload (this excludes weapons that draw from the Engineer's metal supply).
- Players on the BLU team have a cross permanently above their head, only visible to the RED team.
- Upon being killed or general death, BLU team members are automatically assigned to the RED team.
- Being killed by a zombie does not kill the player per-se; the player is immediately assigned to the RED team, without any respawn time and without producing a ragdoll.
- RED team members automatically have their class's Voodoo-Cursed Soul equipped. The Voodoo-Cursed Soul displays as Level 0 on inspection.
- Players on the RED team have an increased amount of health (commonly between 8000 and 12000) and take an increased amount of knockback.
- Any weapons with projectiles that do not function as their primary fire, such as the Sandman's baseball, are removed.
- Scouts are no longer able to double jump. Whether the Atomizer allows the Scout to double jump again varies between different Zombie Escape plugins.
- Engineers do not drain metal under any circumstance, except when shooting with the Widowmaker or Short Circuit. If metal is spent by the Engineer, they can still replenish their ammo supply with conventional methods, such as medium ammo pickups dropped by dead players or with a Dispenser; nonetheless, metal slowly regenerates on its own.
- Engineers can only build Combat Mini-Sentry Guns, regardless of what melee weapon they are using. There can also be only four or five Mini-Sentry Guns deployed at one time, depending on the map.
- Some classes have a limit of only 6 at a time for survivors. Which classes specifically heavily depends on the plugin/server, but the Scout is most commonly limited.
Weapon Rebalances
Scout
| Scout Primaries | ||||
|---|---|---|---|---|
| Weapon | Vanilla Attributes | Zombie Escape Attributes | ||
 |
|
| ||
 |
|
| ||
 |
|
| ||
 |
|
| ||
 |
|
| ||
 |
|
| ||
| Scout Secondaries | ||||
 |
|
| ||
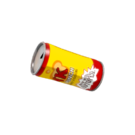 |
|
| ||
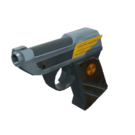 |
|
| ||
 |
|
| ||
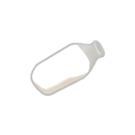 |
|
| ||
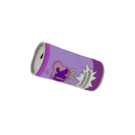 |
|
| ||
 |
|
| ||
| Scout Melees | ||||
 |
|
| ||
 |
|
| ||
 |
|
| ||
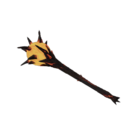 |
|
| ||
 |
|
| ||
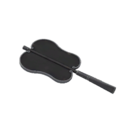 |
|
| ||
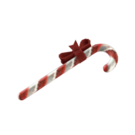 |
|
| ||
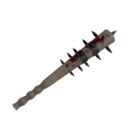 |
|
| ||
Soldier
| Soldier Primaries | ||||
|---|---|---|---|---|
| Weapon | Base Game Attributes | Zombie Escape Attributes | ||
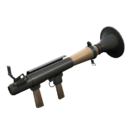 |
|
| ||
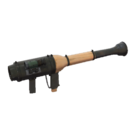 |
|
| ||
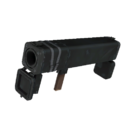 |
|
| ||
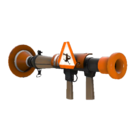 |
|
| ||
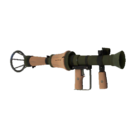 |
|
| ||
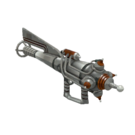 |
|
| ||
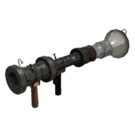 |
|
| ||
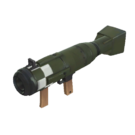 |
|
| ||
| Soldier Secondaries | ||||
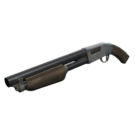 |
|
| ||
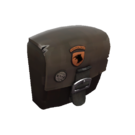 |
|
| ||
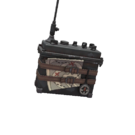 |
|
| ||
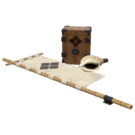 |
|
| ||
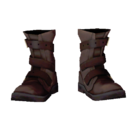 |
|
| ||
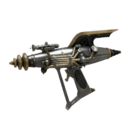 |
|
| ||
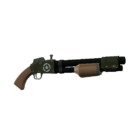 |
|
| ||
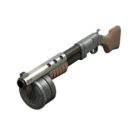 |
|
| ||
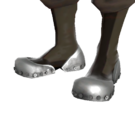 |
|
| ||
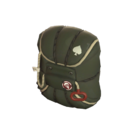 |
|
| ||
| Soldier Melees | ||||
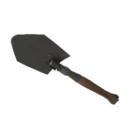 |
|
| ||
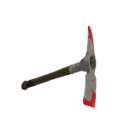 |
|
| ||
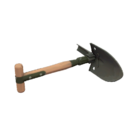 |
|
| ||
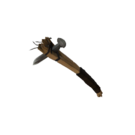 |
|
| ||
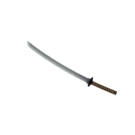 |
|
| ||
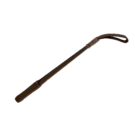 |
|
| ||
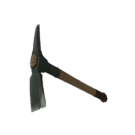 |
|
| ||
Pyro
| Pyro Primaries | ||||
|---|---|---|---|---|
| Weapon | Edited Attributes | Zombie Escape Attributes | ||
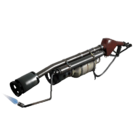 |
|
| ||
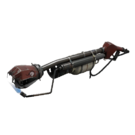 |
|
| ||
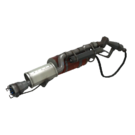 |
|
| ||
 |
|
| ||
 |
|
| ||
| Pyro Secondaries | ||||
 |
|
| ||
 |
|
| ||
 |
|
| ||
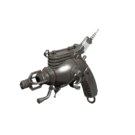 |
|
| ||
 |
|
| ||
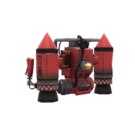 |
|
| ||
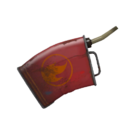 |
|
| ||
 |
|
| ||
 |
|
| ||
| Pyro Melees | ||||
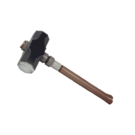 |
|
|||
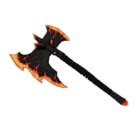 |
|
| ||
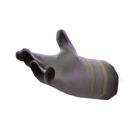 |
|
| ||
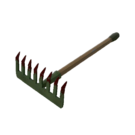 |
|
| ||
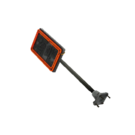 |
|
| ||
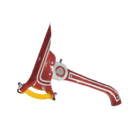 |
|
| ||
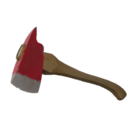 |
|
| ||
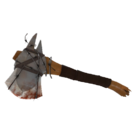 |
|
| ||
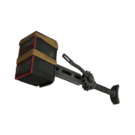 |
|
| ||
Demoman
Heavy
| Heavy Primaries | ||||
|---|---|---|---|---|
| Weapon | Edited Attributes | Zombie Escape Attributes | ||
 |
|
| ||
 |
|
| ||
 |
|
| ||
 |
|
| ||
 |
|
| ||
| Heavy Secondaries | ||||
 |
|
| ||
 |
|
| ||
 |
|
| ||
 |
|
| ||
 |
|
| ||
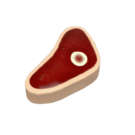 |
|
| ||
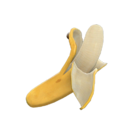 |
|
| ||
| Heavy Melees | ||||
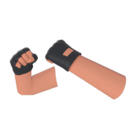 |
|
| ||
 |
|
| ||
 |
|
| ||
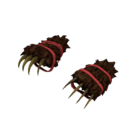 |
|
| ||
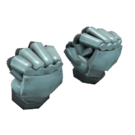 |
|
| ||
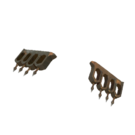 |
|
| ||
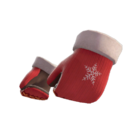 |
|
| ||
Engineer
| Engineer Primaries | ||||
|---|---|---|---|---|
| Weapon | Stock Attributes | Zombie Escape Attributes | ||
 |
|
| ||
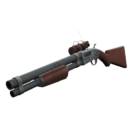 |
|
| ||
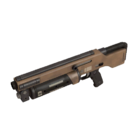 |
|
| ||
 |
|
| ||
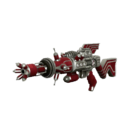 |
|
| ||
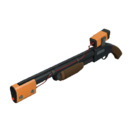 |
|
| ||
| Engineer Secondaries | ||||
 |
|
| ||
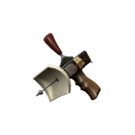 |
|
| ||
 |
|
| ||
| Engineer Melees | ||||
 |
|
| ||
 |
|
| ||
 |
|
| ||
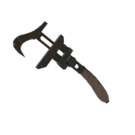 |
|
| ||
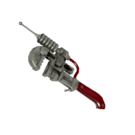 |
|
| ||
| Melee | Sentry Gun | Dispenser | |||||||
|---|---|---|---|---|---|---|---|---|---|
| Cost | Damage | Health | Deploy Time | Cost | Healing | Health | Deploy Time | ||
| Wrench | |||||||||
| Jag | |||||||||
| Eureka Effect | |||||||||
| Souther Hospitality | |||||||||
| Gunslinger | |||||||||
Medic
| Medic Primaries | ||||
|---|---|---|---|---|
| Weapon | Edited Attributes | Zombie Escape Attributes | ||
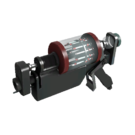 |
|
| ||
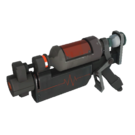 |
|
| ||
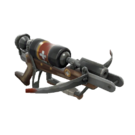 |
|
| ||
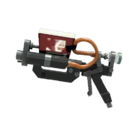 |
|
| ||
| Medic Secondaries | ||||
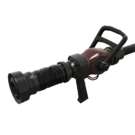 |
|
| ||
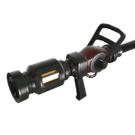 |
|
| ||
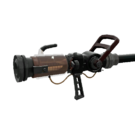 |
|
| ||
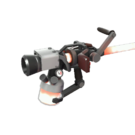 |
|
| ||
| Medic Melees | ||||
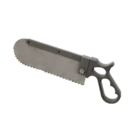 |
|
| ||
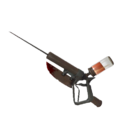 |
|
| ||
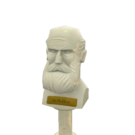 |
|
| ||
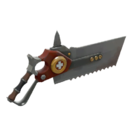 |
|
| ||
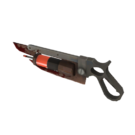 |
|
| ||
Sniper
| Sniper Primaries | ||||
|---|---|---|---|---|
| Weapon | Base Game Attributes | Zombie Escape Attributes | ||
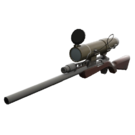 |
|
| ||
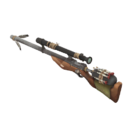 |
|
| ||
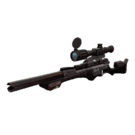 |
|
| ||
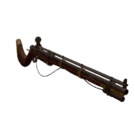 |
|
| ||
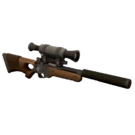 |
|
| ||
 |
|
| ||
 |
|
| ||
| Sniper Secondaries | ||||
 |
|
| ||
 |
|
| ||
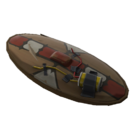 |
|
| ||
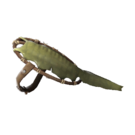 |
|
| ||
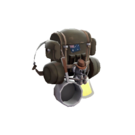 |
|
| ||
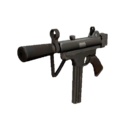 |
|
| ||
| Sniper Melees | ||||
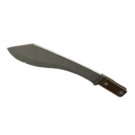 |
|
| ||
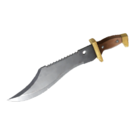 |
|
| ||
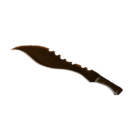 |
|
| ||
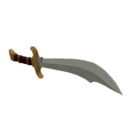 |
|
| ||
Spy
| Spy Primaries | ||||
|---|---|---|---|---|
| Weapon | Base Game Attributes | Zombie Escape Attributes | ||
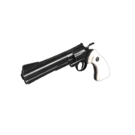 |
|
| ||
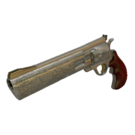 |
|
| ||
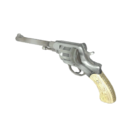 |
|
| ||
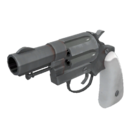 |
|
| ||
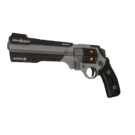 |
|
| ||
| Spy Secondaries | ||||
 |
|
| ||
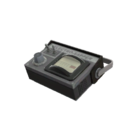 |
|
| ||
| Spy Melees | ||||
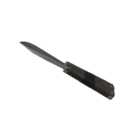 |
|
| ||
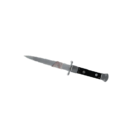 |
|
| ||
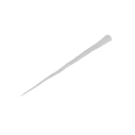 |
|
| ||
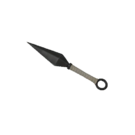 |
|
| ||
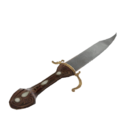 |
|
| ||
| Spy Watches | ||||
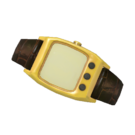 |
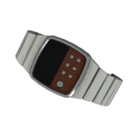
Cloak type: Motion sensitive |
Cloak type: Motion sensitive | ||
 |
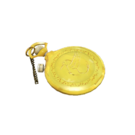
Cloak type: Timed |
Cloak type: Timed | ||
 |
Cloak type: Feign death |
Cloak type: Feign death | ||
Environmental hazards
Maps
| Map name | Port? | Stages? | NPCs? | Bosses? | Soundtrack |
|---|---|---|---|---|---|
 A_E_S_T_H_E_T_I_C_p3 |
CSS Port | Single | Gondola King Gondola |
All-Seeing-Eye | Moanin, Cowboy Bebop OST 1 - Too Good Too Bad, Cowboy Bebop OST 4 - Yo pumpkin head, Retrofit, Genetic Scale (Goh Hotoda Mix), Moliendo cafe, Town of the Fisherman (extended), Tong-Nou (Upscale V3), Transmigration (Tong-Nou Ending Theme). |
 ascension_v6b |
TF2 Original | Two | |||
 atix_apocalypse_12 |
CSS Port | Single with variations | No | No | NA |
 atix_panic_5 |
CSS Port | Single | No | No | NA |
 bathroom_8 |
CSS Port | Two | No | Rubber Ducky Sponge |
I see fire, Two Steps From Hell - For the Win, Reanne |
 best_korea_4 |
CSS Port | Three | North Korean Soldier Suicide Bomber |
Baby Kim Jong Un | Chollima on the Wing, Aurora (Downshifted), The Mt.Paektu Wind Blows, Defend the Headquarters of the Revolution!, Snowstorm of the Revolution, Witch Doctor |
 bioluminescent_v2 |
CSS Port | Three | No | Omnipotent Cube | Roller Mobster, T-Rex Echoes, Ethereal, Endless Reflections, Physical Nature, A Picture in Motion |
 bowser_in_the_fire_sea_6 |
CSS Port | Four | No | Bowser | NA |
 breezy_v5 |
TF2 Original | Single plus Minigames/ZM mode | No | Electrical Box | Battle with Final Despair, Battle with True Despair, The Man With The Machine Gun, V3Gallery Music, Showdown, nonsensecondon, Black Mesa Surface Tension 3, Black Mesa Surface Tension 4, Fear Factory |
 contra_b3 |
CSS Port | Armed Gate Alien Terminator |
Fortress of Flame, Horrible Heartbeat, The Final Gauntlet, Helicopter, Intro, Jungle Battle, The Foggy Cave in the Darkness, Creatures from Outer Space, Death Bed, Thunder Landing, The Dawn, Neo Kobe Steel Factory, Maza Fortress Stage 2, Stage Clear, Ground Zero, Invasion | ||
 crazy_escape_2 |
CSS Port | Three | Aeon, Away From Home, Angelica, Can't Go Home Again, Baby, Dread and Bold, Dreamer's Dream, Fear, Forbidden Anguish, Naive Race, Rose of Sharon, Sleeping Volcano, TeMP it Up, TeMPoison, Tokyo Drift, Welcome Mr Hwang | ||
 dark_souls_2 |
CSS Port | Three plus Bonus stage | They Hit Without Warning, Taurus Demon, A Moment's peace, Dance of the Boreal Valley, Gwyn, Lord of Cinder, Twin Princes, Nameless Song, Old Dragon Slayer, Firelink Shine, Fire Keepers, Old Demon King, Majula, Iron Golem, The Ancient Dragon, Dark Souls III | ||
 deadcore_5 |
CSS Port | Four | Niflheimr, Anhedonia, Roarlis, Area184-Persona, PSYCHO-PASS, Axion Extended, Namae No Nai Kaibutsu (Instrumental), Cor puella, It's muzzle rules justice, Lax, At The Distant World of Stars, Truffle Shuffle, Galaxy Collapse | ||
 defense3002_2 |
CSS Port | Two | Make It Bun Dem, I'm Sorry (Far Cry 3) | ||
 diddle_6 |
CSS Port | Five plus Bonus stage and extreme | Floating Heads |
Diddler Slasher |
-HEAT UP- (8bit), -HEAT UP- (2nd mix), Miss Monomi's Practice Lesson, Beautiful Days (Piano Arrangement), STFU, Weeaboo song, All Star, Niko, Halloween Theme, Monster, Zodd, Sign II |
 djinn_2 |
CSS Port | Single | War Horn Dark, Magic Mamaliga, Alfadhirhaiti, Baiana (CloZee Remix), Paul's Dream, Scattle-Shambles, Turbo Killer, You're mine | ||
 DOOM_3 |
CSS Port | Three | At Doom's Gate, The Imps Song, Dark Halls, Sign Of Evil, Hiding the Secrets, I Sawed the Demons, The Demons from Adrians Pen, https://www.youtube.com/watch?v=vVRbEvPvF7A Intermission from Doom], Untitled | ||
 dreamin_b2 |
CSS Port | Four | かねこちはる-絶対零度, World Fragments, Bloomin' Lights, Starry Blossom, Chronomia/Lime, Decipher (Long Version), dreamin' of u (long ver), Dreamin', Glorious Crown, Fractal, Pastel Subliminal, Physical Emotion, WHITEOUT | ||
 evernight |
CSS Port | Three | |||
 fall_guys_2 |
CSS Port | Two | |||
 fapescape_rote_9 |
CSS Port | Six | |||
 ffvii_cosmo_canyon_b1 |
CSS Port | Four plus ZM Mode | |||
 ffvii_mako_reactor_13 |
CSS Port | Four | |||
 ffvii_mako_reactor_v6_b5 |
CSS Port | Five difficulties plus ZM Mode | |||
 ffxii_mt_bur_omisace_b1 |
CSS Port | Four plus ZM Mode | |||
 ffxii_westersand_3 |
CSS Port | Four | |||
 ffxiv_wanderers_palace_4 |
CSS Port | Four | |||
 frostdrake_tower_3 |
CSS Port | Single | |||
 frozen_abyss |
CSS Port | Two | |||
 garten_of_banban_v2 |
TF2 Original | Single | |||
 gris_5 |
CSS Port | Four plus Bonus stage | |||
 halloween_house_4 |
CSS Port | ||||
 hydroponic_garden_s_2 |
CSS Port | Four | |||
 icecap_escape_o2 |
CSS Port | Single | |||
 johnny_nukem_6 |
CSS Port | Three | |||
 kitchen_7 |
CSS Port | ||||
 krusty_krab |
CSS Port | ||||
 krusty_krab_4 |
TF2 Original | ||||
 l0v0l |
CSS Port | Three plus Bonus stage | |||
 laserheaven_v2a |
TF2 Original | ||||
 laserhell_v1 |
TF2 Original | ||||
 last_man_standing_b1 |
CSS Port | ||||
 lotr_minas_tirith_14 |
CSS Port | ||||
 lotr_mines_of_moria_4 |
CSS Port | Single | |||
 lotr_mount_doom_s2_tf2 |
CSS Port | ||||
 luciddreams_v3_6_f2 |
CSS Port | Single | |||
 meatropolis_2 |
CSS Port | ||||
 minecraft_adventure_6 |
CSS Port | Three | |||
 minecraft_universe_2 |
CSS Port | Single | |||
 mist_3 |
CSS Port | Single | |||
 neochrome_b1 |
CSS Port | Single | |||
 offliner |
CSS Port | ||||
 otakuroom_4 |
CSS Port | Three plus ZM Mode | |||
 outlast_6 |
CSS Port | ||||
 palace_of_minolila_4 |
CSS Port | ||||
 parkour_paradise_v3d |
TF2 Original | ||||
 persona_v3 |
TF2 Original | ||||
 peter_griffin's_burger_emporium |
TF2 Original | ||||
 pirates_port_royal_12 |
CSS Port | Six | |||
 pokemon_adventure_11 |
CSS Port | ||||
 portal_story_6 |
CSS Port | Single | |||
 predator_ultimate_3 |
CSS Port | Four | |||
 quicksand_v1e |
TF2 Original | Four plus Bumper Car stage | |||
 random_7 |
CSS Port | ||||
 randomizer_b2 |
CSS Port | ||||
 realm_h2 |
TF2 Original | Single | |||
 rizomata_8 |
CSS Port | Five | |||
 rooftop_runaway2_v5 |
CSS Port | ||||
 rush_b_6 |
CSS Port | Single | |||
 ryujin_v3 |
TF2 Original | ||||
 S_A_M_9 |
CSS Port | Five plus ZM Mode | |||
 sandstone_v2 |
TF2 Original | ||||
 santassination_s4 |
CSS Port | Four plus the Truth | Raindeer, Elf Bender, Baby Bipedal Present, Beaver |
Slim Santa Fat Santa Socrates |
O Tannenbaum, A Mysterious Christmas, Fear Factor, Forest Dance #2, Seven Swords’ Victory, Carol of the Bells, What Child is This, Deck the Halls, We Wish You a Merry Christmas, Dripping that Sauce, The Lion King-Circle Of Life, Jingle Bells, One Winged Angel (Final Fantasy VII), The Lion King-Stampedo, Last Christmas, Santa Mixtape, A/G |
 saw_final_8 |
CSS Port | ||||
 scp_4 |
CSS Port | ||||
 serpentis_temple_4 |
CSS Port | Five | |||
 shroomforest_7 |
CSS Port | ||||
 shroomforest2 |
CSS Port | Six plus ZM Mode | |||
 shroomforest3 |
CSS Port | ||||
 sonic_3_3 |
CSS Port | Two | |||
 sorrento_escape_2 |
CSS Port | ||||
 space_station |
CSS Port | ||||
 squid_game_6 |
CSS Port | Single | |||
 stalker_ultimate_s3 |
CSS Port | ||||
 star_wars_prequel_10 |
CSS Port | Three | |||
 subway_escape_9 |
TF2 Original | Single | |||
 super_mario_64_3 |
CSS Port | ||||
 surf_facility_b1 |
CSS Port | ||||
 surf_froyo_b3 |
CSS Port | ||||
 surf_sahok_4 |
CSS Port | ||||
 surf_vortex_6 |
CSS Port | Single | |||
 swamp_facility_b2d |
TF2 Original | ||||
 tesv_skyrim_3 |
CSS Port | ||||
 timesplitters_2 |
CSS Port | Single | |||
 titanic_13 |
CSS Port | Single | |||
 uchiha_legacy_8 |
CSS Port | Four | |||
 v0u0v_b2 |
CSS Port | ||||
 voodoo_islands_5 |
CSS Port | Single | |||
 2012_s2_tf2 |
CSS Port | ||||
 666_crazy_escape_v2 |
CSS Port |
Gallery
Bosses
NPCs
| |||||
