Difference between revisions of "Community Swiftwater strategy"
HitlineMiamo (talk | contribs) |
m |
||
| Line 2: | Line 2: | ||
{{Community strategy stub|Add more content}} | {{Community strategy stub|Add more content}} | ||
{{Map infobox | {{Map infobox | ||
| + | | map-strategy = yes | ||
| game-type = Payload | | game-type = Payload | ||
| file-name = pl_swiftwater_final1 | | file-name = pl_swiftwater_final1 | ||
Revision as of 18:12, 16 April 2021
| “Sun Tzu's got nothing on us!” This article is a Community strategy stub. As such, it is not complete. You can help the Team Fortress Wiki Community Strategy Project by expanding it. Notes: Add more content |
| Community Swiftwater strategy | |
|---|---|

| |
| Basic Information | |
| Developer(s): | Unknown |
| Map Info | |
| Environment: | Alpine |
| Setting: | Daylight, sunny |
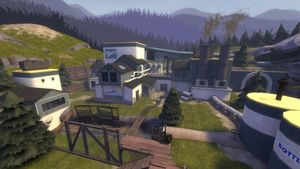
This article is about Community Swiftwater strategy.
Note: It is recommended to read the main Swiftwater article first to become familiar with the names of key map locations used in this article.
General strategy
At the beginning of the round, BLU should coordinate a push with ÜberCharge as the RED team has a high advantage overlooking BLU's spawn. ÜberCharge is important to push as it will negate spam from above.
Class-specific strategy
 Scout
Scout
General
 Soldier
General
 Pyro
Pyro
General
 Demoman
General
 Heavy
Heavy
General
 Engineer
General
- Engineer can be extremely beneficial to both RED and BLU. Engineer's can place Sentry Guns and Dispensers to aid their team. Teleporters are also very useful as it allows teammates to get to places quickly.
Offense
 Medic
Medic
General
Using ÜberCharge to wipe out enemies and forward operating bases is effective as it impedes progress on their goals.