Difference between revisions of "Community Nightfall strategy"
m |
m (Sync map infobox) |
||
| Line 2: | Line 2: | ||
{{Map infobox | {{Map infobox | ||
| − | | map-strategy | + | | map-strategy = yes |
| − | | game-type | + | | game-type = Payload Race |
| − | | file-name | + | | file-name = plr_nightfall_final |
| − | | map-image | + | | map-image = Nightfall stage2.png |
| − | | developer | + | | developer = [[User:Psy|Aaron "Psy" Garcha]],<br/>Paul Good |
| − | | map-environment = Alpine / Industrial | + | | map-environment = Alpine / Industrial |
| − | | map-setting | + | | map-setting = Nighttime, raining |
| − | | map-deep-water | + | | map-deep-water = Yes <small>(stage 3)</small> |
| − | | map-hazards | + | | map-hazards = [[Environmental death#Pitfalls|Pitfall]] <small>(stage 3)</small> |
| − | | map-health-pickups-small = 15 | + | | map-health-pickups-small = 15 |
| − | | map-health-pickups-medium = 13 | + | | map-health-pickups-medium = 13 |
| − | + | | map-ammo-pickups-small = 23 | |
| − | | map-ammo-pickups-small = 23 | + | | map-ammo-pickups-medium = 6 |
| − | | map-ammo-pickups-medium = 6 | + | | map-stamp-link = http://steamcommunity.com/stats/TF2/leaderboards/141482 |
| − | | map- | ||
}} | }} | ||
Revision as of 14:02, 18 April 2021
| “Sun Tzu's got nothing on us!” This article is a Community strategy stub. As such, it is not complete. You can help the Team Fortress Wiki Community Strategy Project by expanding it. Notes: Expand the "General strategy" section to cover map locations in more detail. Potentially look at the class-specific strategies as well. |
| Community Nightfall strategy | |
|---|---|

| |
| Basic Information | |
| Developer(s): | Unknown |
| Map Info | |
| Environment: | Alpine / Industrial |
| Setting: | Nighttime, raining |
| Hazards: | Pitfall (stage 3) |
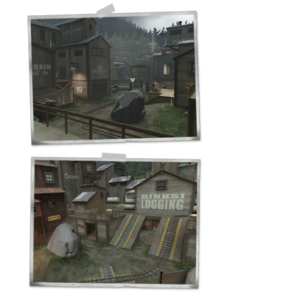
| Map Photos | |
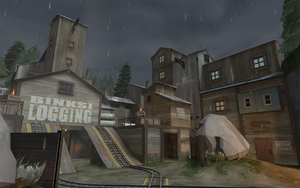
This article is about Community Nightfall strategy.
Note: It is recommended to read the main Nightfall article first to become familiar with the names of key map locations used in this article.
General strategy
- Because of the unique anti-stalemate function in Nightfall, if your team's cart is ahead of the opposing team's cart near the end of the round, it may pay off to pull back and simply defend your cart. In doing so, both carts will continue to roll forward on their own. This strategy doesn't work on Stage 3, as there is no time limit.
- Stages 1 and 2 feature buildings separating each team's spawn from the central area, rendering sticky jumps and rocket jumps rather ineffective. However, Soldiers and Demomen can jump directly to the cart on Stage 3 with a well-timed blast.
- On Stage 2, team members should initially focus on pushing the cart up the incline. The cart will roll back if it does not reach the top, and this part of the map can become a choke point if the opposing team sets up a successful defense.
Class-specific strategy
 Scout
Scout
- Scouts have extreme mobility on all stages and can annoy the other team while they are trying to get back on their cart.
- With the Force-A-Nature you can knock people into the pit on Stage 3.
 Soldier
- Being pocketed by a Medic is not great on this specific map. Instead, use your own rocketjump ability to flank the other team and even push of people on Stage 3.
- Use the advantage of having rockets to shoot around the other team's cart while they are pushing it. This will have most of the other team be in the process while your team can be pushing the bomb.
 Pyro
Pyro
- On Stage 3, Pyros should make use of their compression blast to push opposing team members off their cart. Even if they don't get pushed into the pit, forcing them to climb back up to the cart costing them valuable time while your team pushes.
- Pyros can aim to airblast enemy players away from their cart so they are unable to push it. This will slow them down for a little bit to give your team more time to push their cart.
 Demoman
- Due to open spaces, on stage 2 a Demoman can easily stickyjump to reach the other side quickly and easily dominate the mid-point of the map.
- Demomen can sticky trap the opposing team's cart so when a large amount of player gather around it, the Demoman can easily stop them from pushing it, by detonating the bombs.
- A Demoman can be useful for offense with using the default Grenade Launcher. With this, the Demoman can bounce Grenades off walls of the tunnels that the cart travels through. This may help with destroying certain obstacles like a Sentry Gun.
- The Demoman can use the Loose Cannon to push enemy players away from their cart, allowing your team to get ahead of the other team.
 Heavy
Heavy
- Using the G.R.U. can be really useful to get to the mid-point of Stage 2 quickly- Pairing up with a Medic can be devastating!
- The Heavy should stay near the cart most of the time. The Heavy should focus on taking out obstacles that are ahead of the cart such as a Engineer base.
 Engineer
- Due to the tight corridors, Engineers equipped with the Gunslinger can deploy Mini-Sentry Guns to great effect on certain parts of the map, namely around corners. They can also be a distraction while teammates flank the opposing team.
 Medic
Medic
- If using the Kritzkrieg on any stage, pair up with a Demoman. A kritz Demoman on stage 3 can push many people off cliffs, and crit-sticky kill a great amount of players.
- Using the Medi Gun is the only useful Medi Gun to pair up with a Heavy; due to many open spaces, people can flee from Kritz, and the Quick-Fix is easily evadeable.
- Use the Quick-Fix ONLY if pairing up with a Scout, otherwise you are wasting your Übercharge.
 Sniper
- Stage 3's open nature is very friendly for Snipers, with long sightlines. On Stage 1 and especially on Stage 2, Snipers may be better off equipping the Huntsman, along with Jarate, to do more close-range damage.
- On Stage 3, Snipers should equip the Razorback to avoid being backstabbed by enemy Spies.
 Spy
Spy
- Spies can make effective use of the tight corridors of Stages 1 and 2 to pick off enemies not on the cart.
- Spies should use the Dead Ringer to effectively get past enemies. Using the Cloak and Dagger or the default Invis Watch will get you caught easily if a player bumps into you through those narrow tunnels.
