Difference between revisions of "Community Mann Manor strategy"
m (→Class-specific Horseless Headless Horsemann Strategy) |
BrazilianNut (talk | contribs) m |
||
| Line 26: | Line 26: | ||
}} | }} | ||
| − | {{ | + | {{Other uses|this=strategy specific to the [[Halloween map|Halloween]] variant of [[Mountain Lab]]|for=strategy specific to the standard variant|Community Mountain Lab strategy}} |
This article is about '''Community Mann Manor strategy'''. | This article is about '''Community Mann Manor strategy'''. | ||
| Line 40: | Line 40: | ||
== General Horseless Headless Horsemann Strategy == | == General Horseless Headless Horsemann Strategy == | ||
| − | + | * The Horsemann can traverse the entire map except for spawn rooms and a few ledges, such as a rooftop between points A and B which Scouts, Soldiers and Demomen can access. If you are IT, going up to these ledges will cause the Horsemann to lose interest in you and chase someone else. | |
| − | *The Horsemann can traverse the entire map except for spawn rooms and a few ledges, such as a rooftop between points A and B which Scouts, Soldiers and Demomen can access. If you are IT, going up to these ledges will cause the Horsemann to lose interest in you and chase someone else. | + | * When you are IT and the spots above aren't nearby, look for enemies to either run around or hit with your melee weapon (the latter will pass the IT status to them). Doing so gives you a better chance of surviving being IT. |
| − | *When you are IT and the spots above aren't nearby, look for enemies to either run around or hit with your melee weapon (the latter will pass the IT status to them). Doing so gives you a better chance of surviving being IT. | + | * Wearing a [[Saxton Hale Mask]] or [[Horseless Headless Horsemann's Head]] will prevent you from getting [[stun]]ned by the Horsemann's taunt. |
| − | *Wearing a [[Saxton Hale Mask]] or [[Horseless Headless Horsemann's Head]] will prevent you from getting [[stun]]ned by the Horsemann's taunt. | + | * The Horsemann runs at Scout speed, so do not attempt to outrun him unless you are a Demoman and have a [[Demoman shield|shield]] with you. |
| − | *The Horsemann runs at Scout speed, so do not attempt to outrun him unless you are a Demoman and have a [[Demoman shield|shield]] with you. | + | * A strategy for the player designated IT is to act as bait for the Horsemann, while all other players inflict as much damage as they can. |
| − | *A strategy for the player designated IT is to act as bait for the Horsemann, while all other players inflict as much damage as they can. | + | * The Horsemann's target can trap him by standing on the ledge behind the wall of the shack on the rock outcrop. Standing there while you are IT makes the Horsemann attack the wall of the shack and ignore all other players for the duration that you are IT, including those attacking him with melee weapons. |
| − | *The Horsemann's target can trap him by standing on the ledge behind the wall of the shack on the rock outcrop. Standing there while you are IT makes the Horsemann attack the wall of the shack and ignore all other players for the duration that you are IT, including those attacking him with melee weapons. | + | * Another effective spot for trapping the Horsemann is just in front of BLU's spawn in the shelf-filled building; by crouch-jumping onto the barrel and then again onto the middle shelves, one can stand on top and the Horsemann will run about below, trying to attack the player. While upon the shelves the player and other teammates can safely attack the Horsemann until he dies or switches targets. |
| − | *Another effective spot for trapping the Horsemann is just in front of BLU's spawn in the shelf-filled building; by crouch-jumping onto the barrel and then again onto the middle shelves, one can stand on top and the Horsemann will run about below, trying to attack the player. While upon the shelves the player and other teammates can safely attack the Horsemann until he dies or switches targets. | + | * The control points stay active while the Horseless Headless Horsemann is out. It is a good strategy to use this time to take control of the point while the enemy is distracted. |
| − | *The control points stay active while the Horseless Headless Horsemann is out. It is a good strategy to use this time to take control of the point while the enemy is distracted. | + | ** If you are IT and are near the currently contested point, you can try to lead the Horsemann to enemies trying to cap the point. |
| − | **If you are IT and are near the currently contested point, you can try to lead the Horsemann to enemies trying to cap the point. | + | ** On RED, while defending the last point, stay close to the spawn and wait until someone on your team is IT. The Horsemann will spend a lot of time chasing the BLU team, defending the point for you. |
| − | **On RED, while defending the last point, stay close to the spawn and wait until someone on your team is IT. The Horsemann will spend a lot of time chasing the BLU team, defending the point for you. | + | * Use the gap around the final control point as a buffer. If the Horsemann gets too close, it is possible to simply jump the gap while he will be forced to maneuver around the crack in the floor in order to reach you. |
| − | *Use the gap around the final control point as a buffer. If the Horsemann gets too close, it is possible to simply jump the gap while he will be forced to maneuver around the crack in the floor in order to reach you. | + | * While the Horsemann can chase IT onto the roof of B, he cannot chase players onto the roofs of the buildings near it. Therefore, it is still possible to deal damage without the risk of being killed. |
| − | *While the Horsemann can chase IT onto the roof of B, he cannot chase players onto the roofs of the buildings near it. Therefore, it is still possible to deal damage without the risk of being killed. | + | * The Horsemann cannot jump, but he will walk off of ledges and fall down to reach those marked as IT. |
| − | *The Horsemann cannot jump, but he will walk off of ledges and fall down to reach those marked as IT. | ||
== Class-specific Horseless Headless Horsemann Strategy == | == Class-specific Horseless Headless Horsemann Strategy == | ||
| Line 60: | Line 59: | ||
! class="header" | Strategy | ! class="header" | Strategy | ||
|- | |- | ||
| − | | class="small" align="center" valign="center" style="padding:0.5em" | [[ | + | | class="small" align="center" valign="center" style="padding:0.5em" | [[File:Scout.png|100x100px|link=Scout]]<br>[[Scout]] |
| class="xsmall" | vs | | class="xsmall" | vs | ||
| − | | class="small" align="center" valign="center" style="padding:0.5em" | [[ | + | | class="small" align="center" valign="center" style="padding:0.5em" | [[File:HHH.png|100x100px|link=Horseless Headless Horsemann]]<br>[[Horseless Headless Horsemann]] |
|{{Info}}Playing as [[Scout]] allows you to evade the Horsemann's attacks more easily than other classes with your jumping and running abilities. | |{{Info}}Playing as [[Scout]] allows you to evade the Horsemann's attacks more easily than other classes with your jumping and running abilities. | ||
| − | {{Info}}Hit-and-run tactics are a necessity when attacking [[Horseless Headless Horsemann]]. | + | {{Info}} Hit-and-run tactics are a necessity when attacking [[Horseless Headless Horsemann]]. |
| − | {{Pro}}[[Bonk! Atomic Punch]] will allow you to survive the Horsemann's melee attack. Just stay at a distance so as to not get killed while consuming it. | + | {{Pro}} [[Bonk! Atomic Punch]] will allow you to survive the Horsemann's melee attack. Just stay at a distance so as to not get killed while consuming it. |
{{Pro}} The [[Winger]] can be used for extra damage. The frequent reloading can be negated by staying at a distance. | {{Pro}} The [[Winger]] can be used for extra damage. The frequent reloading can be negated by staying at a distance. | ||
| Line 75: | Line 74: | ||
{{Pro}} The [[Atomizer]] and [[Soda Popper]] are an upgrade in terms of evasion. You're not likely to engage in melee combat with the Horsemann anyway, so it's downsides are negligible. | {{Pro}} The [[Atomizer]] and [[Soda Popper]] are an upgrade in terms of evasion. You're not likely to engage in melee combat with the Horsemann anyway, so it's downsides are negligible. | ||
| − | {{Con}}The following weapons may be less effective against the Horsemann, due to his immunity to fire, stun, bleeding, mini-crits, on-hit and on-kill attributes: | + | {{Con}} The following weapons may be less effective against the Horsemann, due to his immunity to fire, stun, bleeding, mini-crits, on-hit and on-kill attributes: [[Pretty Boy's Pocket Pistol]], [[Flying Guillotine]] [[Crit-a-Cola]], [[Mad Milk]], [[Sandman]], [[Candy Cane]], [[Boston Basher]] / [[Three-Rune Blade]], [[Sun-on-a-Stick]], [[Fan O'War]] and [[Wrap Assassin]]. |
|- | |- | ||
| − | | class="small" align="center" valign="center" style="padding:0.5em" | [[ | + | | class="small" align="center" valign="center" style="padding:0.5em" | [[File:Soldier.png|100x100px|link=Soldier]]<br>[[Soldier match-ups|Soldier]] |
| class="xsmall" | vs | | class="xsmall" | vs | ||
| − | | class="small" align="center" valign="center" style="padding:0.5em" | [[ | + | | class="small" align="center" valign="center" style="padding:0.5em" | [[File:HHH.png|100x100px|link=Horseless Headless Horsemann]]<br>[[Horseless Headless Horsemann]] |
| | | | ||
{{Info}} [[Jumping#Rocket jump|Rocket jumping]] is a viable method of retreating if the Horsemann is chasing you. Jumping from the different heights around Control Point B will force the Horsemann to take long routes, and he may give up chasing you. | {{Info}} [[Jumping#Rocket jump|Rocket jumping]] is a viable method of retreating if the Horsemann is chasing you. Jumping from the different heights around Control Point B will force the Horsemann to take long routes, and he may give up chasing you. | ||
| Line 99: | Line 98: | ||
|- | |- | ||
| − | | class="small" align="center" valign="center" style="padding:0.5em" | [[ | + | | class="small" align="center" valign="center" style="padding:0.5em" | [[File:Pyro.png|100x100px|link=Pyro]]<br>[[Pyro match-ups|Pyro]] |
| class="xsmall" | vs | | class="xsmall" | vs | ||
| − | | class="small" align="center" valign="center" style="padding:0.5em" | [[ | + | | class="small" align="center" valign="center" style="padding:0.5em" | [[File:HHH.png|100x100px|link=Horseless Headless Horsemann]]<br>[[Horseless Headless Horsemann]] |
| | | | ||
| − | {{Info}}Because the Horsemann does not suffer [[afterburn]] damage, using the Pyro against the Horsemann is inadvisable. In addition, the Pyro's short range of effectiveness and the Horsemann's resistance to [[ | + | {{Info}} Because the Horsemann does not suffer [[afterburn]] damage, using the Pyro against the Horsemann is inadvisable. In addition, the Pyro's short range of effectiveness and the Horsemann's resistance to [[Flame Thrower]]s makes attacking head-on a very deadly prospect. |
| − | {{Pro}}The [[Backburner]] can be moderately effective if the Horsemann is distracted. | + | {{Pro}} The [[Backburner]] can be moderately effective if the Horsemann is distracted. |
| − | {{Pro}}Using the [[Phlogistinator]]'s Mmmph is useful as well, since the crits will inflict a great deal of damage to the Horsemann. | + | {{Pro}} Using the [[Phlogistinator]]'s Mmmph is useful as well, since the crits will inflict a great deal of damage to the Horsemann. |
| − | {{Pro}}The Shotgun can be effective against the Horsemann as base damage remains the same when attacking him. This will allow you to do more damage from a longer range than normal. | + | {{Pro}} The Shotgun can be effective against the Horsemann as base damage remains the same when attacking him. This will allow you to do more damage from a longer range than normal. |
| − | {{Con}}[[Compression blast|Airblasts]] will not work on the Horsemann as he cannot be knocked back. | + | {{Con}} [[Compression blast|Airblasts]] will not work on the Horsemann, as he cannot be knocked back. |
| − | {{Con}}The following weapons may be less effective against the Horsemann, due to his immunity to fire, stun, bleeding, mini-crits, on-hit and on-kill attributes: [[Flare Gun]], [[Detonator]], [[Scorch Shot]], [[Manmelter]], [[Reserve Shooter]], [[Axtinguisher]] / [[Postal Pummeler]], [[Powerjack]] and [[Sharpened Volcano Fragment]]. | + | {{Con}} The following weapons may be less effective against the Horsemann, due to his immunity to fire, stun, bleeding, mini-crits, on-hit and on-kill attributes: [[Flare Gun]], [[Detonator]], [[Scorch Shot]], [[Manmelter]], [[Reserve Shooter]], [[Axtinguisher]] / [[Postal Pummeler]], [[Powerjack]] and [[Sharpened Volcano Fragment]]. |
|- | |- | ||
| − | | class="small" align="center" valign="center" style="padding:0.5em" | [[ | + | | class="small" align="center" valign="center" style="padding:0.5em" | [[File:Demoman.png|100x100px|link=Demoman]]<br>[[Demoman match-ups|Demoman]] |
| class="xsmall" | vs | | class="xsmall" | vs | ||
| − | | class="small" align="center" valign="center" style="padding:0.5em" | [[ | + | | class="small" align="center" valign="center" style="padding:0.5em" | [[File:HHH.png|100x100px|link=Horseless Headless Horsemann]]<br>[[Horseless Headless Horsemann]] |
| | | | ||
| − | {{Info}}You can try to retreat by charging with the [[Chargin' Targe]] or [[Splendid Screen]] in a single direction across open ground. | + | {{Info}} You can try to retreat by charging with the [[Chargin' Targe]] or [[Splendid Screen]] in a single direction across open ground. |
| − | {{Pro}}Direct hits with the [[Grenade Launcher]] or [[Loch-n-Load]] will deal large amounts of damage to the Horsemann, so it is advisable to lead your shots slightly to ensure they connect. This strategy is especially effective with a [[Kritzkrieg]] ÜberCharge. | + | {{Pro}} Direct hits with the [[Grenade Launcher]] or [[Loch-n-Load]] will deal large amounts of damage to the Horsemann, so it is advisable to lead your shots slightly to ensure they connect. This strategy is especially effective with a [[Kritzkrieg]] ÜberCharge. |
| − | {{Pro}}Stickybomb traps are very effective against the Horsemann, as he will not try to avoid them; it just requires having the IT player lure the Horsemann onto the trap. This works even better with the [[Scottish Resistance]], since it has 6 extra bombs and a faster fire rate at the cost of a slower arming time. Plan your traps well. | + | {{Pro}} Stickybomb traps are very effective against the Horsemann, as he will not try to avoid them; it just requires having the IT player lure the Horsemann onto the trap. This works even better with the [[Scottish Resistance]], since it has 6 extra bombs and a faster fire rate at the cost of a slower arming time. Plan your traps well. |
{{Pro}} Convincing a Medic to use a Kritzkrieg charge on you to lay sticky bombs can deal huge damage in a single hit. A cluster of critical stickybombs will take a huge chunk of its health away and can kill it very quickly. | {{Pro}} Convincing a Medic to use a Kritzkrieg charge on you to lay sticky bombs can deal huge damage in a single hit. A cluster of critical stickybombs will take a huge chunk of its health away and can kill it very quickly. | ||
| − | {{Con}}Playing as a Demoknight is risky as the Horsemann attacks if he feels something is blocking his movement, and a player will be made IT if they are closest when the Horsemann changes target. | + | {{Con}} Playing as a Demoknight is risky as the Horsemann attacks if he feels something is blocking his movement, and a player will be made IT if they are closest when the Horsemann changes target. |
| − | {{Con}}The following weapons may be less effective against the Horsemann, due to his immunity to fire, stun, bleeding, mini-crits, on-hit and on-kill attributes: [[Eyelander]] / [[Horseless Headless Horsemann's Headtaker]] / [[Nessie's Nine Iron]], [[Persian Persuader]], [[Claidheamh Mòr]], and [[Half-Zatoichi]]. | + | {{Con}} The following weapons may be less effective against the Horsemann, due to his immunity to fire, stun, bleeding, mini-crits, on-hit and on-kill attributes: [[Eyelander]] / [[Horseless Headless Horsemann's Headtaker]] / [[Nessie's Nine Iron]], [[Persian Persuader]], [[Claidheamh Mòr]], and [[Half-Zatoichi]]. |
|- | |- | ||
| − | | class="small" align="center" valign="center" style="padding:0.5em" | [[ | + | | class="small" align="center" valign="center" style="padding:0.5em" | [[File:Heavy.png|100x100px|link=Heavy]]<br>[[Heavy match-ups|Heavy]] |
| class="xsmall" | vs | | class="xsmall" | vs | ||
| − | | class="small" align="center" valign="center" style="padding:0.5em" | [[ | + | | class="small" align="center" valign="center" style="padding:0.5em" | [[File:HHH.png|100x100px|link=Horseless Headless Horsemann]]<br>[[Horseless Headless Horsemann]] |
| | | | ||
| − | {{Info}}The Heavy is one of the best classes to go head-on against the Horsemann. Despite his resistance to [[Minigun]] bullets, any Minigun will shred the boss in a matter of seconds at short range, even without crits. | + | {{Info}} The Heavy is one of the best classes to go head-on against the Horsemann. Despite his resistance to [[Minigun]] bullets, any Minigun will shred the boss in a matter of seconds at short range, even without crits. |
| − | {{Info}}The Heavy is slow, thus vulnerable, if he does not have a Medic pocketing him ready to pull an Über if the Horsemann picks either of them as his next target. The [[G.R.U]] and the [[Buffalo Steak Sandvich]] give some time to prepare for escapes, especially if he is still firing if he is marked as IT. | + | {{Info}} The Heavy is slow, thus vulnerable, if he does not have a Medic pocketing him ready to pull an Über if the Horsemann picks either of them as his next target. The [[G.R.U]] and the [[Buffalo Steak Sandvich]] give some time to prepare for escapes, especially if he is still firing if he is marked as IT. |
{{Pro}} A Heavy under the effects of a [[Kritzkrieg]] can shred the boss in mere seconds, and since the Horsemann targets those who are closest to him, and critical hits have no damage falloff, this can be done quite safely. | {{Pro}} A Heavy under the effects of a [[Kritzkrieg]] can shred the boss in mere seconds, and since the Horsemann targets those who are closest to him, and critical hits have no damage falloff, this can be done quite safely. | ||
| Line 144: | Line 143: | ||
{{Pro}} The [[Tomislav]] has good use for hit and run strategies, due to its faster spin-up time. Just remember that the fire rate is lower than the other Miniguns. | {{Pro}} The [[Tomislav]] has good use for hit and run strategies, due to its faster spin-up time. Just remember that the fire rate is lower than the other Miniguns. | ||
| − | {{Con}}The Shotgun should rarely be used, as the time between shots and damage spread mean you will always get more damage from your primary weapon. Nonetheless, if you have run out of ammunition for your primary weapon, remember that base damage remains constant while attacking the Horsemann, so you can use the Shotgun effectively from further ranges than normal. | + | {{Con}} The Shotgun should rarely be used, as the time between shots and damage spread mean you will always get more damage from your primary weapon. Nonetheless, if you have run out of ammunition for your primary weapon, remember that base damage remains constant while attacking the Horsemann, so you can use the Shotgun effectively from further ranges than normal. |
{{Con}} The [[Brass Beast]], even under a Kritzkrieg charge, is only recommended if the Horsemann is distracted and you are far away, since you are very slow while revving and moving with it, which gives the Horsemann and even the enemy team a good reason to attack you. | {{Con}} The [[Brass Beast]], even under a Kritzkrieg charge, is only recommended if the Horsemann is distracted and you are far away, since you are very slow while revving and moving with it, which gives the Horsemann and even the enemy team a good reason to attack you. | ||
| − | {{Con}}The following weapons may be less effective against the Horsemann, due to his immunity to fire, stun, bleeding, mini-crits, on-hit and on-kill attributes: [[Natascha]], [[Buffalo Steak Sandvich]], [[Killing Gloves of Boxing]], [[Fists of Steel]], [[Warrior's Spirit]], [[Eviction Notice]], and [[Holiday Punch]]. | + | {{Con}} The following weapons may be less effective against the Horsemann, due to his immunity to fire, stun, bleeding, mini-crits, on-hit and on-kill attributes: [[Natascha]], [[Buffalo Steak Sandvich]], [[Killing Gloves of Boxing]], [[Fists of Steel]], [[Warrior's Spirit]], [[Eviction Notice]], and [[Holiday Punch]]. |
|- | |- | ||
| − | | class="small" align="center" valign="center" style="padding:0.5em" | [[ | + | | class="small" align="center" valign="center" style="padding:0.5em" | [[File:Engineer.png|100x100px|link=Engineer]]<br>[[Engineer match-ups|Engineer]] |
| class="xsmall" | vs | | class="xsmall" | vs | ||
| − | | class="small" align="center" valign="center" style="padding:0.5em" | [[ | + | | class="small" align="center" valign="center" style="padding:0.5em" | [[File:HHH.png|100x100px|link=Horseless Headless Horsemann]]<br>[[Horseless Headless Horsemann]] |
| | | | ||
| − | {{Info}}Since the Horsemann is not affected by [[ | + | {{Info}} Since the Horsemann is not affected by [[knockback]], the player should never rely on his [[Sentry Gun]] to keep the monster away. |
| − | {{Info}}The Horsemann will attack anything he walks into - this includes players and buildings. He generally | + | {{Info}} The Horsemann will attack anything he walks into - this includes players and buildings. He generally will not pay attention to them unless the player who is IT is alongside a building. |
| − | {{Pro}}Sentry Guns will target the Horsemann even when he is outside their normal range. | + | {{Pro}} Sentry Guns will target the Horsemann even when he is outside their normal range. |
| − | {{Pro}}Because Sentry Guns never deal critical hits (except mini-crits, which do not affect the Horsemann), your Sentry Gun can be an effective way to deal damage to the Horsemann without risking being marked as IT. Use the [[Wrangler]] for maximum damage. | + | {{Pro}} Because Sentry Guns never deal critical hits (except mini-crits, which do not affect the Horsemann), your Sentry Gun can be an effective way to deal damage to the Horsemann without risking being marked as IT. Use the [[Wrangler]] for maximum damage. |
| − | {{Pro}}The Shotgun and Pistol can both be effective against the Horsemann as their base damage remains the same when attacking it. This will allow you to do more damage from a longer range than normal. | + | {{Pro}} The Shotgun and Pistol can both be effective against the Horsemann as their base damage remains the same when attacking it. This will allow you to do more damage from a longer range than normal. |
| − | {{Con}}The following weapons may be less effective against the Horsemann, due to his immunity to fire, stun, bleeding, mini-crits, on-hit and on-kill attributes: [[Widowmaker]] and [[Southern Hospitality]]. | + | {{Con}} The following weapons may be less effective against the Horsemann, due to his immunity to fire, stun, bleeding, mini-crits, on-hit and on-kill attributes: [[Widowmaker]] and [[Southern Hospitality]]. |
|- | |- | ||
| − | | class="small" align="center" valign="center" style="padding:0.5em" | [[ | + | | class="small" align="center" valign="center" style="padding:0.5em" | [[File:Medic.png|100x100px|link=Medic]]<br>[[Medic match-ups|Medic]] |
| class="xsmall" | vs | | class="xsmall" | vs | ||
| − | | class="small" align="center" valign="center" style="padding:0.5em" | [[ | + | | class="small" align="center" valign="center" style="padding:0.5em" | [[File:HHH.png|100x100px|link=Horseless Headless Horsemann]]<br>[[Horseless Headless Horsemann]] |
| | | | ||
| − | {{Info}}If you do not have an ÜberCharge ready, it is best advised to stay away and build one up, as the Horsemann attacks in order of whoever is closest. | + | {{Info}} If you do not have an ÜberCharge ready, it is best advised to stay away and build one up, as the Horsemann attacks in order of whoever is closest. |
| − | {{Info}}Most of the Medic's weapons are relatively ineffective, so the Medic should be reserved to a support role. Use your ÜberCharge on teammates so they can attack the Horsemann. | + | {{Info}} Most of the Medic's weapons are relatively ineffective, so the Medic should be reserved to a support role. Use your ÜberCharge on teammates so they can attack the Horsemann. |
{{Pro}} If you are really aggressive against the Horsemann, then the [[Vita-Saw]] can allow you to deploy ÜberCharges more quickly. The health penalty is negligible since the Horsemann's axe is an instant kill anyway. | {{Pro}} If you are really aggressive against the Horsemann, then the [[Vita-Saw]] can allow you to deploy ÜberCharges more quickly. The health penalty is negligible since the Horsemann's axe is an instant kill anyway. | ||
| − | {{Con}}It is risky to use the [[Quick-Fix]] or the Kritzkrieg against the Horsemann, as The Horsemann's melee attack takes 80% of the target's base (not current) health except against Übered players and Dead Ringer Spies. However, at a distance, the Kritzkrieg charge is effective at dispatching the Horsemann. | + | {{Con}} It is risky to use the [[Quick-Fix]] or the Kritzkrieg against the Horsemann, as The Horsemann's melee attack takes 80% of the target's base (not current) health except against Übered players and Dead Ringer Spies. However, at a distance, the Kritzkrieg charge is effective at dispatching the Horsemann. |
| − | {{Con}}The following weapons may be less effective against the Horsemann, due to his immunity to fire, stun, bleeding, mini-crits, on-hit and on-kill attributes: [[Blutsauger]] and [[Ubersaw]]. | + | {{Con}} The following weapons may be less effective against the Horsemann, due to his immunity to fire, stun, bleeding, mini-crits, on-hit and on-kill attributes: [[Blutsauger]] and [[Ubersaw]]. |
|- | |- | ||
| − | | class="small" align="center" valign="center" style="padding:0.5em" | [[ | + | | class="small" align="center" valign="center" style="padding:0.5em" | [[File:Sniper.png|100x100px|link=Sniper]]<br>[[Sniper match-ups|Sniper]] |
| class="xsmall" | vs | | class="xsmall" | vs | ||
| − | | class="small" align="center" valign="center" style="padding:0.5em" | [[ | + | | class="small" align="center" valign="center" style="padding:0.5em" | [[File:HHH.png|100x100px|link=Horseless Headless Horsemann]]<br>[[Horseless Headless Horsemann]] |
| | | | ||
| − | {{Info}}The basic [[Sniper Rifle]] has medium effectiveness against the Horsemann, as [[ | + | {{Info}} The basic [[Sniper Rifle]] has medium effectiveness against the Horsemann, as [[headshot]]s do not deal extra damage. However, charging shots is still worthwhile as the damage will properly scale against the Horsemann. The [[Machina]] will deal slightly more damage in this regard. |
| − | {{Pro}}The [[Sydney Sleeper]]'s faster charge rate makes it more useful than the standard Sniper Rifle, since the Sniper Rifle can not score headshots on the Horsemann. | + | {{Pro}} The [[Sydney Sleeper]]'s faster charge rate makes it more useful than the standard Sniper Rifle, since the Sniper Rifle can not score headshots on the Horsemann. |
| − | {{Pro}}Additionally, the [[Huntsman]] is the only Sniper weapon that can cause critical hits upon headshotting the Horsemann. | + | {{Pro}} Additionally, the [[Huntsman]] is the only Sniper weapon that can cause critical hits upon headshotting the Horsemann. |
{{Pro}} The [[SMG]] is viable as a last resort weapon if the Horsemann is actively chasing you. You'll probably use up the three clips it has by the time he kills you anyway. | {{Pro}} The [[SMG]] is viable as a last resort weapon if the Horsemann is actively chasing you. You'll probably use up the three clips it has by the time he kills you anyway. | ||
| − | {{Con}}The following weapons may be less effective against the Horsemann, due to his immunity to fire, stun, bleeding, mini-crits, on-hit and on-kill attributes: [[Bazaar Bargain]], [[Cleaner's Carbine]], [[Jarate]], [[Tribalman's Shiv]] and [[Bushwacka]]. | + | {{Con}} The following weapons may be less effective against the Horsemann, due to his immunity to fire, stun, bleeding, mini-crits, on-hit and on-kill attributes: [[Bazaar Bargain]], [[Cleaner's Carbine]], [[Jarate]], [[Tribalman's Shiv]] and [[Bushwacka]]. |
|- | |- | ||
| − | | class="small" align="center" valign="center" style="padding:0.5em" | [[ | + | | class="small" align="center" valign="center" style="padding:0.5em" | [[File:Spy_RED.png|100x100px|link=Spy]]<br>[[Spy match-ups|Spy]] |
| class="xsmall" | vs | | class="xsmall" | vs | ||
| − | | class="small" align="center" valign="center" style="padding:0.5em" | [[ | + | | class="small" align="center" valign="center" style="padding:0.5em" | [[File:HHH.png|100x100px|link=Horseless Headless Horsemann]]<br>[[Horseless Headless Horsemann]] |
| | | | ||
| − | {{Info}}The [[Dead Ringer]]'s feign death ability will allow you to survive one hit; however, the Horsemann will continue to follow you even when cloaked. | + | {{Info}} The [[Dead Ringer]]'s feign death ability will allow you to survive one hit; however, the Horsemann will continue to follow you even when cloaked. |
| − | {{Pro}}The [[Revolver]] and the [[Enforcer]] are the most viable weapons to use, although they should only be used against the Horsemann if he is focused on another player. | + | {{Pro}} The [[Revolver]] and the [[Enforcer]] are the most viable weapons to use, although they should only be used against the Horsemann if he is focused on another player. |
| − | {{Con}}The Spy is rather ineffective against the Horsemann, as a [[ | + | {{Con}} The Spy is rather ineffective against the Horsemann, as a [[backstab]] only does normal knife damage, rendering its primary function useless. |
| − | {{Con}}The following weapons may be less effective against the Horsemann, due to his immunity to fire, stun, bleeding, mini-crits, on-hit and on-kill attributes: [[Ambassador]], [[L'Etranger]], [[Your Eternal Reward]] / [[Wanga Prick]], [[Conniver's Kunai]] and [[Big Earner]]. | + | {{Con}} The following weapons may be less effective against the Horsemann, due to his immunity to fire, stun, bleeding, mini-crits, on-hit and on-kill attributes: [[Ambassador]], [[L'Etranger]], [[Your Eternal Reward]] / [[Wanga Prick]], [[Conniver's Kunai]] and [[Big Earner]]. |
|} | |} | ||
| − | {{Map | + | {{Map Strategy Nav}} |
| + | |||
[[Category:HHH]] | [[Category:HHH]] | ||
Revision as of 14:36, 21 September 2024
| “Sun Tzu's got nothing on us!” This article is a Community strategy stub. As such, it is not complete. You can help the Team Fortress Wiki Community Strategy Project by expanding it. Notes: This page could use strategy specific to the map itself besides that applying to the HHH, Mention some of the differences from the standard variant and how they may affect combat. Note: True most of the article is about the HHH, but even though the HHH now appears on other maps, the HHH is the most unique element of the map AND strategy for engaging and defeating the HHH and obtaining the achievements applies only on this map; on each of the other maps, engaging the HHH bad strategy. |
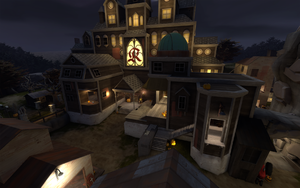
| Mann Manor | |
|---|---|
| |
| Basic Information | |
| Map type: | Control Point |
| File name: | cp_manor_event
|
| Released: | October 27, 2010 Patch (Scream Fortress Update) |
| Variants: | Mountain Lab |
| Developer(s): | Valve Tim "YM" Johnson Alex "Rexy" Kreeger |
| Map Info | |
| Environment: | Halloween |
| Setting: | Nighttime, overcast |
| Hazards: | Pumpkin bombs, Horseless Headless Horsemann, Pit |
| Pyrovision Support: | Yes |
| Bot support: | Yes |
| Map Items | |
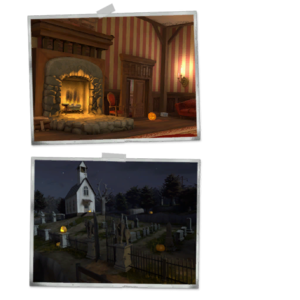
| Map Photos | |
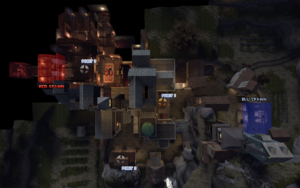
| Map Overview | |
This article is about Community Mann Manor strategy.
Note: It is recommended to read the main Mann Manor article first to become familiar with the names of key map locations used in this article.
General Map Strategy
This Halloween map features pumpkin bombs, Halloween pumpkins, and the Soul Gargoyle; see Community Halloween maps strategy.
- This map is a reskin of Mountain Lab, so any class specific strategies that apply there will work here.
General Horseless Headless Horsemann Strategy
- The Horsemann can traverse the entire map except for spawn rooms and a few ledges, such as a rooftop between points A and B which Scouts, Soldiers and Demomen can access. If you are IT, going up to these ledges will cause the Horsemann to lose interest in you and chase someone else.
- When you are IT and the spots above aren't nearby, look for enemies to either run around or hit with your melee weapon (the latter will pass the IT status to them). Doing so gives you a better chance of surviving being IT.
- Wearing a Saxton Hale Mask or Horseless Headless Horsemann's Head will prevent you from getting stunned by the Horsemann's taunt.
- The Horsemann runs at Scout speed, so do not attempt to outrun him unless you are a Demoman and have a shield with you.
- A strategy for the player designated IT is to act as bait for the Horsemann, while all other players inflict as much damage as they can.
- The Horsemann's target can trap him by standing on the ledge behind the wall of the shack on the rock outcrop. Standing there while you are IT makes the Horsemann attack the wall of the shack and ignore all other players for the duration that you are IT, including those attacking him with melee weapons.
- Another effective spot for trapping the Horsemann is just in front of BLU's spawn in the shelf-filled building; by crouch-jumping onto the barrel and then again onto the middle shelves, one can stand on top and the Horsemann will run about below, trying to attack the player. While upon the shelves the player and other teammates can safely attack the Horsemann until he dies or switches targets.
- The control points stay active while the Horseless Headless Horsemann is out. It is a good strategy to use this time to take control of the point while the enemy is distracted.
- If you are IT and are near the currently contested point, you can try to lead the Horsemann to enemies trying to cap the point.
- On RED, while defending the last point, stay close to the spawn and wait until someone on your team is IT. The Horsemann will spend a lot of time chasing the BLU team, defending the point for you.
- Use the gap around the final control point as a buffer. If the Horsemann gets too close, it is possible to simply jump the gap while he will be forced to maneuver around the crack in the floor in order to reach you.
- While the Horsemann can chase IT onto the roof of B, he cannot chase players onto the roofs of the buildings near it. Therefore, it is still possible to deal damage without the risk of being killed.
- The Horsemann cannot jump, but he will walk off of ledges and fall down to reach those marked as IT.
Class-specific Horseless Headless Horsemann Strategy
| Class | Strategy | ||
|---|---|---|---|
 Scout |
vs |  Horseless Headless Horsemann |
|
 Soldier |
vs |  Horseless Headless Horsemann |
|
 Pyro |
vs |  Horseless Headless Horsemann |
|
 Demoman |
vs |  Horseless Headless Horsemann |
|
 Heavy |
vs |  Horseless Headless Horsemann |
|
 Engineer |
vs |  Horseless Headless Horsemann |
|
 Medic |
vs |  Horseless Headless Horsemann |
|
 Sniper |
vs |  Horseless Headless Horsemann |
|
 Spy |
vs |  Horseless Headless Horsemann |
|
