Difference between revisions of "Community Well (Arena) strategy"
m (Auto: EnforceCapitalization(Dispenser) (Review RC#733765)) |
|||
| Line 10: | Line 10: | ||
| map-ammo-pickups-large = 2 | | map-ammo-pickups-large = 2 | ||
}} | }} | ||
| − | == General == | + | == General (All Classes) == |
* At the start of a round, Snipers will usually take positions at either entrance to the main building, aiming specifically between the wall and train carriage in order to pick off slow moving classes before they even enter the building. Demomen can solve this problem by firing Grenades or Stickybombs over the carriage to dissuade sniping. | * At the start of a round, Snipers will usually take positions at either entrance to the main building, aiming specifically between the wall and train carriage in order to pick off slow moving classes before they even enter the building. Demomen can solve this problem by firing Grenades or Stickybombs over the carriage to dissuade sniping. | ||
Revision as of 16:18, 4 October 2011
| “You are so small! Is funny to me!” This article is a stub. As such, it is not complete. You can help Team Fortress Wiki by expanding it. |
| Community Well (Arena) strategy | |
|---|---|

| |
| Basic Information | |
| Developer(s): | Unknown |
| Map Photos | |
Contents
General (All Classes)
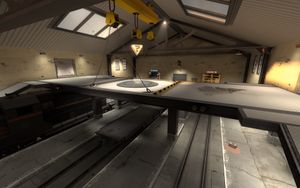
- At the start of a round, Snipers will usually take positions at either entrance to the main building, aiming specifically between the wall and train carriage in order to pick off slow moving classes before they even enter the building. Demomen can solve this problem by firing Grenades or Stickybombs over the carriage to dissuade sniping.
- The lower Central Building will normally be traversed by agile classes, such as Pyros and Scouts. Slow moving or weaker classes would be better suited to wait outside the main building until the area is clear.
- Luring enemies into the oncoming path of the Train can quickly change the tide of the battlefield. This may not work, however, with more aware and experienced players.
- The best way to negate any passive effects such as Jarate, Mad Milk or fire is to enter the water passage on the bottom of each side of the battlements.
Class-specific strategy
 Scout
Scout
- It is possible for the Scout to quickly climb into the main building from either side of the map by double-jumping onto the window ledges embedded into the walls below the battlements, or by Force jumping. Any Scout is capable of using this technique, regardless of loadout.
- When firing at enemies from the Battlements try to jump between the Battlements and the Train Carriages to avoid enemy fire.
 Soldier
- Soldiers can enter the building quickly by Rocket Jumping to the upper entrance. There, they can cover the enemy entrances to the building.
- The carriages beside each side entrance can also be used to rocket jump onto, which makes for an effective way to get some damage done before any fighting starts.
 Pyro
Pyro
- The Pyro is best used in this map to Spy check around Engineer buildings and on the top floor of the inside building.
- If your timing is extremely good, you can make use of the air blast to push enemies into the train that periodically passes through the map.
- The Sniper deck is accessible in the beginning of the round. A Pyro can easily jump on a window, then on the deck using a Detonator.
 Demoman
- A good idea is to place a Sticky trap around the battlements doorway.
- As the round starts, Snipers will shoot between the carriage and the central area. Fire Grenades or Stickybombs over the carriage to stop them.
 Heavy
Heavy
- WARNING: Many people rage against Heavies in arena as they feel that it is imbalanced with his high health and high damage.
- As a Heavy, walking out into the central building too soon is risky. Faster classes and Snipers will pick you off quickly unless you have a Medic.
 Engineer
- An Engineer should build a Dispenser at the base to let your friendly team to heal without enemy fire.
- Engineers can set up their Sentry Guns outside of the spawn to attack any enemies that approach from the building. Once numbers have dwindled, Sentry Guns and Dispensers can be hauled into the Central Building and set up to cover the Control Point.
- An Engineer may set up a Sentry Gun on the floor in the Waterways. Due to this being underwater it is hard for enemies to see the Sentry Gun through the water and may end up getting killed by it.
 Medic
Medic
- As in every Arena map, a Medic is extremely essential in Arena.
 Sniper
- Try to snipe through the gap between the train and the building. Slower moving or idling enemies will be easy targets.
 Spy
Spy
- The underwater entrances can provide Spies with clear movement behind enemies, but doing so will cause them to drip water that can be spotted by eagle-eyed players.
- Spies should try camping above the inner side or in an underwater corner in the hopes of backstabbing a passer-by.
- At the beginning of a round, a Spy should try to run straight to the enemy battlements, as he will have a good chance of backstabbing a good number of unaware enemies.
- A good camping spot for a Spy is the corner between the train carriages at each side of the map and the doorway as you have a low chance of being seen by passing enemies.
See also
