Difference between revisions of "Community Eyeaduct strategy"
ShadowGlove (talk | contribs) |
|||
| Line 16: | Line 16: | ||
*The ability to capture the point will be postponed as long as MONOCULUS is alive so focus on killing it. | *The ability to capture the point will be postponed as long as MONOCULUS is alive so focus on killing it. | ||
| − | *Stay away from MONOCULUS when it begins to rapid fire its projectiles. | + | *Stay away from MONOCULUS when it begins to rapid fire its projectiles. Use cover from buildings if you are close to it when it gets angry. |
| − | *A large group attacking at once can drain MONOCULUS' | + | *A large group attacking at once can drain MONOCULUS' health rapidly by at the risk of enemy team crossfire and less room to evade its projectiles. |
*Players that survive the underworld can use their invulnerable state to stun MONOCULUS. | *Players that survive the underworld can use their invulnerable state to stun MONOCULUS. | ||
| Line 31: | Line 31: | ||
| class="xsmall" | vs | | class="xsmall" | vs | ||
| class="small" align="center" valign="center" style="padding:0.5em" | [[Image:Monoculus normal.png|100x100px|link=MONOCULUS]]<br>[[MONOCULUS]] | | class="small" align="center" valign="center" style="padding:0.5em" | [[Image:Monoculus normal.png|100x100px|link=MONOCULUS]]<br>[[MONOCULUS]] | ||
| − | |{{Info}}Playing as [[Scout]] allows you to evade | + | |{{Info}}Playing as [[Scout]] allows you to evade MONOCULUS's attacks more easily than other classes due to your agility and ability to double and triple jump. |
{{Info}}Hit-and-run tactics are a necessity when attacking [[MONOCULUS]]. | {{Info}}Hit-and-run tactics are a necessity when attacking [[MONOCULUS]]. | ||
| Line 37: | Line 37: | ||
{{Info}}The Scout's agility, double and triple jumps allow him to enter into and survive the underworld with more ease than other classes. | {{Info}}The Scout's agility, double and triple jumps allow him to enter into and survive the underworld with more ease than other classes. | ||
| − | {{Pro}}[[Bonk!]] will allow you to survive | + | {{Pro}}[[Bonk!]] will allow you to survive MONOCULUS' eyeball projectiles for a short time, and can use knockback to escape. |
| − | {{Pro}} | + | {{Pro}} Because base damage is retained at all ranges when attacking MONOCULUS, the [[Scattergun]] will deal the most damage to it, provided you can move to around medium range to ensure you don't partially miss your shots. |
| − | |||
{{Pro}}The [[Special Delivery Set]] can be very useful when trying to kill MONOCULUS, as the health bonus increases your survivability, and the [[Shortstop]] allows you to deal a good amount of damage at medium-range. | {{Pro}}The [[Special Delivery Set]] can be very useful when trying to kill MONOCULUS, as the health bonus increases your survivability, and the [[Shortstop]] allows you to deal a good amount of damage at medium-range. | ||
| + | |||
| + | {{Con}}The [[Soda Popper]] is an ineffective weapon to use as MONOCULUS does not take damage from mini-crits. | ||
| + | |||
| + | {{Con}}Do not use [[Crit-a-Cola]] against MONOCULUS. Your attacks will deal no extra damage and will make it easier for MONOCULUS to kill you. | ||
| − | {{Con}}The [[Sandman]] baseball and [[Fan O' War]] are ineffective against | + | {{Con}}The [[Sandman]] baseball and [[Fan O' War]] are ineffective against MONOCULUS as it cannot be [[stun]]ned by baseballs or marked for death, respectively. |
| − | {{Con}}The Scout's health is low enough that a single hit from | + | {{Con}}The Scout's health is low enough that a single hit from MONOCULUS' projectiles will likely result in death, even with the Special Delivery Set equipped. |
|- | |- | ||
| class="small" align="center" valign="center" style="padding:0.5em" | [[Image:Soldier.png|100x100px|link=Soldier]]<br>[[Soldier match-ups|Soldier]] | | class="small" align="center" valign="center" style="padding:0.5em" | [[Image:Soldier.png|100x100px|link=Soldier]]<br>[[Soldier match-ups|Soldier]] | ||
| Line 52: | Line 55: | ||
| class="small" align="center" valign="center" style="padding:0.5em" | [[Image:Monoculus normal.png|100x100px|link=MONOCULUS]]<br>[[MONOCULUS]] | | class="small" align="center" valign="center" style="padding:0.5em" | [[Image:Monoculus normal.png|100x100px|link=MONOCULUS]]<br>[[MONOCULUS]] | ||
| | | | ||
| − | {{Info}} [[Jumping#Rocket jump|Rocket jumping]] is a viable method of evading | + | {{Info}} [[Jumping#Rocket jump|Rocket jumping]] is a viable method of evading MONOCULUS' projectiles. |
| + | |||
| + | {{Info}} The [[Battalion's Backup]] and [[Concheror]] will charge while taking / doing damage to MONOCULUS and thus are recommended. | ||
| − | {{ | + | {{Pro}} A friendly [[Kritzkrieg]] Medic will allow a skilled Soldier to make short work of MONOCULUS, as a pack of critical rockets and Shotgun shells will take a large chunk of its health away. |
| − | {{Pro}} | + | {{Pro}} The [[Direct Hit]] is probably the Soldiers best primary weapon to use against MONOCULUS. The projectiles are fast and do high damage and MONOCULUS is large enough for you not to worry too much about missing it. |
| − | {{ | + | {{Pro}} The [[Shotgun]] can be effective against MONOCULUS as base damage remains the same when attacking it. This will allow you to do more damage from a longer range than normal. |
| − | {{Con}}The [[Black Box]] does not award health upon hitting | + | {{Con}}Charging MONOCULUS with the [[Equalizer]] at very low health will only be effective if the enemy team is not around and the MONOCULUS is stunned, as your crits will deal around 300 damage. Otherwise, it's a risky strategy. |
| + | |||
| + | {{Con}}The [[Buff Banner]] will charge when doing damage to MONOCULUS, but MONOCULUS is not affected by mini-crits so this is not recommended. | ||
| + | |||
| + | {{Con}}The [[Reserve Shooter]] will not mini-crit against MONOCULUS so this is not recommended. | ||
| + | |||
| + | {{Con}}The [[Black Box]] does not award health upon hitting MONOCULUS and is a considerable drawback when its reduced ammo is taken into account. | ||
|- | |- | ||
| Line 67: | Line 78: | ||
| class="small" align="center" valign="center" style="padding:0.5em" | [[Image:Monoculus normal.png|100x100px|link=MONOCULUS]]<br>[[MONOCULUS]] | | class="small" align="center" valign="center" style="padding:0.5em" | [[Image:Monoculus normal.png|100x100px|link=MONOCULUS]]<br>[[MONOCULUS]] | ||
| | | | ||
| − | {{Info}}Because | + | {{Info}}Because MONOCULUS does not suffer afterburn damage, using the [[Pyro]] against MONOCULUS is inadvisable. In addition, the Pyro's short range of effectiveness and MONOCULUS' resistance to flamethrowers makes attacking head-on a very deadly prospect. |
| − | {{Info}} A skilled Pyro may be able to effectively attack | + | {{Info}} A skilled Pyro may be able to effectively attack MONOCULUS by using airblasts to reflect the MONOCULUS's projectiles back at it. However, unless MONOCULUS is angry these projectiles will travel slowly and will often miss their target. |
{{Pro}}The [[Backburner]] can be moderately effective if MONOCULUS is distracted. | {{Pro}}The [[Backburner]] can be moderately effective if MONOCULUS is distracted. | ||
| + | |||
| + | {{Pro}}The [[Shotgun]] can be effective against MONOCULUS as base damage remains the same when attacking it. This will allow you to do more damage from a longer range than normal. | ||
| + | |||
| + | {{Con}}The [[Reserve Shooter]] will not mini-crit against MONOCULUS so this is not recommended. | ||
{{Con}}The [[Flare Gun]] and the [[Detonator]] are possibly some of the worst weapons to use against the MONOCULUS as he cannot catch on fire. Only the minimal flare impact damage will register. | {{Con}}The [[Flare Gun]] and the [[Detonator]] are possibly some of the worst weapons to use against the MONOCULUS as he cannot catch on fire. Only the minimal flare impact damage will register. | ||
| Line 79: | Line 94: | ||
| class="small" align="center" valign="center" style="padding:0.5em" | [[Image:Monoculus normal.png|100x100px|link=MONOCULUS]]<br>[[MONOCULUS]] | | class="small" align="center" valign="center" style="padding:0.5em" | [[Image:Monoculus normal.png|100x100px|link=MONOCULUS]]<br>[[MONOCULUS]] | ||
| | | | ||
| − | {{Info}}It is possible to briefly dodge MONOCULUS' | + | {{Info}}It is possible to briefly dodge MONOCULUS' projectiles by charging with the [[Chargin' Targe]] or [[Splendid Screen]] in a single direction across open ground. |
| + | |||
| + | {{Pro}}Direct hits with the [[Grenade Launcher]] or [[Loch 'n' Load]] will cause large amounts of damage to MONOCULUS, so it is advisable to lead your shots slightly to ensure they connect. This strategy is especially effective with a [[Kritzkrieg]] charge. | ||
| + | |||
| + | {{Con}}Stickybombs are almost rendered completely ineffective against MONOCULUS as it is generally flying too high or teleporting too quickly to set up a trap. However, a skilled Demoman may be able to arc his shot so it can be detonated to do max damage. | ||
| + | |||
| + | {{Con}}Attempting the above strategy with the [[Scottish Resistance]] is extremely difficult due to the slower arming time of the bombs. | ||
| − | {{ | + | {{Con}}Demoknights are not recommended as they cannot effectively reach MONOCULUS unless it has been stunned or is near the ground. |
| − | |||
| − | |||
|- | |- | ||
| class="small" align="center" valign="center" style="padding:0.5em" | [[Image:Heavy.png|100x100px|link=Heavy]]<br>[[Heavy match-ups|Heavy]] | | class="small" align="center" valign="center" style="padding:0.5em" | [[Image:Heavy.png|100x100px|link=Heavy]]<br>[[Heavy match-ups|Heavy]] | ||
| Line 91: | Line 110: | ||
| class="small" align="center" valign="center" style="padding:0.5em" | [[Image:Monoculus normal.png|100x100px|link=MONOCULUS]]<br>[[MONOCULUS]] | | class="small" align="center" valign="center" style="padding:0.5em" | [[Image:Monoculus normal.png|100x100px|link=MONOCULUS]]<br>[[MONOCULUS]] | ||
| | | | ||
| − | {{Info}}The [[Heavy]] is one of the best classes to go head-on against | + | {{Info}}The [[Heavy]] is one of the best classes to go head-on against MONOCULUS. Despite it's resistance to minigun bullets, any Minigun will shred the boss in a matter of seconds at short range, even without [[crits]]. |
| − | {{Info}}Be aware that the [[Heavy]] has no real means of effectively dodging | + | {{Info}}Be aware that the [[Heavy]] has no real means of effectively dodging MONOCULUS' projectiles, but can withstand at least one direct hit from one (granting the player the Crock Block achievement). Nonetheless, the Heavy should be relying on the [[Gloves of Running Urgently]] to escape in such situations. |
| − | {{Pro}}A [[Heavy]]/[[Medic]] pair can camp the control point | + | {{Pro}}A [[Heavy]]/[[Medic]] pair can camp the control point while building up a [[Kritzkrieg]] charge. The damage resulting from such an attack is usually enough to deal extremely high levels of damage to MONOCULUS. Be ready to escape though, as MONOCULUS will not only be angered, but it will make you both it's primary target. |
| − | {{Con}}The [[Buffalo Steak Sandvich]] is not recommended | + | {{Con}}The [[Buffalo Steak Sandvich]] is not recommended except to attempt quick getaways. |
| − | {{Con}}The [[Shotgun]] should rarely be used, as the time between shots and damage spread mean you will always get more damage from your primary weapon. | + | {{Con}}The [[Shotgun]] should rarely be used, as the time between shots and damage spread mean you will always get more damage from your primary weapon. Nonetheless, if you have run out of ammunition for your primary weapon, remember that base damage remains constant while attacking MONOCULUS, so you can use the shotgun effectively from furthur ranges than normal. |
| − | {{Con}}The [[Brass Beast]], even with a [[Kritzkrieg]], is only recommended if | + | {{Con}}The [[Brass Beast]], even with a [[Kritzkrieg]], is only recommended if MONOCULUS is already busy, as your extremely sluggish movement will tempt even the enemy team to focus on you and make you an easy target for an angry MONOCULUS' projectiles. |
|- | |- | ||
| Line 108: | Line 127: | ||
| class="small" align="center" valign="center" style="padding:0.5em" | [[Image:Monoculus normal.png|100x100px|link=MONOCULUS]]<br>[[MONOCULUS]] | | class="small" align="center" valign="center" style="padding:0.5em" | [[Image:Monoculus normal.png|100x100px|link=MONOCULUS]]<br>[[MONOCULUS]] | ||
| | | | ||
| − | {{Info}}Since | + | {{Info}}Since MONOCULUS is not affected by knockback, the player should never rely on his sentry to keep the monster away. |
| − | {{Info}} | + | {{Info}}MONOCULUS will attack anything within his range - this includes players and buildings. Keep in mind wrangled [[Sentry Gun]]s can survive a few projectile hits, allowing you and your team to profit from the distraction. Don't rely on them too much though; it only takes one or two salvos of MONOCULUS' projectiles to destroy an entire sentry nest. |
{{Pro}}[[Sentry Gun]]s will target the MONOCULUS even when it is outside their normal range. | {{Pro}}[[Sentry Gun]]s will target the MONOCULUS even when it is outside their normal range. | ||
| + | |||
| + | {{Pro}}Because Sentry Guns never deal critical hits (except mini-crits, which do not affect MONOCULUS), your sentry gun can be an effective way to deal damage to MONOCULUS without angering it. Use a [[Wrangler]] for maximum damage. | ||
{{Con}}The [[Widowmaker]] does not return metal for damage done to the MONOCULUS. | {{Con}}The [[Widowmaker]] does not return metal for damage done to the MONOCULUS. | ||
| Line 120: | Line 141: | ||
| class="small" align="center" valign="center" style="padding:0.5em" | [[Image:Monoculus normal.png|100x100px|link=MONOCULUS]]<br>[[MONOCULUS]] | | class="small" align="center" valign="center" style="padding:0.5em" | [[Image:Monoculus normal.png|100x100px|link=MONOCULUS]]<br>[[MONOCULUS]] | ||
| | | | ||
| − | {{Info}}Use your [[ÜberCharge]] on a teammate so they can attack | + | {{Info}}Use your [[ÜberCharge]] on a teammate so they can attack MONOCULUS. While MONOCULUS will ignore Übercharged individuals for as long as possible, keep in mind that it will attempt to target you if you are in range. |
{{Info}}If you do not have an ÜberCharge or [[Kritzkrieg]] charge, it is best advised to stay away and build one up. | {{Info}}If you do not have an ÜberCharge or [[Kritzkrieg]] charge, it is best advised to stay away and build one up. | ||
| − | {{Info}} | + | {{Info}}If using a [[Kritzkrieg]] to attack MONOCULUS, be ready for a quick escape, as MONOCULUS will not only be angered but it will make you and your buddy it's primary targets. |
| + | |||
| + | {{Info}}Most of the [[Medic]]'s weapons are relatively ineffective, so the Medic should be reserved to a support role. | ||
| − | {{ | + | {{Con}}It is not very helpful to use the [[Quick-Fix]] against MONOCULUS. It's enhanced healing power will not be enough to survive MONOCULUS' deadly eyeball projectiles. |
| − | {{Con}}An ÜberCharged pair can be rendered largely ineffective by a wandering | + | {{Con}}An ÜberCharged pair can be rendered largely ineffective by a wandering [[Ghost]]. |
|- | |- | ||
| Line 135: | Line 158: | ||
| class="small" align="center" valign="center" style="padding:0.5em" | [[Image:Monoculus normal.png|100x100px|link=MONOCULUS]]<br>[[MONOCULUS]] | | class="small" align="center" valign="center" style="padding:0.5em" | [[Image:Monoculus normal.png|100x100px|link=MONOCULUS]]<br>[[MONOCULUS]] | ||
| | | | ||
| − | {{Info}}The basic [[Sniper Rifle]] has medium effectiveness against | + | {{Info}}The basic [[Sniper Rifle]] has medium effectiveness against MONOCULUS, as headshots do not deal extra damage. However, charging shots is still worthwhile as the damage will properly scale against MONOCULUS. The [[Machina]] will deal slightly more damage in this regard. |
| − | {{Info}}The extra range that the Sniper class exhibits can allow the player to attack while far outside | + | {{Info}}The extra range that the Sniper class exhibits can allow the player to attack while far outside MONOCULUS' attack range. This however, will make it more difficult to travel to the Underworld to acquire the [[Bombinomicon]]. |
| − | {{Pro}}The [[Sydney Sleeper]]'s faster charge rate makes it more useful than the standard Sniper Rifle, as | + | {{Pro}}The [[Sydney Sleeper]]'s faster charge rate makes it more useful than the standard Sniper Rifle, as MONOCULUS is immune to headshots. |
| − | {{Con}}[[Jarate]] does not affect | + | {{Con}}[[Jarate]] does not affect MONOCULUS. |
|- | |- | ||
| class="small" align="center" valign="center" style="padding:0.5em" | [[Image:Spy_RED.png|100x100px|link=Spy]]<br>[[Spy match-ups|Spy]] | | class="small" align="center" valign="center" style="padding:0.5em" | [[Image:Spy_RED.png|100x100px|link=Spy]]<br>[[Spy match-ups|Spy]] | ||
| Line 147: | Line 170: | ||
| class="small" align="center" valign="center" style="padding:0.5em" | [[Image:Monoculus normal.png|100x100px|link=MONOCULUS]]<br>[[MONOCULUS]] | | class="small" align="center" valign="center" style="padding:0.5em" | [[Image:Monoculus normal.png|100x100px|link=MONOCULUS]]<br>[[MONOCULUS]] | ||
| | | | ||
| − | {{Info}}The [[Dead Ringer]]'s feign death ability will allow you to survive one hit per use, giving the Spy more survivability against | + | {{Info}}The [[Dead Ringer]]'s feign death ability will allow you to survive one hit per use, giving the Spy more survivability against MONOCULUS. |
| − | {{Pro}}The [[Revolver]] and the [[Enforcer]] are the most viable weapons to use, although it should only be used against | + | {{Pro}}The [[Revolver]] and the [[Enforcer]] are the most viable weapons to use, although it should only be used against MONOCULUS if it is focused on another player. |
| − | {{Con}}The [[Spy]] is rather ineffective against | + | {{Con}}The [[Spy]] is rather ineffective against MONOCULUS as a [[Backstab]] is near impossible to land, will not result in an instant death or a critical hit, and does not contribute significant damage. |
| − | {{Con}}As with any other on-hit effect weapons, [[Your Eternal Reward]], [[Conniver's Kunai]] and the [[Big Earner]] will not grant you a bonus upon getting the last hit on | + | {{Con}}As with any other on-hit effect weapons, [[Your Eternal Reward]], [[Conniver's Kunai]] and the [[Big Earner]] will not grant you a bonus upon getting the last hit on MONOCULUS and should be avoided. |
| − | {{Con}} | + | {{Con}}MONOCULUS is not fooled by disguises or invisibility. |
|} | |} | ||
Revision as of 18:48, 1 November 2011
This page lists community strategy related to the Halloween map Eyeaduct.
Generally Map Strategy
- This map is almost identical to Viaduct, so many strategies that work there will also work here.
- Be wary of the ghosts that travel across the map, as their stun can leave you vulnerable.
- After killing MONOCULUS, if you notice much of the enemy team heading to Loot Island, use this opportunity to secure the point in your favor.
- Alternatively, having a large number of your team going to Loot Island can be effective, as though you might lose the point temporarily, the speed, strength, and health boosts given after you exit the Underworld can allow you to annihilate the enemy team.
General MONOCULUS Strategy:
- Do not use melee weapons. MONOCULUS flies and/or hovers across sections of the map out of the range of almost all melee weapons.
- The ability to capture the point will be postponed as long as MONOCULUS is alive so focus on killing it.
- Stay away from MONOCULUS when it begins to rapid fire its projectiles. Use cover from buildings if you are close to it when it gets angry.
- A large group attacking at once can drain MONOCULUS' health rapidly by at the risk of enemy team crossfire and less room to evade its projectiles.
- Players that survive the underworld can use their invulnerable state to stun MONOCULUS.
| Class | Strategy | ||
|---|---|---|---|
 Scout |
vs | 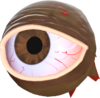 MONOCULUS |
|
 Soldier |
vs | MONOCULUS |
|
 Pyro |
vs | MONOCULUS |
|
 Demoman |
vs | MONOCULUS |
|
 Heavy |
vs | MONOCULUS |
|
 Engineer |
vs | MONOCULUS |
|
 Medic |
vs | MONOCULUS |
|
 Sniper |
vs | MONOCULUS |
|
 Spy |
vs | MONOCULUS |
|
See also