Difference between revisions of "Community Eyeaduct strategy"
(Link the main article and Community Halloween maps strategy. Also make other corrections for consistency.) |
(→General MONOCULUS Strategy: updates and grammar corrections) |
||
| Line 30: | Line 30: | ||
==General MONOCULUS Strategy== | ==General MONOCULUS Strategy== | ||
| + | |||
| + | * Unlike other later MONOCULUS situations, truce is called as long as MONOCULUS is on the map. | ||
| + | |||
| + | *The ability to capture the point will be postponed as long as MONOCULUS is alive so focus on killing it. A large group attacking at once can drain MONOCULUS' health rapidly. | ||
*Do not use melee weapons. MONOCULUS flies and/or hovers across sections of the map out of the range of almost all melee weapons. | *Do not use melee weapons. MONOCULUS flies and/or hovers across sections of the map out of the range of almost all melee weapons. | ||
| − | * | + | *Stay away from MONOCULUS when it begins to rapid fire its projectiles. Use cover from map structures if you are close to it when it gets angry. |
| − | * | + | *Players that survive the Underworld can use their invulnerable state to stun MONOCULUS. |
| − | *A | + | *A critical hit on MONOCULUS will make him angry, causing him to fire three critical projectiles in a row that move at the speed of [[Liberty Launcher]] rockets. When possible, stun him while he is angry to give yourselves breathing room. |
| − | * | + | * Be sure that you are healed up and have full ammunition as MONOCULUS is about to leave or die. |
| − | * | + | * In this particular KOTH arrangement, Engineers tend to build up or move up their positions during each truce. However, everyone has free reign of the map during a truce; so, use this situation to note where the enemy Buildings are located. |
| + | ** When the opportunity presents itself, stand next to enemy buildings while you shoot at MONOCULUS, and avoid your own team's buildings for the same reason. | ||
| + | ** As MONOCULUS gets close to either leaving or being destroyed, set up attacks you can make the moment the truce ends or prepare to thwart enemies attempting to do the same against your Engineers. | ||
== Class-specific MONOCULUS Strategy == | == Class-specific MONOCULUS Strategy == | ||
Revision as of 20:27, 14 July 2018
| Community Eyeaduct strategy | |
|---|---|

| |
| Basic Information | |
| Developer(s): | Unknown |
| Map Info | |
| Environment: | Halloween |
| Setting: | Nighttime, overcast |
| Hazards: | Pumpkin bombs, MONOCULUS, Water in the Underworld, Underworld damage-over-time effect, Loot Island explosion |
| Map Photos | |
This article is about Community Eyeaduct strategy.
Contents
General Map Strategy
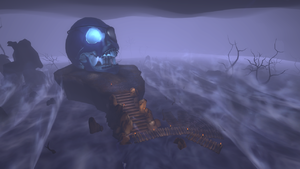
This Halloween map features pumpkin bombs, Halloween pumpkins, Ghosts, and the Soul Gargoyle; see Community Halloween maps strategy.
- This map is almost identical to Viaduct, so many strategies that work there will also work here.
- The game announces whenever a player leaves the Underworld with a bell toll and a message on the text chat. Those notifications can be useful for deciding when it's not a good idea to stand in the open, where invulnerable enemies run through.
- Players in the Underworld are still vulnerable to attack. Be wary of those who might target you or the pumpkin bombs near you while on the chain of islands, and don't let down your guard while waiting for the cage on Loot Island to lower, as enemies may take the opportunity to deny you your Bombinomicon and buffs.
- After killing MONOCULUS, if you notice much of the enemy team heading to Loot Island, use this opportunity to secure the point in your favor.
- Alternatively, having a large number of your team going to Loot Island can be effective, as though you might lose the point temporarily, the speed, strength, and health boosts given after you exit the Underworld can allow you to annihilate the enemy team.
General MONOCULUS Strategy
- Unlike other later MONOCULUS situations, truce is called as long as MONOCULUS is on the map.
- The ability to capture the point will be postponed as long as MONOCULUS is alive so focus on killing it. A large group attacking at once can drain MONOCULUS' health rapidly.
- Do not use melee weapons. MONOCULUS flies and/or hovers across sections of the map out of the range of almost all melee weapons.
- Stay away from MONOCULUS when it begins to rapid fire its projectiles. Use cover from map structures if you are close to it when it gets angry.
- Players that survive the Underworld can use their invulnerable state to stun MONOCULUS.
- A critical hit on MONOCULUS will make him angry, causing him to fire three critical projectiles in a row that move at the speed of Liberty Launcher rockets. When possible, stun him while he is angry to give yourselves breathing room.
- Be sure that you are healed up and have full ammunition as MONOCULUS is about to leave or die.
- In this particular KOTH arrangement, Engineers tend to build up or move up their positions during each truce. However, everyone has free reign of the map during a truce; so, use this situation to note where the enemy Buildings are located.
- When the opportunity presents itself, stand next to enemy buildings while you shoot at MONOCULUS, and avoid your own team's buildings for the same reason.
- As MONOCULUS gets close to either leaving or being destroyed, set up attacks you can make the moment the truce ends or prepare to thwart enemies attempting to do the same against your Engineers.
Class-specific MONOCULUS Strategy
| Class | Strategy | ||
|---|---|---|---|
 Scout |
vs |  MONOCULUS |
|
 Soldier |
vs |  MONOCULUS |
|
 Pyro |
vs |  MONOCULUS |
|
 Demoman |
vs |  MONOCULUS |
|
 Heavy |
vs |  MONOCULUS |
|
 Engineer |
vs |  MONOCULUS |
|
 Medic |
vs |  MONOCULUS |
|
 Sniper |
vs |  MONOCULUS |
|
 Spy |
vs |  MONOCULUS |
|
See also
