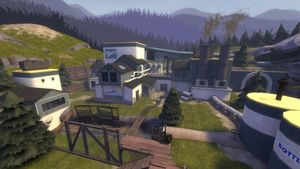
Community Swiftwater strategy
| “Sun Tzu's got nothing on us!” This article is a Community strategy stub. As such, it is not complete. You can help the Team Fortress Wiki Community Strategy Project by expanding it. Notes: Add more content |
| Community Swiftwater strategy | |
|---|---|

| |
| Basic Information | |
| Developer(s): | Unknown |
| Map Info | |
| Environment: | Alpine |
| Setting: | Daylight, sunny |
This article is about Community Swiftwater strategy.
Note: It is recommended to read the main Swiftwater article first to become familiar with the names of key map locations used in this article.
General strategy
At the beginning of the round, BLU should coordinate a push with ÜberCharge as the RED team has a high advantage overlooking BLU's spawn. ÜberCharge is important to push as it will negate spam from above.
Class-specific strategy
 Scout
Scout
General
As Scout you best work on offense, as you can either push the cart or flank. If you push the cart you can help your team get further as you 1v1 other light classes trying to stop the cart. If you flank you can save your team the trouble of dealing with Snipers by taking them out before they take out your team.
 Soldier
General
Like Scout, Soldier can capture or flank. While you capture, items like the Pain Train or any of the Banners will work best to capture. This works well because the Pain Train doubles your capture rate making you capture faster and the banners will help you tank more people while helping your team. If you flank, flanking is different from scout because instead of running you should Rocket Jump to get behind the enemy. The Gunboats will help a lot when rocket jumping, but as helpful as it seems the Liberty Launcher is not a good pick. This is because as you get less damage in your jumps you don’t have enough power to kill off any of the classes.
 Pyro
Pyro
General
Pyro can work on either offense or defense. A Pyro on offense will best work in small rooms and short tunnels. If you have any of the flare guns you can use this to cancel out snipers and make them run to a health pack as you cap. If not you can still play aggressive by flanking and getting the enemy team in a small place where you can go in for the kill. On defense, Pyro can use the Homewrecker to help Engineers and basically make their nests indestructible. Unless a Demoman with a Sticky launcher or a Über-Medic with someone come around the corner, you can keep a good distance and kill any flanking enemy.
 Demoman
General
As a Demoman on offense the Sticky Launcher will be your best friend, as it will take out Sentry nests and Medic-combos. This will save your team the hassle of taking out Engineers and their buildings. Surprisingly enough, Demoknight best works on defense. This is because you have an easier time picking off targets on the enemy team. Also Demoknight on offense has a overall difficult time dealing with Engineers.
 Heavy
Heavy
General
 Engineer
General
- Engineer can be extremely beneficial to both RED and BLU. Engineer's can place Sentry Guns and Dispensers to aid their team. Teleporters are also very useful as it allows teammates to get to places quickly. This can be used to deny any attempt to capture the payload cart.
Offense
 Medic
Medic
General
Using ÜberCharge to wipe out enemies and forward operating bases is effective as it impedes progress on their goals.
 Sniper
General
Sniper is best on defense, some parts of the map has long sight-lines especially by the second capture point. This is where Sniper will shine the most. The payload cart has a basically a strait tunnel for you to shoot into. As the enemy tries to get to the cart you can shoot them down. The only people you need to worry about is spies and other snipers.