User:Lolimsogreat21/Sandbox1
< User:Lolimsogreat21
Revision as of 10:01, 27 January 2022 by Lolimsogreat21 (talk | contribs) (→Class-specific strategy)
| “Sun Tzu's got nothing on us!” This article is a Community strategy stub. As such, it is not complete. You can help the Team Fortress Wiki Community Strategy Project by expanding it. Notes: Expand the "General Strategy" section to cover map locations in more detail. Potentially look at the class-specific strategies as well. Also, the addition of a time limit was a relatively recent change, so remove any strategies that mention or rely on the formerly infinite time limit. |
| Lolimsogreat21 | |
|---|---|

| |
| Basic Information | |
| Developer(s): | Unknown |
| Map Info | |
| Environment: | Industrial |
| Setting: | Daylight, sunny |
| Map Photos | |
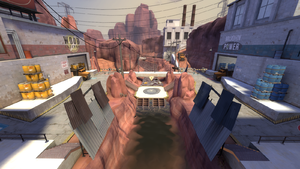
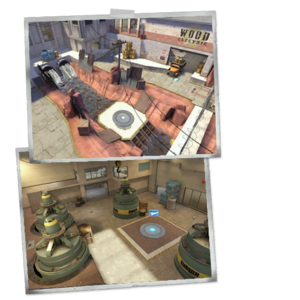
This article is about Community Powerhouse strategy.
Note: It is recommended to read the main Powerhouse article first to become familiar with the names of key map locations used in this article.
General strategy
- As this map has three control points instead of five, capturing goes a lot faster. Make sure that the middle control point is protected or else the battle can easily swing in the opposite direction.
- This map has many different paths you can take. If one doesn't work, use another.
- Due to the nature and layout of the map, it's very common for a prolonged stalemate to occur. Be sure to keep an eye on your team's class balance so you're not unbalanced.
- Because of Powerhouse's "stalematey" nature, actual coordination will be needed. Don't be afraid to hop on the Voice chat and help direct play. Even the best team falls apart without communication.
- The central point is very open and vulnerable from multiple sides and angles. Use this to put massive amounts of pressure onto any team attempting to capture it, thus making them fall apart, and allowing you to capture the point in return. In fact, most of the battles for middle are won this way.
- If you are attacking the enemy's last point, keep in mind that you will first need to capture their Launch Pad Room, which can best be achieved by launching an assault from the advantageous Team Sides.
- With the aforementioned Launch Pad room in your hands, you can either make a dash for the Final point itself, or settle in the Control Room, where another attack can be organized.
- If you are defending your team's last point, then make sure to stage yourself in the Launch Pad Room, which acts as a buffer-zone between the middle and the final point.
- In the event that the Launch Pad Room is lost, you can retreat to the Control Room in order to setup a last line of defense.
Class-specific strategy
 Scout
Scout
- The middle control point is fast to capture and can easily turn the tide of the battle. When the enemy team is pushing, try to sneak by and capture the point.
- Utilize alternative routes to flank the enemy team. This task can further be aided with the use of Bonk! Atomic Punch, especially if you are trying to traverse the Chokepoints.
- This map has a sharp contrast between an open middle point, and a relatively enclosed first/third point. As such, switching between weapons which can benefit from their respective areas is an important strategy to employ.
- For example; mobility-enhancing weapons, such as the Soda Popper or the Atomizer, are very effective on the open middle point, where there is plenty of space available.
- Meanwhile, Force-A-Nature and Back Scatter perform better inside Powerhouse's enclosed sections, where the distance between your targets can quickly be closed.
- The Mad Milk is dangerously effective inside the Chokepoint, where players often clump up together.
- If you have reached the enemy team's battlements, you can camp on top of them and wait for any unaware attackers to pass below.
- The small section of Water on Powerhouse serves as a surprisingly good ambush spot.
 Soldier
- Try to rocket jump through the team side windows. You can quickly get the drop on enemy Snipers harassing your team.
- There are many chokepoints throughout the map. Spamming rockets to keep the enemy team at bay can help your team regroup and strategize.
 Pyro
Pyro
- Use your airblast to keep the enemy team off the middle control point. Try to push them into the moat to slow them down.
- A Phlogistinator can be deadly in confined spaces. Team up with a fully charged Medic and wipe out their team!
- Equip the Homewrecker and become your Engineer's best friend. Keeping his sentry nest and teleporter up will help your team win the round.
 Demoman
- Many of the corridors are narrow, so use your Grenade Launcher when possible.
- Get sticky traps on the control points whenever possible. As the map only has three points they can be captured fast.
- The Iron Bomber can be useful for dealing big damage and chip damage against enemy teams, especially with the lack of roll on grenades. Use it like you would the Stickybomb Launcher with deadly results!
 Heavy
Heavy
- In close firefights, use yourself as a tank to help your team push forward.
- As a Heavy, you're a great Medic buddy. Keep him alive and feed him sandviches when he's weak.
 Engineer
- The last control points have plenty of spots to cover with your Sentry Gun. Set your sights to defend the point as much as possible.
- There are plenty of rooms to hide a Teleporter Exit in. Look for an area that is not getting much action.
- Teleporters win games. Make sure you've got a teleporter up and running at all times. Every second shaved off for getting your teammates to the battlefield is crucial.
- A Eureka Effect loadout can be very powerful on this map.
- Because of the space between mid and last, incremental territorial gains will be key. Be sure to keep your engie nest moved to keep pace with your team.
 Medic
Medic
- Like most other maps, your survival is crucial to the team's survival. Pocket your team's top players to stay alive and lead your team to victory.
- Use your microphone and help coordinate your team. Let them know what your Uber percentage is and when enemies are converging on your team.
- Assist the team in pushing for the middle control point. That point is going to be the main area for fights, and your healing can make the difference between victory or defeat.
- Assist in the main push for the final control point. There are lots of tight corners where teammates can get heavily damaged.
 Sniper
- There's a windowed room on the upper floors of each team side that gives you a complete view of the middle control point area. Use it when possible to prevent captures and to protect your team. However, be aware of enemy Spies who can easily sneak past your team using the many flank routes.
 Spy
Spy
- Sentry nests can be tricky to bust on this map for the other classes. Try to help your team by destroying the Engineer's nest.
- Teleporters win games. If you find your team stuck defending your last point, go behind enemy lines and take out their teleporter entrance. Your team will thank you.
