Community Carnival of Carnage strategy
| “Sun Tzu's got nothing on us!” This article is a Community strategy stub. As such, it is not complete. You can help the Team Fortress Wiki Community Strategy Project by expanding it. Notes: Finish the curse strategy section |
| Community Carnival of Carnage strategy | |
|---|---|
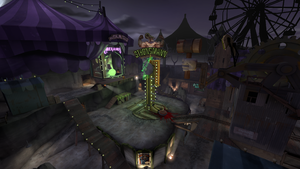
| |
| Basic Information | |
| Developer(s): | Unknown |
| Map Info | |
| Environment: | Desert |
| Setting: | Nighttime |
| Hazards: | Pumpkin bombs, Bottomless pit, The Necro Smasher |
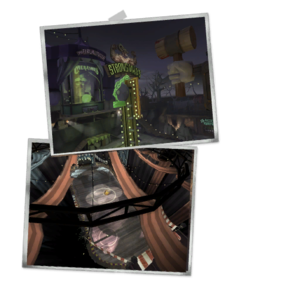
| Map Photos | |
This article is about strategy specific to the Halloween variant of Doomsday. For strategy specific to the standard variant, see Community Doomsday strategy.
This article is about Community Carnival of Carnage strategy.
Note: It is recommended to read the main Carnival of Carnage article first to become familiar with the names of key map locations used in this article.
General strategy
This Halloween map features pumpkin bombs, Halloween pumpkins, magic spells, a Ghost, and the Soul Gargoyle; see Community Halloween maps strategy.
- The Tickets carrier is particularly vulnerable when riding the lift, as they cannot hide from attacks. Killing the Tickets carrier at this point can be enough to seriously set back the offensive team's progress.
- To counter this, the offensive team should try to get as many players as possible onto the lift, both to provide firepower and to block and deflect attacks ; the Tickets carrier can also crouch close to the rocket to reduce their exposed hitbox, provided there are no Snipers with a line of sight to this point — if the other team has Snipers, the Ticketts carrier should keep moving as much as possible.
- An equally viable tactic for the team trying to deliver is to have only the carrier (and possibly a bodyguard) on the lift while his teammates try to occupy and hold the high ground around the rocket, gunning down any enemy trying to ascend the ridge to get a clear shot at the carrier. Watch for divebombing Soldiers, Demomen lobbing their explosives onto the lift from below and Pyros that can airblast the Tickets carrier off of it if they manage to get to the top.
- The lift features a button on the opposite side of the platform with a medium health pack, which stepping on will shortly trigger a blow from the NecroSmasher, killing anyone on it and knocking anyone in the vicinity upwards. Use this to kill enemy players or disrupt the fight by launching combatants into the air.
- The majority of the fighting on this map will take place in a large multi-level area around the rocket. Control of the high ground that the ridge overlooking the lift provides is crucial; it is very difficult to deliver the Tickets if the enemy can attack its carrier freely from a high vantage point.
- Both teams should put a lot of pressure on enemy Snipers, as they can easily ruin your progress if left unchecked. Have your Scouts, Spies and Flare Gun, Detonator, or Scorch Shot Pyros constantly harass their known locations to kill them off or force them to retreat (all the best sniping spots are near the spawn exits).
- Snipers will often use the path between their spawn point and the Tickets drop site as a safe place from which to snipe at players on or around the lift, which can be devastating to either team. This is a very good spot for an ambush—hide in the corner, where players exiting the spawn point cannot see you, and then take them out from behind. Spies equipped with the Cloak and Dagger can land a few easy backstabs while camping in this area.
- There is a bush on RED's side large enough to conceal Combat Mini-Sentry Guns, Snipers, and Spies.
Class-specific strategy
 Scout
Scout
- The Scout is a good class to carry the Tickets, due to his speed and agility. A Scout can get the Tickets to the rocket faster than any other class, at the expense of durability.
- Staying on the lift is quite difficult for a Scout due to his low health, but his small frame and good speed can make him a hard target for Snipers, while the ability to perform double jumps can save him from rockets and bombs by jumping from the platform at the right moment with the first jump and back to it with the second, or just using it to jump back and forth.
- An alternative is to pick up the Tickets, bring it to the rocket, then drop the Tickets (default press L) to pass it to a teammate with more health, such as a Heavy or Soldier, who can ride the rocket with less risk of dying and dropping the Tickets.
 Soldier
- To make up for the lack of speed, rocket jumping can be used to great advantage — it may be useful to equip the Gunboats to counter the health loss. However, this comes at the expense of the Shotgun, which can be a useful alternative to the Rocket Launcher in the open spaces around the lift.
- You cannot carry the Tickets with the Rocket Jumper equipped — instead of trying to make the winning capture, use your Shotgun and your increased mobility to harass enemies, especially Snipers.
- Rocket jumping allows a Soldier to deposit the Tickets in the top of the rocket without waiting for the lift once its lid has been opened, which may be useful if the other team already opened the rocket's lid or if your team's progress was reset at the last minute.
- When on the lift, the Soldier can be a very strong class. His rockets' high damage, large splash radius, and strong knockback make them useful defensive weapons when crouching on the lift, though you need to be precise with them. Spamming the ground with rockets from here is a good tactic, if there are no Snipers on the enemy team or they can't hit you.
- Defensively, the Soldier can also be useful. The Rocket Launcher's high damage and large splash radius make it useful for damaging everyone on the lift at once, including the Tickets carrier. Even more important is the knockback provided, which can push the carrier off the lift.
- The Tickets carrier will probably keep moving as much as possible, often erratically, when not on the lift, so the Rocket Launcher is less useful against him — consider using a hitscan weapon such as the Shotgun at medium-to-close range.
- Since this map is based around a large open space, your rockets can damage enemy Engineer buildings outside the range of his Sentry Guns.
- Rockets are less effective against enemy players, who can easily dodge them, avoiding splash damage due to the open space. Therefore, this map tends to require Soldiers to get quite close to their targets. Rocket launchers with faster-moving projectiles, such as the Liberty Launcher or the Direct Hit can also be helpful (although the Direct Hit's lack of splash damage is a definite downside).
- When riding the lift, the Direct Hit and the Reserve Shooter are excellent utilities for preventing enemy Soldiers and Demomen from blast jumping onto the lift - shooting them midair with the Reserve Shooter will deal extra damage, often knocking the enemy away from you, while an airshot with the Direct Hit will usually kill them instantly.
 Pyro
Pyro
- Afterburn is less effective on the lift, since the lift heals all riders from the Tickets carrier's team during its ascent.
- Utilizing the compression blast to push the Tickets carrier off the lift can turn an assured victory into a plummet back to square one. It is also very useful to protect yourself and your teammates on the lift, both from projectiles and from enemies jumping onto it.
- The Scorch Shot can ignite nearly every enemy on the lift at once from a safe distance. Its knockback may also be enough to knock the Tickets carrier off the lift, resetting his progress (and possibly causing fall damage if the lift is high enough).
- The Thermal Thruster can be used to rocket yourself on to the lift, letting you knock back enemies and contest the capture with your flames and compression blast. Be wary of the increased knockback while in flight, and consider taking off from a distance to ensure enough time to deploy your primary weapon before landing.
- The Gas Passer can ignite groups of enemies on the lift, or to soak the Tickets pickup point during the initial fight.
 Demoman
- Stickybombs around the lift and on the side of the rocket are an obvious strategy when on the defense, but usually effective. They can blow up an unprepared Tickets carrier and his teammates, or waste the carrier's time destroying or dispersing the bombs. Note that you can't put the stickybombs on the moving lift, but you can put them on the rocket itself. It is also a good idea to shoot the stickybombs and grenades upwards, almost directly from underneath the lift at the top, thus staying protected from the enemies above while damaging them.
- Sticky jumping can provide a speed boost to get the Tickets to the lift faster, or can be used to bypass the lift entirely if the lid of the rocket is already open. This comes at the expense of more health than the Soldier's rocket jump, however.
- You are not the best class for carrying the Tickets - your slower movement speed and only slightly above-average health makes it easy for enemy Snipers to kill you.
 Heavy
Heavy
- Offensively, the Heavy can use his health and firepower to his advantage, without worrying about his speed, by standing on the lift and defending the Tickets carrier — just by wary of enemy Snipers .
- Defensively, the Heavy is very good at clearing the lift by standing on one of the raised platforms nearby and attacking the enemies below with his Minigun (which does not require reloading). However, this leaves him vulnerable, both to Spies trying to land an easy backstab and to Snipers.
 Engineer
- Doomsday is not the easiest map for a classic, Wrench-wielding Engineer, due to its small size and wide open spaces. However, a level 3 Sentry Gun on one of the raised platforms near the Tickets pickup point is enough to dispatch any enemy who may attempt to pick it up, leaving it clear for your team when the Tickets is reset.
- Another good place for a sentry when playing defensively is on one of the raised platforms near the lift, especially shielded by one of the doorways, from where it can easily fire at any enemy standing on the lift. However, it is likely to take significant damage here, so an Engineer will need to actively defend it, and stay nearby to ward off Spies, all while dodging Sniper shots.
- Gunslinger Engineers, on the other hand, thrive on this map, as the easily replaceable Mini-Sentry Guns deployed in the open space around the lift can cover a large area and score plenty of kills and assists on the many distracted enemies trying to ascend and wrestle control of the area from you. The intense action will make sure there are usually plenty of dropped weapons lying around, so you should have enough metal to replace lost Sentry Guns regularly. Expect to become a high-value target, however, as the enemy will quickly become frustrated and may target you.
 Medic
Medic
- Doomsday's open design near the lift can make generating ÜberCharge difficult, as you are a target for Snipers. Ensure you have allies with you first, before going in.
- Due to the hectic nature and attraction to the launchpad for both teams, it is best to heal from a good distance and not to cluster near your patients. Riding the lift with your patients opens you up to the fire they will attract, so consider your ubercharge percentage before doing so.
- An ÜberCharge from the Kritzkrieg can be devastating when used on large groups of enemies riding the lift. Soldiers and Demomen can effectively clear a crowded lift with one or two critical explosives.
- The Vaccinator is especially useful on this map, as it does not require a full Übercharge to deploy a shield. It can charge a shield faster than any other Medi Gun, and the Bullet resistance can be used to protect yourself from Sniper headshots.
 Sniper
- The Sniper is very good at defending the Tickets pickup point — the raised platforms provide a good vantage point to attack the Tickets carrier before they arrive at the lift.
- It can also be easy to pick off the Tickets carrier with a headshot from one of the raised platforms near the lift.
- The elevated path from the far spawn exit to the Tickets pickup point provides a good place to snipe from, but you need to be aware of your surroundings and very cautious since it is not protected from enemies in any way. Either the SMG or the Jarate/Bushwhacka combo can protect you somewhat from nearby enemies, while your team's spawn room is not too far away to run to avoid ranged attackers.
- The Machina can be extra-useful on Doomsday. Since it can penetrate the enemy, you can use it to kill both the Tickets carrier and his buddies to prevent the latter from picking up the Tickets; it can be fairly simple when they're all bunched up on the lift's platform, as they can't move around much. However, trying to line up your shots for penetration kills should not happen at the expense of taking down the carrier as quickly as possible.
 Spy
Spy
- The Spy can be the both teams' primary defense against Snipers, who are most likely to be found on one of the raised platforms near the Tickets pickup point or watching the lift, depending on the stage of the game, or on the path between their base and the Tickets pickup point.
- Another use for the Spy is cloaking on the lift and landing a well-timed backstab on the Tickets carrier (the Cloak and Dagger is useful for this). This is a risky strategy, though, and is best attempted when there are few enemies on the lift to avoid being discovered.
Curse strategy
- Curses bring all the players into the central courtyard and resets the tickets. This is a good time to take the tickets whilst the enemy team is distracted and is most effective if the curse gives a speed bonus such as the Balloon Heads or No Guns curses.
Underwater
- Precision/Underwater oriented weapons are incredibly effective in this curse.
- The Soldier's Direct Hit is powerful underwater due to the slower movement speed of enemies and faster projectile speed of the gun. It will be more consistent at damage dealing then stock during the curse.
- The Pyro's Neon Annihilator can instantly crit underwater, so you can kill medics and lower health classes with one hit automatically.
- Inversely, stay away from players taking advantage of these weapons by hiding behind the strongmann and/or keeping your distance.
Balloon Heads
No Guns
- All players are limited to melee weapons and have the rare Shrinking Spell applied to them, without the infinite jump bonus. All projectiles and Sentry ammo are removed while the players are being teleported.
Bumper car strategy
- Keep your speed low and hit the gas when you see an enemy car.
- If you become a ghost, fly back to the course where teammates can revive you so you can reinforce your team and help teammates with Achievements and Contracts.
- If there is a teammate ghost on the course, drive into them to revive them.
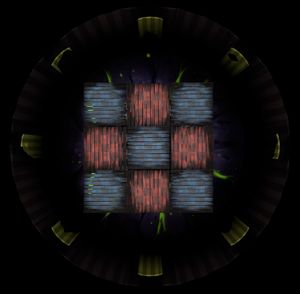
Falling Platforms
- Your main priority is staying alive. Try to knock opponents off when you are on the safe platform.
- Sometimes it is best to avoid enemies without trying to knock them off, as if they miss you entirely, they could possibly fall of the map without you even bumping them.
- If you do want to knock opponents off, a good time to do it is when the platforms are going to fall and knocking them into the platform just as it is about to break.
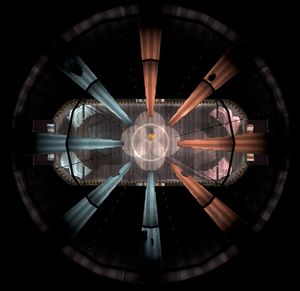
Bumper Car Soccer
- Try to keep opponents distracted while the Horseless Headless Horsemann has not spawned, when it does spawn try to keep away from it and push enemies near it.
- Many players play around the ball exclusively, which results in each team scoring goals after the enemy has scored theirs, due on their position on the field being opposite for their goal (aka BLU scores, then RED is in position to score, then RED scores, then BLU is in position, etc...). To support your team, stay defensively around your goal to blockade incoming scores like a goalie in real life Soccer, it will open up opportunities for your team to score more often.
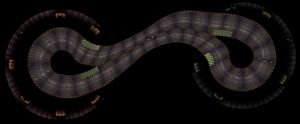
Duck Collectors
- Use the Parachute spell whenever possible to avoid falling off of the track.
- Changing direction to the one the majority of your opponents are using can give you an advantage, as they cannot see you clearly from behind and you can use their current momentum to knock them further off the course.
