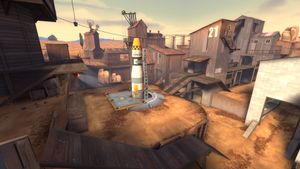
Community Doomsday strategy
| “You are so small! Is funny to me!” This article is a stub. As such, it is not complete. You can help Team Fortress Wiki by expanding it. |
| Community Doomsday strategy | |
|---|---|

| |
| Basic Information | |
| Developer(s): | Unknown |
| Map Info | |
| Environment: | Farmland |
| Setting: | Daylight, sunny |
| Hazards: | Pitfall, Rocket exhaust path |
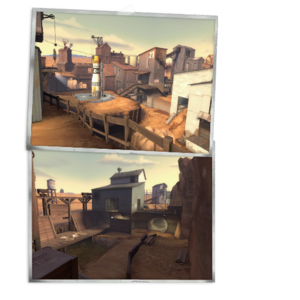
| Map Photos | |
This article is about Community Doomsday strategy.
Contents
General (All Classes)
- Special Delivery requires teams to be flexible, and switch between offensive and defensive gameplay depending on the current owner of the Australium. It is a good idea to have a good balance of offensive and defensive classes, and to be willing to switch classes between lives to better assist your team.
- The Australium carrier should be the defensive team's primary target, as their objective should always be to get the Australium reset; however, it is important not to lose track of other valuable members of the team, especially Medics and players who could get in your team's way later on.
- The Australium carrier is particularly vulnerable when riding the lift, as they have nowhere to go to run from the attack. Killing the Australium carrier at this point can be enough to seriously set back the offensive team's progress
- To counter this, the offensive team should try to get as many players as possible onto the lift, both to provide firepower and to act as human shields; the Australium carrier can also crouch close to the rocket to reduce their exposed surface area.
- The Australium carrier should always try to travel with at least one "buddy", to defend him and to pick up the Australium in the event of his death. The Buddy might want to keep his distance or take an alternative route, however, to avoid being killed as well.
- Much of the strategy for Capture the Flag and Payload also applies to Special Delivery; many of the same tactics may be useful in this case.
Class-specific strategy
 Scout
Scout
- The Scout can be a good class for carrying the Australium, due to its speed and agility. A Scout can get the Australium to the rocket faster than any other class, at the expense of health.
- When carrying the Australium, a Scout should utilise his increased mobility to try and escape conflict, rather than attempting to engage his attacker—his low health and firepower mean it is a battle he is likely to lose.
 Soldier
- The Soldier is one of the slower classes, so it may take more defending to deliver the Australium as a Soldier. However, his high health gives him staying power, allowing him to take more of an assault on the way to the lift.
- When on the lift, the Soldier can be a very strong class. His rockets' high damage, large splash radius, and strong knockback, especially when combined with their arching trajectory, make them useful defensive weapons when crouching on the lift. Spamming the ground with rockets from here is a good tactic.
- Defensively, the Soldier can also be useful. The Rocket Launcher's high damage and large splash radius make it useful for damaging everyone on the lift at once, including the Australium carrier.
- The Australium carrier will probably keep moving as much as possible, often erratically, when not on the lift, so the Rocket Launcher is less useful—consider using a hitscan weapon such as the Shotgun at medium-to-close range.
 Pyro
Pyro
- Afterburn can be useful against the Australium carrier, allowing long-term damage to be inflicted, even after only short engagement or your own death. It can also be used as part of a co-ordinated team effort, to set up an ambush at the nearest Health pack or pool of water.
- The Flamethrower's wide damage radius can damage the Australium carrier and anyone defending him, making it a good tool to dispatch of them all at once to avoid the Australium being picked up again straight away.
- Offensively, the Flamethrower can be less useful, as players on the defence will probably keep their distance. Rather than carrying the Australium, try sneaking up on defensive players using the Backburner to clear the carrier's path.
 Demoman
- Stickybombs on the lift are an obvious strategy when on the defence, but usually effective. They can blow up an unprepared Australium carrier and his buddies, or stall the carrier's progress while the bombs are disposed of with the Shotgun.
- The speed boost provided by charging with a shield such as the Chargin' Targe can be handy when carrying the Australium to the lift, but the Demoman's lack of direct weaponry makes him a weak class overall for carrying the Australium.
 Heavy
Heavy
- The Heavy's health is the highest in the game, giving him staying power as an Australium carrier, and his Minigun makes a strong weapon in the event of an attack. However, this is countered by his slow speed, especially when spun up, and the Heavy tends to be more useful in a supporting role.
- Offensively, the Heavy can use his health and firepower to his advantage, without worrying about his speed, by standing on the lift and defending the Australium carrier.
- Defensively, the Heavy is very good at clearing the lift by standing on one of the raised platforms nearby and spamming it with his Minigun (which does not require reloading). However, it is useful to watch out for spies trying to land an easy backstab.
 Engineer
- Doomsday is not the easiest map for an Engineer, due to its small size and wide open spaces. However, a level 3 sentry gun on one of the raised platforms near the Australium pickup point is enough to dispatch of any enemy who may attempt to pick it up, leaving it clear for members of your team at the start of the round or when the Australium is reset.
- Another good place for a sentry when playing defensively is on one of the raised platforms near the lift, especially shielded by one of the doorways, from where it can easily fire at any enemy standing on the lift. However, it is likely to take significant damage here, so an Engineer will need to be proactive defending it, and stay nearby to repair it at short notice.
 Medic
Medic
- Used correctly, a Medic can be very useful to his team. Offensively, healing the Australium carrier is obviously a good choice, as he tends to be the most important player on the team at any one moment. If you can stay alive yourself for long enough to build up an ÜberCharge (which is not easy, considering your proximity to probably the most-attacked player on the map, although this does mean your ÜberCharge will build much faster), the Australium carrier is a good target for it, for obvious reasons.
- Defensively, the usual tactic of buddying with a Heavy or a Soldier can be very useful to the team, and a well-deployed ÜberCharge can set back the offensive team significantly, or even reset the Australium.
 Sniper
- The Sniper is very good at defending the Australium pickup point—the raised platforms provide a good position from which to land an easy headshot, and anyone wanting to pick up the Australium will have to pass the same point.
- It can also be easy to pick off the Australium carrier with a headshot from one of the raised platforms near the lift.
 Spy
Spy
- The Spy can be the both teams' primary defence against Snipers , who are most likely to be found on one of the raised platforms near the Australium pickup point or the lift, depending on the stage of the game.
- Another use for the Spy is cloaking on the lift and landing a well-timed backstab on the Australium carrier (the Cloak and Dagger is useful for this). This is a risky strategy, though, as the inevitable firefight that will ensue at this point in the game is very likely to reveal the cloak. Land the backstab fast, before you are discovered.
- If his team is on the offensive, a Spy can be handy to dispatch of high-firepower classes like the Heavy or the Solider, who are likely to be concentrating on the lift rather than watching their backs.
