Community Erebus strategy
| “Sun Tzu's got nothing on us!” This article is a Community strategy stub. As such, it is not complete. You can help the Team Fortress Wiki Community Strategy Project by expanding it. |
| Community Erebus strategy | |
|---|---|

| |
| Basic Information | |
| Developer(s): | Unknown |
| Map Info | |
| Environment: | Halloween |
| Setting: | Night |
| Hazards: | Pumpkin bombs, Pitfalls, Skeletons |
| Map Photos | |
This article is about Community Erebus strategy.
Note: It is recommended to read the main Erebus article first to become familiar with the names of key map locations used in this article.
Contents
General strategy
See also: Community Attack/Defend strategy
See also: Community Skeletons strategy
This Halloween map features pumpkin bombs and Halloween pumpkins; see Community Halloween maps strategy.
Offense
Stage 1
Capture Point A
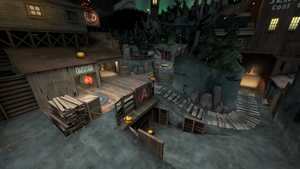
- The best way to quickly take over the Lumber Yard would be to attack it from the Tree Stumps and the Lower area at the same time, thus overwhelming the defenders protecting it.
Capture Point B
- After the Capture Point A is secured, a portal to the Underworld will open up and give any players entering it numerous benefits, which can be used when attacking the next point.
- If traversing through the Sawmill proves to be too hard, the Blu team can make use of the surrounding Mines serving as excellent flank routes.
- Due to the Control Point's B exceedingly fast capture rate, it might be possible to ignore the Red team entirely and simply go straight for the point itself.
Stage 2
Capture Point A
- Once the Blu team exits their spawn, they should try to immediately secure the Cliffs, as they are the fastest route to the Capture Point A available. If this is not possible, the Blu team can then make use of the Cave.
- The Ravine is at a height disadvantage when compared to the aforementioned Cliff, making it an inferior avenue to take.
Capture Point B
- This particular section of the map is very friendly towards the attacking side, due to the abundance of ways from which the Capture Point B can be approached from.
- The Sniper Deck's long sightlines can be used to harass and put constant pressure on the defenders from a far.
- With the help of the appropriately named Left Flank, the Blu team can pull of many ambushes and sneak attacks aimed at the Church.
- Although the Shed's lack of high ground makes it the worst path of the three, it still has some niches going in its favour
Stage 3
Capture Point A
- The fastest and the most direct route to Capture Point A, on this stage at least, would be through the Building 237. However, this does not mean that every single Blu member should pill up inside the aforementioned building, since doing that will leave them exposed to explosive damage.
- Those preferring a flank-oriented playstyle can make heavy use of the Yard, which allows them to sneak behind the enemies up on the Elevation.
Capture Point B
Defense
Stage 1
Capture Point A
- Red teammates can confidently expect the main thrust of offense's attack to come from the Lower area. However, Tree Stumps also should not be forgotten, as they open up a dangerous flank on the left.
Capture Point B
- The Sawmill's chokey nature works in favour of the defending team, which can use it to stop the Blu's rapid advance and halt them for a bit.
- At least one person needs to be on the point at all times, due to the control point's B very fast capture rate of only a few seconds.
Stage 2
Capture Point A
- The most important location on Capture Point A would be the Cliff, primarily due to its powerful High ground advantage. Because of this, the Red team should slowly start retreating in the even that the Cliff falls into enemy hands.
Capture Point B
- Many defenders will often make the mistake of clumping up together inside the Church, thus leaving them very vulnerable to explosives and general spam. Instead, the defending side should spread out and try to cover as much land as possible, creating a sort of a "buffer zone" in between them and the Capture Point B itself.
Stage 3
Capture Point A
- At the beginning of the round, the Red team should primarily focus on protecting the Building 237, as that is where the majority of attackers are going to rush through in an attempt to quickly take over the point.
Capture Point B
- It is important to prevent the Computer Room from falling into Blu hands, as it the most direct route to the final capture point.
