Community Polar strategy
(Redirected from Polar strategy)
| “Sun Tzu's got nothing on us!” This article is a Community strategy stub. As such, it is not complete. You can help the Team Fortress Wiki Community Strategy Project by expanding it. |
| Polar | |
|---|---|

| |
| Basic Information | |
| Map type: | Payload |
| File name: | pl_coal_event
|
| Released: | December 2, 2021 Patch (Smissmas 2021) |
| Developer(s): | Matthew "Panckakebro" Hiller Elián "iron" Rodríguez Phe Ryan "Chill" Foy Denis "xB33" Varchulik William "Cheesypuff" Bartley-Bolster Oliver "OverPovered" Pennanen |
| Map Info | |
| Environment: | Smissmas |
| Setting: | Night, snowy |
| Hazards: | Pitfalls |
| Map Items | |
| Map Photos | |
| Map Overview | |
This article is about Community Polar strategy.
Note: It is recommended to read the main Polar article first to become familiar with the names of key map locations used in this article.
Contents
General Strategy
Offense
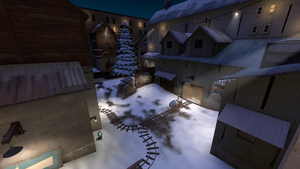
- Defenders often like to overextend into the Christmas tree, opening up an opportunity to encircle and destroy them.
- The Brick Building acts as a powerful shortcut directly to checkpoint A. It is often the best position from which to assault the Sentry Deck.
- If the attackers are capable of successfully reaching the A Point Building, they will be granted with High ground directly overlooking the Sentry Deck.
- Later in the round, the A Point Building is also very important when assaulting the checkpoint B.
- Flanking classes can make use of the Chute in order to flank around the defenders which are retreating from checkpoint A.
- Although the Jenkin Coal.co might seem as good route to point B, it is often more safer to directly follow the Cart's tracks, as they are much wider and not as "chokey".
- Meanwhile, the aforementioned Jenkin Coal.co is better suited for an Über push, rather then dry-pushing.
- Having Soldiers which can reach the Dropdown and use its immense height advantage to bombard the Reds defending point C below, is very powerful.
- The Flank can be used to discretely reach the Red's third spawn.
- On Checkpoint D, taking control over the Factory is simply imperative for winning the round.
- To do this, a Teleporter can be setup in the room above the Dropdown, from which attackers can launch assault after assault onto the Factory's upper floors.
Defense
- As the attackers are pushing the Cart up to Checkpoint A, it is possible to put them in a crossfire between the Sentry Deck and the A Point Building.
- Keeping an eye on the Brick Building is important, since the attacking team often utilizes it for offensive purposes.
- The Concrete platform and the Jenkin Coal.co can work together to put the attackers advancing on point B in a crossfire.
- Holding on to the Jenkin Coal.co is not absolutely necessary, but it is useful for certain diversion and flanking tactics, which can come in handy.
- For defending checkpoint C, it is important to keep an eye out on the Dropdown, since attackers often love to setup in there, as well as use it to flank above the Gates.
- The Factory is immensely important on point D and should be defended at all costs. This task is best achieved by Soldiers and Pyros, due to their close-ranged nature.
Class-specific strategy
 Scout
Scout
Offense
- Up until the Sentry Deck, you should be able to quite easily dominate the battlefield on checkpoint A.
- If you wish to flank behind the Red defenses on point A, you can do so through the A Point Building, since it is the only route not covered by the appropriately named Sentry Deck.
- However, there is sometimes a Sentry Gun inside the A Point Building itself, so beware.
- As the defenders are retreating from Point A, you can surprise them from their sides by flanking through either the Chute, or the A Point Building.
- The Bonk! Atomic Punch is useful when attempting to break through the Checkpoint B's defenses.
- You can utilize one of your jump-extending weapons, such as the Atomizer or the Winger, in order to climb up the Dropdown.
- The Dropdown can be used in order to completely circumnavigate the Point C, thus allowing you to reach the Red spawn and subsequently their backline.
- Be careful when traversing through the Factory, as you will be vulnerable to explosives in its tight rooms and corridors. Use your speed to get out of an unfavourable situation.
- The Final point usually becomes infested with Red Sentry Guns, which can either be bypassed with the Bonk! Atomic Punch or spammed out from a far with the Pistol.
Defense
- You can wait on top of the Boulder for a high value target, such as the Medic, to step outside the Blu spawn. At which point you can Force-A-Nature them of a cliff.
- If the coast is clear, you might be able to sneak through the Brick Building in order to end up in front of the Blu team's spawn.
- While the attackers are pushing the Cart up to checkpoint B, you can hide under the Chute and wait for them to show you their back.
- The Jenkin Coal.co is an excellent flank route for Red Scouts. It is also a good place in which to make use of the Mad Milk.
- There are a lot of obstacles and pieces of map geometry present around the area of Checkpoint C, between which you can repeatedly jump in order to make yourself a difficult target.
- Mobility-enhancing weapons, such as the Soda Popper, are quite useful in this regard.
- Attackers tend to cluster up as they are assaulting the final checkpoint, making themselves vulnerable to effects of the Mad Milk.
 Soldier
Offense
- From the spawn, you can use the Soldier's rockets to target enemy Snipers on top of the A Point Building.
- Peeking through the Brick Building will give you direct vision of the Sentry Deck.
- The Concrete Platform can be targeted from within the Jenkin Coal.co.
- On point C, you can cause immense destruction to the Red team by Rocket jumping up to the Dropdown and approaching them from above.
- Focus your attention on taking over the Factory, as it is greatly important for a last point push and you will be able to safely target Red Sentry Guns from it.
Defense
- When defending checkpoint A, you can either play aggressively or passively.
- An aggressive playstyle involves taking up forward positions in the Brick Building and the Christmas Tree area, in order to receive the attackers immediately.
- A passive playstyle, on the other hand, focuses on sitting in the A Point Building and using its height advantage to bombard the Cart from a far.
- A concealed ambush position can be found on top of the Boulder.
- Blu attackers will often setup a forward Sentry base behind the Cargo Crates on Point B, which can be targeted from within the Chute.
- The Base Jumper is quite useful for defending the third checkpoint, where you will be at a height disadvantage when compared to the Blu team.
- Blu Soldiers and Scouts will often attempt to reach the Factory by jumping up to it in a predictable fashion, something which the Direct Hit can exploit.
 Pyro
Pyro
Offense
- Enemy Demomen like to lay down Sticky traps in the Brick Building. Use your Compression Blast to quickly move them out of the way.
- Avoid the Sentry Deck on checkpoint A, since it often contains Sentry Guns.
- Checkpoint B's long Sniper sightline necessitates the use of the Scorch Shot, which is excellent for long-range harassment of the Sniper's Hut.
- The Detonator can be utilized to reach the Dropdown.
- The Dropdown allows you to flank above the defenders on Point C, opening up an opportunity to ambush unsuspecting opponents.
- Checkpoint D is often filled with multiple Red Sentry Guns located on high ground positions, making the Dragon's Fury a very useful weapon.
- However, keep in mind that you are still quite powerless even with the Dragon's Fury. So it might be better to simply let other classes deal with the Sentry problem.
Defense
- Your Compression Blast can be used near the Christmas Tree, where it will push exiting attackers off the cliff.
- The relatively tight and narrow corridors of the Jenkin Coal.co are perfect ambush grounds for a Red Pyro.
- The area around Checkpoint C offers loads of flanking opportunities, making the Back Burner quite effective here, if used correctly.
- There are plenty of obstacles and ledges on Point C, something which the Thermal Thruster or the Detonator can exploit in order to gain a vantage point over the Blu.
- If you prefer a flank-orianted playstyle, you can hide in the Flanks and wait for the attackers to advance past you.
- Blu Soldiers love spamming at Red Sentry Guns protecting the Checkpoint D from within the Factory, something your Compression Blast can put an immediate stop to.
 Demoman
Offense
- On checkpoint A, your primary task should be to destroy the Sentry Gun nest located on the Sentry Deck.
- The Jenkin Coal.co offers a good, albeit a dangerous view of the Concrete Platform, which often houses Red Sentry Guns.
- Sticky Jumping up to the Dropdown will grant you a full overview of the area around Point C.
- If you are having trouble with directly attacking the Sentry Guns protecting the Final Checkpoint, you can try approaching them from the Factory and using the Loch-n-Load.
Defense
- Due to the structure of Blu spawn, your charged-up Sticky Bombs can reach the Blu's Resuply locker even from the outside.
- The long nature of checkpoint B, accompanied by a fair few flank routes, opens up an opportunity for the Demoknight to shine.
- Using the Base Jumper on Point C is a viable strategy. Due to it being in the open.
- If you launch yourself correctly, it is possible to Sticky jump from the Final checkpoint and all the way to the Gates.
- Logically, the Sticky Jumper shines at this.
 Heavy
Heavy
Offense
- On checkpoint A, you can compensate for your slow speed by taking the shortcut through the Brick Building, which will lead you directly to Red defenses.
- Watch out for Red Snipers targeting you from the Sniper's Hut, while you are attempting to capture checkpoint B.
- The Stock Minigun is ideal for assaulting checkpoint C, due to its average performance suited for such a general environment.
- Assuming a Medic is willing to Über you, pushing from the Shipping Crates is the best way to cause immense damage to Point D's defenses.
Defense
- If you prefer a passive playstyle, you can position yourself on either the Sentry Deck or the A Point Building, and use the Tomislav for long range harassment.
- Try to hang around the Jenkin Coal.co when defending point B, since it offers plenty of cover, as well as multiple opportunities to ambush incoming attackers.
- The Point C's numerous flank routes open up an opportunity for an ambush-Heavy type of playstyle. In that case, the Second Banana is your best friend.
- Unless you hang out very far back, the threat of Snipers around the last area is quite severe. So it is recommended to use the Fists of Steel.
 Engineer
Offense
- When the round begins, it is advised that you focus on the right hand side, where the Christmas Tree is located, since that area is more calmer and not under such heavy fire.
- After checkpoint A is captured, you should advance forward and set up a Sentry Gun nest behind the Cargo crates, where your teammates can take cover.
- Although you cannot reach the Dropdown (Atleast not without Sentry Jumping), you can still place a Teleporter on it by climbing on to a nearby prop.
- Make sure to rebuild your Teleporter entrance once checkpoint B is captured, since Blu spawn changes.
- If the defenders are too preoccupied, you can sneak into the Factory's left tunnel and setup a Sentry there, thus allowing it to overlook the Delivery Pod.
Defense
- The appropriately named "Sentry Deck" offers a decent defensive position on checkpoint A.
- Alternatively, you can setup your stuff in the A Point Building, which grants height advantage at a cost to being vulnerable from the flanks.
- While you are defending the Gates, watch out for Blu ÜberCharges dropping down onto you from the Dropdown room above.
- The Wrangler is quite useful when setting up a Sentry directly outside the final Red Spawn, since you can use it to fend off attackers pestering you from the Factory.
 Medic
Medic
Offense
- Avoid Übering immediately after exiting the spawn. You will need that ÜberCharge a lot more when assaulting the Sentry Deck.
- Watch out for Snipers on checkpoint B. They are particularly dangerous on that part of the map.
- If they are giving you too much trouble, you can try punishing them with the Crusader's Crossbow. But be careful while doing this.
- Securing the Concrete Platform is best done by Übering out of the Jenkin Coal.co.
- When assaulting checkpoint D, you have two choices:
- Either expend valuable Über and time on fully securing the Factory first.
- Or ignore the Factory, wrap around the Shipping Crates, and launch an immediate attack from there.
Defenses
- For the first few minutes of the round, you will primarily want to position behind the Brick Building, as if to avoid any potential Snipers.
- Keep an eye out on the A Point Building, since Blu members can unexpectedly originate from it and give you a nasty surprise.
- Just like on offense, watch out for Snipers when defending Checkpoint B. Although you may not see them at first, they can easily peek out of the A Point Building's metal gate.
- You can give a nasty surprise to the attackers by Übering out of the Flank, just as they are pushing into Checkpoint C.
- This is especially effective with the Kritzkrieg, which strives on surprise.
 Sniper
Offense
- Once your team takes control of the A Point Building, you can peek out of its gate in order to target Red defenders around the Concrete Platform.
- Blu team has High ground advantage on the third checkpoint, which can be exploited by Jarate.
- While picking of the Reds inside the Factory, keep an eye out on flankers approaching you from the Shack.
- Due to the cramped nature of last point defenses, the Machina's penetrating capability can be somewhat effective.
Defense
- There is a small section of the A Point Building's roof on which you can stand on, thus giving you a full view of the Blu spawn.
- Although it is a good a sniping position overall, the Sniper's Hut can also be quite dangerous, as it is highly susceptible to Blu Spies due to its isolation.
- Use the Razorback if you intend on position on it.
- The Gates offer a good vantage point over the Checkpoint C. Plus, you sitting on them can block Blu Spies from reaching the Dropdown.
 Spy
Spy
Offense
- The best way to infiltrate Red defenses on Checkpoint A is through the A Point Building, which often contains find Red Sentry Gun nests.
- Red Snipers love to hang out in the Sniper's Hut, which is usually far away from the remainder of the Red team, ensuring that there are no eyewitnesses present.
- Buildings such as the Shed and the Flank are rarely checked by enemy teammates. Something to take note off.
- The Your Eternal Reward is surprising effective on the last Checkpoint, where you will encounter multiple Sentry nests.
Defense
- There is little Ammo around the first Blu spawn, so take the Cloak and Dagger if you intend on operating around there.
- There is a shipping crate near the Concrete Platform, which you can climb on wait for the incoming attackers to pass you.
- Use the Gate's elevation to get drop stabs on passing opponents below.
- Due to the immense distance between Blu's spawn and checkpoint D, taking out Blu team's Teleporters is essentially a death sentence to them.

