Difference between revisions of "Community Eyeaduct strategy"
BrazilianNut (talk | contribs) m (→Class-specific MONOCULUS Strategy) |
m (Auto: EnforceCapitalization(Crits), EnforceCapitalization(Crit), WordFilter(Flamethrower → Flame Thrower), WordFilter(Mini-crit → Mini-Crit), WordFilter(Mini-crits → Mini-Crits), WordFilter(Critical Hit → Critical hit), WordFilter(Critical Hits...) |
||
| (2 intermediate revisions by 2 users not shown) | |||
| Line 4: | Line 4: | ||
{{Map infobox | {{Map infobox | ||
| map-strategy = yes | | map-strategy = yes | ||
| − | | map- | + | | map-status = official |
| − | | game-type | + | | map-name = Eyeaduct |
| − | | file-name | + | | map-game-type = King of the Hill |
| + | | map-file-name = koth_viaduct_event | ||
| map-image = Eyeaduct_1.png | | map-image = Eyeaduct_1.png | ||
| + | | map-released = {{Patch name|10|27|2011}} | ||
| + | | map-released-major = Very Scary Halloween Special | ||
| map-environment = Halloween | | map-environment = Halloween | ||
| map-setting = Nighttime, overcast | | map-setting = Nighttime, overcast | ||
| − | | map-hazards = [[Pumpkin bomb]]s,<br/>[[MONOCULUS]],<br/> | + | | map-hazards = [[Pumpkin bomb]]s, [[Ghost]]s,<br/>[[MONOCULUS]] |
| − | | map-health | + | | map-hazards-underworld = [[Environmental_death#Health_drain|Health drain]] <small>(Purgatory)</small>,<br/>[[Pumpkin bomb]]s <small>(Purgatory)</small>,<br/>[[Environmental_death#Deadly_waters|Deadly waters]],<br/>[[Environmental_death#Area_Explosion|Area Explosion]] <small>(Loot Island)</small> |
| − | | map-ammo | + | | map-pickups-health-medium = 6 |
| − | | map-special | + | | map-pickups-ammo-medium = 6 |
| − | | map-special- | + | | map-pickups-special-sgg = yes |
| + | | map-pickups-special-pumpkin = yes | ||
| + | | map-has-bots = yes | ||
}} | }} | ||
| Line 41: | Line 46: | ||
==General MONOCULUS Strategy== | ==General MONOCULUS Strategy== | ||
| − | * Unlike other later MONOCULUS situations, truce is called as long as MONOCULUS is on the map. | + | * Unlike other later MONOCULUS situations, [[Truce mode|truce]] is called as long as MONOCULUS is on the map. |
*The ability to capture the point will be postponed as long as MONOCULUS is alive so focus on killing it. A large group attacking at once can drain MONOCULUS' health rapidly. | *The ability to capture the point will be postponed as long as MONOCULUS is alive so focus on killing it. A large group attacking at once can drain MONOCULUS' health rapidly. | ||
| Line 49: | Line 54: | ||
*Players that survive the Underworld can use their invulnerable state to stun MONOCULUS. | *Players that survive the Underworld can use their invulnerable state to stun MONOCULUS. | ||
| − | *A | + | *A Critical hit on MONOCULUS makes him angry, causing him to fire three critical projectiles in a row that move at the speed of [[Liberty Launcher]] rockets. |
** Use cover from map structures if you are close to it when it gets angry. | ** Use cover from map structures if you are close to it when it gets angry. | ||
** When possible, stun him while he is angry to give yourselves breathing room. | ** When possible, stun him while he is angry to give yourselves breathing room. | ||
| Line 104: | Line 109: | ||
{{Con}} None of Soldier's [[banner]]s charge upon hitting MONOCULUS. | {{Con}} None of Soldier's [[banner]]s charge upon hitting MONOCULUS. | ||
| − | {{Con}}Charging MONOCULUS with the [[Equalizer]] at very low health will only be effective if the enemy team is not around and MONOCULUS is stunned, as your | + | {{Con}}Charging MONOCULUS with the [[Equalizer]] at very low health will only be effective if the enemy team is not around and MONOCULUS is stunned, as your Crits will deal around 300 damage. Otherwise, it's a risky strategy. |
| − | {{Con}}The [[Reserve Shooter]] will not | + | {{Con}}The [[Reserve Shooter]] will not Mini-Crit against MONOCULUS so this is not recommended. |
{{Con}}The [[Black Box]] does not award health upon hitting MONOCULUS and is a considerable drawback when its reduced ammo is taken into account. | {{Con}}The [[Black Box]] does not award health upon hitting MONOCULUS and is a considerable drawback when its reduced ammo is taken into account. | ||
| Line 129: | Line 134: | ||
{{Pro}}The Shotgun can be effective against MONOCULUS as base damage remains the same when attacking it. This will allow you to do more damage from a longer range than normal. | {{Pro}}The Shotgun can be effective against MONOCULUS as base damage remains the same when attacking it. This will allow you to do more damage from a longer range than normal. | ||
| − | {{Pro}}When emerging from the underworld, you can use a | + | {{Pro}}When emerging from the underworld, you can use a Crit-boosted [[Flare Gun]], [[Detonator]], or [[Scorch Shot]] to tag MONOCULUS from a distance, stunning him for others to attack. If MONOCULUS is close enough, you can rush in while he's stunned and attack with your Flame Thrower, then jump in the portal he leaves behind and repeat. |
{{Con}} The [[Phlogistinator]] is not recommended, as the lack of airblast makes it ineffective. | {{Con}} The [[Phlogistinator]] is not recommended, as the lack of airblast makes it ineffective. | ||
| − | {{Con}}The Reserve Shooter will not | + | {{Con}}The Reserve Shooter will not Mini-Crit against MONOCULUS so this is not recommended. |
{{Con}}The [[Flare Gun]] and the [[Detonator]] are possibly some of the worst weapons to use against MONOCULUS as he cannot catch on fire. Only the minimal flare impact damage will register. | {{Con}}The [[Flare Gun]] and the [[Detonator]] are possibly some of the worst weapons to use against MONOCULUS as he cannot catch on fire. Only the minimal flare impact damage will register. | ||
| Line 187: | Line 192: | ||
{{Pro}}Sentry Guns will target MONOCULUS even when it is outside their normal range. | {{Pro}}Sentry Guns will target MONOCULUS even when it is outside their normal range. | ||
| − | {{Pro}}Because Sentry Guns never deal | + | {{Pro}}Because Sentry Guns never deal Critical hits (except Mini-Crits, which do not affect MONOCULUS), your Sentry Gun can be an effective way to deal damage to MONOCULUS without angering it. Use the Wrangler for maximum damage. |
{{Pro}}The Shotgun and Pistol can both be effective against MONOCULUS as their base damage remains the same when attacking it. This will allow you to do more damage from a longer range than normal. | {{Pro}}The Shotgun and Pistol can both be effective against MONOCULUS as their base damage remains the same when attacking it. This will allow you to do more damage from a longer range than normal. | ||
| Line 230: | Line 235: | ||
{{Pro}}The [[Revolver]] and the [[Enforcer]] are the most viable weapons to use, although it should only be used against MONOCULUS if it is focused on another player. | {{Pro}}The [[Revolver]] and the [[Enforcer]] are the most viable weapons to use, although it should only be used against MONOCULUS if it is focused on another player. | ||
| − | {{Con}}The [[Spy]] is rather ineffective against MONOCULUS as a [[Backstab]] is near impossible to land and will not result in an instant death or a | + | {{Con}}The [[Spy]] is rather ineffective against MONOCULUS as a [[Backstab]] is near impossible to land and will not result in an instant death or a Critical hit, and does not contribute significant damage. |
{{Con}}As with any other on-hit effect weapons, [[Your Eternal Reward]], [[Conniver's Kunai]] and the [[Big Earner]] will not grant you a bonus upon getting the last hit on MONOCULUS and should be avoided. | {{Con}}As with any other on-hit effect weapons, [[Your Eternal Reward]], [[Conniver's Kunai]] and the [[Big Earner]] will not grant you a bonus upon getting the last hit on MONOCULUS and should be avoided. | ||
Latest revision as of 23:30, 25 December 2024
| “Sun Tzu's got nothing on us!” This article is a Community strategy stub. As such, it is not complete. You can help the Team Fortress Wiki Community Strategy Project by expanding it. Notes: This page, in its current state, is more about MONOCULUS! (who is no longer exclusive to this map) than the map itself. |
| “Gotta move that gear up!” This article may contain content that is out of date. You can help improve this article by updating the content as necessary. See the wiki style guide. Notes: None added |
| Eyeaduct | |
|---|---|

| |
| Basic Information | |
| Map type: | King of the Hill |
| File name: | koth_viaduct_event
|
| Released: | October 27, 2011 Patch (Very Scary Halloween Special) |
| Variants: | Viaduct |
| Developer(s): | Valve |
| Map Info | |
| Environment: | Halloween |
| Setting: | Nighttime, overcast |
| Hazards: | Pumpkin bombs, Ghosts, MONOCULUS |
| Hazards (Underworld): | Health drain (Purgatory), Pumpkin bombs (Purgatory), Deadly waters, Area Explosion (Loot Island) |
| Bot support: | Yes |
| Map Items | |
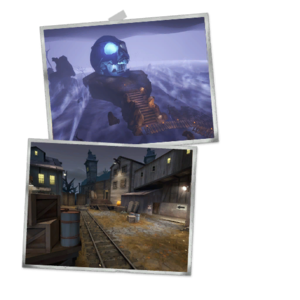
| Map Photos | |
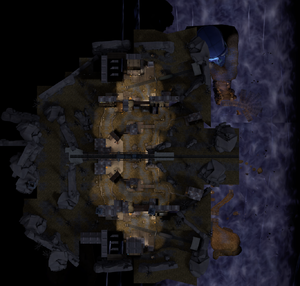
| Map Overview | |
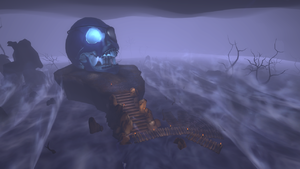
This article is about Community Eyeaduct strategy.
Note: It is recommended to read the main Eyeaduct article first to become familiar with the names of key map locations used in this article.
General Map Strategy
This Halloween map features pumpkin bombs, Halloween pumpkins, Ghosts, and the Soul Gargoyle; see Community Halloween maps strategy.
- This map is almost identical to Viaduct, so many strategies that work there will also work here.
- The game announces whenever a player leaves the Underworld with a bell toll and a message on the text chat. Those notifications can be useful for deciding when it's not a good idea to stand in the open, where invulnerable enemies run through.
- Players in the Underworld are still vulnerable to attack. Be wary of those who might target you or the pumpkin bombs near you while on the chain of islands, and don't let down your guard while waiting for the cage on Loot Island to lower, as enemies may take the opportunity to deny you your Bombinomicon and buffs.
- After killing MONOCULUS, if you notice much of the enemy team heading to Loot Island, use this opportunity to secure the point in your favor.
- Alternatively, having a large number of your team going to Loot Island can be effective, as though you might lose the point temporarily, the speed, strength, and health boosts given after you exit the Underworld can allow you to annihilate the enemy team.
General MONOCULUS Strategy
- Unlike other later MONOCULUS situations, truce is called as long as MONOCULUS is on the map.
- The ability to capture the point will be postponed as long as MONOCULUS is alive so focus on killing it. A large group attacking at once can drain MONOCULUS' health rapidly.
- Do not use melee weapons. MONOCULUS flies and/or hovers across sections of the map out of the range of almost all melee weapons.
- Players that survive the Underworld can use their invulnerable state to stun MONOCULUS.
- A Critical hit on MONOCULUS makes him angry, causing him to fire three critical projectiles in a row that move at the speed of Liberty Launcher rockets.
- Use cover from map structures if you are close to it when it gets angry.
- When possible, stun him while he is angry to give yourselves breathing room.
- Be sure that you are healed up and have full ammunition as MONOCULUS is about to leave or die.
- In this particular KOTH arrangement, Engineers tend to build up or move up their positions during each truce. However, everyone has free reign of the map during a truce; so, use this situation to note where the enemy Buildings are located.
- When the opportunity presents itself, stand next to enemy buildings while you shoot at MONOCULUS, and avoid your own team's buildings for the same reason.
- As MONOCULUS gets close to either leaving or being destroyed, set up attacks you can make the moment the truce ends or prepare to thwart enemies attempting to do the same against your Engineers.
Class-specific MONOCULUS Strategy
| Class | Strategy | ||
|---|---|---|---|
 Scout |
vs |  MONOCULUS |
|
 Soldier |
vs |  MONOCULUS |
|
 Pyro |
vs |  MONOCULUS |
|
 Demoman |
vs |  MONOCULUS |
|
 Heavy |
vs |  MONOCULUS |
|
 Engineer |
vs |  MONOCULUS |
|
 Medic |
vs |  MONOCULUS |
|
 Sniper |
vs |  MONOCULUS |
|
 Spy |
vs |  MONOCULUS |
|

