Difference between revisions of "Community Ghost Town strategy"
m (Auto: EnforceCapitalization(Escape Plan) (Review RC#3278648)) |
GrampaSwood (talk | contribs) (Reworded, the rest of this simply said "resistance is important" which goes for every mission and not just this one. The crit part, however, is a good mission-specific tip) |
||
| (16 intermediate revisions by 7 users not shown) | |||
| Line 2: | Line 2: | ||
{{Map infobox | {{Map infobox | ||
| − | | map-strategy= yes | + | | map-strategy = yes |
| − | | | + | | map-status = official |
| − | | game-type = Mann vs. Machine | + | | map-name = Ghost Town |
| − | | file-name = mvm_ghost_town | + | | map-game-type = Mann vs. Machine |
| − | | map-image = Mvm_coaltown_event. | + | | map-file-name = mvm_ghost_town |
| − | | | + | | map-image = Mvm_coaltown_event.png |
| − | | | + | | map-released = {{Patch name|10|26|2012}} |
| − | | map-environment = Desert | + | | map-released-major = Spectral Halloween Special |
| − | | map-setting | + | | map-environment = Desert |
| − | | map-hazards = [[Environmental_death#Pitfalls|Pitfall]] | + | | map-setting = Night |
| − | | map-health | + | | map-hazards = [[Environmental_death#Pitfalls|Pitfall]] |
| − | | map-health | + | | map-pickups-health-medium = 2 |
| − | | map-ammo | + | | map-pickups-health-large = 5 |
| − | | map-ammo | + | | map-pickups-ammo-medium = 4 |
| − | | map-special | + | | map-pickups-ammo-large = 12 |
| + | | map-pickups-special-pumpkin = yes | ||
}} | }} | ||
| Line 34: | Line 35: | ||
* When the wave of Spy robots (with the tanks) appears, having your back against the wall will prevent getting backstabbed. | * When the wave of Spy robots (with the tanks) appears, having your back against the wall will prevent getting backstabbed. | ||
* The Bowmen, Soldiers, Demomen, Pyros, and Heavies at the end of the wave all have damage multipliers in addition to Crits which can make short work of any class, even with maximum resistances. Consider using Über Canteens if you are constantly dying during those sections. | * The Bowmen, Soldiers, Demomen, Pyros, and Heavies at the end of the wave all have damage multipliers in addition to Crits which can make short work of any class, even with maximum resistances. Consider using Über Canteens if you are constantly dying during those sections. | ||
| + | * Due to the high amount of enemies with Crit weapons, Crit resistance is one of the most important resistances to get. | ||
== Class-specific strategy == | == Class-specific strategy == | ||
=== {{class link|Scout}} === | === {{class link|Scout}} === | ||
* Scout's biggest and most important objective is to collect money. 5000 credits is a lot, but it will not be enough to win by itself. | * Scout's biggest and most important objective is to collect money. 5000 credits is a lot, but it will not be enough to win by itself. | ||
| + | * With a lot of money, having a high resistance and mobility can increase survivability. | ||
* If Tanks are an issue, consider using an upgraded [[Shortstop]] against them due to its high damage output. | * If Tanks are an issue, consider using an upgraded [[Shortstop]] against them due to its high damage output. | ||
* Consider using the [[Soda Popper]] if you want to focus on survivability. | * Consider using the [[Soda Popper]] if you want to focus on survivability. | ||
* A Scout with the [[Mad Milk]] can help keep his team alive, but the [[Bonk! Atomic Punch]] may prove more useful later on for survivability. | * A Scout with the [[Mad Milk]] can help keep his team alive, but the [[Bonk! Atomic Punch]] may prove more useful later on for survivability. | ||
* Crit canteens are most effective when used against Tanks, try to avoid using them for anything else unless you're at risk of losing. | * Crit canteens are most effective when used against Tanks, try to avoid using them for anything else unless you're at risk of losing. | ||
| + | * The [[Sandman]] can be used to Mark Giant Robots For Death, providing a ranged alternative to the [[Fan O'War]]. Due to the fact that it's necessary to run back to spawn for upgrades, you can use the Sandman to Mark a Robot while making your way to the money dropped while you were upgrading. | ||
=== {{class link|Soldier}} === | === {{class link|Soldier}} === | ||
| Line 55: | Line 59: | ||
* The [[Backburner]] is also advised against, as its benefits do not work against Tanks. | * The [[Backburner]] is also advised against, as its benefits do not work against Tanks. | ||
* Only airblast to reset the bomb or to reflect Critical projectiles as airblasts can interfere with the rest of the team. | * Only airblast to reset the bomb or to reflect Critical projectiles as airblasts can interfere with the rest of the team. | ||
| + | * The [[Gas Passer]] can be used against large groups of small Robots or for big burst damage against Giant Robots. | ||
| + | * For Tanks or Giant Robots, the [[Dragon's Fury]] increased rate of fire and damage can be very useful. Although its airblast is weaker than the stock Flame Thrower's airblast, it rarely comes into play. | ||
=== {{class link|Demoman}} === | === {{class link|Demoman}} === | ||
* Upgrading your [[Grenade Launcher]] will help greatly against Tanks. Consider upgrading both your Grenade Launcher and the [[Scottish Resistance]] if you have the money. | * Upgrading your [[Grenade Launcher]] will help greatly against Tanks. Consider upgrading both your Grenade Launcher and the [[Scottish Resistance]] if you have the money. | ||
* Demoknights can be powerful with a fully upgraded sword, however, be sure there is an Escape Plan in a tight situation. An Über canteen is useful for escaping as any class. | * Demoknights can be powerful with a fully upgraded sword, however, be sure there is an Escape Plan in a tight situation. An Über canteen is useful for escaping as any class. | ||
| + | * The [[Loose Canon]] can be used to push Giant Robots to your sticky trap. Be careful to not use it as a regular damage dealer, as the inconsistent knockback will mess with your team's aim. | ||
=== {{class link|Heavy}} === | === {{class link|Heavy}} === | ||
Latest revision as of 00:46, 1 June 2024
| “Sun Tzu's got nothing on us!” This article is a Community strategy stub. As such, it is not complete. You can help the Team Fortress Wiki Community Strategy Project by expanding it. Notes: Expand the "General strategy" section to cover map locations in more detail. Potentially look at the class-specific strategies as well. |
| Ghost Town | |
|---|---|

| |
| Basic Information | |
| Map type: | Mann vs. Machine |
| File name: | mvm_ghost_town
|
| Released: | October 26, 2012 Patch (Spectral Halloween Special) |
| Variants: | Coal Town |
| Developer(s): | Valve |
| Map Info | |
| Environment: | Desert |
| Setting: | Night |
| Hazards: | Pitfall |
| Map Items | |
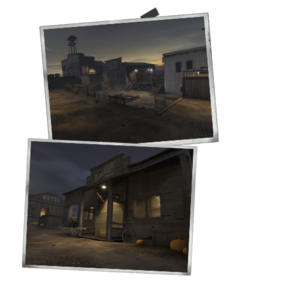
| Map Photos | |
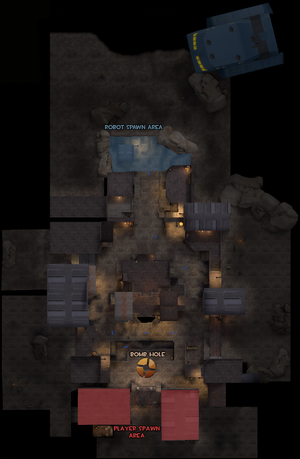
| Map Overview | |
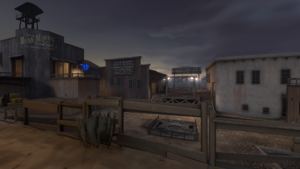
This article is about Community Ghost Town strategy.
Note: It is recommended to read the main Ghost Town article first to become familiar with the names of key map locations used in this article.
General strategy
- As there is only one "wave" in Wave 666, there is significantly less free time to return to the spawn and buy upgrades. The best times to do this will be immediately after respawning, and when the next robots are slower Giants.
- If you have an Engineer that has two-way Teleporters you can use it to quickly get upgrades between any sub-wave.
- You will receive 5000 credits at the start of the match, rather than the 400 to 1500 most maps start you with. Use this money wisely.
- Due to the sheer number of robots that will attack you, each class will struggle in different parts of the wave.
- Damage output is the main difficulty, and there is tons of money available. Use Crit Canteens freely.
- Upgrading your Crit Resistance to the max is a very smart option to take, as most of this wave will have Crit-boosted robots somewhere.
- When the wave of Spy robots (with the tanks) appears, having your back against the wall will prevent getting backstabbed.
- The Bowmen, Soldiers, Demomen, Pyros, and Heavies at the end of the wave all have damage multipliers in addition to Crits which can make short work of any class, even with maximum resistances. Consider using Über Canteens if you are constantly dying during those sections.
- Due to the high amount of enemies with Crit weapons, Crit resistance is one of the most important resistances to get.
Class-specific strategy
 Scout
Scout
- Scout's biggest and most important objective is to collect money. 5000 credits is a lot, but it will not be enough to win by itself.
- With a lot of money, having a high resistance and mobility can increase survivability.
- If Tanks are an issue, consider using an upgraded Shortstop against them due to its high damage output.
- Consider using the Soda Popper if you want to focus on survivability.
- A Scout with the Mad Milk can help keep his team alive, but the Bonk! Atomic Punch may prove more useful later on for survivability.
- Crit canteens are most effective when used against Tanks, try to avoid using them for anything else unless you're at risk of losing.
- The Sandman can be used to Mark Giant Robots For Death, providing a ranged alternative to the Fan O'War. Due to the fact that it's necessary to run back to spawn for upgrades, you can use the Sandman to Mark a Robot while making your way to the money dropped while you were upgrading.
 Soldier
- The Beggar's Bazooka and the Air Strike are viable to destroy robots and Tanks in short bursts.
- It's encouraged to have a banner (preferably Buff Banner) to help out team with Tanks. Even more so if you have a Sniper.
- Fire your Rocket Launcher as close to the Tanks as possible for maximum damage ramp-up.
- You need the most damage and AoE (Area of Effect) on this wave, so do not use the Direct Hit or the Liberty Launcher.
- Crit canteens are very useful when firing at a large group of robots and or Tanks.
 Pyro
Pyro
- The hardest sub-wave of the map is probably the Tanks and Spies sub-wave, so having a Pyro is very helpful.
- The Degreaser's strength is to combine it with the Pyro's other weapons, it's not advised to use this weapon due to its upsides not coming into play.
- The Backburner is also advised against, as its benefits do not work against Tanks.
- Only airblast to reset the bomb or to reflect Critical projectiles as airblasts can interfere with the rest of the team.
- The Gas Passer can be used against large groups of small Robots or for big burst damage against Giant Robots.
- For Tanks or Giant Robots, the Dragon's Fury increased rate of fire and damage can be very useful. Although its airblast is weaker than the stock Flame Thrower's airblast, it rarely comes into play.
 Demoman
- Upgrading your Grenade Launcher will help greatly against Tanks. Consider upgrading both your Grenade Launcher and the Scottish Resistance if you have the money.
- Demoknights can be powerful with a fully upgraded sword, however, be sure there is an Escape Plan in a tight situation. An Über canteen is useful for escaping as any class.
- The Loose Canon can be used to push Giant Robots to your sticky trap. Be careful to not use it as a regular damage dealer, as the inconsistent knockback will mess with your team's aim.
 Heavy
Heavy
- A Heavy that invests in the Destroy Projectiles upgrade will be invaluable during the periods where Soldier Robots attack, and will provide some assistance during Demoman attacks.
- Remember, all of the Heavy's primaries do 25% of their normal damage against Tanks, so it is important to help keep the front with the Engineer.
- You need the most damage per second on this wave, so do not use the Natascha.
 Engineer
- With the extra cash and length of the mission, two-way Teleporters are an important way to help your team.
- Ensure that most, if not all, of your teammates, can reach your Dispenser safely.
- The lack of Super Scouts on this mission enables you to be very mobile with your Sentry Gun. Movement Speed and Jump Height upgrades can help in being more mobile.
- If metal and maintenance are a problem, keep Upgrade Canteens maxed out to replace destroyed Sentry Guns.
- The Widowmaker can be extremely useful with Crit canteens to maximize damage output without using the Wrangler. Consider experimenting with it if Tanks are problematic.
- As a bonus, the Widowmaker can grant you more than enough metal to replace a fully upgraded Sentry Gun if used correctly. Note that it's still important to keep your Sentry alive.
- The Rescue Ranger can help if you are having too much trouble positioning your Sentry Gun or keeping your Sentry alive.
- The Rescue Ranger significantly decreases your damage output and requires a lot of upgrading. Consider using it to keep your Sentry mobile enough so that Spies can't sap it while it's shooting Tanks.
- Do not ignore Resistance upgrades. All resistances except fire can be critical when you do not have the Rescue Ranger equipped to heal your Sentry from a safe distance.
 Medic
Medic
- Most classes shouldn't actually die very often during this mission, with the key difficulty being damage output, not healing. If anything, reviving teammates will just rob them of the opportunity to buy upgrades and canteens. Anyone who attempts to play Medic should be very skilled at maximizing their effective damage output with the Projectile Shield and the Ubersaw.
- Use the Kritzkrieg with a Demoman using the Scottish Resistance to help make large clusters of crit stickies.
- The Heavy will benefit the most from your healing, as it will allow him to get closer to robots and deal more damage.
- Medic can be quite useful if Spies are a problem, but be careful not to heal any disguised Spies.
 Sniper
- Sniper's primary goal is eliminating Über Medic, Giants, and groups of robots respectively. Aiming at smaller targets is viable, but only when aiming at a Giant would not do the same.
- By that same notion, if there is a Giant and a Tank are alive at the same time, focus on the Giant before moving to the Tank.
- Clustered Giants make landing a quadruple headshot rather easy. With the Explosive Headshots upgrade, the resulting damage will be massive.
- Using the Hitman's Heatmaker for more damage output or the Sydney Sleeper to coat far enemies in Jarate may prove beneficial.
- Even though the Sydney Sleeper cannot deal critical headshot damage, the Explosive Headshots upgrade still functions as normal and should still be used with this weapon.
- There will be lots of Spies, consider using the Razorback to counter the Spies if you cannot rely on your teammates to kill them.
- Otherwise, you can achieve great mileage with the Cleaner's Carbine and use its mini-crits together with the Bushwacka. If you max out your swing speed, this combo can shred through Tanks.
- If you have leftover credits, do not be afraid to buy Über canteens as they can allow you to keep dealing damage where you'd otherwise be waiting on the respawn screen.
 Spy
Spy
- Tanks can pose a big danger to your team. Spy does not have enough damage output to function as a tank buster. When playing Spy, try to focus on making things easier for other players to kill the Tanks without having to worry about other factors such as Spies and Snipers.
- The large numbers of Giants and a high amount of starting cash make the Spy a very viable money collector on this mission.
- Before the onslaught begins, consider purchasing at least one point of Health Regen. The Pyro Robots can be troublesome, and having their afterburn almost negated for a small 200 credits can prove both an easy time at the start, and regenerative health to shrug off hits from feigning.
- A Spy can single-handedly take care of a Giant Quick-Fix Medic + Heavy combo without any help from his teammates.
- During the Spy-Bot + Tank sub-wave, a Spy can act as bait for the Spy-Bots, keeping them away from the team.
- Your Sapper is an important tool, as it can deal with swarms of Crit-boosted robots and Spies. Consider having Ammo Refill canteens ready and make sure it's fully upgraded.

