Difference between revisions of "Community Rottenburg strategy/fr"
(→{{class link|Medic}}) |
m (Move community strategy pages into Category:Map strategy) |
||
| Line 1: | Line 1: | ||
{{DISPLAYTITLE: Stratégie communautaire de Rottenburg}} | {{DISPLAYTITLE: Stratégie communautaire de Rottenburg}} | ||
{{Map infobox | {{Map infobox | ||
| + | | map-strategy = yes | ||
| developer = Valve | | developer = Valve | ||
| game-type = Mann vs. Machine | | game-type = Mann vs. Machine | ||
Revision as of 04:17, 3 June 2021
| Community Rottenburg strategy | |
|---|---|

| |
| Informations de base | |
| Développeur(s) : | Inconnu |
| Informations sur la carte | |
| Environnement : | Ville allemande |
| Cadre : | En journée, ensoleillé |
| Dangers : | Falaise |
| Photos de la carte | |
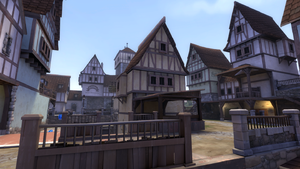
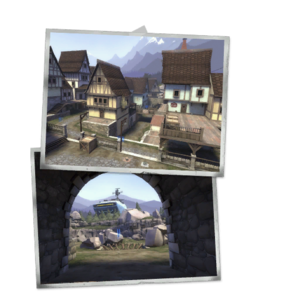
Cet article traite de la stratégie communautaire de Rottenburg
Sommaire
Générale (Toutes les classes)
- À chaque fois qu'un Tank apparaît, il est recommandé si possible qu'un ou deux joueurs au maximum suivent le Tank dans la ville. Le Pyro, Soldier, Engineer et Scout sont très utiles pour démolir les Tanks. Le reste de l'équipe devrait maintenir le front et tenir le porteur de la bombe sous contrôle.
- Ne laissez pas la bombe pénétrer dans la ville. Lorsque les robots voudront prendre la bombe, des Engineers vont apparaître et placer des téléporteurs.
- Une fois que le Tank est détruit, soyez sûr de récupérer tout l'argent. Vérifiez toutes les zones proches sur les différentes altitudes.
- Évitez que les Medics activent leur Übercharge en leur infligeant des dommages, les Demomens ou d'autres classes appropriées peuvent facilement s'en débarrasser d'un seul coup.
- Notez le chemin du porteur de la bombe avant que la vague ne débute. Cela vous aidera pour votre seconde défense si la bombe pénètre dans la ville.
- Utilisez vos bonus de résistance ou de critiques le plus rapidement possible.
Stratégie spécifique aux classes
 Scout
Scout
- Use Mad Milk with upgraded slowdown to soak Giant Scouts, especially if they are running with the bomb.
- Due to the map's large, open spaces, the Soda Popper can greatly help in credit collection and general agility.
- Pay attention to teammates who like to kill robots in weird places and not collect the money.
- Use your Fan-O-War or upgraded Sandman to mark Giants for death. Make sure to mark Giant Medics before their pockets.
- While collecting money and not using your support weapons, kill the bomb carrier to keep him from buffing.
- If necessary for waves with Super Scouts, you can use Ammo Canteens to instantly recharge your Mad Milk.
- Kill Snipers when they spawn.
- After upgrading Movement Speed, Jump Height, and Crit Resistance, if you do not need other Resistances to survive, upgrade your primary weapon as much as you can afford to for Tank killing. Scout is one of the best anti-Tank classes when fully upgraded.
 Soldier
- Upgrade one point of Rocket Specialist, and use direct hits to stagger Super Scouts and other Giants.
- Follow Tanks when they spawn. Equip the Buff Banner and deploy it as much as possible against them.
- Upgrade Reload Speed and Firing Speed before Damage, unless using the Beggar's Bazooka, in which case Firing Speed should not be upgraded until very late.
- Soldier's mobility and weaponry make him good at removing Engineer bots, which can be quite a nuisance on this map if left unchecked.
- Soldier is also good at eliminating Snipers.
 Pyro
Pyro
- M1-ing with Health on Kill and Resistances is the most effective strategy on this map. If a group of robots is too strong for you to tackle head-on, let them target your teammates first, then attack from behind.
- The Backburner is Pyro's best weapon for killing Giants, but the Phlogistinator is the best Tank killer.
- Most servers favor a Medic and Soldier over a Pyro for this map, but a very popular strategy is to abuse the Refund option and have multiple Phlogistinator Pyros for the 3-Tank last wave of Hamlet Hostility.
- When a Tank spawns, follow it. Pyro is the best Tank buster regardless of weapon choice (although the Degreaser is still not recommended); just make sure to keep your primary stocked with ammo.
- There are 3 ways to reset the bomb in Rottenburg. Use an upgraded Scorch Shot or your airblast (Scorch Shot recommended) to put these ways to ggod use.
- If the bomb follows the lower route, it can be hard-reset in the bottomless pit in the middle of the map.
- If the bomb follows the upper route, it can be soft-reset by airblasting the bomb carrier off of the bridge in the middle of the map.
- The bomb can be hard-reset regardless of route off the cliff near the hatch (the area where the tank exits from). Be sure not to let the bomb carrier on the hatch, though.
- Be sure to help out teammates if they are having trouble with Spies.
 Demoman
- The Scottish Resistance has a higher damage output and is cheaper to upgrade than the stock Sticky Launcher, though the extra arming time takes getting used to.
- Focus Engineers. When an Engineer is building a Sentry Gun, lay a sticky trap to kill the Sentry before it can fire and the Engineer before he can run off and build another.
- Against active Sentry Guns, take advantage of your ability to kill targets not in your direct line of sight.
- Upgrading your Grenade Launcher can kill Tanks more effectively, at the expense of requiring greater skill against robots.
- Stickies are very effective against Giant Medics. Lay a big sticky trap when a Giant Medic is getting low on health to kill it before it can deploy.
- Damage-upgraded crit sticky traps can kill Giant Medics in one blow, even if their Megaheal is deployed.
 Heavy
Heavy
- Kill Giant Medics by shooting them point-blank. Do not use Rage against them; it only directly decreases your damage output, indirectly decreases your team's damage output due to damage falloff, and makes it harder for your Demo or Sniper to predict the Giant Medic's movements.
- Remember, Heavy's damage is harshly reduced against Tanks. Be efficient and use your firepower to keep your teammates alive.
- Although the Brass Beast does more damage when all things are equal, the stock Minigun allows for more mobility, allowing you to move closer to your targets and take advantage of damage ramp-up.
- Hover near your team's Dispenser to stay alive.
- When a Super Scout spawns, bodyblock it. Just don't let it slap you away with its Holy Mackerel.
- Against Force-A-Nature Super Scouts, there isn't much you can do. Block them for the short period you can.
 Engineer
- The best spot for the Sentry is just to the left of the right corner of the tunnel entrance. This way, it covers the right side choke path when not Wrangled, and has a clear shot of the middle of the field while Wrangled. Best of all, it blocks Super Scouts.
- On waves without Super Scouts or Medic bots, the Sentry can go behind the wooden barricade, or behind the gap between the two leftmost rocks.
- The Dispenser usually goes behind the rock formation to the left of the barricade, though it may be moved behind the rock on the right as the robots begin to funnel though that side.
- Popular Teleporter Exit spots include the tower in the middle of the map and the forward Upgrade Station.
- Make sure your Teleporter Exit isn't facing a wall.
- If you get pushed back, Sentry placement becomes more complicated. Hold the tunnel if possible. If you lose it, it is sometimes best to just set up at spawn.
- The Wrangler is important for killing Giants, Tanks, and Snipers, and avoiding ÜberCharges from Medic bots.
 Medic
Medic
- Les joueurs moins expérimentés ont en général de la difficulté à survivre longtemps sans l'aide d'un Medic. Réanimez vos coéquipiers et utilisez votre bouclier pour les aider.
- Lorsque vous soignez, favorisez les Heavies et les Soldiers, mais ne négligez pas le reste de votre équipe.
- Utilisez votre Ubersaw/fr contre les robots et les Sentry Busters lorsque la situation le permet pour remplir plus rapidement votre Übercharge.
- Les joueurs réanimés réapparaissent à l'endroit où ils sont morts, assurez-vous qu'il n'y aie plus de danger avant de les réanimer!
 Sniper
- Tirez sur les robots lents dans la tête pendant qu'ils upgraded with Explosive Headshots. Les Géants et le porteur de la bombe sont votre première priorité.
- Les Medics sont extrêmement importants et sont votre première priorité.
 Spy
Spy
- Spy is very powerful on the last few waves of Bavarian Botbash. Consider having a Spy instead of a Scout for all or part of that mission, especially if your team has trouble killing Giant Medics.
- Maxed out Armor Penetration and Knife Attack Speed can make quick work of Giant Medics, as they don't turn around to look at you.
- Focus on stabbing Giants, Medics, Snipers, and the bomb carrier. Your Sapper can be used to sap and chainstab groups of robots when upgraded.
- One point of Sapper upgrade is all you need at first. Stabbing Speed and Armor Penetration are higher priorities.
- Spy can easily assassinate the bomb carrier once it's buffed by taking advantage of his disguises to approach safely, unlike other classes.
- The Diamondback stores a crit for each backstab you make. Consider using it to help out a bit with Tanks.
- Without any crits, if there is nothing left to attack but the Tank, just stab it repeatedly. Your increased stabbing speed with give you a higher DPS than shooting it with an unupgraded Revolver.
- Upgrade Movement Speed and disguise as a Scout.
