Difference between revisions of "Community Byre strategy"
(Created page with "{{hatnote|This article discusses community strategy for Byre.}} {{Map infobox | game-type = arena | file-name = arena_byre | map-image...") |
|||
| Line 15: | Line 15: | ||
== General strategy == | == General strategy == | ||
| + | |||
| + | * Teams should focus their attention to the control points, capturing at least one before engaging the other team. As the map requires both points captured this will allow you to set up a defense against the enemy team. | ||
| + | * The drainage ditches are a great way to flank the enemy team protecting their point. | ||
== Class-specific strategy == | == Class-specific strategy == | ||
=== {{class link|Scout}} === | === {{class link|Scout}} === | ||
| + | |||
| + | * Scouts can run from the drainage ditch for an ambush attack from behind. | ||
=== {{class link|Soldier}} === | === {{class link|Soldier}} === | ||
| + | |||
| + | * From a good [[Rocket jump|rocket jump]], you will have a good view of the enemy team to engage. Try to keep rocket jumping to a minimum as health is scarce. | ||
=== {{class link|Pyro}} === | === {{class link|Pyro}} === | ||
| + | |||
| + | * Pyros have great damage capabilities due to the map's small size, however this also means that there is less room to maneuver. | ||
=== {{class link|Demoman}} === | === {{class link|Demoman}} === | ||
| + | |||
| + | * Bear in mind that with the double control points, the enemy team will have to work to get to your team's control point in order to win. This can lead to great opportunities to lay stickytraps. | ||
=== {{class link|Heavy}} === | === {{class link|Heavy}} === | ||
| + | |||
| + | * With the map's small size, Heavies can maneuver around offensively armed with a [[Shotgun]] or [[Family Business]]. | ||
=== {{class link|Engineer}} === | === {{class link|Engineer}} === | ||
| + | |||
| + | * Engineers should prioritize dropping their [[Dispenser|dispenser]] ASAP to supply health to the rest of the team. | ||
| + | * Be wary of sentry positions, as due to the lack of sufficient cover a well placed shot from a Soldier or Demoman can easily destroy it. | ||
=== {{class link|Medic}} === | === {{class link|Medic}} === | ||
| + | |||
| + | * Medics can change the tide for your team. As health is scarce and far from the fight, Medics can keep your team's health stable in a firefight. | ||
=== {{class link|Sniper}} === | === {{class link|Sniper}} === | ||
| + | |||
| + | * Despite not having any highground, the map has little cover, allowing for quick snipers to pick off an enemy or two right at the start. | ||
=== {{class link|Spy}} === | === {{class link|Spy}} === | ||
| + | |||
| + | * Although not an ideal map for spies, due to the map's small size a good spy can catch the enemy team if they're in the middle of a firefight. | ||
{{Map strategy}} | {{Map strategy}} | ||
Revision as of 05:49, 8 November 2015
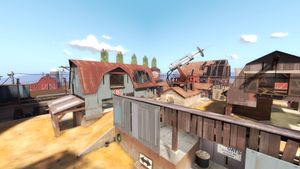
This article discusses community strategy for Byre.
| Community Byre strategy | |
|---|---|

| |
| Basic Information | |
| Developer(s): | Unknown |
| Map Info | |
| Environment: | Farmland/construction |
| Setting: | Daylight, sunny |
Contents
General strategy
- Teams should focus their attention to the control points, capturing at least one before engaging the other team. As the map requires both points captured this will allow you to set up a defense against the enemy team.
- The drainage ditches are a great way to flank the enemy team protecting their point.
Class-specific strategy
 Scout
Scout
- Scouts can run from the drainage ditch for an ambush attack from behind.
 Soldier
- From a good rocket jump, you will have a good view of the enemy team to engage. Try to keep rocket jumping to a minimum as health is scarce.
 Pyro
Pyro
- Pyros have great damage capabilities due to the map's small size, however this also means that there is less room to maneuver.
 Demoman
- Bear in mind that with the double control points, the enemy team will have to work to get to your team's control point in order to win. This can lead to great opportunities to lay stickytraps.
 Heavy
Heavy
- With the map's small size, Heavies can maneuver around offensively armed with a Shotgun or Family Business.
 Engineer
- Engineers should prioritize dropping their dispenser ASAP to supply health to the rest of the team.
- Be wary of sentry positions, as due to the lack of sufficient cover a well placed shot from a Soldier or Demoman can easily destroy it.
 Medic
Medic
- Medics can change the tide for your team. As health is scarce and far from the fight, Medics can keep your team's health stable in a firefight.
 Sniper
- Despite not having any highground, the map has little cover, allowing for quick snipers to pick off an enemy or two right at the start.
 Spy
Spy
- Although not an ideal map for spies, due to the map's small size a good spy can catch the enemy team if they're in the middle of a firefight.