|
|
| Line 1: |
Line 1: |
| − | {{AllowedEditors | + | {{DISPLAYTITLE:{{Item name|grappling Hook}}}} |
| − | | user-1 = Howtoplaytf2happy | + | {{Item infobox |
| | + | | type = action |
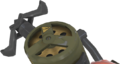
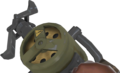
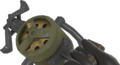
| | + | | image = Grappling Hook.png |
| | + | | 3d-image-1 = Grappling Hook |
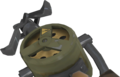
| | + | | 3d-image-2 = Grappling Hook Projectile |
| | + | | 3d-button-1 = default_half |
| | + | | 3d-button-2 = default_half |
| | + | | 3d-viewname-1 = Default |
| | + | | 3d-viewname-2 = Projectile |
| | + | | used-by = {{used by|All classes}} |
| | + | | released = {{Patch name|12|22|2014}} |
| | + | | released-major = Smissmas 2014 |
| | + | | availability = {{avail|stock}} |
| | + | | gift = yes |
| | + | | paint = no |
| | + | | numbered = no |
| | + | | loadout = yes |
| | + | | quality = Normal |
| | + | | item-kind = {{item kind|Grappling Hook}} |
| | + | | item-level = 1 |
| | + | | item-description = {{item description|Grappling Hook}} |
| | + | | att-1-positive = {{attribute|SingleWepHolsterBonus|80}} |
| | + | | att-2-positive = {{attribute|SingleWepDeployBonus|100}} |
| | }} | | }} |
| − | {{Other uses|for=팀 포트리스 2의 모든 공식 맵|List of maps/ko|l1=맵 목록}}
| |
| − | [[File:Wellconceptart.png|thumb|right|500px|''팀 포트리스 2''의 세계 - [[Well (Control Point)/ko|Well]]의 공장과 선로가 보이는 구상도.]]
| |
| | | | |
| − | 이 글은 ''[[Team Fortress 2/ko|팀 포트리스 2]]''의 '''게임 모드 목록'''입니다. 초기에는, [[#깃발 탈취전|깃발 탈취전]], [[#지점 점령|지점 점령]] 및 [[#지역 점령|지역 점령]]의 세 가지 모드를 지원했습니다. 여러 [[Patches/ko|업데이트]]를 통해 [[#수레 밀기|수레 밀기]], [[#아레나|아레나]], [[#언덕의 왕|언덕의 왕]], [[#수레 밀기 경주|수레 밀기 경주]], [[#중세 모드|중세 모드]], [[#특별 배달|특별 배달]], [[#Mann 대 기계|Mann 대 기계]], [[#로봇 파괴|로봇 파괴]], [[#인력충만|인력충만]], [[#'패스' 시간|'패스' 시간]], [[#플레이어 말살|플레이어 말살]], [[#VS 색스턴 헤일|VS 색스턴 헤일]] 및 [[#Zombie Infection|Zombie Infection]]의 13가지 게임 모드가 추가되어, 총 16개의 공식 게임 모드와 2개의 훈련 맵이 있습니다. 현재 ''팀 포트리스 2''의 공식 [[List of maps/ko|맵]]은 100개가 넘으며, 이 맵들로 여러 가지 플레이 스타일을 경험할 수 있습니다.
| + | {{Quotation|{{item name|Grappling Hook}}을 사용 중인 '''스카웃'''|이야, 여기서 내 기지가 보인다!|sound=Scout_apexofjump04.wav}} |
| | | | |
| − | == {{anchor|arena}} 아레나 ==
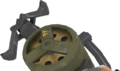
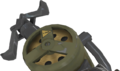
| + | '''{{item name|Grappling Hook}}'''는 [[Classes/ko|모든 병과]]의 [[Action items/ko|액션 아이템]] 입니다. [[Mannpower/ko|인력충만]] [[List of game modes/ko|게임 모드]]에서 이동을 하는데 사용할 수 있습니다. |
| − | [[File:Gametype_arena.png|right|400px]] | |
| | | | |
| − | {{Main|Arena/ko|l1=아레나}} | + | {{item name|Grappling Hook}}를 착용하면, 플레이어는 액션 키 {{DK|H}}를 눌러 바라보고 있는 방향으로 갈고리를 던지게 됩니다. 액션 키를 누르는 동안 갈고리가 계속 날아가며, 액션 키를 떼면 갈고리가 사라집니다. 만약 갈고리가 벽, 천장 등의 표면에 부착되면, 플레이어는 직선으로 날아가게 됩니다. 갈고리가 부착된 표면에 간 플레이어는, 액션 키를 뗄 때까지 표면에 붙어있게 됩니다. 이를 통해 플레이어가 맵을 빠르게 돌아다니거나 벽이나 천장에 붙어있게 합니다. |
| | | | |
| − | {{See also|Tips/ko#Arena|l1=아레나 팁}} | + | [[Cloak/ko|은폐]]하거나 [[Disguise/ko|변장]]한 {{cl|spy}}도 {{item name|Grappling Hook}}를 사용할 수 있지만, {{item link|dead ringer}}를 꺼낸 상태에서는 사용할 수 없습니다. |
| | | | |
| − | {{Quotation|'''에이브러햄 링컨''', ''1865년 두 번째 취임 연설 중''|꾸미지 않고 사실 만을 말하자면, 저는 아레나 모드가 "좋습니다".}} | + | 플레이어가 갈고리를 타고 날아가다가 막히면 ,플레이어는 계속 앞으로 나아가려고 합니다. 만약 장애물이 없어지만, 플레이어는 계속 나아갑니다. 갈고리로 나아가다가 점프 키 {{DK|Space|link=no}}를 누르면 갈고리가 떨어지며 수직 가속도를 얻습니다. {{item name|Grappling Hook}}는 하늘에 사용할 수 없으며, 범위는 2000 [[Hammer unit/ko|해머 유닛]]입니다.<ref>game\shared\tf\tf_weapon_rapplinghook.cpp:L204</ref> |
| | | | |
| − | '''아레나''' 맵들은 두 팀 사이에 목표에 집중하면서 ''팀 포트리스 2''의 병과의 다양성을 유지하도록 설계되었습니다. 아레나 외의 다른 게임 모드는 팀의 전반적인 전략을 추구하는 반면, 아레나는 팀이 싸움에서 이길 수 있는 구체적인 전략적 선택에 집중하고 있습니다. 아레나 맵들에는 {{code|arena_}}라는 접두사가 붙습니다.
| + | 적에게 {{item name|Grappling Hook}}를 맞춘 플레이어는 그 적에게 나아가며, 갈고리가 부착된 상태로 무기를 변경할 수 있습니다. 갈고리에 맞은 플레이어는 갈고리가 떨어질 때까지 [[Bleeding/ko|출혈 상태]]가 됩니다. |
| | | | |
| − | 아레나 모드는, 플레이어가 죽은 뒤 부활할 수 없기 때문에, 경기의 진행 시간을 짧게 하기 위해 작은 맵에서 진행됩니다. 아레나 모드에서 죽었을 경우, 플레이어는 해당 라운드가 끝날 때까지 [[Spectate/ko|관전가]] 모드가 됩니다. 아레나 맵들은 보통 중앙에 점령 지점이 하나 있으며, 부활이 없는 언덕의 왕 맵들과 비슷한 모습입니다.
| + | {{item name|Grappling Hook}}는 또한 6번째 무기 칸에 장착할 수 있으며, 이 때에는 액션 버튼 대신 주 공격 발사 버튼을 사용합니다. |
| | | | |
| − | 만약 팀의 인원이 불균형하다면, 두 명의 플레이어에게 "주의하십시오! 이번 라운드에서 패배할 경우 다음 라운드에 교체될 수 있습니다!" 라는 메시지가 나타나며, 그 팀이 패배할 경우, 다음 라운드까지 관전자가 됩니다.
| + | {{Weapon Demonstration}} |
| | | | |
| − | 게임이 시작되기 전 카운트다운 도중 장비 설정을 변경해도 자살하지 않으면 장비 설정은 변경되지 않습니다. 카운트다운이 끝나기 전 병과를 바꿨다가 다시 돌아와도 장비 설정이 변경됩니다.
| + | == 업데이트 내역 == |
| | + | '''{{Patch name|12|22|2014}}''' ({{update link|Smissmas 2014}}) |
| | + | * 기동 갈고리가 게임에 추가되었습니다. |
| | | | |
| − | 아레나 만의 특징으로 [[First Blood/ko|최초 처치]] 효과가 있습니다. 라운드 시작 후 처음으로 적을 처치한 플레이어는 일시적으로 치명타 증진이 적용됩니다.
| + | '''{{Patch name|12|23|2014}}''' |
| | + | * [[Disguise Kit/ko|변장한]] [[Spy/ko|스파이]]가 갈고리 색깔을 잘못 사용하던 점을 수정했습니다. |
| | + | * [[respawn/ko|부활]] 후에도 갈고리가 연결되어 있던 점을 수정했습니다. |
| | + | * {{item name|Grappling Hook}}를 사용해 맵 밖으로 나갈 수 있던 오류를 수정했습니다. |
| | + | * {{cvar|hud_fastswitch}}가 꺼져 있을때, 액션 키를 누를경우 무기 선택 메뉴에서 갈고리를 선택할 것입니다. |
| | | | |
| − | 아레나 모드는 빠른 대전 모드에서 선택할 수 없습니다.
| + | '''{{Patch name|1|9|2015}}''' |
| | + | * {{item name|Grappling Hook}}를 장착할 수 없는 오류를 수정했습니다. |
| | + | * 다른 무기에서 {{item name|Grappling Hook}}로 바꾸면 다시 무기를 바꿀 수 없는 오류를 수정했습니다. |
| | + | * 죽거나 존재하지 않는 플레이어에게 갈고리가 계속 부착되는 오류를 수정했습니다. |
| | | | |
| − | '''아레나 맵 목록''': | + | '''{{Patch name|1|27|2015}}''' |
| − | {{Maps list|arena_}} | + | * {{code|hud_fastswitch}}의 설정에 따라 액션 칸의 {{item name|Grappling Hook}}가 다르게 작동하는 오류를 수정했습니다. |
| | | | |
| − | {{clr}} | + | '''{{Patch name|2|18|2015}}''' |
| − | == {{anchor|CTF|ctf|capture the flag}} 깃발 탈취전 ==
| + | * {{item name|Grappling Hook}}를 사용하고 다시 발사하는 사이에 0.2초 지연을 추가했습니다. |
| − | [[File:Gametype_ctf.png|right|400px]]
| |
| | | | |
| − | {{Main|Capture the Flag/ko|l1=깃발 탈취전}} | + | '''{{Patch name|3|12|2015}}''' |
| | + | * {{item name|Grappling Hook}}를 사용하는 동안 점프를 할 수 있게 하여, 점프 키를 누르면 갈고리가 떨어지고 더 높이 올라갑니다. (점프 속도는 ConVar {{cvar|tf_grapplinghook_jump_up_speed}}로 설정됩니다.) |
| | + | * {{item name|Grappling Hook}}로 적에게 갈고리를 부착할 수 있습니다. |
| | + | ** 적에게 {{item name|Grappling Hook}}를 부착시키면 적에게 끌려갑니다. |
| | + | ** 갈고리가 부착된 플레이어는 1초에 2의 피해를 입는 출혈 상태가 됩니다. |
| | + | ** 갈고리가 부착된 적과 갈고리를 부착한 플레이어가 서로 시야 내에 |
| | | | |
| − | {{Quotation|'''스카웃'''|네 비밀 쓰레기에 작별이나 고하라고, 멍청아!|sound=Scout_specialcompleted05.wav|en-sound=yes}}
| + | == 버그 == |
| − | | + | * 이 아이템을 사용 후 무기를 바꿀경우 무기 교체 속도가 굉장히 빨라집니다. |
| − | '''깃발 탈취전''' 모드에서는 [[RED/ko|레드]] 팀과 [[BLU/ko|블루]] 팀의 각 기지에 [[Capture the flag/ko#기밀 서류 가방|기밀 서류 가방]]이 있습니다. 양 팀의 목표는 설정된 횟수만큼 상대의 기밀 서류 가방을 탈취하는 동시에 적이 기밀 서류 가방을 탈취하는 것을 막는 것입니다.
| + | * [[Name Tag/ko|이름표]]와 [[Description Tag/ko|설명표]]를 기동 갈고리에 사용해도 아무런 반응이 없습니다. |
| − | | |
| − | 각 팀의 기밀 서류 가방은 각 팀의 영역의 깊숙한 곳인 "정보실"이라는 공간에 있으며, 이 공간은 상대 팀과 대칭적인 곳에 있습니다. 기밀 서류 가방을 탈취하려면, 적의 기밀 서류 가방을 건드려야 합니다. 적의 기밀 서류 가방을 손에 넣은 후에는, 자신의 팀의 기밀 서류 가방이 있는 곳의 "점령 지점"으로 가져가야 합니다. 성공적으로 적의 기밀 서류 가방을 탈취하면, 자신의 팀은 10초간 [[Critical hits/ko|치명타 증진]]을 얻습니다.
| |
| − | | |
| − | 기밀 서류 가방을 들고 있는 사람이 죽거나 기밀 서류 가방을 떨어트리면, 관리자는 양 팀에게 이를 알리며, 기밀 서류 가방은 60초간 가만히 있게 되며, 기밀 서류 가방의 위에 타이머가 나타나며, 그 시간이 다 되기 전까지 기밀 서류 가방을 들지 않으면 기밀 서류 가방은 원래 위치로 돌아가게 됩니다. 기밀 서류 가방을 줍고 다시 떨어트릴 때마다 타이머가 초기화됩니다. 적은 자신의 팀의 기밀 서류 가방을 들거나 옮길 수 없으며, 기밀 서류 가방을 든 플레이어는 {{item link|Medi gun}}의 [[überCharge/ko|우버차지]] 및 {{item link|Bonk! Atomic Punch}}를 사용할 수 없고, 또한 메디 건의 우버차지를 받거나 [[Teleporters/ko|텔레포터]]를 사용할 수 없습니다. {{item link|Eureka Effect}}를 착용한 {{cl|engineer}}는 순간이동을 사용할 수 있으나, 기밀 서류 가방은 사용한 자리에 떨어지게 됩니다. 또한, {{item link|Rocket Jumper}}를 착용한 {{cl|soldier}}나 {{item link|sticky Jumper}}를 착용한 {{cl|demoman}}은 기밀 서류 가방을 주울 수 없으며, [[Cloak/ko|은신]] 상태의 스파이는 은신을 해제하기 전까지 기밀 서류 가방을 주울 수 없고, [[Disguise/ko|변장]]한 스파이가 기밀 서류 가방을 주우면 변장이 해제되며, 기밀 서류 가방을 주운 스파이는 기밀 서류 가방을 든 상태에서 다시 변장을 하거나 은신을 할 수 없습니다. 하지만, {{item link|Dead Ringer}}를 착용한 스파이는 {{item name|Dead Ringer}}를 사용할 수 있습니다.
| |
| − | | |
| − | 기밀 서류 가방을 가진 플레이어가 [[Environmental death/ko#구덩이|구덩이나 절벽에 떨어져]] 사망하는 등 일반적으로 갈 수 없는 곳에서 죽는 경우. 기밀 서류 가방은 원래 위치로 즉시 돌아가게 됩니다. 양 팀이 서버의 타이머가 다 되기 전 목표 횟수만큼 탈취하지 못하면, [[Sudden Death/ko|단판승부]] 모드가 됩니다.
| |
| − | | |
| − | {{map link|Crasher}} 맵은 특이하게 자신의 기밀 서류 가방 (폭발 나무통으로 모습이 바뀜)을 상대의 기지로 옮겨야 합니다.
| |
| − | | |
| − | {{map link|Haarp}} 맵은 레드 팀이 점령 지점을 지키고, 블루 팀이 자신의 기밀 서류 가방을 점령 지점으로 옮기는 공격/방어 형식을 취하고 있습니다.
| |
| − | | |
| − | 다른 게임들의 깃발 탈취전과는 다르게, 플레이어는 자신의 기지에 기밀 서류 가방이 없어도 탈취할 수 있습니다.
| |
| − | | |
| − | '''깃발 탈취전 맵 목록''':
| |
| − | {{Maps list|ctf_1}}
| |
| − | | |
| − | {{clr}}
| |
| − | == {{anchor|comp|competitive mode}} 경쟁전 모드 ==
| |
| − | [[File:Meet Your Match.png|right||300px|]]
| |
| − | | |
| − | {{Main|Competitive Mode/ko|l1=경쟁전 모드}}
| |
| − | | |
| − | {{Quotation|'''관리자'''|적어도 평소보단 절 실망시키지 않는군요.|sound=Cm_admin_outlier_no_04.mp3|en-sound=yes}}
| |
| − | | |
| − | '''경쟁전 모드'''는 ''팀 포트리스 2''의 공식 게임 모드입니다. 경쟁전 모드는 [[Account types/ko|고급]] ''팀 포트리스 2'' 계정이며, [https://store.steampowered.com/mobile Steam Guard 모바일 인증기]를 사용 중이고 {{item link|Competitive Matchmaking Pass}} 또는 [[Community (quality)/ko|커뮤니티]] 등급이나 [[Self-Made/ko|자체 제작]] 등급의 아이템을 가지고 있는 계정으로만 플레이할 수 있습니다. 하지만, 고급 계정이 [[Valve Anti-Cheat/ko|VAC]] 밴을 당한 계정은 Mann Co. 상점에서 패스를 사야만 합니다. 다른 게임 모드와 마찬가지로, 사용할 수 있는 무기 및 병과에 대한 제한이 없습니다.
| |
| − | | |
| − | '''경쟁전 맵 목록''':
| |
| − | {{Maps list|comp}}
| |
| − | | |
| − | {{clr}}
| |
| − | == {{anchor|CP|cp|control point}} 지점 점령==
| |
| − | [[File:Gametype_cp.png|right|400px]]
| |
| − | | |
| − | {{Main|Control Point (game mode)/ko|l1=지점 점령}}
| |
| − | | |
| − | {{See also|Control point (objective)/ko|l1=점령 지점 (목표)}}
| |
| − | | |
| − | {{Quotation|'''엔지니어'''|이 지점은 알아서 점령되지 않는다고! 어서 오게!|sound=Engineer_helpmecapture02.wav|en-sound=yes}}
| |
| − | | |
| − | '''지점 점령''' 맵은 두 가지의 게임 모드가 있습니다.
| |
| − | | |
| − | 점령 지점은 팀 색상의 빛과 팀 문양의 홀로그램이 있는 원판입니다 (중립 지점의 경우 하얀 빛과 홀로그램이 있습니다). 중립 지점이거나 적의 점령 지점을 점령하기 위해서는 ,플레이어는 점령 막대가 팀 색상으로 채워질 때까지 점령 지점 위에 서 있으면 됩니다. 플레이어가 더 많이 서 있을수록, 점령 속도가 빨라지지만, [[Control point timing/ko|최대 속도]]가 정해져 있습니다. 스카웃 및 {{item link|Pain Train}}을 착용한 솔저와 데모맨은 2명의 플레이어로 취급됩니다. 만약 양 팀 모두 점령 지점 위에 있으면, 점령을 할 수 없습니다. 만약 점령 지점 을 점령하기 전 플레이어가 죽거나, 점령 지점에서 벗어나는 경우, 점령 진행도는 즉시 초기화 되지 않으며, 시간이 지날수록 천천히 감소됩니다.
| |
| − | | |
| − | '''점령 지점은 3가지의 상태가 있습니다''':
| |
| | | | |
| | + | == 갤러리 == |
| | <gallery> | | <gallery> |
| − | File:CP Neutral.png|'''중립''': 이 지점은 두 팀 모두에 의해 점령 가능합니다(보통 점령 지점 맵에서 가운데 지점). | + | File:Grappling Hook Scout First Person.png|[[Scout/ko|스카웃]]의 1인칭 시점. |
| − | File:CP Captured RED.png|'''점령됨''': 이 지점은 한 팀이 점령했지만, 다른 팀이 다시 점령할 수 있습니다. | + | File:Grappling Hook Soldier First Person.png|[[Soldier/ko|솔저]]의 1인칭 시점. |
| − | File:CP Locked RED.png|'''잠김''': 이 지점은 한 팀이 점령했고, 다른 팀이 점령할 수 없습니다. | + | File:Grappling Hook Pyro First Person.png|[[Pyro/ko|파이로]]의 1인칭 시점. |
| | + | File:Grappling Hook Demoman First Person.png|[[Demoman/ko|데모맨]]의 1인칭 시점. |
| | + | File:Grappling Hook Heavy First Person.png|[[Heavy/ko|헤비]]의 1인칭 시점. |
| | + | File:Grappling Hook Engineer First Person.png|[[Engineer/ko|엔지니어]]의 1인칭 시점. |
| | + | File:Grappling Hook Engineer with Gunslinger First Person.png|[[Gunslinger/ko|총잡이]]를 장착한 엔지니어의 1인칭 시점. |
| | + | File:Grappling Hook Medic RED First Person.png|레드 [[Medic/ko|메딕]]의 1인칭 시점. |
| | + | File:Grappling Hook Medic BLU First Person.png|블루 메딕의 1인칭 시점. |
| | + | File:Grappling Hook Sniper First Person.png|[[Sniper/ko|스나이퍼]]의 1인칭 시점. |
| | + | File:Grappling Hook Spy RED First Person.png|레드 [[Spy/ko|스파이]]의 1인칭 시점. |
| | + | File:Grappling Hook Spy BLU First Person.png|블루 스파이의 1인칭 시점. |
| | </gallery> | | </gallery> |
| | | | |
| − | '''현재 총 5개의 지점 점령 맵의 종류가 있습니다''' – 대칭 지점 점령 맵, 독점 점령 지점 맵, 공격 및 수비, 중세 공격 및 수비 및 선로의 끝 공격 및 수비.
| + | {{Smissmas 2014 Nav}} |
| − | === {{anchor|Standard Control Point}} 대칭 점령 지점 ===
| + | {{Standard Weapons Nav}} |
| − | [[File:CP_Yukon_overview.png|thumb|right|300px|{{map link|Yukon}}]]
| + | {{Tool Nav}} |
| − | | |
| − | '''대칭 점령 지점''' 또는 '''직선 점령 지점'''에서는, 두 팀이 하나 이상의 점령된 점령 지점이 있고, 중앙 점령 지점은 중립 상태입니다. 모든 점령 지점을 점령한 팀이 승리하게 됩니다. 만약 시간 내에 두 팀 모두 점령 지점을 모두 점령하지 못했다면 단판승부 또는 [[Match outcomes/ko#무승부|무승부]] 상태가 됩니다. 상대 팀이 한 팀의 기지와 가까운 점령 지점들을 점령하는 속도는 더 빨라집니다.
| |
| − | | |
| − | '''대칭 지점 점령 맵 목록''':
| |
| − | {{Maps list|cp_1}}
| |
| − | | |
| − | {{clr}}
| |
| − | | |
| − | === 독점 점령 지점 ===
| |
| − | [[File:Cp_standin_B.jpg|thumb|right|300px|{{map link|Standin}}]]
| |
| − | | |
| − | '''독점 점령 지점''' 맵은 대칭적입니다. 양 팀은 점령된 지점 없이 시작하며, 모든 점령 지점은 중립 상태입니다. 모든 점령 지점을 점령한 팀이 승리하게 됩니다. 만약 시간 내에 두 팀 모두 점령 지점을 모두 점령하지 못했다면 단판승부 또는 무승부 상태가 됩니다. 한 팀이 세 개의 점령 지점을 모두 점령하면, 다른 팀이 점령 지점을 얼마나 점령했는 지에 상관 없이 승리하게 됩니다.
| |
| − | | |
| − | '''독점 지점 점령 맵''':
| |
| − | {{Maps list|cp_2}}
| |
| − | | |
| − | {{clr}}
| |
| − | === {{anchor|attack/defend|Attack/Defend}} 공격 및 수비 ===
| |
| − | [[File:Gametype_ad.png|right|400px]]
| |
| − | | |
| − | {{Quotation|'''데모맨'''|다음에는 빌어먹을 내 지점에 서기 전에 먼저 물어나 보라고.|sound=Demoman_specialcompleted06.wav|en-sound=yes}}
| |
| − | | |
| − | '''공격 및 수비''' 맵은 비대칭적입니다. 레드 팀은 모든 점령 지점을 가지고 시작하며, 블루 팀은 모든 점령 지점을 점령할 경우 승리하게 됩니다. 몇몇 맵의 경우, 점령 지점 등은 정해진 순서에 따라 점령해야 됩니다. 시간 내에 블루 팀이 점령 지점을 점령하지 못하면, 레드 팀이 승리하게 됩니다. 블루 팀이 점령한 점령 지점은 잠기게 되며, 레드 팀이 다시 점령할 수 없습니다.
| |
| − | | |
| − | 공격 및 수비 맵은 다양한 종류가 있습니다. 몇몇 맵에서는, 블루 팀은 세 전장에서 각각 두 점령 지점을 점령해야 합니다. 블루 팀이 아무 전장에서도 승리하지 못하면, 팀이 변경되어 첫 번째 전장부터 다시 시작하게 됩니다. 다른 맵에서는, 블루 팀은 순서에 상관 없이 두 점령 지점을 점령하고 나서 마지막 점령 지점을 점령해야 합니다. {{map link|Steel}}은 독특한 공격 및 수비 맵으로, 작은 점령 지점 A, B, C 및 D를 점령하여 주요 점령 지점 E에 더 접근하기 쉬워지지만, 주요 점령 지점 E만 점령하여도 승리할 수 있습니다.
| |
| − | | |
| − | '''공격 및 수비 맵 목록''':
| |
| − | {{Maps list|cp_3}}
| |
| − | | |
| − | === {{anchor|Medieval}} 중세 공격 및 수비 ===
| |
| − | [[File:Gette it Onne!.png|right|200px|Gette It Onne!]]
| |
| − | | |
| − | {{Main|Medieval Mode/ko|l1=중세 모드}}
| |
| − | | |
| − | {{Quotation|'''Valve'''|어떻게 팀 포트리스 2의 남자다운 남자들이 10세기의 흉벽에 나타나냐구요? 간단합니다, [https://tvtropes.org/pmwiki/pmwiki.php/Main/AWizardDidIt '''솔저가 마법사를 화나게 했거든요.''']}}
| |
| − | | |
| − | '''중세 공격 및 수비''' 모드는 중세 모드의 일종으로, {{update link|Australian Christmas}} 업데이트 때 추가되었습니다. 일반적인 공격 및 수비 모드와 비슷하나, 모든 총이 사라지고 [[Medieval Mode/ko#허용된 무기|옛 무기]]만 사용할 수 있습니다. 또한, 플레이어는 사망 시 소형 치료제와 중형 탄약 상자를 떨어트립니다. 채팅은 (상당히 부정확한) 옛 영어 형식으로 변경되며, 맵은 중세 시대의 모습입니다. 또한, 맵의 곳곳에 횃불이 있어 {{item link|Huntsman}} 및 {{item link|Fortified Compound}}의 화살에 불을 붙일 수 있습니다.
| |
| − | | |
| − | '''중세 공격 및 수비 맵 목록''':
| |
| − | {{Maps list|cp_4}}
| |
| − | | |
| − | === 선로의 끝 공격 및 수비 ===
| |
| − | [[File:Cp_snowplow.jpg|thumb|right|300px|{{map link|Snowplow}}]]
| |
| − | | |
| − | '''선로의 끝 공격 및 수비''' 모드는 {{update link|Gun Mettle Update}} 때 추가되었습니다. 다른 공격 및 수비 맵들과는 달리, 맵의 목표는 수레를 옮기는 기차이지만, 수레 밀기 맵과 다른 형식의 맵입니다. 블루 팀의 목표는 기차를 각 전장의 세 점령 지점을 점령해 기차를 맵의 끝으로 옮기며, 총 여섯 개의 점령 지점을 점령하여야 합니다. 각각의 점령 지점에서, 기차는 완충 장치에 의해 멈추게 되며, 레드 팀의 장치가 기차를 35초마다 공격합니다. 이 35초는 블루 팀이 점령하고 있는 동안 잠시 멈추게 되며, 블루 팀이 점령하면 초기화 됩니다.
| |
| − | | |
| − | 블루 팀이 점령 지점을 점령하지 않고 있을 때마다, 35초 간격으로 기차의 체력이 10%씩 줄어듭니다. 블루 팀이 점령 지점을 점령하면, 기차는 체력을 10% 얻고, 완충 장치를 파괴하며, 다음 점령 지점으로 나아가 다시 35초 카운트다운이 시작됩니다. 첫 전장에서의 기차의 체력은 다음 전장으로 이어지며, 첫 전장의 점령 지점을 모두 점령하지 않으면 체력이 깎인 상태로 다음 전장을 시작하게 됩니다. 블루 팀은 각 전장에서 기차가 파괴되지 않고 점령 지점을 모두 점령하면 승리하게 되며, 기차가 파괴되면 레드 팀이 승리하게 됩니다.
| |
| − | | |
| − | '''선로의 끝 공격 및 수비 맵 목록''':
| |
| − | {{Maps list|cp_5}}
| |
| − | | |
| − | {{clr}}
| |
| − | | |
| − | == {{anchor|KOTH|koth|King of the hill|king of the hill}} 언덕의 왕 ==
| |
| − | [[File:Gametype_koth.png|right|400px]]
| |
| − | | |
| − | {{Main|King of the Hill/ko|l1=언덕의 왕}}
| |
| − | | |
| − | {{Quotation|'''{{update link|Classless Update}}'''|1895년 언덕의 존재가 발견된 이후로, 왕들은 언덕들에게 매료되었습니다.}}
| |
| − | | |
| − | '''언덕의 왕''' 모드는 아레나와 비슷합니다. 언덕의 왕은 맵 중앙의 하나의 점령 지점을 두고 양 팀이 싸우게 되며, 점령 지점은 게임이 시작할 때 중립 상태로 잠겨있습니다. 양 팀은 점령 지점으로 가서, 잠금이 풀렸을 때 점령해야 합니다. 한 팀이 점령하면, 그 팀의 3분 타이머가 시작됩니다. 상대 팀이 점령 지점을 빼앗으면, 먼저 점령한 팀의 타이머가 멈추고 상대 팀의 타이머가 시작됩니다. 한 팀이 점령 지점을 점령한 상태에서, 3분 타이머가 다 지나고, 상대 팀의 점령 진행도가 없어졌을 때 승리하게 됩니다.
| |
| − | | |
| − | '''언덕의 왕 맵 목록''':
| |
| − | {{Maps list|koth_}}
| |
| − | | |
| − | {{clr}}
| |
| − | == {{anchor|MVM|mvm|Mann vs. Machine|Co-op}} Mann 대 기계 ==
| |
| − | [[File:Main_menu_button_mvm.png|right|400px]]
| |
| − | | |
| − | {{Main|Mann vs. Machine/ko|l1=Mann 대 기계}}
| |
| − | | |
| − | {{Quotation|'''헤비'''|파편들이 더 쏟아지면 문제는 줄어들지!|sound=Heavy_specialcompleted03.wav|en-sound=yes}}
| |
| − | | |
| − | '''Mann 대 기계'''는 [[Mann vs. Machine (update)/ko|동일 이름의 업데이트]] 떼 출시된 게임 모드입니다. Mann 대 기계에서, 3명에서 6명 사이의 팀원들은 Mann Co.의 요새로 폭탄을 들고 오는 로봇 부대를 막아야 합니다. 플레이어는 로봇을 파괴하면 주울 수 있는 자금을 통해 개선과 [[Power Up Canteen/ko|강화용 수통]]의 특수 능력을 구입할 수 있습니다. 만약 한 공격에서 모든 자금을 회수하면 팀에게 추가 자금이 지급됩니다.
| |
| − | | |
| − | 모든 병과와 [[weapons/ko|무기]]는 각기 다른 개선이 있습니다. 모든 공격을 방어하면 임무가 완료됩니다. 플레이어가 첫 임무를 완수하면, {{item name|Power Up Canteen}}을 얻습니다.
| |
| − | | |
| − | 현재 Mann 대 기계에는 5가지의 [[Tour of Duty/ko|작전]]과 29가지의 [[Mann vs. Machine mission/ko|임무]]가 존재합니다.
| |
| − | | |
| − | '''Mann 대 기계 맵 목록''':
| |
| − | {{Maps list|mvm_}}
| |
| − | | |
| − | {{clr}}
| |
| − | == {{anchor|CTF|ctf|mannpower}} 인력충만 ==
| |
| − | [[File:Gametype_mannpower.png|right|400px]]
| |
| − | | |
| − | {{Main|Mannpower/ko|l1=인력충만}}
| |
| − | | |
| − | {{Quotation|'''데모맨'''|정정당당한 남자의 싸움에 겁 먹은 것은 아니겠지!|sound=Demoman_dominationspy03.wav|en-sound=yes}}
| |
| − | | |
| − | '''인력충만'''은 깃발 탈취전의 수정된 버전으로, 양 팀이 상대 팀의 [[Intelligence/ko|기밀 서류 가방]]을 탈취해야 합니다. 능력보강 모드는 {{item link|Grappling Hook}}와 12가지의 능력보강이 있습니다.
| |
| − | | |
| − | 무기를 바꾸거나 액션 키를 눌러 사용할 수 있는 {{item name|Grappling Hook}}는 플레이어가 바라보는 표면에 부착되며, 벽, 땅, 천장 및 적에게 부착시킬 수 있습니다. 기동 갈고리가 부착되면, 플레이어는 자동으로 공중에서 바라보고 있는 방향으로 직선으로 날아갑니다. 기동 갈고리가 적에게 부착되면, 적은 상대를 죽이기 전까지 [[Bleeding/ko|출혈]] 피해를 입습니다. 플레이어는 기동 갈고리를 사용하는 동안 점프를 할 수 있어, 난간을 넘어갈 수 있고, 다른 무기는 사용할 수 없습니다.
| |
| − | | |
| − | 수퍼노바를 제외한 능력보강은 주운 플레이어에게 능력을 부여합니다. 라운드가 시작되면, 여러 능력보강이 맵 곳곳에 생성되며, 양 팀의 플레이어가 주울 수 있습니다. 능력보강을 주운 플레이어가 죽으면, 능력보강이 상대 팀의 색상으로 떨어져, 죽은 플레이어의 팀이 주울 수 없게 됩니다. 특정 시간 동안 팀 색상의 능력보강을 아무도 줍지 않으면, 적절한 팀의 기지에 재생성됩니다. 플레이어는 기밀 서류 가방 떨어트리기 키를 눌러 능력보강을 떨어트릴 수 있으며, 떨어진 능력보강은 중립 상태가 됩니다.
| |
| − | | |
| − | 인력충만 맵은 깃발 탈취전 모드 용으로 변경된 {{map link|Gorge (Capture the Flag)}}, {{map link|Foundry (Capture the Flag)}}, {{map link|Thunder Mountain (Capture the Flag)}} 맵과 인력충만 용으로 만들어진 {{map link|Hellfire}}가 있습니다. 플레이어가 리스폰할 때마다, 플레이어는 수 초간 무적 상태가 됩니다. 기밀 서류 가방이 "정보실"에 있는 기본 깃발 탈취전 맵과 달리, 인력충만 모드의 기밀 서류 가방은 공개된 공간에 있습니다. 하지만, 떨어트린 기밀 서류 가방의 타이머는 주웠다 다시 떨어트려도 초기화 되지 않습니다. 또한, 능력보강을 얻고 기밀 서류 가방을 주운 플레이어의 기동 갈고리 속도는 25% 느려지게 되며, 능력 보강을 얻지 못한 플레이어는 체력 재생 효과를 얻습니다. 한 팀이 기밀 서류 가방을 탈취하면, 양 팀의 점령 지점은 30초간 비활성화 됩니다. 팀의 균형이 맞지 않으면, 지고 있는 팀은 "복수" 능력보강을 얻게 되어, 일시적인 치명타 증진, 발사 속도 증진 및 탄창 증기 효과를 얻습니다. 기밀 서류 가방이 탈취된 지 90초가 지나면, 기밀 서류 가방을 들고 있는 플레이어는 죽음의 표식을 얻게 됩니다. 양 팀의 기밀 서류 가방이 탈취된 지 90초가 지나면, 기밀 서류 가방은 떨어지자마자 원래 위치로 돌아가게 됩니다.
| |
| − | | |
| − | 모든 근접 무기는 피해량이 30% 증가되지만, 방패를 착용한 데모맨은 피해량이 증가되지 않습니다. 또한, 무작위 치명타는 비활성화 되어 있습니다.
| |
| − | | |
| − | All melee weapons do an additional 30% damage. Demomen equipped with a shield do not receive this bonus. Random critical hits are disabled.
| |
| − | | |
| − | '''능력보강의 종류''':
| |
| − | <!-- making a template for this
| |
| − | * Strength - Double damage for all weapons. Distance damage fall-off immunity. Doesn't stack with crits.
| |
| − | * Resistance - Reduces incoming damage by 50%. Immune to Plague, Reflect and blocks backstabs.
| |
| − | * Vampire - All damage dealt is returned as health. Flamethrowers and Miniguns have reduced health leeched from damage done. Melee attacks returns 1.25x damage as health. 25% damage resistance. Max health increased by 80.
| |
| − | * Reflect - 80% of damage received is reflected back to the attacker (reflected damage cannot directly cause death). Max health increased to 400. 100% of received Sentry damage is reflected back to the Sentry Gun.
| |
| − | * Haste - Double weapon firing and reload rate. Double clip size and max ammo count. Movement speed increased by 30%. Sticky bomb arm time reduced. Double Ubercharge gain.
| |
| − | * Regeneration - Ammo, health, and metal regenerate. The rate of health regeneration is inversely proportional to max health.
| |
| − | * Precision - Greatly reduced bullet spread. Distance damage falloff immunity. Rocket and grenade travel speed increased by 250%. Sniper rifles have quicker damage ramp-up and re-zoom after shooting, and have double damage. Increased blast weapon clip size by 50%. Explosive projectiles have no radius damage falloff. Immunity to self-blast damage.
| |
| − | * Agility - Movement speed increased by 50%. Grapple speed increase. Jump height increased by 80%. Instant weapon switch. Immune to fall damage. Reduced grapple movement speed bonus when carrying the intelligence.
| |
| − | * Knockout - Restricts the carrier to Melee and Grappling Hook only. Max health increased by 150 except for Heavies and Demomen wielding a sword, a shield, or both, gaining only 120 health, 130 health, 80 health, and 20 health, respectively. Immune to airblast and damage pushback. Melee weapon deals 190% of base damage and forcibly shoves the victim away (Doesn't stack with crits). Melee hit forces the victim to drop their Powerup or the flag if they have it. 4x melee damage to buildings. Collects health pack health without subtracting their health bonus. Shield Charge cooldowns are greatly increased.
| |
| − | * King - Increased max health. Small health regeneration, fire, and reload rate increase. All effects except maximum health increase are shared by nearby teammates, though the regeneration buff is only applied to teammates and enemy Spies who also have Powerups. Regeneration effect is inversely proportional to maximum health.
| |
| − | * Plague - Radius health kit collection. Touching an enemy gives them and their nearby teammates the plague. Plague victims bleed to death in 10 seconds unless they pick up a health kit or touch a resupply cabinet. Plague blocks King's health regeneration and team buff.
| |
| − | * Supernova - Discharge a supernova attack (grapple secondary fire) to briefly stun nearby visible enemies. Requires full Powerup meter. Powerup meter fills over time, or by dealing damage. Stunned enemies drop their Powerups, and are pushed away from the supernova attacker. Once discharged, the Supernova Powerup disappears and respawns. When the Powerup meter is full, enemies glow when in range.
| |
| − | * Critical Hit - Temporary full crit power for 30 seconds. Respawns in the same place after 60 seconds.
| |
| − | -->
| |
| − | | |
| − | '''인력충만 맵 목록''':
| |
| − | {{Maps list|ctf_2}}
| |
| − | | |
| − | == {{Anchor|PT|pt|Pass time}} '패스' 시간 ==
| |
| − | [[File:Gametype_passtime.png|right|400px]]
| |
| − | | |
| − | {{Main|PASS Time/ko|ㅣ1='패스' 시간}}
| |
| − | | |
| − | {{Quotation|'''스카웃'''|플레이 볼!|sound=Scout_battlecry01.wav|en-sound=yes}}
| |
| − | | |
| − | ''''패스' 시간''' is a game mode for ''Team Fortress 2'' that combines the traditional combat in the game with sports elements of football (soccer in-game), hockey, and basketball. It is a heavily team-based game mode and it is critical that players use teamwork when playing it. There are many perks and jump pads to assist the players. If the match ends in a tie, Sudden Death begins. PASS Time also provides a voice command to get teammates to pass the ball to the player, who is given a speed boost and healing nearby teammates when holding the ball.
| |
| − | | |
| − | '''PASS Time maps''':
| |
| − | {{Maps list|pass_}}
| |
| − | | |
| − | {{clr}}
| |
| − | | |
| − | == {{anchor|PL|pl|payload}} Payload ==
| |
| − | [[File:Gametype_payload.png|right|400px]]
| |
| − | | |
| − | {{Main|Payload}}
| |
| − | | |
| − | {{Quotation|'''The Heavy'''|Onward, great bomb-cart!|sound=Heavy_cartmovingforwardoffense17.wav}}
| |
| − | | |
| − | In '''Payload''' maps, BLU team must escort a [[Payload#Carts|cart]] full of explosives through a series of checkpoints and into RED's base within a certain amount of time. BLU team members move or 'push' the cart by standing next to it — the more people next to the cart, the faster it moves (up to a maximum capture rate of three). Any RED team member standing near the cart stops it from venturing further, regardless of the number of BLU team members on the cart. If no BLU players push the cart for 30 seconds, the cart starts moving backward slowly until it reaches a checkpoint, BLU spawn, an uphill slope (in certain maps), or is pushed by BLU team members again, which also resets the timer. The cart functions as a level 1 [[Dispenser]] for BLU team (and disguised enemy Spies) to restore health, ammo, and metal to those pushing it. Ammunition is not restored to players standing at the front of the cart.
| |
| − | | |
| − | Some maps have flanking routes that open when a specific point is taken.
| |
| − | | |
| − | There are two distinct types of Payload missions; the type depends on the map. Some Payload maps, including Gold Rush, Hoodoo, and Thunder Mountain, are ''multiple-staged'' and play similarly to {{map link|Dustbowl}} by splitting the mission into three sections, each with multiple checkpoints. Capturing the final point on the last stage results in BLU blowing up RED's base, often with [[Environmental death|a spectacular explosion]] wiping out everyone around the bomb cart. Time is added whenever BLU captures a non-stage-winning point.
| |
| − | | |
| − | The other type of Payload mission, an example being [[Badwater Basin]], is ''single-staged'', similar to [[Mountain Lab]], and has all checkpoints within one long stage, with larger time bonuses for BLU upon successful captures. There are also fewer total checkpoints, resulting in three or four checkpoints and a final point, where BLU can win the game and blow up RED's base.
| |
| − | | |
| − | '''Single-stage Payload maps''':
| |
| − | {{Maps list|pl_1}}
| |
| − | | |
| − | '''Multiple-stage Payload Maps''':
| |
| − | {{Maps list|pl_2}}
| |
| − | | |
| − | {{clr}}
| |
| − | === {{anchor|PLR|plr|payload race|race}} Payload Race ===
| |
| − | [[File:Gametype_plr.png|right|400px]]
| |
| − | | |
| − | {{Main|Payload Race}}
| |
| − | | |
| − | {{Quotation|'''In-game summary'''|Two teams. Two bombs. Two tracks. Hilarity ensues.}}
| |
| − | | |
| − | Unlike standard Payload maps, '''Payload Race''' maps feature both RED and BLU teams issued with a cart; neither team is restricted to an attacking or defending role, with both teams assuming characteristics of both roles. To win, each team must simultaneously push their cart through enemy territory to reach the final point while preventing the enemy team from doing the same. As with Payload mode, team members push the cart by standing next to it, with more members increasing the speed of the cart and opposing team members halting it.
| |
| − | | |
| − | Unlike Payload mode, the cart does not move backward after any duration of time and there is no time limit; the map only ends when one team successfully pushes their cart to the finishing point. Each cart works as a level 1 Dispenser for their team (and disguised enemy Spies), restoring health, ammo, and metal to those pushing the cart. Parts of the track may feature slopes on which the cart quickly rolls back down to the bottom unless it is being constantly pushed. In many maps, there are uphill pushes. Should the cart pushers be killed or move away from the cart, the cart slides down the ramp to its original state.
| |
| − |
| |
| − | Payload Race maps may or may not be split into multiple rounds.
| |
| − | | |
| − | '''Payload Race maps''':
| |
| − | {{Maps list|plr_}}
| |
| − | | |
| − | {{clr}}
| |
| − | == {{anchor|PD|pd|player destruction}} Player Destruction ==
| |
| − | [[File:Gamemode invasion.png|right|300px]]
| |
| − | | |
| − | {{Main|Player Destruction}}
| |
| − | | |
| − | {{Quotation|'''The Engineer''' to drunk UFO pilots|I believe I will buy you a beer!|sound=Cm_engie_summary_callout_03.mp3}}
| |
| − | | |
| − | '''Player Destruction''' is a community-created game mode added as part of the {{update link|Invasion Community Update}}. This game mode focuses on teams collecting a special pickup by killing enemy players and then accessing the map's delivery zone in order to add them to their scores. Whenever a player is killed, they drop all their currently held pickups, which can be picked up by both teams.
| |
| − | | |
| − | The player on each team with the largest amount of pickups provides health and ammo equal to a Level 1 Dispenser to themselves and nearby teammates, but their outline and the number of pickups they possess are constantly visible to both teams.
| |
| − | | |
| − | '''Player Destruction maps''':
| |
| − | {{Maps list|pd_}}
| |
| − | | |
| − | {{clr}}
| |
| − | == {{anchor|SD|sd|special delivery}} Special Delivery ==
| |
| − | [[File:Gametype_sd.png|right|400px]]
| |
| − | | |
| − | {{Main|Special Delivery (game mode)}}
| |
| − | | |
| − | {{Quotation|'''The Administrator'''|Gentlemen, today we launch a monkey into space.|sound=Announcer_sd_monkeynaut_start01.wav}}
| |
| − | | |
| − | '''Special Delivery''' is a game mode released as part of the {{update link|Pyromania Update}}. In this game mode, an initially neutral briefcase must be transported to the top of a lift<!--referred to as such (not as an elevator) by both the Administrator and Merasmus--> before the opposing team can do the same.
| |
| − | | |
| − | If a player picks up the briefcase and is killed while holding it, only players from the same team as its recently-deceased carrier can pick it up again. If the team fails to do so within 45 seconds, the briefcase is sent back to its original position and reverts to neutral.
| |
| − | | |
| − | The player who has a hold of the briefcase must stand on the lift all the way up and deliver it to the goal at the top. In [[Doomsday]], the player has to remain on the platform until the compartment hatch of the rocket fully opens and is ready to receive the briefcase.
| |
| − | | |
| − | '''Special Delivery maps''':
| |
| − | {{Maps list|sd_}}
| |
| − | | |
| − | {{clr}}
| |
| − | == {{anchor|TC|tc|territorial control}} Territorial Control ==
| |
| − | [[File:Territorial Control Map TC Hydro.JPG|300px|right|thumb|{{map link|Hydro}}]]
| |
| − | | |
| − | {{Main|Territorial Control}}
| |
| − | | |
| − | {{Quotation|'''The Soldier'''|We have you surrounded, at least from this side!|sound=Soldier_taunts12.wav}}
| |
| − | | |
| − | In '''Territorial Control''', the goal is to take over the entire map by capturing "territories". Each game is randomly selected from the six available layouts in a 'point against point' game where both teams must capture the opposite point while defending their own. After a team successfully captures the opposite point, the next round takes place in a different area of the map which is also randomly selected. After a team captures all four territories, that team must capture the enemy team's base. If the base point is captured (in Hydro, the Radar Dish for RED, the Power Plant for BLU), the attacking team wins the game. When the next round begins, territories are reset and a new random layout is selected.
| |
| − | | |
| − | In any game in TC (except in RED/BLU base games), if a control point is not captured before the eight-minute time clock reaches zero, the game goes into Sudden Death mode.
| |
| − | | |
| − | '''Territorial Control maps''':
| |
| − | {{Maps list|tc_}}
| |
| − | | |
| − | {{clr}}
| |
| − | == {{anchor|VSH|vsh|VS Saxton Hale}} Versus Saxton Hale ==
| |
| − | {{Main|Versus Saxton Hale}}
| |
| − | | |
| − | [[File:VSH Saxton Hale Model.png|right||100px|]]
| |
| − | {{Quotation|Publicity blurb|'''What is VS Saxton Hale?''' It's in the name! You fight Saxton Hale! Or you play as Saxton Hale and fight the Mercenaries. Are you ready to face 23 enemies at once? ‘Cause they surely aren’t ready to face you!}}
| |
| − | | |
| − | '''Versus Saxton Hale''' is a game mode released as part of the {{update link|Summer 2023 Update}}. Similar to the [[Arena]] game mode, it features one player controlling [[Saxton Hale]] on the BLU team, and all other players on the RED team attempting to defeat him. Saxton has several moves that can kill most classes in a single hit, and similar to Arena, all destroyed players become spectators until the end of the round.
| |
| − | | |
| − | '''Versus Saxton Hale maps''':
| |
| − | {{Maps list|vsh_}}
| |
| − | | |
| − | == {{anchor|ZI|zi|zombie infection}} Zombie Infection ==
| |
| − | {{main|Zombie Infection}}
| |
| − | | |
| − | [[File:Zombified Engineer BLU.png|right||100px|]]
| |
| − | {{Quotation|'''The Demoman'''|Hell zombies!|sound=Demoman sf13 bosses01.wav}}
| |
| − | | |
| − | '''Zombie Infection''' is a game mode released as part of the {{update link|Scream Fortress 2023}} update. In this game mode, BLU plays as a horde of Zombies, while RED plays as regular Humans. If a RED Human dies, they become a BLU Zombie; if a BLU Zombie dies, they respawn as normal. BLU wins if all of RED turns into Zombies, while RED wins by surviving for long enough.
| |
| − | | |
| − | '''Zombie Infection maps''':
| |
| − | {{Maps list|zi_}}
| |
| − | | |
| − | == {{anchor|training|train|Training|Training Mode}} Training Mode ==
| |
| − | [[File:Training basic.png|right||180px|]]
| |
| − | [[File:Training offlinepractice.png|right||180px|]]
| |
| − | | |
| − | {{Main|Training Mode}}
| |
| − | | |
| − | {{Quotation|'''The Engineer'''|My 11th PhD is in Applied Ass-Kicking!|sound=Cm_engie_gamewon_13.mp3}}
| |
| − | | |
| − | '''Training Mode''' maps are intended to teach the basics of gameplay and advanced techniques on wooden targets and bots. Training Mode shipped with the [[Mac Update]], which introduced two official training maps. The [[Training Mode#Offline Practice|Offline Practice]] allows for new and unfamiliar players to train on specific game modes, along with the capability to adjust the difficulty scale of bots to suit the player.
| |
| − | | |
| − | '''Training Mode maps''':
| |
| − | {{Maps list|tr_}}
| |
| − | | |
| − | Brandon Reinhart indirectly announced on the Official TF2 Blog on July 28, 2010, that Corey Peters was currently working on another official training map,<ref name="newtraining">https://www.teamfortress.com/post.php?id=4130</ref> though details remain unknown for which class or what gameplay mechanics were being focused on.
| |
| − | | |
| − | Current training classes are:
| |
| − | * {{cl|Soldier}}
| |
| − | * {{cl|Demoman}}
| |
| − | * {{cl|Engineer}}
| |
| − | * {{cl|Spy}}
| |
| − | | |
| − | == {{anchor|high|highlanger|High}} Highlander ==
| |
| − | [[File:ETF2L_highlander_medal_Gold.png|right|100px|Highlander tournament prize]]
| |
| − | | |
| − | {{Quotation|'''The Demoman'''|There can be only one!|sound=Demoman_eyelandertaunt02.wav}}
| |
| − | | |
| − | '''Highlander''' mode restricts the number of players of each team to 9 players and only allows one player per class on each team. It is applicable to any game mode and can be activated by entering <code>mp_highlander 1</code> into the console.
| |
| − | | |
| − | The idea behind Highlander mode existed previous to its official inclusion in the game and had been implemented in server mods. Highlander mode was officially added in the {{Patch name|2|3|2010}}.
| |
| − | | |
| − | The game mode's name is a reference to the [[w:Highlander (film)|''Highlander'' film series]], where the phrase "There can be only one" was often repeated; this references the limitation of one player per class.
| |
| − | | |
| − | == Dueling Mini-Game ==
| |
| − | [[File:Backpack Dueling Mini-Game.png|right|100px|{{item name|Dueling Mini-Game}}]]
| |
| − | | |
| − | {{Main|Dueling Mini-Game}}
| |
| − | | |
| − | {{Quotation|'''The Spy'''|Let's settle this like gentlemen!|sound=Spy_MeleeDare01.wav}}
| |
| − | | |
| − | A mini-game released in the {{update link|Mann-Conomy Update}}, the '''Dueling Mini-Game''' is an [[Action items|Action item]] that can be purchased in the [[Mann Co. Store]], received via [[trading]], or found via the [[item drop system]]. When loaded into the action slot, the item can be triggered to put the user against one person on the opposing team, provided they accept the challenge. Until the end of the round, points are gained by killing or assisting in a kill against the other person. Kills of the two players dueling are tracked, and the player with the most points wins the "duel" when the round ends. If one of the players disconnects or leaves the match, a short duel ban is issued to that player. The item itself has a maximum of 5 uses and is usable on all official maps. After a player participates in their first duel, a {{item link|Bronze Dueling Badge}} is granted, which levels up to [[Silver Dueling Badge|Silver]], [[Gold Dueling Badge|Gold]], and finally [[Platinum Dueling Badge|Platinum]] as they gain more wins. For every 10 wins, an extra Dueling Mini-Game is granted. Every day, a unique [[Cosmetic items|cosmetic item]], the {{item link|Dueler}}, is given to the player who won the most duels the previous day.
| |
| − | | |
| − | == Tournament Mode ==
| |
| − | [[File:Tournament Mode Example.png|right|200px|Tournament Mode header]]
| |
| − | | |
| − | {{Main|Tournament Mode}}
| |
| − | | |
| − | {{Quotation|'''The Soldier'''|Dominated, hippie! Get a job!|sound=Soldier_DominationSoldier01.wav}}
| |
| − | | |
| − | '''Tournament Mode''' is used mostly on competitive servers. It allows for the creation of custom teams, and the ability to track the success of a particular team over multiple games. A user interface is present for naming teams, and once team members have been organized, teams must say they are ready to start the game. In Tournament Mode, there are no player limits for either team and no [[Team balance|autobalancing]].
| |
| − | | |
| − | Similarly to Highlander, Tournament Mode is applicable to any game mode and can be activated by entering <code>mp_tournament 1</code> into the console.
| |
| − | | |
| − | == Community Modes ==
| |
| − | [[File:Tf2ware screenshot.png|right|200px|link=TF2Ware|TF2Ware, a community mod by Mecha the Slag]]
| |
| − | | |
| − | {{Main|Custom Mods}}
| |
| − | | |
| − | {{Quotation|'''The Soldier'''|Never bring a bat to a battlefield, war is not a game.|sound=Soldier DominationScout07.wav}}
| |
| − | | |
| − | Community game modes/mods are custom, unofficial game modes, produced by various community members. They vary from remakes of ''[[Team Fortress Classic]]'' game modes to completely original modes like [[Smash Bros.]] and may change anything about the way a class works from their core mechanics to the weapons they carry. Some modes even add new enemies for the RED and BLU teams to fight or put the player in the shoes of someone or something they couldn't play in an official mode. Some game modes/mods have been honorably mentioned by Valve on the [[TF2 Official Blog]] and [[VS Saxton Hale Mode (custom game mode)|VS Saxton Hale]] has even made it officially into the game.
| |
| − | | |
| − | == Unused content ==
| |
| − | === Courier ===
| |
| − | There was a planned '''Courier''' game mode in development which for unknown reasons was scrapped. There is still an existing [[Media:Announcer stop courier.wav|Announcer voiceline]] in the files which was going to be used in this game mode and the class [[Civilian]] that used to be joinable with commands. The {{Patch name|12|20|2007}} prevented this from being possible.
| |
| − | | |
| − | === Robot Destruction ===
| |
| − | [[File:Beta rd blueprints.png|frameless|right]]
| |
| − | | |
| − | {{Main|Robot Destruction}}
| |
| − | | |
| − | {{Quotation|'''The Medic'''|Oh, I vill tear you apart, bolt by bolt!|sound=Medic_mvm_taunt01.wav}}
| |
| − | | |
| − | '''Robot Destruction''' is a game mode that has not yet been officially released. However, it can be played by setting up a beta server. So far there is only one known map using this game mode. This map takes place on a [[Asteroid|moon base map]] Valve mentioned and showed concept art for in an earlier TF2 update post. The game mode is similar to Capture the Flag, but instead involves destroying enemy robots and stealing their power cores. Once stolen, power cores (unlike a normal Intelligence briefcase) are instantly stored in a vault once touched. A team can go to the enemy vault and take their power cores back to slow down the other team from winning. The map itself is not finished with, as there is a lack of proper textures, but does include new robot NPCs that have brand new textures (aside from a few using the ÜberCharge texture showing that it is locked, but it is assumed that it is only a placeholder).
| |
| − | | |
| − | '''Robot Destruction maps''':
| |
| − | {{Maps list|rd_}}
| |
| − | | |
| − | === Raid ===
| |
| − | {{Main|Raid}}
| |
| − | | |
| − | There are several unused game logic options found in Hammer. {{code|tf_logic_boss_battle}}, used for an extension of the '''Raid''' game mode, or {{code|tf_logic_raid}}. In this game mode, a player would be on a team with 4 other players against hordes of bots, similar to ''[[Left 4 Dead]]''.
| |
| − | | |
| − | === Gasworks ===
| |
| − | The only evidence of this game mode is a logic option called {{code|tf_logic_gasworks}}, removed as part of the {{Patch name|12|22|2014}}. It was likely a deathmatch-esque mode, given that it shares a name with [[Gasworks (Classic)]].
| |
| − | | |
| − | == See also ==
| |
| − | * [[Custom maps]]
| |
| − | * [[Control point timing]]
| |
| − | * [[Map name prefixes]]
| |
| − | * [[List of skyboxes]]
| |
| − | | |
| − | == References ==
| |
| − | <references/>
| |
| − | | |
| − | {{Maps Nav}} | |
| − | {{Mapping Nav}} | |
| − | | |
| − | [[:Category:Game modes| ]]
| |
| − | [[:Category:Lists|Game modes]]
| |
| − | [[:Category:Mapping]]
| |


