Community Granary (Arena) strategy
Revision as of 20:06, 3 August 2015 by Ruhig Arvore (talk | contribs) (→Class-specific strategy: Numerous tips added. Edited Tip 2 on Medic.)
This article discusses community strategy for Granary (Arena).
| Community Granary (Arena) strategy | |
|---|---|

| |
| Basic Information | |
| Developer(s): | Unknown |
| Map Info | |
| Environment: | Farmland |
| Setting: | Daylight, sunny |
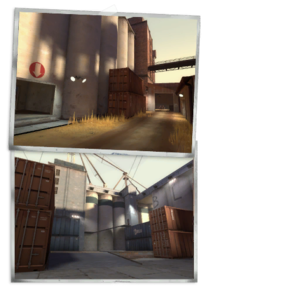
| Map Photos | |
General strategy
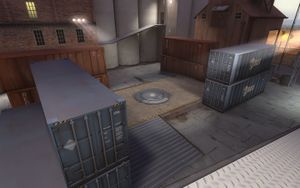
- Aside from the containers, there is very little cover on this map. Staying mobile is imperative.
- By jumping from the catwalk you can get on top of the containers. This method can be useful for Spies and Pyros trying to get behind the enemy and catch them in a surprise attack from the rear.
- When fighting around the point, use the containers to gain a height advantage. As a Demoman or Soldier you can Stickyjump or Rocket Jump up to them. Even if you cannot do either, you can still get on the containers by jumping from the balcony ramps.
- The containers are not parallel to one another, so you can avoid fall damage by landing on the edge of one container, then the ground. This is helpful for Spies to avoid taking unneeded damage.
Class-specific strategy
 Scout
Scout
- The Sandman can be very useful here. Try to negate the height advantage of enemies in the central area by rendering them defenseless with a Sandman ball.
- As enemy players exit their base, you can surprise them and shoot them from behind.
- Mad Milk is ever more useful on Granary compared to other arena maps with health kits.
 Soldier
- The containers are very useful for Soldiers as they offer a height advantage against enemies on the Control Point.
- The Rocket Jumper can be used effectively, as early in the round, a Soldier can rocket jump onto enemy catwalks and use a Shotgun to eliminate surprised opponents.
- If there is a Medic or Dispenser around, the stock Rocket Launcher can be used to rocket jump onto the crates, gaining a height advantage and making the Soldier harder to pick off.
 Pyro
Pyro
- Make good use of the containers, as they can be used to get in sneak attacks on unsuspecting enemies.
- Due to the long walkways, airblasting is good to eliminate enemies while protecting your team.
- The Flare Gun can be use to ignite enemies across the map and pick them off slowly.
- Playing a more defensive role may prove more effective in the long run here. Stay with teammates able to make up for your short range, while you watch for ambushes and reflect incoming projectiles.
 Demoman
- Make good use of Sticky Bombs by placing them behind doorways to surprise unsuspecting enemies.
- In the same style as with a Soldier, the Sticky Jumper can be used to navigate onto the enemy catwalk and quickly take out opponents with a primary or melee weapon.
 Heavy
Heavy
- Granary does not have much cover, so if you have a Sandvich available, eat it when you're low on health. This will also be handy for your teammates if there is no Medic of Engineer on your team.
- Drop your Sandvich for your Medic if he's on fire, or has low health.
- Use the containers to get up high and gain a height advantage and the element of surprise against enemies below.
- When going around corners, if is wise to have your Minigun already revving in case there are enemies there.
- The main room, to the right from spawn, leaves you vulnerable to Snipers watching from their own room. Taking the ramp to higher ground is advised for reduced risk.
 Engineer
- Granary is much more Engineer-friendly than most other Arena maps. Making a small base with a Dispenser and Sentry Gun on your side of the map can give your team members a point to fall back to.
- For Engineers using the Gunslinger, place your Combat Mini-Sentry in the various nooks and crannies on this map to surprising the enemies. You might be able to score a kill on an unsuspecting enemy, or damage them enough to force them to retreat.
- Putting a Combat Mini-Sentry on a crate can damage enemies below. The height also makes it harder to be destroyed.
- A Dispenser just outside your resupply can provide vital health and ammo for retreating teammates.
- If your metal supplies allow it, consider placing an inactive teleporter at your spawn. You can use this to warn your team of any possible flanks if a Scout or a dubious french man decides to harm it.
 Medic
Medic
- With the long walkways, this map isn't quite Medic-friendly, so be sure to get a Medic Buddy early in the round.
- If you have an ÜberCharge ready, you will be the Engineer's worst enemy. Use the charge on an offensive class to take out Engineer bases.
- If there is a lack of Engineers on your team, equip the Amputator, and taunt in a potentially safe place (for instance, within your base), when health is needed.
- There are no Medkits in this map. You are an important class so don't take risks. Your team will need you as the fight goes on.
 Sniper
- You could camp at the right room, aiming at the opponent's room, catching them as they come out of the room.
- Use the first blood crit boost with your SMG, to deal lots of damage.
- As a Sniper, the catwalk near the containers are your friend; the catwalk will not only give you a height advantage over your opponents, but it is also handy for getting in a sneak attack with a Melee weapon on your opponents below.
- While standing on the catwalk, use the nearby doorway as cover.
- Enemy Engineers may set up their base near their side of the map. If so, you can use the Sniper Rifle and take cover while scoping-in to destroy their base.
- Granary has many tight corners. Use the SMG as a priority.
 Spy
Spy
- As a Spy, using the Cloak and Dagger is good for staying on the containers only jumping off to Backstab when you see an enemy run by.
- Like on many arena maps, there are many choke points. Try to stay out of these as you have low health and damage will reveal you if you're cloaked.
- Granary has a lot of flat ground, this makes the Ambassador easier to use. Keep this in mind when equipping items for this map.
