The Pyro is a relatively bulky class that excels at close range combat, particularly in confined areas where his Flamethrower is difficult to avoid. Due to the Flamethrower’s wide damage spread, the Pyro can focus more on outmaneuvering his opponents and has more leeway when fighting at close range. Additionally, the Pyro has access to the compression blast, a powerful source of utility that allows him to forcibly reposition enemies or reflect projectiles. The overall theme of the Pyro’s available weapons is close range power; because he lacks strong ranged weaponry, he is most vulnerable when distant from enemies or when in open areas.
General
 Role Role
|
- The Pyro tends to find more success in ambushing opponents rather than approaching them head-on. Be aware of your surroundings; if you see an enemy Pyro, take note of what available routes he can take to ambush you and reposition yourself accordingly.
|
 Health Health
|
- The Pyro has an above average amount of health and can be a hassle to take down if allowed to enter close range.
|
 Speed Speed
|
- Although the Pyro is relatively bulky, he only travels at the standard movement speed and is suspectible to being kited or even defeated before he gets too close.
|
 Power Power
|
- The Pyro is strong at close range but has very weak long range weaponry. Keeping your distance will prevent much of the Pyro's possible damage.
|
Weapon-specific
Primary weapons
Flamethrower/Festive Flamthrower
|
- The Flamethrower deals continuous damage and can set you on fire. If a Pyro manages to approach you, his moderate movement speed will allow him to quickly deplete your health.
- If you're set on fire, don't panic; if you run, the Pyro can keep up with and damage you. Instead, try and defeat the Pyro before trying to extinguish yourself.
- There are many items that can extinguish burning teammates, the most common being a friendly Pyro's compression blast and the Sniper's Jarate. If you have access to those abilities, make sure to help out burning teammates.
|

Backburner
|
- The Backburner amplifies the Pyro's offense, dealing substantially more damage when attacking from behind. Stay aware of your surroundings so that you aren't unexpectedly turning away from any Pyro.
- Always try to keep the Pyro in front of you; not only does this improve your accuracy, but also prevents critical hits from the Backburner.
- To flee from a Backburner means to expose your back, so attempt to fend off the Pyro first if you need to retreat.
- The Backburner uses much more ammunition for the compression blast. This leaves the Pyro more vulnerable to projectiles; Backburner ammunition can be easily wasted by forcing the Pyro on the defensive.
|
Degreaser
|
- The Degreaser allows a Pyro to quickly switch weapons. This makes weapon heckling ineffective and makes close-quarters combat much more dangerous.
- Even if a Pyro has you cornered, try to stay out of melee range. An example of a popular combination attack is for a Pyro to set you on fire, reposition you with the compression blast, then finish you off with the Axtinguisher in just a few short moments.
- The Degreaser inflicts less afterburn damage, meaning that if you survive the Pyro's initial assault, the fire is less likely to kill you.
|
Phlogistinator
|
- The Phlogistinator has a unique "Mmmph" meter that is charged by dealing fire damage, promoting an aggressive playstyle. To prevent the Pyro from quickly charging the meter at close range, don't allow him to easily enter that range.
- Once the "Mmmph" meter is fully charged, the Pyro can then activate a taunt that causes the Pyro to deal guaranteed critical hits for the next few seconds. During the taunt, the Pyro takes heavily reduced damage, making attempts to prevent the taunt futile.
- Instead, use the time the Pyro spends taunting to either retreat or set up a counter-offensive. For example, a Demoman can plant a field of Stickybombs while a Sniper can line up an easy headshot.
- A Pyro with the Phlogistinator cannot reflect attacks, so you can free use rockets, grenades, and other projectiles that are normally reflectable.
|
| Compression Blast
|
- The compression blast's most obvious use is to shove you into stage hazards, such as bottomless pits, or into corners, where you are then easily targetable. Stay out in the open, away from areas where a Pyro can easily pin you down.
- While the compression blast can reflect projectiles, there is a moderate cooldown time. If you are using a projectile-based weapon, attempt to trick the Pyro into using the compression blast early, then fire your weapon.
- The compression blast uses a significant amount of ammunition. You can trick the Pyro into wasting compression blasts, such as by pretending that you're going to fire your weapon.
|
|
Secondary weapons
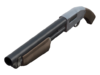
Shotgun
|
- This weapon is only truly effective at mid-range or closer due to its bullet spread. Most classes have much more dangerous ranged weapons to use if the Pyro is forced to engage you from a distance.
- Watch out for the Pyro lighting you on fire and then finishing you off with the Shotgun. Move outside its range quickly to avoid this.
|

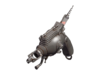
Flare Gun
|
- This weapon is slow to fire and can be difficult to score a hit with. While it can set you on fire, the damage from the flare itself is low and it will take time for the Pyro to hit you again with it. Further, the flare is very easy to avoid in open areas.
- Most Pyros use this weapon as a long-range harassment weapon. It should be easy enough to find a body of water, a Dispenser, or a Medic without having to fight the Pyro up-close. If you do get lit on fire, keep your distance from the Pyro so they cannot inflict even more damage on you with the Flamethrower or the Axtinguisher.
- If you are on fire, avoid flares at all costs, as they will deal critical hits on burning enemies.
|
Detonator
|
- Most of the rules for countering the Flare Gun also apply to the Detonator.
- Detonator flares can be remotely triggered by the Pyro that fired them, creating a small blast radius that can ignite multiple targets simultaneously. Teammates should stay scattered to minimize the amount of damage Detonator flares can inflict.
- Detonator flares have a distinctive 'whine' they emit while in the air, making them easy to distinguish from standard Flare Gun shots.
- Pyros equipped with the Detonator can use its explosive effects to mimic Rocket jumping, at the cost of nearly a third of their health. One should thus be wary of potential ambushes from above, in addition to typical Pyro ambush locations.
|
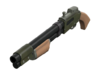
Reserve Shooter
|
- This weapon is an effective counter to other Pyros, due to the compression blast capable of launching the target into the air, whereby the attacking Pyro can subsequently shoot for mini-crits. This can make exchanges between Pyros very quick, compared to the slower (and more dangerous) method of a head-on Flamethrower battle, which usually leaves one Pyro dead and the other at very low health.
- This weapon can also be used for open combat where the Pyro is at a disadvantage against enemies such as the Demoman or Soldier, where Pyros can blow enemies away while simultaneously back pedalling with the Reserve Shooter, hopefully dealing large amounts of damage. This tactic is limited as the Reserve Shooter, like all shotguns, suffer from bullet spread with increasing range.
- The Reserve Shooter only carries 3 rounds as opposed to the standard Shotgun's 6. Thus, Pyros will need to be aim more carefully when shooting. Conversely, this means that enemies may use the frequent reload periods to launch a counterattack.
- Enemies must avoid close quarter combat with Pyros using the Reserve Shooter with the Degreaser at all costs. The Pyro now has an even greater weapon-switch time, and will exploit this to their advantage by using the Reserve Shooter in the case that the Axtinguisher has missed.
|
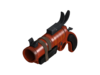
Manmelter
|
- The Manmelter behaves similarly to the Flare Gun, but with a distinctive orange-coloured projectile, and unlimited ammo. However, the Manmelter projectiles move 50% faster than flares, so they are more difficult to avoid at medium range.
- This weapon does not do critical damage to burning target like the Flare Gun, but the damage potential of the afterburn means its attacks should still be dodged.
- The harassment potential of this weapon is higher due to the infinite ammo, so lurking Manmelter Pyros should be rooted out swiftly, especially if they are using this weapon in combination with the Phlogistinator to build up charge.
|
Melee weapons
Fire Axe / Saxxy / Conscientious Objector
|
- Most Pyros will use other melee weapons instead of the Fire Axe. If a Pyro is using this, he's either counting on a random critical hit or he's out of Flamethrower ammunition. Use this to your advantage and press your attack.
|
 
Axtinguisher/Postal Pummeler
|
- This is arguably the Pyro's most dangerous weapon, as it usually only takes one hit to kill most classes. You won't usually see the Pyro use this weapon unless you're on fire and in close range of the Pyro, because it deals very little damage to a non-burning target.
- Heavies and overhealed Soldiers usually take two (or sometimes three) hits before dying to this weapon. If you're being healed by a Medic, be sure to hit the Pyro with everything you have; that extra second or two can make the difference between life and death.
- The best strategy for dealing with the Axtinguisher is prevention. Avoid being caught on fire, and avoid getting within melee range if you do get lit. This holds especially true against Pyros who pair this weapon with the Degreaser; the faster weapon switch allows for much faster kills.
|
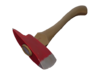
Homewrecker/Maul
|
- The Homewrecker/Maul does decreased damage to players making it less effective as a melee weapon.
- Watch your Buildings, as a Pyro with the Homewrecker/Maul can easily destroy them due to the increased damage.
- Spies will have increased difficulty sapping Buildings if a Pyro wielding the Homewrecker/Maul is defending them; it only takes a single hit to destroy a Sapper. Either kill the Pyro first, or change to/get help from a class equally or more suited to destroying Buildings, such as the Demoman.
|
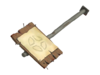
Powerjack
|
- Pyros tend to use this weapon in a similar manner as an Axtinguisher; they will light you on fire and attempt to finish you off with the Powerjack in order to gain back health. As the weapon doesn't deal critical hits to burning foes like the Axtinguisher can, this may give you more time to fend off a Pyro who attempts this.
- While equipped, this weapon gives the Pyro a 20% vulnerability to melee weapons. If a Pyro equips the Powerjack, exploit this weakness by attacking it with your own melee weapon.
- However, as the Powerjack is capable of overhealing the Pyro, killing it can still be a difficult task. Be careful engaging in close combat with a Pyro you've witnessed murder a few of your teammates with the weapon.
|
Back Scratcher
|
- The Back Scratcher makes it harder for a Pyro/Medic combo to be effective because the Pyro will be healed at a much slower rate. This can make it a lot easier to take out the Pyro first, rather than attempting to kill its Medic first.
- Avoid a melee fight with a Pyro wielding the Back Scratcher; the weapon deals 25% more damage than the standard Fire Axe, giving the Pyro the advantage.
- If there are health kits around the area, have yourself or your allies take them as soon as possible, as the health of a Pyro is replenished more quickly when it takes a medkit with the Back Scratcher equipped.
- Wounded Pyros wielding the Back Scratcher can greatly help a Medic build his UberCharge. Be sure to finish off the Pyro and its Medic quickly.
|
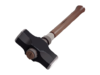
Sharpened Volcano Fragment
|
- This weapon inflicts 20% less damage than the regular Fire Axe, but this is offset by the fact that a successful hit can set enemies on fire. Stay out of melee range by walking backwards and attacking using your ranged weapons, much like you would with against the Flamethrower.
- Many Pyros use the Sharpened Volcano Fragment as a last resort to set enemies on fire, or in Medieval Mode as one of only two ways to burn their foes.
- Since this weapon engulfs its victims in flames, you should always be wary of other enemy Pyros wielding the Axtinguisher or Flare Gun as well as enemy Scouts with the Sun-on-a-Stick.
- If you are struck, keep an eye out for friendly Medics, Dispensers, water sources and health packs in order to counteract the afterburn damage.
|
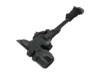
Third Degree
|
- This weapon transfers damage between players connected by Medi Gun beams. If playing as Medic, as you are free to look around while healing, ensure you keep a watch for Pyros armed with this weapon.
|
Item set effects
See also
 Pyro Pyro |
|---|
| | Weapons |
Primary | | | Secondary | | | Melee |
Fire Axe ( Frying Pan, Saxxy, Conscientious Objector, Freedom Staff, Bat Outta Hell, Memory Maker, Ham Shank, Golden Frying Pan, Necro Smasher, Crossing Guard, Prinny Machete) · Axtinguisher ( Postal Pummeler) · Homewrecker ( Maul) · Powerjack · Back Scratcher · Sharpened Volcano Fragment · Third Degree · Lollichop · Neon Annihilator · Hot Hand | | | | | | |
| | | Abilities | | | | Cosmetics | | | | Item sets | | | | Special taunts | | | | Achievements | | | | Character | | | | Strategy | | | | Other | |
|
