Difference between revisions of "Scream Fortress 2022/pl"
(Added DISPLAYTITLE.) |
BrazilianNut (talk | contribs) m (New table colors.) |
||
| Line 17: | Line 17: | ||
{|class="wikitable" cellpadding=2 style="text-align:center;" | {|class="wikitable" cellpadding=2 style="text-align:center;" | ||
|-style="height:20px;" | |-style="height:20px;" | ||
| − | ! class="header" style="background:# | + | ! class="header" style="background:#BD0BB4;color:#FFFFFF;" | {{common string|Name}} |
| − | ! class="header" style="background:# | + | ! class="header" style="background:#BD0BB4;color:#FFFFFF;" | {{common string|Picture}} |
| − | ! class="header" style="background:# | + | ! class="header" style="background:#BD0BB4;color:#FFFFFF;" | {{common string|Game mode}} |
| − | ! class="header" style="background:# | + | ! class="header" style="background:#BD0BB4;color:#FFFFFF;" | {{common string|File name}} |
|- | |- | ||
| − | | width="90px" style="background:# | + | | width="90px" style="background:#FD52FF;" | '''[[Bonesaw (map){{if lang}}|<font color="white">Bonesaw</font>]]''' |
| − | | style="background:# | + | | style="background:#DDC9E1;" | [[File:Plr hacksaw event.png|160px|link=Bonesaw (map){{if lang}}]] |
| − | | style="background:# | + | | style="background:#DDC9E1;" | '''[[Payload Race{{if lang}}|{{common string|Payload Race}}]]'''<br>[[File:Hoodoo Bombcart.png|50px|link=Payload#Payload_Race_2{{if lang}}]] |
| {{code|plr_hacksaw_event}} | | {{code|plr_hacksaw_event}} | ||
|- | |- | ||
| − | | style="background:# | + | | style="background:#FD52FF;" | '''[[Crasher{{if lang}}|<font color="white">Crasher</font>]]''' |
| − | | style="background:# | + | | style="background:#DDC9E1;" | [[File:Ctf crasher.png|160px|link=Crasher{{if lang}}]] |
| − | | style="background:# | + | | style="background:#DDC9E1;" | '''[[Capture the Flag{{if lang}}|{{common string|Capture the Flag}}]]'''<br>[[File:Intel blu idle.png|50px|link=Capture the Flag{{if lang}}]] |
| {{code|ctf_crasher}} | | {{code|ctf_crasher}} | ||
|- | |- | ||
| − | | style="background:# | + | | style="background:#FD52FF;" | '''[[Ghoulpit{{if lang}}|<font color="white">Ghoulpit</font>]]''' |
| − | | style="background:# | + | | style="background:#DDC9E1;" | [[File:Pl sludgepit event.png|160px|link=Ghoulpit{{if lang}}]] |
| − | | style="background:# | + | | style="background:#DDC9E1;" | '''[[Payload{{if lang}}|{{common string|Payload}}]]'''<br>[[File:Hoodoo Bombcart.png|50px|link=Payload{{if lang}}]] |
| {{code|pl_sludgepit_event}} | | {{code|pl_sludgepit_event}} | ||
|- | |- | ||
| − | | style="background:# | + | | style="background:#FD52FF;" | '''[[Helltrain{{if lang}}|<font color="white">Helltrain</font>]]''' |
| − | | style="background:# | + | | style="background:#DDC9E1;" | [[File:Ctf helltrain event.png|160px|link=Helltrain{{if lang}}]] |
| − | | style="background:# | + | | style="background:#DDC9E1;" | '''[[Capture the Flag{{if lang}}|{{common string|Capture the Flag}}]]'''<br>[[File:Intel blu idle.png|50px|link=Capture the Flag{{if lang}}]] |
| {{code|ctf_helltrain_event}} | | {{code|ctf_helltrain_event}} | ||
|- | |- | ||
| − | | style="background:# | + | | style="background:#FD52FF;" | '''[[Soul-Mill{{if lang}}|<font color="white">Soul-Mill</font>]]''' |
| − | | style="background:# | + | | style="background:#DDC9E1;" | [[File:Koth sawmill event.png|160px|link=Soul-Mill{{if lang}}]] |
| − | | style="background:# | + | | style="background:#DDC9E1;" | '''[[King of the Hill{{if lang}}|{{common string|King of the Hill}}]]'''<br>[[File:Controlpoint.png|50px|link=King of the Hill{{if lang}}]] |
| {{code|koth_sawmill_event}} | | {{code|koth_sawmill_event}} | ||
|- | |- | ||
| − | | style="background:# | + | | style="background:#FD52FF;" | '''[[Spookeyridge{{if lang}}|<font color="white">Spookeyridge</font>]]''' |
| − | | style="background:# | + | | style="background:#DDC9E1;" | [[File:Cp spookeyridge.png|160px|link=Spookeyridge{{if lang}}]] |
| − | | style="background:# | + | | style="background:#DDC9E1;" | '''[[Control Point (game mode){{if lang}}|{{common string|Attack/Defend}}]]'''<br>[[File:Controlpoint.png|50px|link=Control Point (game mode){{if lang}}]] |
| {{code|cp_spookeyridge}} | | {{code|cp_spookeyridge}} | ||
|} | |} | ||
| Line 56: | Line 56: | ||
{{main|Cosmetic items/pl||l1=Przedmioty ozdobne}} | {{main|Cosmetic items/pl||l1=Przedmioty ozdobne}} | ||
{| class="wikitable collapsible" cellpadding="3" style="text-align:center;" | {| class="wikitable collapsible" cellpadding="3" style="text-align:center;" | ||
| − | | width="90px" style="background:# | + | | width="90px" style="background:#BD0BB4;" rowspan="2" | '''{{class link|Scout|br=yes|color=white}}''' |
| style="background:#4B69FF;" | {{item icon|Imp's Imprint|75px}} | | style="background:#4B69FF;" | {{item icon|Imp's Imprint|75px}} | ||
| − | | style="background:# | + | | style="background:#DDC9E1;" | '''{{item link|Imp's Imprint}}''' |
|- | |- | ||
| style="background:#8847FF;" | {{item icon|Masked Fiend|75px}} | | style="background:#8847FF;" | {{item icon|Masked Fiend|75px}} | ||
| − | | style="background:# | + | | style="background:#DDC9E1;" | '''{{item link|Masked Fiend}}''' |
|- | |- | ||
| − | | style="background:# | + | | style="background:#BD0BB4;" rowspan="3" | '''{{class link|Soldier|br=yes|color=white}}''' |
| style="background:#D32CE6;" | {{item icon|Cranial Cowl|75px}} | | style="background:#D32CE6;" | {{item icon|Cranial Cowl|75px}} | ||
| − | | style="background:# | + | | style="background:#DDC9E1;" | '''{{item link|Cranial Cowl}}''' |
|- | |- | ||
| style="background:#4B69FF;" | {{item icon|Firearm Protector|75px}} | | style="background:#4B69FF;" | {{item icon|Firearm Protector|75px}} | ||
| − | | style="background:# | + | | style="background:#DDC9E1;" | '''{{item link|Firearm Protector}}''' |
|- | |- | ||
| style="background:#8847FF;" | {{item icon|Safety Stripes|75px}} | | style="background:#8847FF;" | {{item icon|Safety Stripes|75px}} | ||
| − | | style="background:# | + | | style="background:#DDC9E1;" | '''{{item link|Safety Stripes}}''' |
|- | |- | ||
| − | | style="background:# | + | | style="background:#BD0BB4;" rowspan="3" | '''{{class link|Pyro|br=yes|color=white}}''' |
| style="background:#FFD700;" | {{item icon|Fire Breather|75px}} | | style="background:#FFD700;" | {{item icon|Fire Breather|75px}} | ||
| − | | style="background:# | + | | style="background:#DDC9E1;" | '''{{item link|Fire Breather}}''' |
|- | |- | ||
| style="background:#FFD700;" | {{item icon|Magical Mount|75px}} | | style="background:#FFD700;" | {{item icon|Magical Mount|75px}} | ||
| − | | style="background:# | + | | style="background:#DDC9E1;" | '''{{item link|Magical Mount}}''' |
|- | |- | ||
| style="background:#EB4B4B;" | {{item icon|Propaniac|75px}} | | style="background:#EB4B4B;" | {{item icon|Propaniac|75px}} | ||
| − | | style="background:# | + | | style="background:#DDC9E1;" | '''{{item link|Propaniac}}''' |
|- | |- | ||
| − | | style="background:# | + | | style="background:#BD0BB4;" rowspan="3" | '''{{class link|Demoman|br=yes|color=white}}''' |
| style="background:#D32CE6;" | {{item icon|Alcoholic Automaton|75px}} | | style="background:#D32CE6;" | {{item icon|Alcoholic Automaton|75px}} | ||
| − | | style="background:# | + | | style="background:#DDC9E1;" | '''{{item link|Alcoholic Automaton}}''' |
|- | |- | ||
| style="background:#4B69FF;" | {{item icon|Bombard Brigadier|75px}} | | style="background:#4B69FF;" | {{item icon|Bombard Brigadier|75px}} | ||
| − | | style="background:# | + | | style="background:#DDC9E1;" | '''{{item link|Bombard Brigadier}}''' |
|- | |- | ||
| style="background:#4B69FF;" | {{item icon|Nightbane Brim|75px}} | | style="background:#4B69FF;" | {{item icon|Nightbane Brim|75px}} | ||
| − | | style="background:# | + | | style="background:#DDC9E1;" | '''{{item link|Nightbane Brim}}''' |
|- | |- | ||
| − | | style="background:# | + | | style="background:#BD0BB4;" rowspan="4" | '''{{class link|Heavy|br=yes|color=white}}''' |
| style="background:#4B69FF;" | {{item icon|Horror Shawl|75px}} | | style="background:#4B69FF;" | {{item icon|Horror Shawl|75px}} | ||
| − | | style="background:# | + | | style="background:#DDC9E1;" | '''{{item link|Horror Shawl}}''' |
|- | |- | ||
| style="background:#FFD700;" | {{item icon|Misha's Maw|75px}} | | style="background:#FFD700;" | {{item icon|Misha's Maw|75px}} | ||
| − | | style="background:# | + | | style="background:#DDC9E1;" | '''{{item link|Misha's Maw}}''' |
|- | |- | ||
| style="background:#8847FF;" | {{item icon|Road Block|75px}} | | style="background:#8847FF;" | {{item icon|Road Block|75px}} | ||
| − | | style="background:# | + | | style="background:#DDC9E1;" | '''{{item link|Road Block}}''' |
|- | |- | ||
| style="background:#D32CE6;" | {{item icon|Road Rage|75px}} | | style="background:#D32CE6;" | {{item icon|Road Rage|75px}} | ||
| − | | style="background:# | + | | style="background:#DDC9E1;" | '''{{item link|Road Rage}}''' |
|- | |- | ||
| − | | style="background:# | + | | style="background:#BD0BB4;" rowspan="4" | '''{{class link|Engineer|br=yes|color=white}}''' |
| style="background:#FFD700;" | {{item icon|Cabinet Mann|75px}} | | style="background:#FFD700;" | {{item icon|Cabinet Mann|75px}} | ||
| − | | style="background:# | + | | style="background:#DDC9E1;" | '''{{item link|Cabinet Mann}}''' |
|- | |- | ||
| style="background:#8847FF;" | {{item icon|Dustbowl Devil|75px}} | | style="background:#8847FF;" | {{item icon|Dustbowl Devil|75px}} | ||
| − | | style="background:# | + | | style="background:#DDC9E1;" | '''{{item link|Dustbowl Devil}}''' |
|- | |- | ||
| style="background:#4B69FF;" | {{item icon|More Gun Marshal|75px}} | | style="background:#4B69FF;" | {{item icon|More Gun Marshal|75px}} | ||
| − | | style="background:# | + | | style="background:#DDC9E1;" | '''{{item link|More Gun Marshal}}''' |
|- | |- | ||
| style="background:#FFD700;" | {{item icon|Pony Express|75px}} | | style="background:#FFD700;" | {{item icon|Pony Express|75px}} | ||
| − | | style="background:# | + | | style="background:#DDC9E1;" | '''{{item link|Pony Express}}''' |
|- | |- | ||
| − | | style="background:# | + | | style="background:#BD0BB4;" rowspan="2" | '''{{class link|Medic|br=yes|color=white}}''' |
| style="background:#8847FF;" | {{item icon|Lavish Labwear|75px}} | | style="background:#8847FF;" | {{item icon|Lavish Labwear|75px}} | ||
| − | | style="background:# | + | | style="background:#DDC9E1;" | '''{{item link|Lavish Labwear}}''' |
|- | |- | ||
| style="background:#D32CE6;" | {{item icon|Victorian Villainy|75px}} | | style="background:#D32CE6;" | {{item icon|Victorian Villainy|75px}} | ||
| − | | style="background:# | + | | style="background:#DDC9E1;" | '''{{item link|Victorian Villainy}}''' |
|- | |- | ||
| − | | style="background:# | + | | style="background:#BD0BB4;" rowspan="2" | '''{{class link|Sniper|br=yes|color=white}}''' |
| style="background:#8847FF;" | {{item icon|Headhunter's Brim|75px}} | | style="background:#8847FF;" | {{item icon|Headhunter's Brim|75px}} | ||
| − | | style="background:# | + | | style="background:#DDC9E1;" | '''{{item link|Headhunter's Brim}}''' |
|- | |- | ||
| style="background:#4B69FF;" | {{item icon|Hunting Cloak|75px}} | | style="background:#4B69FF;" | {{item icon|Hunting Cloak|75px}} | ||
| − | | style="background:# | + | | style="background:#DDC9E1;" | '''{{item link|Hunting Cloak}}''' |
|- | |- | ||
| − | | style="background:# | + | | style="background:#BD0BB4;" rowspan="1" | '''{{class link|Spy|br=yes|color=white}}''' |
| style="background:#4B69FF;" | {{item icon|Turncoat|75px}} | | style="background:#4B69FF;" | {{item icon|Turncoat|75px}} | ||
| − | | style="background:# | + | | style="background:#DDC9E1;" | '''{{item link|Turncoat}}''' |
|- | |- | ||
| − | | style="background:# | + | | style="background:#BD0BB4;" rowspan="3" | '''{{class link|All Classes|br=yes|color=white}}''' |
| style="background:#4B69FF;" | {{item icon|Beaten and Bruised|75px}} | | style="background:#4B69FF;" | {{item icon|Beaten and Bruised|75px}} | ||
| − | | style="background:# | + | | style="background:#DDC9E1;" | '''{{item link|Beaten and Bruised}}''' |
|- | |- | ||
| style="background:#EB4B4B;" | {{item icon|Onimann|75px}} | | style="background:#EB4B4B;" | {{item icon|Onimann|75px}} | ||
| − | | style="background:# | + | | style="background:#DDC9E1;" | '''{{item link|Onimann}}''' |
|- | |- | ||
| style="background:#4B69FF;" | {{item icon|Starlight Sorcerer|75px}} | | style="background:#4B69FF;" | {{item icon|Starlight Sorcerer|75px}} | ||
| − | | style="background:# | + | | style="background:#DDC9E1;" | '''{{item link|Starlight Sorcerer}}''' |
|} | |} | ||
| Line 169: | Line 169: | ||
{{main|Taunts/pl|l1=Drwiny}} | {{main|Taunts/pl|l1=Drwiny}} | ||
{| class="wikitable collapsible" cellpadding="3" style="text-align:center;" | {| class="wikitable collapsible" cellpadding="3" style="text-align:center;" | ||
| − | | width="90px" style="background:# | + | | width="90px" style="background:#BD0BB4;" rowspan="2" | '''{{class link|Demoman|br=yes|color=white}}''' |
| − | | style="background:# | + | | style="background:#FD52FF;" | {{item icon|Drunk Mann's Cannon|75px}} |
| − | | style="background:# | + | | style="background:#DDC9E1;" | '''{{item link|Drunk Mann's Cannon}}''' |
|- | |- | ||
| − | | style="background:# | + | | style="background:#FD52FF;" | {{item icon|Shanty Shipmate|75px}} |
| − | | style="background:# | + | | style="background:#DDC9E1;" | '''{{item link|Shanty Shipmate}}''' |
|- | |- | ||
| − | | style="background:# | + | | style="background:#BD0BB4;" | '''{{class link|Engineer|br=yes|color=white}}''' |
| − | | style="background:# | + | | style="background:#FD52FF;" | {{item icon|Texas Twirl 'Em|75px}} |
| − | | style="background:# | + | | style="background:#DDC9E1;" | '''{{item link|Texas Twirl 'Em}}''' |
|- | |- | ||
| − | | style="background:# | + | | style="background:#BD0BB4;" | '''{{class link|Spy|br=yes|color=white}}''' |
| − | | style="background:# | + | | style="background:#FD52FF;" | {{item icon|Travel Agent|75px}} |
| − | | style="background:# | + | | style="background:#DDC9E1;" | '''{{item link|Travel Agent}}''' |
|- | |- | ||
| − | | style="background:# | + | | style="background:#BD0BB4;" | '''{{class link|All classes|br=yes|color=white}}''' |
| − | | style="background:# | + | | style="background:#FD52FF;" | {{item icon|Scaredy-cat!|75px}} |
| − | | style="background:# | + | | style="background:#DDC9E1;" | '''{{item link|Scaredy-cat!}}''' |
|} | |} | ||
| Line 192: | Line 192: | ||
{{main|Tools/pl|l1=Narzędzia}} | {{main|Tools/pl|l1=Narzędzia}} | ||
{| class="wikitable collapsible" cellpadding="3" style="text-align:center;" | {| class="wikitable collapsible" cellpadding="3" style="text-align:center;" | ||
| − | | width="90px" style="background:# | + | | width="90px" style="background:#FD52FF;" | {{item icon|Ghoulish Gains Case|75px}} |
| − | | style="background:# | + | | style="background:#DDC9E1;" | '''{{item link|Ghoulish Gains Case}}''' |
|- | |- | ||
| − | | style="background:# | + | | style="background:#FD52FF;" | {{item icon|Ghoulish Gains Key|75px}} |
| − | | style="background:# | + | | style="background:#DDC9E1;" | '''{{item link|Ghoulish Gains Key}}''' |
|- | |- | ||
| − | | style="background:# | + | | style="background:#FD52FF;" | {{item icon|Scream Fortress XIV War Paint Case|75px}} |
| − | | style="background:# | + | | style="background:#DDC9E1;" | '''{{item link|Scream Fortress XIV War Paint Case}}''' |
|- | |- | ||
| − | | style="background:# | + | | style="background:#FD52FF;" | {{item icon|Scream Fortress XIV War Paint Key|75px}} |
| − | | style="background:# | + | | style="background:#DDC9E1;" | '''{{item link|Scream Fortress XIV War Paint Key}}''' |
|} | |} | ||
Revision as of 12:13, 8 October 2022
| “Ale jesteś malutki! Normalnie mnie rozśmieszasz!” To jest tylko zalążek artykułu. Nie jest więc ukończony. Możesz pomóc Team Fortress Wiki rozbudowując go. |
Scream Fortress 2022 lub Scream Fortress XIV to wydarzenie halloweenowe i główna aktualizacja, która rozpoczeła się 1 października 2022 wraz z aktywacją w grze przedmiotów ozdobnych dostępnych tylko podczas Halloween i pełni księżyca. Cztery dni później, Aktualizacja z 5 października 2022 dodała 6 nowych map halloweenowych, 22 nowe przedmioty ozdobne, 5 nowych przedmiotów ozdobnych dostępnych tylko podczas Halloween i pełni księżyca, 5 nowych drwin, 25 nowych nietypowych efektów, oraz 11 nowych barw wojennych. Darmowe halloweenowe kontrakty zostały reaktywowane za pośrednictwem ConTrackera wraz z dodatkiem 6 nowych kontraktów dotyczących nowych map halloweenowych. Wszystkie poprzednio ukończone halloweenowe kontrakty zostały zresetowane, dając graczom możliwość zdobycia nagród na nowo.
Spis treści
Przebieg wydarzenia
1 października 2022 przedmioty ozdobne dostępne tylko podczas Halloween i pełni księżyca zostały aktywowane. W menu trybu Swobodnego pojawiła się specjalna zakładka Halloween dla poprzednich halloweenowych map.
5 października 2022, halloweenowe kontrakty zostały aktywowane, do menu specjalnego wydarzenia dodano nowe halloweenowe mapy, a Gargulce dusz zaczeły zbierać dusze. W tym czasie przyznano też Gargulca dusz tym graczom, którzy grali podczas wydarzenia, a jeszcze go nie posiadali.
Wydarzenie ma się zakończyć 7 listopada 2022.
Zawartość
Mapy
| Nazwa | Zdjęcie | Tryb gry | Nazwa pliku |
|---|---|---|---|
| Bonesaw | 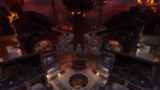
|
Wyścig ładunków
|
plr_hacksaw_event
|
| Crasher | 
|
Zdobądź flagę |
ctf_crasher
|
| Ghoulpit | 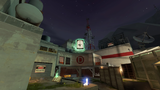
|
Ładunek
|
pl_sludgepit_event
|
| Helltrain | 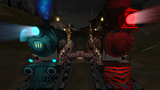
|
Zdobądź flagę |
ctf_helltrain_event
|
| Soul-Mill | 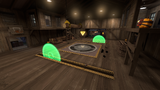
|
Król wzgórza |
koth_sawmill_event
|
| Spookeyridge | 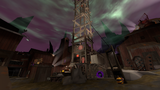
|
Atak/obrona |
cp_spookeyridge
|
Przedmioty ozdobne
Barwy wojenne
Kolekcja Scream Fortress XIV
 Święty zabójca
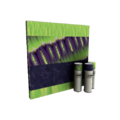 Obgryzający Bonzo
 Pogromca duchów
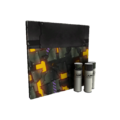 Metaliczna dusza
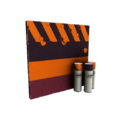 Dyniowa dekoracja
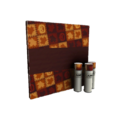 Chłodna jesień
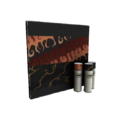 Wschód słońca
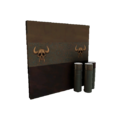
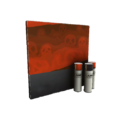 Zdrowie i piekło
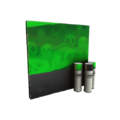 Zdrowie i piekło (zieleń)
 Hipergon
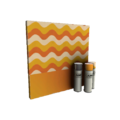 Krem kukurydziany


_War_Paint_Factory_New.png)


Drwiny
| Armata alkoholika | ||
| Pijackie szanty | ||
| Teksański tupaniec | ||
| Travel Agent | ||
| Płochliwy jak zając! |
Narzędzia
| Pojemnik upiornych zdobyczy | |
| Klucz upiornych zdobyczy | |
| Pojemnik barw wojennych Scream Fortress XIV | |
| Klucz do skrzyni barw wojennych Scream Fortress XIV |
Nietypowe efekty
| Lista nietypowych efektów aktualizacji Scream Fortress 2022 | ||||||
|---|---|---|---|---|---|---|
| Efekty przedmiotów ozdobnych |  |
 |
 |
 |
 |
 |
| Nawiedzony Kraken | Upiorny Kraken | Straszliwa siekiera | Jatka Jeźdźca | RED | BLU | |
| Wieczyste nawiedzenie | ||||||
 |
 |
 |
 |
 |
 | |
| Już zawsze, na zawsze | Permamentne przekleństwo | Plaga ciem | Mroczne Monoculusy | RED | BLU | |
| Nawiedzony knot | ||||||
 |
 | |||||
| Nikczemny knot | Widmowy knot | |||||
| Efekty drwin |  |
 |
 |
 |
 |
 |
| RED | BLU | Toksyczne opary | Wrzący wywar | Tajemnicza mikstura | Lingwistyczne odchylenie | |
| Ceremonialne aksamitki | ||||||
 |
 |
 |
 |
 |
 | |
| Cesarska pieczęć | RED | BLU | Mglisty pryzmat | RED | BLU | |
| Runiczna niewola | Rytuał wyniesienia | |||||
 |
 |
 |
 |
 | ||
| RED | BLU | Toksyczny chwyt | Piekielny chwyt | Śmiertelny chwyt | ||
| Krwawy chwyt | ||||||
Galeria
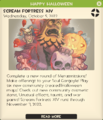
Powiadomienie w grze o rozpoczęciu wydarzenia.

Zobacz także
Linki zewnętrzne
- ,,Scream Fortress XIV rozpoczeło się!" (angielski), oficjalna strona TF2, 5 października 2022
| ||||||||||||||||||||||
| ||||||||||||||||||||||||||||||||||||||||||||||||||||||||||||||||||||||||||||||||||||||||||||||||||