Difference between revisions of "Dispenser"
(→Update history) |
m (→{{anchor|Dispenser Strategy}} Strategy) |
||
| (126 intermediate revisions by 57 users not shown) | |||
| Line 1: | Line 1: | ||
{{Featured article tag}} | {{Featured article tag}} | ||
| + | [[File:Engiwithdispenser.png|250px|right|The Engineer with a fully upgraded Dispenser.]] | ||
| + | {{Quotation|'''The Scout'''|Need a dispenser here!|sound=Scout needdispenser01.wav}} | ||
| − | [[ | + | The '''Dispenser''', also known as the '''Dispense-O-Matic 9000 Provisions Dispenser''', is a [[Buildings|building]] that can be constructed by an [[Engineer]] using the [[PDA|Build Tool]]. The team-colored device is a sort of gas station pump with various supplies inside and a [[w:Cathode-ray tube|CRT]] screen with a gauge. |
| − | + | While operational, a Dispenser provides an endless source of [[health]] and [[ammo]] to all nearby players on the owner's team (as well as disguised enemy [[Spy|Spies]]), in addition to generating and supplying a limited but regenerating supply of [[metal]] to any friendly Engineers. A single Dispenser can heal multiple players at once, lowering the burden of friendly [[Medic]]s, especially if many teammates are on fire or there are more important classes to heal. Dispensers are also more effective at keeping weapons restocked than any ammo pickup, which reduces teammates' dependence on health and ammo kits. This results in Engineers having more ammo kits to use themselves, allowing them to acquire more metal from the kits to build and upgrade their buildings. However, Dispensers themselves are defenseless and take considerable effort to build up to full power. If a team can defend their Dispensers adequately, they form an anchor to the team's hold on an area. | |
| − | + | == Functionality == | |
| + | Dispensers can prove to be very valuable in supporting a team when used effectively. Teammates that have been ignited can put themselves out by simply standing near the Dispenser. In addition to being an alternative health source, Dispensers act as a portable ammo source as well. They can provide additional metal for other Engineers to use. Dispensers also attract many teammates to one area, which can help to better forward an attack, particularly if the team is scattered and ungrouped. However, it can also make the group an easy target for rocket splash damage or incoming grenades. A Dispenser does not hand over new weapons if the player modified their loadout; a [[Respawn#Resupply|Resupply locker]] is required to do so. | ||
| − | + | The Dispenser costs 100 [[Metal]] to place, 200 Metal to upgrade to Level 2, and a further 200 to upgrade to Level 3, for a total metal cost of 500 metal. Each upgrade increases the Dispenser's health, as well as its outputs of ammo, metal, and health. While being constructed, a Dispenser's health increases until reaching 150 upon completion. A newly built Dispenser contains 25 Metal and thereafter generates 40 Metal every 5 seconds unless upgraded. It can hold up to 400 Metal, as represented by a gauge on the front of the Dispenser. A Dispenser can be manually rotated to face a different direction before one builds it. When the blueprint is shown, using the alternate attack button ([[List of default keys|default key]]: {{key|MOUSE2}}) rotates the blueprints 90 degrees counterclockwise per mouse click. A destroyed Dispenser (regardless of level) leaves behind 50 Metal (5 parts, 10 Metal/half ammo each) that can be picked up as metal or ammo by all players, regardless of team affiliation. | |
| − | + | <!-- | |
| − | + | When an Engineer is standing on top of their own Dispenser that has a full reserve of metal, the metal and ammo they gain from it are doubled. However, doing this also drains the Dispenser's reserve at a double rate. | |
| − | + | --> | |
| − | + | In [[Mann vs. Machine]], Dispensers can be upgraded at [[Upgrade Station]]s to increase their health and range. Using an [[Power Up Canteen|Upgrade Buildings Canteen]] also instantly upgrades the Dispenser to level 3. | |
| − | |||
| − | The Dispenser costs 100 [[Metal]] to place, 200 Metal to upgrade to Level 2, and a further 200 to upgrade to Level 3, for a total metal cost of 500 metal. Each upgrade increases the Dispenser's health, as well as its outputs of ammo, metal, and health. While being constructed, a Dispenser's health | ||
| − | |||
| − | In [[Mann vs. Machine | ||
{{Weapon Demonstration}} | {{Weapon Demonstration}} | ||
| − | == Levels == | + | == Dispenser Levels == |
{{Dispenser level}} | {{Dispenser level}} | ||
| Line 27: | Line 26: | ||
| 1 = {{Show achievement|Demoman|The Argyle Sap}} | | 1 = {{Show achievement|Demoman|The Argyle Sap}} | ||
}} | }} | ||
| + | |||
=== {{class link|Heavy}} === | === {{class link|Heavy}} === | ||
| Line 32: | Line 32: | ||
| 1 = {{Show achievement|Heavy|Factory Worker}} | | 1 = {{Show achievement|Heavy|Factory Worker}} | ||
}} | }} | ||
| + | |||
=== {{class link|Engineer}} === | === {{class link|Engineer}} === | ||
{{Achievement table | {{Achievement table | ||
| − | | 1 = {{Show achievement|Engineer|(Not So) Lonely Are the Brave}} | + | | 1 = {{Show achievement|Engineer|Doc Holiday}} |
| + | {{Show achievement|Engineer|Drugstore Cowboy}} | ||
| + | | 2 = {{Show achievement|Engineer|(Not So) Lonely Are the Brave}} | ||
{{Show achievement|Engineer|The Extinguished Gentleman}} | {{Show achievement|Engineer|The Extinguished Gentleman}} | ||
| − | |||
| − | |||
}} | }} | ||
| − | {{anchor|Dispenser Strategy}} | + | == {{anchor|Dispenser Strategy}} Strategy == |
| − | + | {{main|Basic Engineer strategy|l1=Engineer strategy}} | |
| − | |||
| − | {{main|Engineer strategy}} | ||
| − | * A [[Pyro]] standing near a Dispenser can act as a mobile "firewall". The Dispenser is capable of replenishing the [[ | + | * There are two places commonly regarded as the best Dispenser positions. The best position is usually around the corner of a choke point/objective, where the enemy cannot shoot it. Placing it near a popular healthpack can also work, as teammates will naturally travel there if they are injured. It is also common to have the Sentry Gun be able to see the Dispenser to stop attackers from destroying it. |
| − | * The [[Heavy]] can utilize a Dispenser in the same way, laying down a hail of bullets across a large area. This can be used as an anti-Spy measure, or to defend an area such as a cap point or choke point. | + | * A [[Pyro]] standing near a Dispenser can act as a mobile "firewall". The Dispenser is capable of replenishing the [[Flame Thrower]]'s ammo faster than can be fired. This is a potential anti-[[Spy]] measure, but it leaves the team short of a possible attacking class. This is especially helpful to a skilled Pyro, as they could reflect projectiles away from the Engineer's buildings with the [[compression blast]]. |
| − | + | * The [[Heavy]] can utilize a Dispenser in the same way, laying down a hail of bullets across a large area. This can be used as an anti-Spy measure, or to defend an area such as a cap point or choke point. Any Heavy using this technique needs to be aware of the damage drop off of his [[Minigun]]. This can be used to control hallways or even in an enemy's base (such as the sewers in [[2Fort]]) to keep either an entrance open or a safe place for a [[Teleporters|Teleporter]]. A Heavy can fire continuously; sweeping an area to send away stickies and [[Spy checking|check]] for hidden Spies. | |
| − | * When entering [[Sudden | + | * When entering [[Sudden Death]], building a Dispenser first is important to provide health, ammunition, and metal to the team. |
| − | * Dispensers give ammunition for any teammates nearby, including disguised enemy Spies. As a [[Spy]], consider leaving enemy Dispensers intact to recharge | + | * Dispensers give ammunition for any teammates nearby, including disguised enemy Spies. As a [[Spy]], consider leaving enemy Dispensers intact to recharge cloak, fill the health meter, or to remain indefinitely invisible while using the [[Invis Watch|Invisibility Watch]]. |
| − | * When in a centralized area close to other Engineers, consider putting all the Dispensers close to each other. The healing and ammo dispensing mechanisms do stack for multiple Dispensers, so placing them together | + | * When in a centralized area close to other Engineers, consider putting all the Dispensers close to each other. The healing and ammo dispensing mechanisms do stack for multiple Dispensers, so placing them together allows players to refill and heal up to full health much faster than with a single Dispenser by each Engineer's [[Sentry Gun]]. While the risk of losing the Dispensers is higher, the benefits can sometimes be enough to keep teammates on the attack. It is not recommended having more than two Dispensers next to each other, especially if both are level 3. Having three or more Dispensers near each other risks the loss of all of the Dispensers in a counterattack. It may be more effective to spread out Dispensers to make it an easily accessible source of health. |
| − | * A Dispenser can effectively block narrow passages from enemies, slowing down their progress. This is very effective versus [[Scout]]s and [[Spies]] when coupled with a Sentry Gun nearby. | + | * Dispensers take the longest to build. It is usually best to construct one, and then put up a Sentry while it is still building. Because they take so long to build, they are less valuable to build if your team is about to win or lose. |
| − | + | * While Sentry Guns are usually the main target of ÜberCharge pushes, destroying the Dispenser is also important. Without it, it takes much longer for the enemy to rebuild, not to mention heal, resupply, and allow the team more time to regroup for a decisive push. | |
| − | * | + | * Teammates may pass through the Dispenser, while enemies and the Engineer who built the Dispenser cannot. This fact has a few potential applications: |
| − | * An Engineer can stand on his own Dispenser, allowing him to reach higher platforms than he could just by jumping, allowing for more strategic deployment of Sentry Guns and other buildings. Keep in mind, however, that a Sentry Gun is taller than a Dispenser, regardless of which level it is | + | ** Teammates (especially [[Medic]]s) can hide inside friendly Dispensers as a "shield" against [[hitscan]] classes. |
| − | + | ** A Dispenser can effectively block narrow passages and stairwells from enemies, slowing down their progress. This is very effective versus [[Scout]]s and [[Spy|Spies]] when coupled with a Sentry Gun nearby. This can also be used as an early warning system, as these classes will have to destroy the Dispenser to pass by, alerting the Engineer. | |
| − | + | ** An Engineer can stand on his own Dispenser, allowing him to reach higher platforms than he could just by jumping, allowing for more strategic deployment of Sentry Guns and other buildings. Keep in mind, however, that a Sentry Gun is taller than a Dispenser, regardless of which level it is. | |
| − | |||
== Update history == | == Update history == | ||
| − | {{Update history | '''{{Patch name|2|28|2008}}''' | + | {{Update history| |
| − | * Changed Engineer buildings to detonate when a player disconnects instead of blinking out | + | '''{{Patch name|2|28|2008}}''' |
| − | * Fixed Engineer being able to detonate buildings that are being sapped | + | * Changed Engineer buildings to detonate when a player disconnects instead of blinking out. |
| − | * Fixed potential client crash for players being healed by a Medic or Dispenser | + | * Fixed Engineer being able to detonate buildings that are being sapped. |
| + | * Fixed potential client crash for players being healed by a Medic or Dispenser. | ||
'''{{Patch name|4|2|2008|xbox}}''' | '''{{Patch name|4|2|2008|xbox}}''' | ||
| Line 95: | Line 94: | ||
'''{{Patch name|8|2|2012}}''' | '''{{Patch name|8|2|2012}}''' | ||
| − | * {{ | + | * {{Undocumented}} Dispensers can no longer be wrenched during an upgrade animation. |
'''{{Patch name|6|3|2013}}''' | '''{{Patch name|6|3|2013}}''' | ||
| Line 101: | Line 100: | ||
'''{{Patch name|2|11|2014}}''' | '''{{Patch name|2|11|2014}}''' | ||
| − | * Fixed some missing knobs on the level 2 | + | * Fixed some missing knobs on the level 2 Dispenser. |
| + | |||
| + | '''{{Patch name|6|11|2014}} #1''' | ||
| + | * {{undocumented}} Dispensers now cost 70 metal when using the Gunslinger. | ||
| + | |||
| + | '''{{Patch name|6|11|2014|no-link=yes}} #2''' | ||
| + | * Fixed being charged the incorrect amount of metal for a Dispenser when The Gunslinger is equipped. | ||
| + | |||
| + | '''{{Patch name|4|29|2015}}''' | ||
| + | * Fixed a dedicated server crash related to the Dispenser. | ||
| + | |||
| + | '''{{Patch name|10|20|2017}} #1''' ([[Jungle Inferno Update]]) | ||
| + | * Fixed a bug where the Dispenser would use different bounds checks for distributing ammo and health. | ||
| + | |||
| + | '''{{Patch name|6|21|2022}}''' | ||
| + | * Fixed an exploit where Dispensers could heal through glass on some maps. | ||
}} | }} | ||
[[File:Dispenser Information.png|right|200px]] | [[File:Dispenser Information.png|right|200px]] | ||
| − | ==Bugs== | + | == Bugs == |
| − | * Rarely, the Dispenser's CRT screen | + | * Rarely, the Dispenser's CRT screen disappears, making it possible to see through it. |
| − | + | * On occasion, the Dispenser does not share health, metal or ammo. This may happen after packing and deploying the Dispenser. | |
| − | + | * When an Engineer is standing on the top of his own Dispenser instead of standing next to the Dispenser, the Engineer receives 2x the amount of metal. This does not affect how much metal is generated from the Dispenser, as it uses twice the amount of metal stored in the Dispenser. | |
| − | * | ||
| − | |||
| − | |||
| − | |||
| − | * | ||
| − | |||
| − | |||
| − | |||
| − | |||
| − | |||
| + | == Trivia == | ||
| + | * Per the Sentry Gun's instruction manual, the Dispenser's full model name is "Dispense-O-Matic 9000 Provisions Dispenser". | ||
| + | * The {{botignore|scrap metal}} models in the bottom drawer appear in the [[:File:Item icon Scrap Metal.png|Scrap Metal item]]. | ||
| + | * The ammo belts with nails on them hanging out of the bottom tray of a fully built Dispenser were originally intended to be used for the Scout's [[Nail Gun]], which was cut from the game before release. | ||
| + | * The syringes on the bottom tray of level 2 and 3 Dispensers reference the [[Syringe]], a scrapped [[Medic]] melee weapon. | ||
| + | * Originally, Dispensers were meant to deal damage when detonated. This was revealed in the leaked 2008 ''Team Fortress 2'' code from 2012. The damage and blast radius (a minimum of 100, up to 250)<ref>src_main\game\server\tf\tf_obj_dispenser.cpp:L278-299, 2007 Source Engine leak</ref> was to increase with its metal count. The code was re-used for the scrapped [[Mini-Dispenser]].<ref>game\server\tf\tf_obj_dispenser.cpp:L151-170</ref> | ||
| + | * A Level 1 BLU Dispenser makes a cameo appearance as a "Curious Dispenser" in the fourth episode of the Telltale game ''[[w:Sam & Max: The Devil's Playhouse|Sam & Max: The Devil's Playhouse]]'', Beyond the Alley of the Dolls, and its remaster. Standing near it makes the usual Dispenser healing sound. Sam can hit the Dispenser 8 times with a Wrench (complete with the genuine sound effect) to open the bottom drawer revealing a "Banang" shake. Sam can try to take the Banang, but the drawer closes again before he can grab it (Max actually unplugs it out of irritation). It also makes an appearance in the next episode of the same game, The City that Dares Not Sleep, where it is present in the same area. | ||
{{Quotation|'''Sam''' on Curious Dispensers |Look Max, free health, ammo, cupcakes, clues, and enlightenment! Oh wait, it's empty.|sound=SamDispenser.wav}} | {{Quotation|'''Sam''' on Curious Dispensers |Look Max, free health, ammo, cupcakes, clues, and enlightenment! Oh wait, it's empty.|sound=SamDispenser.wav}} | ||
| Line 133: | Line 144: | ||
{{main|Merchandise}} | {{main|Merchandise}} | ||
<gallery> | <gallery> | ||
| − | File:Merch Dispenser Shirt.png| | + | File:Merch Dispenser Shirt.png|Dispenser T-Shirt. |
</gallery> | </gallery> | ||
| + | |||
| + | == References == | ||
| + | <references/> | ||
{{Engineer Nav}} | {{Engineer Nav}} | ||
[[Category:Buildings]] | [[Category:Buildings]] | ||
Latest revision as of 12:38, 10 October 2024
| “ | Need a dispenser here!
Click to listen
— The Scout
|
” |
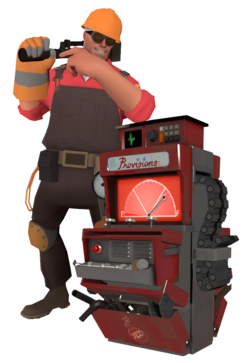
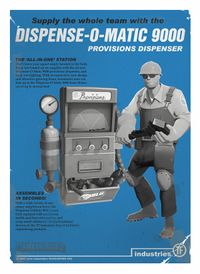
The Dispenser, also known as the Dispense-O-Matic 9000 Provisions Dispenser, is a building that can be constructed by an Engineer using the Build Tool. The team-colored device is a sort of gas station pump with various supplies inside and a CRT screen with a gauge.
While operational, a Dispenser provides an endless source of health and ammo to all nearby players on the owner's team (as well as disguised enemy Spies), in addition to generating and supplying a limited but regenerating supply of metal to any friendly Engineers. A single Dispenser can heal multiple players at once, lowering the burden of friendly Medics, especially if many teammates are on fire or there are more important classes to heal. Dispensers are also more effective at keeping weapons restocked than any ammo pickup, which reduces teammates' dependence on health and ammo kits. This results in Engineers having more ammo kits to use themselves, allowing them to acquire more metal from the kits to build and upgrade their buildings. However, Dispensers themselves are defenseless and take considerable effort to build up to full power. If a team can defend their Dispensers adequately, they form an anchor to the team's hold on an area.
Contents
Functionality
Dispensers can prove to be very valuable in supporting a team when used effectively. Teammates that have been ignited can put themselves out by simply standing near the Dispenser. In addition to being an alternative health source, Dispensers act as a portable ammo source as well. They can provide additional metal for other Engineers to use. Dispensers also attract many teammates to one area, which can help to better forward an attack, particularly if the team is scattered and ungrouped. However, it can also make the group an easy target for rocket splash damage or incoming grenades. A Dispenser does not hand over new weapons if the player modified their loadout; a Resupply locker is required to do so.
The Dispenser costs 100 Metal to place, 200 Metal to upgrade to Level 2, and a further 200 to upgrade to Level 3, for a total metal cost of 500 metal. Each upgrade increases the Dispenser's health, as well as its outputs of ammo, metal, and health. While being constructed, a Dispenser's health increases until reaching 150 upon completion. A newly built Dispenser contains 25 Metal and thereafter generates 40 Metal every 5 seconds unless upgraded. It can hold up to 400 Metal, as represented by a gauge on the front of the Dispenser. A Dispenser can be manually rotated to face a different direction before one builds it. When the blueprint is shown, using the alternate attack button (default key: MOUSE2) rotates the blueprints 90 degrees counterclockwise per mouse click. A destroyed Dispenser (regardless of level) leaves behind 50 Metal (5 parts, 10 Metal/half ammo each) that can be picked up as metal or ammo by all players, regardless of team affiliation. In Mann vs. Machine, Dispensers can be upgraded at Upgrade Stations to increase their health and range. Using an Upgrade Buildings Canteen also instantly upgrades the Dispenser to level 3.
Demonstration
Dispenser Levels
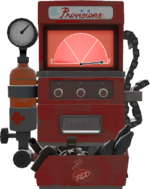
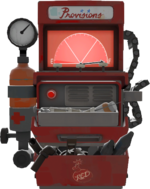
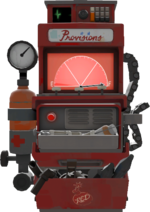
| Level | Health | Cost (Metal) |
Generation | Effect on cloaking device when cloaked | |||||
|---|---|---|---|---|---|---|---|---|---|
| Health | Ammo | Metal | Cloak | ||||||
|
150 | 100 | 10/second | 20%/second | 40/5 seconds | 5%/second | Invis Watch, Enthusiast's Timepiece, Quäckenbirdt
| ||
|
180 | 300 | 15/second | 30%/second | 50/5 seconds | 10%/second | Invis Watch, Enthusiast's Timepiece, Quäckenbirdt
Dead Ringer
| ||
|
216 | 500 | 20/second | 40%/second | 60/5 seconds | 15%/second | Invis Watch, Enthusiast's Timepiece, Quäckenbirdt
Dead Ringer
| ||
Related achievements
 Demoman
|
 Heavy
Heavy
|
 Engineer
|
|
Strategy
- There are two places commonly regarded as the best Dispenser positions. The best position is usually around the corner of a choke point/objective, where the enemy cannot shoot it. Placing it near a popular healthpack can also work, as teammates will naturally travel there if they are injured. It is also common to have the Sentry Gun be able to see the Dispenser to stop attackers from destroying it.
- A Pyro standing near a Dispenser can act as a mobile "firewall". The Dispenser is capable of replenishing the Flame Thrower's ammo faster than can be fired. This is a potential anti-Spy measure, but it leaves the team short of a possible attacking class. This is especially helpful to a skilled Pyro, as they could reflect projectiles away from the Engineer's buildings with the compression blast.
- The Heavy can utilize a Dispenser in the same way, laying down a hail of bullets across a large area. This can be used as an anti-Spy measure, or to defend an area such as a cap point or choke point. Any Heavy using this technique needs to be aware of the damage drop off of his Minigun. This can be used to control hallways or even in an enemy's base (such as the sewers in 2Fort) to keep either an entrance open or a safe place for a Teleporter. A Heavy can fire continuously; sweeping an area to send away stickies and check for hidden Spies.
- When entering Sudden Death, building a Dispenser first is important to provide health, ammunition, and metal to the team.
- Dispensers give ammunition for any teammates nearby, including disguised enemy Spies. As a Spy, consider leaving enemy Dispensers intact to recharge cloak, fill the health meter, or to remain indefinitely invisible while using the Invisibility Watch.
- When in a centralized area close to other Engineers, consider putting all the Dispensers close to each other. The healing and ammo dispensing mechanisms do stack for multiple Dispensers, so placing them together allows players to refill and heal up to full health much faster than with a single Dispenser by each Engineer's Sentry Gun. While the risk of losing the Dispensers is higher, the benefits can sometimes be enough to keep teammates on the attack. It is not recommended having more than two Dispensers next to each other, especially if both are level 3. Having three or more Dispensers near each other risks the loss of all of the Dispensers in a counterattack. It may be more effective to spread out Dispensers to make it an easily accessible source of health.
- Dispensers take the longest to build. It is usually best to construct one, and then put up a Sentry while it is still building. Because they take so long to build, they are less valuable to build if your team is about to win or lose.
- While Sentry Guns are usually the main target of ÜberCharge pushes, destroying the Dispenser is also important. Without it, it takes much longer for the enemy to rebuild, not to mention heal, resupply, and allow the team more time to regroup for a decisive push.
- Teammates may pass through the Dispenser, while enemies and the Engineer who built the Dispenser cannot. This fact has a few potential applications:
- Teammates (especially Medics) can hide inside friendly Dispensers as a "shield" against hitscan classes.
- A Dispenser can effectively block narrow passages and stairwells from enemies, slowing down their progress. This is very effective versus Scouts and Spies when coupled with a Sentry Gun nearby. This can also be used as an early warning system, as these classes will have to destroy the Dispenser to pass by, alerting the Engineer.
- An Engineer can stand on his own Dispenser, allowing him to reach higher platforms than he could just by jumping, allowing for more strategic deployment of Sentry Guns and other buildings. Keep in mind, however, that a Sentry Gun is taller than a Dispenser, regardless of which level it is.
Update history
- Changed Engineer buildings to detonate when a player disconnects instead of blinking out.
- Fixed Engineer being able to detonate buildings that are being sapped.
- Fixed potential client crash for players being healed by a Medic or Dispenser.
- Dispenser heal rate returned to normal.
April 29, 2008 Patch (Gold Rush Update)
- Mapmakers can now place Engineer buildings directly into a map, with an option for them to be invulnerable
- Fixed buffed health not decaying properly after being healed by a Dispenser.
- The Engineer's Dispensers can now be upgraded to level three. It will give out metal and heal faster as it is upgraded.
- Fixed Dispenser not healing players at the correct rate if it's upgraded while the players are already touching the Dispenser.
- Fixed Spies being able to build Dispensers.
- Fixed a rare server crash related to Dispensers.
- Fixed a case where health overheal wasn't being applied when multiple healers were involved.
- Fixed being able to place buildings in nobuild zones.
- [Undocumented] Dispensers no longer maintain player overheal.
- [Undocumented] Dispensers can no longer be wrenched during an upgrade animation.
- Fixed a missing LOD on the Dispenser.
- Fixed some missing knobs on the level 2 Dispenser.
- [Undocumented] Dispensers now cost 70 metal when using the Gunslinger.
June 11, 2014 Patch #2
- Fixed being charged the incorrect amount of metal for a Dispenser when The Gunslinger is equipped.
- Fixed a dedicated server crash related to the Dispenser.
October 20, 2017 Patch #1 (Jungle Inferno Update)
- Fixed a bug where the Dispenser would use different bounds checks for distributing ammo and health.
- Fixed an exploit where Dispensers could heal through glass on some maps.
Bugs
- Rarely, the Dispenser's CRT screen disappears, making it possible to see through it.
- On occasion, the Dispenser does not share health, metal or ammo. This may happen after packing and deploying the Dispenser.
- When an Engineer is standing on the top of his own Dispenser instead of standing next to the Dispenser, the Engineer receives 2x the amount of metal. This does not affect how much metal is generated from the Dispenser, as it uses twice the amount of metal stored in the Dispenser.
Trivia
- Per the Sentry Gun's instruction manual, the Dispenser's full model name is "Dispense-O-Matic 9000 Provisions Dispenser".
- The scrap metal models in the bottom drawer appear in the Scrap Metal item.
- The ammo belts with nails on them hanging out of the bottom tray of a fully built Dispenser were originally intended to be used for the Scout's Nail Gun, which was cut from the game before release.
- The syringes on the bottom tray of level 2 and 3 Dispensers reference the Syringe, a scrapped Medic melee weapon.
- Originally, Dispensers were meant to deal damage when detonated. This was revealed in the leaked 2008 Team Fortress 2 code from 2012. The damage and blast radius (a minimum of 100, up to 250)[1] was to increase with its metal count. The code was re-used for the scrapped Mini-Dispenser.[2]
- A Level 1 BLU Dispenser makes a cameo appearance as a "Curious Dispenser" in the fourth episode of the Telltale game Sam & Max: The Devil's Playhouse, Beyond the Alley of the Dolls, and its remaster. Standing near it makes the usual Dispenser healing sound. Sam can hit the Dispenser 8 times with a Wrench (complete with the genuine sound effect) to open the bottom drawer revealing a "Banang" shake. Sam can try to take the Banang, but the drawer closes again before he can grab it (Max actually unplugs it out of irritation). It also makes an appearance in the next episode of the same game, The City that Dares Not Sleep, where it is present in the same area.
| “ | Look Max, free health, ammo, cupcakes, clues, and enlightenment! Oh wait, it's empty.
Click to listen
— Sam on Curious Dispensers
|
” |
