Difference between revisions of "Weapons/sv"
< Weapons
m |
(Centered information, added class icons, adjusted spacing, fixed class positioning, added Sticky Jumper / Horseless Headless Horsemann's Headtaker, fixed kill icons.) |
||
| Line 1: | Line 1: | ||
{{DISPLAYTITLE:Vapen}} | {{DISPLAYTITLE:Vapen}} | ||
| + | |||
{{trans|Swedish}} | {{trans|Swedish}} | ||
| − | ==Primära Vapen== | + | == Primära Vapen == |
| − | {| class="wikitable grid" | + | {| class="wikitable grid" style="text-align: center;" |
! class="header" rowspan=2 | Ryggsäcks Ikon | ! class="header" rowspan=2 | Ryggsäcks Ikon | ||
! class="header" rowspan=2 | Döds Ikon | ! class="header" rowspan=2 | Döds Ikon | ||
| Line 23: | Line 24: | ||
| align="center" | {{Icon killicon|weapon=Scattergun}} | | align="center" | {{Icon killicon|weapon=Scattergun}} | ||
| '''[[Scattergun/sv|Hagelbössa]]''' | | '''[[Scattergun/sv|Hagelbössa]]''' | ||
| − | | rowspan="3"| | + | | rowspan="3"|[[Image:Leaderboard class scout.png|15px]] <br/> [[Scout/sv|Spanare]] |
| 6 | | 6 | ||
| 32 | | 32 | ||
| Line 57: | Line 58: | ||
| align="center" | {{Icon killicon|weapon=Rocket Launcher}} | | align="center" | {{Icon killicon|weapon=Rocket Launcher}} | ||
| '''[[Rocket Launcher/sv|Raketgevär]]''' | | '''[[Rocket Launcher/sv|Raketgevär]]''' | ||
| − | | rowspan="4"| | + | | rowspan="4"|[[Image:Leaderboard class soldier.png|15px]] <br/> [[Soldier/sv|Soldat]] |
| 4 | | 4 | ||
| 20 | | 20 | ||
| Line 89: | Line 90: | ||
|- | |- | ||
| {{Backpack icon|weapon=Rocket Jumper|icon-size=100x100px}} | | {{Backpack icon|weapon=Rocket Jumper|icon-size=100x100px}} | ||
| − | | | + | | align="center" | {{Icon killicon|weapon=Rocket Jumper}} |
| '''[[Rocket Jumper/sv|Raket Hopparen]]''' | | '''[[Rocket Jumper/sv|Raket Hopparen]]''' | ||
| 4 | | 4 | ||
| Line 102: | Line 103: | ||
| align="center" | {{Icon killicon|weapon=Flamethrower}} | | align="center" | {{Icon killicon|weapon=Flamethrower}} | ||
| '''[[Flamethrower/sv|Eldkastare]]''' | | '''[[Flamethrower/sv|Eldkastare]]''' | ||
| − | | rowspan="3"| | + | | rowspan="3"|[[Image:Leaderboard class pyro.png|15px]] <br/> [[Pyro/sv|Pyro]] |
| 200 | | 200 | ||
| N/A | | N/A | ||
| Line 136: | Line 137: | ||
| align="center" | {{Icon killicon|weapon=Grenade Launcher}} | | align="center" | {{Icon killicon|weapon=Grenade Launcher}} | ||
| '''[[Grenade Launcher|Granatkastare]]''' | | '''[[Grenade Launcher|Granatkastare]]''' | ||
| − | | | + | | [[Image:Leaderboard class demo.png|15px]] <br/> [[Demoman/sv|Demoman]] |
| 4 | | 4 | ||
| 16 | | 16 | ||
| Line 148: | Line 149: | ||
| align="center" | {{Icon killicon|weapon=Minigun}} | | align="center" | {{Icon killicon|weapon=Minigun}} | ||
| '''[[Minigun]]''' | | '''[[Minigun]]''' | ||
| − | | rowspan="2"| | + | | rowspan="2"|[[Image:Leaderboard class heavy.png|15px]] <br/> [[Heavy/sv|Tungviktaren]] |
| 200 | | 200 | ||
| N/A | | N/A | ||
| Line 154: | Line 155: | ||
| 5-30 | | 5-30 | ||
| 5-10 | | 5-10 | ||
| − | | 108 | + | | 108 (27 per bullet) |
| Standard | | Standard | ||
|- | |- | ||
| Line 165: | Line 166: | ||
| 3-20 | | 3-20 | ||
| 3-6 | | 3-6 | ||
| − | | 72 | + | | 72 (18 per bullet) |
| Låsa upp | | Låsa upp | ||
|- | |- | ||
| Line 171: | Line 172: | ||
| align="center" | {{Icon killicon|weapon=Shotgun}} | | align="center" | {{Icon killicon|weapon=Shotgun}} | ||
| '''[[Shotgun|Hagelgevär]]''' | | '''[[Shotgun|Hagelgevär]]''' | ||
| − | | rowspan="2"| | + | | rowspan="2"|[[Image:Leaderboard class engineer.png|15px]] <br/> [[Engineer/sv|Ingenjör]] |
| 6 | | 6 | ||
| 32 | | 32 | ||
| Line 194: | Line 195: | ||
| align="center" | {{Icon killicon|weapon=Syringe Gun}} | | align="center" | {{Icon killicon|weapon=Syringe Gun}} | ||
| '''[[Syringe Gun|Sprutgevär]]''' | | '''[[Syringe Gun|Sprutgevär]]''' | ||
| − | | rowspan="2"| | + | | rowspan="2"|[[Image:Leaderboard class medic.png|15px]] <br/> [[Medic/sv|Sjukvårdare]] |
| 40 | | 40 | ||
| 150 | | 150 | ||
| Line 205: | Line 206: | ||
| {{Backpack icon|weapon=Blutsauger|icon-size=100x100px}} | | {{Backpack icon|weapon=Blutsauger|icon-size=100x100px}} | ||
| align="center" | {{Icon killicon|weapon=Blutsauger}} | | align="center" | {{Icon killicon|weapon=Blutsauger}} | ||
| − | | '''[[Blutsauger]] | + | | '''[[Blutsauger]]''' |
| 40 | | 40 | ||
| 150 | | 150 | ||
| Line 217: | Line 218: | ||
| align="center" | {{Icon killicon|weapon=Sniper Rifle}} | | align="center" | {{Icon killicon|weapon=Sniper Rifle}} | ||
| '''[[Sniper Rifle|Krypskyttegevär]]''' | | '''[[Sniper Rifle|Krypskyttegevär]]''' | ||
| − | | rowspan="3"| | + | | rowspan="3"|[[Image:Leaderboard class sniper.png|15px]] <br/> [[Sniper/sv|Skarpskytt]] |
| 25 | | 25 | ||
| − | | N/A | + | | N/A |
| 43-172 | | 43-172 | ||
| 43-172 | | 43-172 | ||
| Line 241: | Line 242: | ||
| '''[[Sydney Sleeper|Sydney-Sövaren]]''' | | '''[[Sydney Sleeper|Sydney-Sövaren]]''' | ||
| 25 | | 25 | ||
| − | | N/A | + | | N/A |
| 45-160 | | 45-160 | ||
| 45-160 | | 45-160 | ||
| Line 251: | Line 252: | ||
| align="center" | {{Icon killicon|weapon=Revolver}} | | align="center" | {{Icon killicon|weapon=Revolver}} | ||
| '''[[Revolver]]''' | | '''[[Revolver]]''' | ||
| − | | rowspan="4"| | + | | rowspan="4"|[[Image:Leaderboard class spy.png|15px]] <br/> [[Spy]] |
| 6 | | 6 | ||
| 24 | | 24 | ||
| Line 294: | Line 295: | ||
|} | |} | ||
| − | ==Slot 2 Weapons== | + | == Slot 2 Weapons == |
| − | {| class="wikitable grid" | + | {| class="wikitable grid" style="text-align: center;" |
! class="header" rowspan=2 | Ryggsäcks Ikon | ! class="header" rowspan=2 | Ryggsäcks Ikon | ||
! class="header" rowspan=2 | Döds Icon | ! class="header" rowspan=2 | Döds Icon | ||
| Line 311: | Line 312: | ||
! class="header" | Långt avstång | ! class="header" | Långt avstång | ||
! class="header" | Kritiskt | ! class="header" | Kritiskt | ||
| − | |||
|- | |- | ||
| {{Backpack icon|weapon=Pistol|icon-size=100x100px}} | | {{Backpack icon|weapon=Pistol|icon-size=100x100px}} | ||
| align="center" | {{Icon killicon|weapon=Pistol}} | | align="center" | {{Icon killicon|weapon=Pistol}} | ||
| '''[[Pistol]]''' | | '''[[Pistol]]''' | ||
| − | | rowspan="2"| | + | | rowspan="2"|[[Image:Leaderboard class scout.png|15px]] <br/> [[Scout]] |
| + | |||
| + | |||
| + | [[Image:Leaderboard class engineer.png|15px]] <br/> [[Engineer]] | ||
| 12 | | 12 | ||
| 36 (Scout)<br />200 (Engineer) | | 36 (Scout)<br />200 (Engineer) | ||
| Line 339: | Line 342: | ||
| | | | ||
| '''[[Bonk! Atomic Punch]]''' | | '''[[Bonk! Atomic Punch]]''' | ||
| − | | rowspan="3"| | + | | rowspan="3"|[[Image:Leaderboard class scout.png|15px]] <br/> [[Scout]] |
| 1 | | 1 | ||
| ∞ | | ∞ | ||
| Line 349: | Line 352: | ||
|- | |- | ||
| {{Backpack icon|weapon=Crit-a-Cola|icon-size=100x100px}} | | {{Backpack icon|weapon=Crit-a-Cola|icon-size=100x100px}} | ||
| − | | | + | | |
| '''[[Crit-a-Cola]]''' | | '''[[Crit-a-Cola]]''' | ||
| 1 | | 1 | ||
| Line 360: | Line 363: | ||
|- | |- | ||
| {{Backpack icon|weapon=Mad Milk|icon-size=100x100px}} | | {{Backpack icon|weapon=Mad Milk|icon-size=100x100px}} | ||
| − | | | + | | |
| '''[[Galen Mjölk]]''' | | '''[[Galen Mjölk]]''' | ||
| 1 | | 1 | ||
| Line 373: | Line 376: | ||
| align="center" | {{Icon killicon|weapon=Shotgun}} | | align="center" | {{Icon killicon|weapon=Shotgun}} | ||
| '''[[Shotgun/sv|Gevär]]''' | | '''[[Shotgun/sv|Gevär]]''' | ||
| − | | | + | | [[Image:Leaderboard class soldier.png|15px]] <br/> [[Soldier/sv|Soldat]] |
| + | |||
| + | |||
| + | [[Image:Leaderboard class pyro.png|15px]] <br/> [[Pyro/sv|Pyro]] | ||
| + | |||
| + | |||
| + | [[Image:Leaderboard class heavy.png|15px]] <br/> [[Heavy/sv|Tungviktaren]] | ||
| 6 | | 6 | ||
| 32 | | 32 | ||
| Line 383: | Line 392: | ||
|- | |- | ||
| {{Backpack icon|weapon=Buff Banner|icon-size=100x100px}} | | {{Backpack icon|weapon=Buff Banner|icon-size=100x100px}} | ||
| − | | | + | | |
| '''[[Buff Banner]]''' | | '''[[Buff Banner]]''' | ||
| − | | rowspan="3"| | + | | rowspan="3"|[[Image:Leaderboard class soldier.png|15px]] <br/> [[Soldier]] |
| N/A | | N/A | ||
| N/A | | N/A | ||
| Line 395: | Line 404: | ||
|- | |- | ||
| {{Backpack icon|weapon=Battalion's Backup|icon-size=100x100px}} | | {{Backpack icon|weapon=Battalion's Backup|icon-size=100x100px}} | ||
| − | | | + | | |
| '''[[Battalion's Backup]]''' | | '''[[Battalion's Backup]]''' | ||
| N/A | | N/A | ||
| Line 406: | Line 415: | ||
|- | |- | ||
| {{Backpack icon|weapon=Gunboats|icon-size=100x100px}} | | {{Backpack icon|weapon=Gunboats|icon-size=100x100px}} | ||
| − | | | + | | |
| '''[[Gevärsstövlar]]''' | | '''[[Gevärsstövlar]]''' | ||
| N/A | | N/A | ||
| Line 419: | Line 428: | ||
| align="center" | {{Icon killicon|weapon=Flare Gun}} | | align="center" | {{Icon killicon|weapon=Flare Gun}} | ||
| '''[[Lyss Pistol]]''' | | '''[[Lyss Pistol]]''' | ||
| − | | | + | | [[Image:Leaderboard class pyro.png|15px]] <br/> [[Pyro]] |
| 16 | | 16 | ||
| N/A | | N/A | ||
| Line 431: | Line 440: | ||
| align="center" | {{Icon killicon|weapon=Stickybomb Launcher}} | | align="center" | {{Icon killicon|weapon=Stickybomb Launcher}} | ||
| '''[[Stickybomb Launcher]]''' | | '''[[Stickybomb Launcher]]''' | ||
| − | | rowspan=" | + | | rowspan="4"|[[Image:Leaderboard class demo.png|15px]] <br/> [[Demoman]] |
| 8 | | 8 | ||
| 24 | | 24 | ||
| Line 442: | Line 451: | ||
| {{Backpack icon|weapon=Scottish Resistance|icon-size=100x100px}} | | {{Backpack icon|weapon=Scottish Resistance|icon-size=100x100px}} | ||
| align="center" | {{Icon killicon|weapon=Scottish Resistance}} | | align="center" | {{Icon killicon|weapon=Scottish Resistance}} | ||
| − | | '''[[Skotska motståndet ]]''' | + | | '''[[Skotska motståndet]]''' |
| 8 | | 8 | ||
| 36 | | 36 | ||
| Line 462: | Line 471: | ||
| Låsa upp | | Låsa upp | ||
|- | |- | ||
| − | | {{Backpack icon|weapon= | + | | {{Backpack icon|weapon=Sticky Jumper|icon-size=100x100px}} |
| − | | | + | | align="center" | {{Icon killicon|weapon=Sticky Jumper}} |
| − | | | + | | '''[[Sticky Jumper]]''' |
| − | | | + | | 8 |
| − | | | + | | 48 |
| − | | | + | | N/A |
| − | | | + | | N/A |
| − | | | + | | N/A |
| − | | | + | | N/A |
| − | | | ||
| Konstruering | | Konstruering | ||
| − | |- | + | |- |
| {{Backpack icon|weapon=Sandvich|icon-size=100x100px}} | | {{Backpack icon|weapon=Sandvich|icon-size=100x100px}} | ||
| − | | | + | | |
| '''[[Macka]]''' | | '''[[Macka]]''' | ||
| + | | rowspan="2"|[[Image:Leaderboard class heavy.png|15px]] <br/> [[Heavy]] | ||
| 1 | | 1 | ||
| ∞ | | ∞ | ||
| Line 484: | Line 493: | ||
| N/A | | N/A | ||
| Låsa upp | | Låsa upp | ||
| + | |- | ||
| + | | {{Backpack icon|weapon=Dalokohs Bar|icon-size=100x100px}} | ||
| + | | | ||
| + | | '''[[Dalokohs Bar]]''' | ||
| + | | 1 | ||
| + | | ∞ | ||
| + | | N/A | ||
| + | | N/A | ||
| + | | N/A | ||
| + | | N/A | ||
| + | | Konstruering | ||
|- | |- | ||
| {{Backpack icon|weapon=Wrangler|icon-size=100x100px}} | | {{Backpack icon|weapon=Wrangler|icon-size=100x100px}} | ||
| align="center" | {{Icon killicon|weapon=Wrangler}} | | align="center" | {{Icon killicon|weapon=Wrangler}} | ||
| '''[[Wrangler]]''' | | '''[[Wrangler]]''' | ||
| − | | | + | | [[Image:Leaderboard class engineer.png|15px]] <br/> [[Engineer]] |
| N/A | | N/A | ||
| N/A | | N/A | ||
| Line 498: | Line 518: | ||
|- | |- | ||
| {{Backpack icon|weapon=Medigun|icon-size=100x100px}} | | {{Backpack icon|weapon=Medigun|icon-size=100x100px}} | ||
| − | | | + | | |
| '''[[Medigun]]''' | | '''[[Medigun]]''' | ||
| − | | rowspan="2"| | + | | rowspan="2"|[[Image:Leaderboard class medic.png|15px]] <br/> [[Medic]] |
| N/A | | N/A | ||
| N/A | | N/A | ||
| − | | 24 (<10 sec after | + | | 24 (<10 sec after injury) |
| − | | 48 (>12.5 sec after | + | | 48 (>12.5 sec after injury) |
| − | | 72 (>15 sec after | + | | 72 (>15 sec after injury) |
| N/D (Invulnerability) | | N/D (Invulnerability) | ||
| Standard | | Standard | ||
|- | |- | ||
| {{Backpack icon|weapon=Kritzkrieg|icon-size=100x100px}} | | {{Backpack icon|weapon=Kritzkrieg|icon-size=100x100px}} | ||
| − | | | + | | |
| '''[[Kritzkrieg]]''' | | '''[[Kritzkrieg]]''' | ||
| N/A | | N/A | ||
| N/A | | N/A | ||
| − | | 24 (<10 sec after | + | | 24 (<10 sec after injury) |
| − | | 48 (>12.5 sec after | + | | 48 (>12.5 sec after injury) |
| − | | 72 (>15 sec after | + | | 72 (>15 sec after injury) |
| N/D (100% Crit) | | N/D (100% Crit) | ||
| Låsa upp | | Låsa upp | ||
| Line 523: | Line 543: | ||
| align="center" | {{Icon killicon|weapon=Submachine Gun}} | | align="center" | {{Icon killicon|weapon=Submachine Gun}} | ||
| '''[[Kulsprutepistol]]''' | | '''[[Kulsprutepistol]]''' | ||
| − | | rowspan="4"| | + | | rowspan="4"|[[Image:Leaderboard class sniper.png|15px]] <br/> [[Sniper]] |
| 25 | | 25 | ||
| 75 | | 75 | ||
| Line 533: | Line 553: | ||
|- | |- | ||
| {{Backpack icon|weapon=Razorback|icon-size=100x100px}} | | {{Backpack icon|weapon=Razorback|icon-size=100x100px}} | ||
| − | | | + | | |
| '''[[Razorback]]''' | | '''[[Razorback]]''' | ||
| 1 | | 1 | ||
| Line 544: | Line 564: | ||
|- | |- | ||
| {{Backpack icon|weapon=Darwin's Danger Shield|icon-size=100x100px}} | | {{Backpack icon|weapon=Darwin's Danger Shield|icon-size=100x100px}} | ||
| − | | | + | | |
| '''[[Darwins faro sköld]]''' | | '''[[Darwins faro sköld]]''' | ||
| 1 | | 1 | ||
| Line 555: | Line 575: | ||
|- | |- | ||
| {{Backpack icon|weapon=Jarate|icon-size=100x100px}} | | {{Backpack icon|weapon=Jarate|icon-size=100x100px}} | ||
| − | | | + | | |
| '''[[Jarate]]''' | | '''[[Jarate]]''' | ||
| 1 | | 1 | ||
| Line 568: | Line 588: | ||
| align="center" | {{Icon killicon|weapon=Electro Sapper}} | | align="center" | {{Icon killicon|weapon=Electro Sapper}} | ||
| '''[[Elektrisk Sappare]]''' | | '''[[Elektrisk Sappare]]''' | ||
| − | | | + | | [[Image:Leaderboard class spy.png|15px]] <br/> [[Spy]] |
| 1 | | 1 | ||
| ∞ | | ∞ | ||
| Line 579: | Line 599: | ||
| − | ''Note'': '''N/D''': No Damage. - '''N/A''': Not Available. - '''HP''': Health. - '''sec.''': Seconds. - '''N/R''': No Range. - '''∞''': Unlimited. | + | ''* Note'': '''N/D''': No Damage. - '''N/A''': Not Available. - '''HP''': Health. - '''sec.''': Seconds. - '''N/R''': No Range. - '''∞''': Unlimited. |
| − | ==Melee Weapons== | + | == Melee Weapons == |
| − | {| class="wikitable grid" | + | {| class="wikitable grid" style="text-align: center;" |
! class="header" colspan=2 | Ikon | ! class="header" colspan=2 | Ikon | ||
! class="header" rowspan=2 | Namn | ! class="header" rowspan=2 | Namn | ||
| Line 598: | Line 618: | ||
| align="center" | {{Icon killicon|weapon=Bat}} | | align="center" | {{Icon killicon|weapon=Bat}} | ||
| '''[[Bat]]''' | | '''[[Bat]]''' | ||
| − | | rowspan=4| | + | | rowspan=4|[[Image:Leaderboard class scout.png|15px]] <br/> [[Scout]] |
| 35 | | 35 | ||
| 105 | | 105 | ||
| Standard | | Standard | ||
|- | |- | ||
| − | |rowspan=2 | {{Backpack icon|weapon=Sandman|icon-size=100x100px}} | + | | rowspan=2 | {{Backpack icon|weapon=Sandman|icon-size=100x100px}} |
| align="center" | {{Icon killicon|weapon=Sandman}} | | align="center" | {{Icon killicon|weapon=Sandman}} | ||
| '''[[Sandman]]''' | | '''[[Sandman]]''' | ||
| 35 | | 35 | ||
| 105 | | 105 | ||
| − | |rowspan=2 | Låsa upp | + | | rowspan=2 | Låsa upp |
|- | |- | ||
| align="center" | {{Icon killicon|weapon=Sandman Ball}} | | align="center" | {{Icon killicon|weapon=Sandman Ball}} | ||
| Line 625: | Line 645: | ||
| align="center" | {{Icon killicon|weapon=Shovel}} | | align="center" | {{Icon killicon|weapon=Shovel}} | ||
| '''[[Shovel]]''' | | '''[[Shovel]]''' | ||
| − | | rowspan=2| | + | | rowspan=2|[[Image:Leaderboard class soldier.png|15px]] <br/> [[Soldier]] |
| 65 | | 65 | ||
| 195 | | 195 | ||
| Line 640: | Line 660: | ||
| align="center" | {{Icon killicon|weapon=Pain Train}} | | align="center" | {{Icon killicon|weapon=Pain Train}} | ||
| '''[[Pain Train]]''' | | '''[[Pain Train]]''' | ||
| − | | rowspan=2| | + | | rowspan=2|[[Image:Leaderboard class soldier.png|15px]] <br/> [[Soldier]] |
| + | |||
| + | |||
| + | [[Image:Leaderboard class demo.png|15px]] <br/> [[Demoman]] | ||
| 65 | | 65 | ||
| 195 | | 195 | ||
| Line 655: | Line 678: | ||
| align="center" | {{Icon killicon|weapon=Fire Axe}} | | align="center" | {{Icon killicon|weapon=Fire Axe}} | ||
| '''[[Fire Axe]]''' | | '''[[Fire Axe]]''' | ||
| − | | rowspan=4| | + | | rowspan=4|[[Image:Leaderboard class pyro.png|15px]] <br/> [[Pyro]] |
| 65 | | 65 | ||
| 195 | | 195 | ||
| Line 684: | Line 707: | ||
| align="center" | {{Icon killicon|weapon=Bottle}} | | align="center" | {{Icon killicon|weapon=Bottle}} | ||
| '''[[Bottle]]''' | | '''[[Bottle]]''' | ||
| − | | rowspan= | + | | rowspan=4|[[Image:Leaderboard class demo.png|15px]] <br/> [[Demoman]] |
| 65 | | 65 | ||
| 195 | | 195 | ||
| Standard | | Standard | ||
| − | |||
|- | |- | ||
| {{Backpack icon|weapon=Eyelander|icon-size=100x100px}} | | {{Backpack icon|weapon=Eyelander|icon-size=100x100px}} | ||
| Line 694: | Line 716: | ||
| '''[[Eyelander]]''' | | '''[[Eyelander]]''' | ||
| 65 | | 65 | ||
| − | | 195 | + | | 195 |
| Låsa upp | | Låsa upp | ||
|- | |- | ||
| Line 702: | Line 724: | ||
| 78 | | 78 | ||
| 234 | | 234 | ||
| + | | Konstruering | ||
| + | |- | ||
| + | | {{Icon weapon|weapon=Horseless Headless Horsemann's Headtaker|icon-size=100x100px}} | ||
| + | | align="center" | {{Icon killicon|weapon=Horseless Headless Horsemann's Headtaker}} | ||
| + | | '''[[Horseless Headless Horsemann's Headtaker]]''' | ||
| + | | 65 | ||
| + | | 195 | ||
| Konstruering | | Konstruering | ||
|- | |- | ||
| Line 707: | Line 736: | ||
| align="center" | {{Icon killicon|weapon=Fists}} | | align="center" | {{Icon killicon|weapon=Fists}} | ||
| '''[[Fists]]''' | | '''[[Fists]]''' | ||
| − | | rowspan=3| | + | | rowspan=3|[[Image:Leaderboard class heavy.png|15px]] <br/> [[Heavy]] |
| 65 | | 65 | ||
| 195 | | 195 | ||
| Line 720: | Line 749: | ||
|- | |- | ||
| {{Backpack icon|weapon=GRU|icon-size=100x100px}} | | {{Backpack icon|weapon=GRU|icon-size=100x100px}} | ||
| − | |align="center" | {{Icon killicon|weapon=GRU}} | + | | align="center" | {{Icon killicon|weapon=GRU}} |
| '''[[G.R.U.]]''' | | '''[[G.R.U.]]''' | ||
| 33 | | 33 | ||
| Line 729: | Line 758: | ||
| align="center" | {{Icon killicon|weapon=Wrench}} | | align="center" | {{Icon killicon|weapon=Wrench}} | ||
| '''[[Wrench]]''' | | '''[[Wrench]]''' | ||
| − | | rowspan=6| | + | | rowspan=6|[[Image:Leaderboard class engineer.png|15px]] <br/> [[Engineer]] |
| 65 | | 65 | ||
| 195 | | 195 | ||
| Line 741: | Line 770: | ||
| Special | | Special | ||
|- | |- | ||
| − | |rowspan=2 | {{Backpack icon|weapon=Gunslinger|icon-size=100x100px}} | + | | rowspan=2 | {{Backpack icon|weapon=Gunslinger|icon-size=100x100px}} |
| align="center" | {{Icon killicon|weapon=Gunslinger}} | | align="center" | {{Icon killicon|weapon=Gunslinger}} | ||
| '''[[Gunslinger]]''' | | '''[[Gunslinger]]''' | ||
| Line 753: | Line 782: | ||
| 195 on third hit (without missing the enemy) | | 195 on third hit (without missing the enemy) | ||
|- | |- | ||
| − | |rowspan=2 | {{Backpack icon|weapon=Southern Hospitality|icon-size=100x100px}} | + | | rowspan=2 | {{Backpack icon|weapon=Southern Hospitality|icon-size=100x100px}} |
| align="center" | {{Icon killicon|weapon=Southern Hospitality}} | | align="center" | {{Icon killicon|weapon=Southern Hospitality}} | ||
| '''[[Southern Hospitality]]''' | | '''[[Southern Hospitality]]''' | ||
| Line 768: | Line 797: | ||
| align="center" | {{Icon killicon|weapon=Bonesaw}} | | align="center" | {{Icon killicon|weapon=Bonesaw}} | ||
| '''[[Bonesaw]]''' | | '''[[Bonesaw]]''' | ||
| − | | rowspan=3| | + | | rowspan=3|[[Image:Leaderboard class medic.png|15px]] <br/> [[Medic]] |
| 65 | | 65 | ||
| 195 | | 195 | ||
| Line 790: | Line 819: | ||
| align="center" | {{Icon killicon|weapon=Kukri}} | | align="center" | {{Icon killicon|weapon=Kukri}} | ||
| '''[[Kukri]]''' | | '''[[Kukri]]''' | ||
| − | | rowspan=4| | + | | rowspan=4|[[Image:Leaderboard class sniper.png|15px]] <br/> [[Sniper]] |
| 65 | | 65 | ||
| 195 | | 195 | ||
| Standard | | Standard | ||
|- | |- | ||
| − | |rowspan=2 | {{Backpack icon|weapon=Tribalman's Shiv|icon-size=100x100px}} | + | | rowspan=2 | {{Backpack icon|weapon=Tribalman's Shiv|icon-size=100x100px}} |
| align="center" | {{Icon killicon|weapon=Tribalman's Shiv}} | | align="center" | {{Icon killicon|weapon=Tribalman's Shiv}} | ||
| '''[[Tribalman's Shiv]]''' | | '''[[Tribalman's Shiv]]''' | ||
| Line 814: | Line 843: | ||
| Konstruering | | Konstruering | ||
|- | |- | ||
| − | |rowspan=2 | {{Backpack icon|weapon=Knife|icon-size=100x100px}} | + | | rowspan=2 | {{Backpack icon|weapon=Knife|icon-size=100x100px}} |
| align="center" | {{Icon killicon|weapon=Knife}} | | align="center" | {{Icon killicon|weapon=Knife}} | ||
| '''[[Knife]]''' | | '''[[Knife]]''' | ||
| − | |rowspan=4 | | + | | rowspan=4 | [[Image:Leaderboard class spy.png|15px]] <br/> [[Spy]] |
| 40 | | 40 | ||
| 120 | | 120 | ||
| − | |rowspan=2 | Standard | + | | rowspan=2 | Standard |
|- | |- | ||
| align="center" | {{Icon killicon|weapon=Backstab}} | | align="center" | {{Icon killicon|weapon=Backstab}} | ||
| '''([[Backstab]])''' | | '''([[Backstab]])''' | ||
| − | |N/A | + | | N/A |
| − | |Six times the target's current health. <small>([[Backstab]])</small> | + | | Six times the target's current health. <small>([[Backstab]])</small> |
|- | |- | ||
| rowspan=2|{{Backpack icon|weapon=Your Eternal Reward|icon-size=100x100px}} | | rowspan=2|{{Backpack icon|weapon=Your Eternal Reward|icon-size=100x100px}} | ||
| Line 832: | Line 861: | ||
| 40 | | 40 | ||
| 120 | | 120 | ||
| − | |rowspan=2 | Konstruering | + | | rowspan=2 | Konstruering |
|- | |- | ||
| align="center" | {{Icon killicon|weapon=Backstab}} | | align="center" | {{Icon killicon|weapon=Backstab}} | ||
| '''([[Backstab]])''' | | '''([[Backstab]])''' | ||
| − | |N/A | + | | N/A |
| − | |Six times the target's current health. <small>([[Backstab]])</small> | + | | Six times the target's current health. <small>([[Backstab]])</small> |
|- | |- | ||
|} | |} | ||
| − | ==Primary PDAs== | + | == Primary PDAs == |
| − | {| class="wikitable grid" | + | |
| + | {| class="wikitable grid" style="text-align: center;" | ||
! class="header" | Ikon | ! class="header" | Ikon | ||
! class="header" | Namn | ! class="header" | Namn | ||
| Line 851: | Line 881: | ||
| {{Backpack icon|weapon=Builder|icon-size=100x100px}} | | {{Backpack icon|weapon=Builder|icon-size=100x100px}} | ||
| Build '''[[PDA]]''' | | Build '''[[PDA]]''' | ||
| − | | [[Engineer]] | + | | [[Image:Leaderboard class engineer.png|15px]] <br/> [[Engineer]] |
| Enables the Engineer to build [[Buildings]] | | Enables the Engineer to build [[Buildings]] | ||
| Standard | | Standard | ||
| Line 857: | Line 887: | ||
| {{Backpack icon|weapon=Disguise Kit|icon-size=100x100px}} | | {{Backpack icon|weapon=Disguise Kit|icon-size=100x100px}} | ||
| '''[[Disguise Kit]]''' | | '''[[Disguise Kit]]''' | ||
| − | | [[Spy]] | + | | [[Image:Leaderboard class spy.png|15px]] <br/> [[Spy]] |
| Enables the Spy to [[Disguise]] himself | | Enables the Spy to [[Disguise]] himself | ||
| Standard | | Standard | ||
| Line 863: | Line 893: | ||
|} | |} | ||
| − | ==Secondary PDAs== | + | == Secondary PDAs == |
| − | {| class="wikitable grid" | + | |
| + | {| class="wikitable grid" style="text-align: center;" | ||
! class="header" | Icon | ! class="header" | Icon | ||
! class="header" | Name | ! class="header" | Name | ||
| Line 873: | Line 904: | ||
| {{Backpack icon|weapon=Destroy|icon-size=100x100px}} | | {{Backpack icon|weapon=Destroy|icon-size=100x100px}} | ||
| Destroy '''[[PDA]]''' | | Destroy '''[[PDA]]''' | ||
| − | | [[Engineer]] | + | | [[Image:Leaderboard class engineer.png|15px]] <br/> [[Engineer]] |
| Enables the Engineer to destroy his own [[Buildings]]. | | Enables the Engineer to destroy his own [[Buildings]]. | ||
| Standard | | Standard | ||
| Line 879: | Line 910: | ||
| {{Backpack icon|weapon=Invisibility Watch|icon-size=100x100px}} | | {{Backpack icon|weapon=Invisibility Watch|icon-size=100x100px}} | ||
| '''[[Invisibility Watch]]''' | | '''[[Invisibility Watch]]''' | ||
| − | | [[Spy]] | + | | rowspan="3"|[[Image:Leaderboard class spy.png|15px]] <br/> [[Spy]] |
| Enables the Spy to [[Cloak]]. Can be replenished by collecting [[metal]]. | | Enables the Spy to [[Cloak]]. Can be replenished by collecting [[metal]]. | ||
| Standard | | Standard | ||
| Line 885: | Line 916: | ||
| {{Backpack icon|weapon=Cloak and Dagger|icon-size=100x100px}} | | {{Backpack icon|weapon=Cloak and Dagger|icon-size=100x100px}} | ||
| '''[[Cloak and Dagger]]''' | | '''[[Cloak and Dagger]]''' | ||
| − | |||
| Enables the Spy to [[Cloak]]. Motion sensitive, regenerates indefinitely when Spy is standing still. | | Enables the Spy to [[Cloak]]. Motion sensitive, regenerates indefinitely when Spy is standing still. | ||
| Unlock | | Unlock | ||
| Line 891: | Line 921: | ||
| {{Backpack icon|weapon=Dead Ringer|icon-size=100x100px}} | | {{Backpack icon|weapon=Dead Ringer|icon-size=100x100px}} | ||
| '''[[Dead Ringer]]''' | | '''[[Dead Ringer]]''' | ||
| − | |||
| [[Cloak]]s Spy for 6.5 seconds upon a non-lethal hit and drops a fake corpse, heavily reducing the amount of damage the Spy takes during. Can be replenished by collecting [[metal]], but doing so nullifies damage reduction after 6.5 seconds. | | [[Cloak]]s Spy for 6.5 seconds upon a non-lethal hit and drops a fake corpse, heavily reducing the amount of damage the Spy takes during. Can be replenished by collecting [[metal]], but doing so nullifies damage reduction after 6.5 seconds. | ||
| Unlock | | Unlock | ||
|} | |} | ||
| − | ==Taunt Attacks== | + | == Taunt Attacks == |
| − | {| class="wikitable grid" | + | |
| + | {| class="wikitable grid" style="text-align: center;" | ||
! class="header" | | ! class="header" | | ||
! class="header" | Kill Icon | ! class="header" | Kill Icon | ||
| Line 904: | Line 934: | ||
! class="header" | Weapon | ! class="header" | Weapon | ||
! class="header" | Damage | ! class="header" | Damage | ||
| − | ! class="header" | Duration | + | ! class="header" | Duration |
! class="header" | Details | ! class="header" | Details | ||
|- | |- | ||
| Line 910: | Line 940: | ||
| align="center" | {{Icon killicon|weapon=Home Run}} | | align="center" | {{Icon killicon|weapon=Home Run}} | ||
| '''[[Home Run]]''' | | '''[[Home Run]]''' | ||
| − | | [[Scout]] | + | | [[Image:Leaderboard class scout.png|15px]] <br/> [[Scout]] |
| [[Sandman]] | | [[Sandman]] | ||
| 500 (Instant kill) | | 500 (Instant kill) | ||
| 5 seconds | | 5 seconds | ||
| − | | | + | | Swings a deadly blow to an enemy, sending their torso flying. |
|- | |- | ||
| {{Backpack icon|weapon=Kamikaze|icon-size=100x100px}} | | {{Backpack icon|weapon=Kamikaze|icon-size=100x100px}} | ||
| align="center" | {{Icon killicon|weapon=Kamikaze}} | | align="center" | {{Icon killicon|weapon=Kamikaze}} | ||
| '''[[Kamikaze]]''' | | '''[[Kamikaze]]''' | ||
| − | | [[Soldier]] | + | | [[Image:Leaderboard class soldier.png|15px]] <br/> [[Soldier]] |
| [[Equalizer]] | | [[Equalizer]] | ||
| 500 (Instant kill) | | 500 (Instant kill) | ||
| 4 seconds | | 4 seconds | ||
| − | | 6 | + | | 6 ft blast radius which kills any enemies.<br/> Kills the user upon completion (except when a Rocket Jumper is equipped.) |
|- | |- | ||
| {{Backpack icon|weapon=Hadouken|icon-size=100x100px}} | | {{Backpack icon|weapon=Hadouken|icon-size=100x100px}} | ||
| align="center" | {{Icon killicon|weapon=Hadouken}} | | align="center" | {{Icon killicon|weapon=Hadouken}} | ||
| '''[[Hadouken]]''' | | '''[[Hadouken]]''' | ||
| − | | [[Pyro]] | + | | [[Image:Leaderboard class pyro.png|15px]] <br/> [[Pyro]] |
| [[Shotgun]]<br/>[[Flare Gun]]<br/> | | [[Shotgun]]<br/>[[Flare Gun]]<br/> | ||
| 500 (Instant kill) | | 500 (Instant kill) | ||
| 3 seconds | | 3 seconds | ||
| − | | Kills with [[fire]] effect | + | | Kills an enemy with a deadly [[fire]] effect. |
|- | |- | ||
| {{Backpack icon|weapon=Decapitation|icon-size=100x100px}} | | {{Backpack icon|weapon=Decapitation|icon-size=100x100px}} | ||
| align="center" | {{Icon killicon|weapon=Decapitation}} | | align="center" | {{Icon killicon|weapon=Decapitation}} | ||
| '''[[Decapitation]]''' | | '''[[Decapitation]]''' | ||
| − | | [[Demoman]] | + | | [[Image:Leaderboard class demo.png|15px]] <br/> [[Demoman]] |
| [[Eyelander]] | | [[Eyelander]] | ||
| 500 (Instant kill) | | 500 (Instant kill) | ||
| 5 seconds | | 5 seconds | ||
| − | | Adds a head to the killer's Head | + | | Adds a head to the killer's Head Count. <br/> Has a close to medium range. |
|- | |- | ||
| {{Backpack icon|weapon=Showdown|icon-size=100x100px}} | | {{Backpack icon|weapon=Showdown|icon-size=100x100px}} | ||
| align="center" | {{Icon killicon|weapon=Showdown}} | | align="center" | {{Icon killicon|weapon=Showdown}} | ||
| '''[[Showdown]]''' | | '''[[Showdown]]''' | ||
| − | | [[Heavy]] | + | | [[Image:Leaderboard class heavy.png|15px]] <br/> [[Heavy]] |
| [[Fists]] | | [[Fists]] | ||
| 500 (Instant kill) | | 500 (Instant kill) | ||
| 3 seconds | | 3 seconds | ||
| − | | Has medium range | + | | Kills the enemy that's pointed at. <br/> Has medium range. |
| − | |||
|- | |- | ||
| {{Backpack icon|weapon=Dischord|icon-size=100x100px}} | | {{Backpack icon|weapon=Dischord|icon-size=100x100px}} | ||
| align="center" | {{Icon killicon|weapon=Dischord}} | | align="center" | {{Icon killicon|weapon=Dischord}} | ||
| '''[[Dischord]]''' | | '''[[Dischord]]''' | ||
| − | | [[Engineer]] | + | | rowspan="2"|[[Image:Leaderboard class engineer.png|15px]] <br/> [[Engineer]] |
| [[Frontier Justice]] | | [[Frontier Justice]] | ||
| 500 (Instant kill) | | 500 (Instant kill) | ||
| 4 seconds | | 4 seconds | ||
| − | | | + | | Instantly kills any enemy within range of the guitar. |
|- | |- | ||
| {{Backpack icon|weapon=Organ Grinder|icon-size=100x100px}} | | {{Backpack icon|weapon=Organ Grinder|icon-size=100x100px}} | ||
| align="center" | {{Icon killicon|weapon=Organ Grinder}} | | align="center" | {{Icon killicon|weapon=Organ Grinder}} | ||
| '''[[Organ Grinder]]''' | | '''[[Organ Grinder]]''' | ||
| − | |||
| [[Gunslinger]] | | [[Gunslinger]] | ||
| 500 (Instant kill) | | 500 (Instant kill) | ||
| 4 seconds | | 4 seconds | ||
| − | | Kills with [[Gib]] | + | | Kills with a [[Gib]] effect. |
|- | |- | ||
| {{Backpack icon|weapon=Oktoberfest|icon-size=100x100px}} | | {{Backpack icon|weapon=Oktoberfest|icon-size=100x100px}} | ||
| | | | ||
| '''[[Oktoberfest]]''' | | '''[[Oktoberfest]]''' | ||
| − | | [[Medic]] | + | | rowspan="2"|[[Image:Leaderboard class medic.png|15px]] <br/> [[Medic]] |
| [[Kritzkrieg]] | | [[Kritzkrieg]] | ||
| None | | None | ||
| 4 seconds | | 4 seconds | ||
| − | | Heals | + | | Heals the user with 11 health. |
|- | |- | ||
| {{Backpack icon|weapon=Spinal Tap|icon-size=100x100px}} | | {{Backpack icon|weapon=Spinal Tap|icon-size=100x100px}} | ||
| align="center" | {{Icon killicon|weapon=Spinal Tap}} | | align="center" | {{Icon killicon|weapon=Spinal Tap}} | ||
| '''[[Spinal Tap]]''' | | '''[[Spinal Tap]]''' | ||
| − | |||
| [[Übersaw]] | | [[Übersaw]] | ||
| − | | 1 (swing)<br/>500 (Instant kill) | + | | 1 (swing) <br/> 500 (Instant kill) |
| 4 seconds approx. | | 4 seconds approx. | ||
| − | | | + | | An initial stab with a stun effect, followed by the deadly Übersaw removal. <br/> Adds 50% to the [[ÜberCharge]] meter. |
|- | |- | ||
| {{Backpack icon|weapon=Skewer|icon-size=100x100px}} | | {{Backpack icon|weapon=Skewer|icon-size=100x100px}} | ||
| align="center" | {{Icon killicon|weapon=Skewer}} | | align="center" | {{Icon killicon|weapon=Skewer}} | ||
| '''[[Skewer]]''' | | '''[[Skewer]]''' | ||
| − | | [[Sniper]] | + | | [[Image:Leaderboard class sniper.png|15px]] <br/> [[Sniper]] |
| − | | [[Huntsman]] | + | | [[Huntsman]] |
| − | | Initial Stab: None (stun effect). Removal: 500 (Instant kill) | + | | Initial Stab: None (stun effect). Removal: 500 (Instant kill) |
| − | | 4 seconds | + | | 4 seconds |
| − | | | + | | An arrow stab with a stun effect, followed by the deadly arrow removal. Kills players even when they aren't hit with the initial stab, as long as they're in range of the arrow when the Sniper pulls it back. |
|- | |- | ||
| {{Backpack icon|weapon=Fencing|icon-size=100x100px}} | | {{Backpack icon|weapon=Fencing|icon-size=100x100px}} | ||
| align="center" | {{Icon killicon|weapon=Fencing}} | | align="center" | {{Icon killicon|weapon=Fencing}} | ||
| '''[[Fencing]]''' | | '''[[Fencing]]''' | ||
| − | | [[Spy]] | + | | [[Image:Leaderboard class spy.png|15px]] <br/> [[Spy]] |
| [[Knife]]<br/>[[Your Eternal Reward]] | | [[Knife]]<br/>[[Your Eternal Reward]] | ||
| 50 (swings)<br/>500 (Instant kill) | | 50 (swings)<br/>500 (Instant kill) | ||
| 5 seconds | | 5 seconds | ||
| − | | Two swings followed by | + | | Two weak swings, followed by a killing thrust. |
|} | |} | ||
| − | ==Notes== | + | == Notes == |
| + | |||
When switching weapons, there is a .67 second delay before it can be fired. The Degreaser reduces this time by 65%, to .2345 seconds for all weapons that that Pyro has equipped at that time. | When switching weapons, there is a .67 second delay before it can be fired. The Degreaser reduces this time by 65%, to .2345 seconds for all weapons that that Pyro has equipped at that time. | ||
Due to odd quirks of the item system, some weapons display in different slots: | Due to odd quirks of the item system, some weapons display in different slots: | ||
| + | |||
* The Demoman's primary and secondary slots are reversed. | * The Demoman's primary and secondary slots are reversed. | ||
* The Spy's primary slot is displayed as secondary. | * The Spy's primary slot is displayed as secondary. | ||
* The Spy's [[Electro Sapper]], like the Engineer's toolbox, doesn't even have a slot and so is not interchangeable with any possible items yet. | * The Spy's [[Electro Sapper]], like the Engineer's toolbox, doesn't even have a slot and so is not interchangeable with any possible items yet. | ||
* The Spy's PDA2 slot is displayed as PDA. | * The Spy's PDA2 slot is displayed as PDA. | ||
| + | |||
These do not affect gameplay, but have a bearing on [[crafting]] blueprints. | These do not affect gameplay, but have a bearing on [[crafting]] blueprints. | ||
| − | ==Weapon Availability== | + | == Weapon Availability == |
| + | |||
* Standard weapons are always available. | * Standard weapons are always available. | ||
* Unlock weapons are available via [[Achievements]], [[crafting]], [[Trading]], [[Mann Co. Store|buying]], or the [[Item drop system|drop system]]. | * Unlock weapons are available via [[Achievements]], [[crafting]], [[Trading]], [[Mann Co. Store|buying]], or the [[Item drop system|drop system]]. | ||
| Line 1,026: | Line 1,057: | ||
* There are only 35 different varieties of vintage weapons. | * There are only 35 different varieties of vintage weapons. | ||
| − | ==See also== | + | == See also == |
*[[Unused content]] | *[[Unused content]] | ||
Revision as of 19:06, 15 November 2010
| Denna sida är på väg att bli översatt till svenska. Om du kan tala svenska, posta på diskussionssidan eller prata med dom som har bidragit till sidan (genom att titta på sidhistoriken). |
Innehåll
Primära Vapen
| Ryggsäcks Ikon | Döds Ikon | Namn | Klass | Ammunition | Skada | Tillgänglighet | ||||
|---|---|---|---|---|---|---|---|---|---|---|
| Laddat | Buret | Svart på vitt | Medium Avstånd | Långt Avstånd | Kritiskt | |||||
|
Hagelbössa | Spanare |
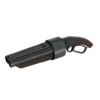
6 | 32 | 85-105 | 10-40 | 3-10 | 180 | Standard | |
|
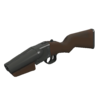
Hagel-Med-Kraft | 2 | 32 | 92-113 | 11-43 | 3-11 | 194 | Låsa upp | ||
|
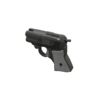
Snabbstopparen | 4 | 36 | 69-72 | 24-48 | 6-12 | 194 | Konstruering | ||
|
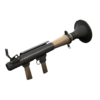
Raketgevär | Soldat |
4 | 20 | 105-112 | 50-90 | 45-60 | 270 (D/H) | Standard | |
|
Direkta Träffen | 4 | 20 | 140 | 74-107 | 55-58 | 338 | Låsa upp | ||
|
Svarta Lådan | 3 | 20 | 105-112 | 50-90 | 45-60 | 270 (D/H) | Konstruering | ||
|
File:Killicon rocket jumper.png | Raket Hopparen | 4 | 60 | N/A | N/A | N/A | N/A | Konstruering | |
|
Eldkastare | Pyro |
200 | N/A | 6.2 per particle (D/D) | 3.72 per particle (D/D) (M/R) | N/A | 3x Base damage (see range), per particle, then rounded. 11-19 (D/D) | Standard | |
|
Ryggbrännaren | 200 | N/A | 7.13 per particle (D/D) | 4.28 per particle (D/D) (M/R) | N/A | 3x Base damage (see range) per particle, then rounded. 14-21 (D/D) | Låsa upp | ||
|
Avfettaren | 200 | N/A | 6.2 per particle (D/D) | 3.72 per particle (D/D) (M/R) | N/A | 3x Base damage (see range), per particle, then rounded. 11-19 (D/D) | Konstruering | ||
|
Granatkastare | 15px Demoman |
4 | 16 | 64-132 (D/H) | 64-132 (D/H) | 64-132 (D/H) | 280-300 (D/H) | Standard | |
|
Minigun | Tungviktaren |
200 | N/A | 50-54 | 5-30 | 5-10 | 108 (27 per bullet) | Standard | |
|
Natascha | 200 | N/A | 32-36 | 3-20 | 3-6 | 72 (18 per bullet) | Låsa upp | ||
|
Hagelgevär | Ingenjör |
6 | 32 | 80-90 | 10-30 | 3-10 | 180 | Standard | |
|
Den Laglöses Rättvisa | 3 | 32 | 80-90 | 10-30 | 3-10 | 180 | Låsa upp | ||
|
Sprutgevär | Sjukvårdare |
40 | 150 | 10-15 | 5-10 | 5-6 | 30 | Standard | |
|
Blutsauger | 40 | 150 | 10-15 | 5-10 | 5-6 | 30 | Låsa upp | ||
|
Krypskyttegevär | Skarpskytt |
25 | N/A | 43-172 | 43-172 | 43-172 | 150-450 (Headshot only) | Standard | |
|
Huntsman | 1 | 12 | 44-137 | 44-137 | 44-137 | 150-360 | Låsa upp | ||
|
Sydney-Sövaren | 25 | N/A | 45-160 | 45-160 | 45-160 | 150-450 | Konstruering | ||
|
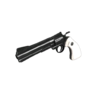
Revolver | Spy |
6 | 24 | 55-60 | 35-45 | 20-25 | 120 | Standard | |
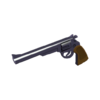
|
Big Kill | 6 | 24 | 55-60 | 35-45 | 20-25 | 120 | Promotion | ||
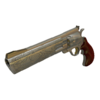
|
Ambassadören | 6 | 24 | 46-56 | 31-37 | 15-19 | 102 (Headshot only) | Låsa upp | ||
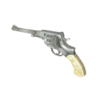
|
L'Étranger | 6 | 24 | 44-48 | 28-36 | 16-20 | 96 | Konstruering | ||
Slot 2 Weapons
| Ryggsäcks Ikon | Döds Icon | Namn | Klass | Ammunition | Skada | Tillgänglighet | ||||
|---|---|---|---|---|---|---|---|---|---|---|
| Laddat | Buret | Svart på vitt | Medium avstånd | Långt avstång | Kritiskt | |||||
|
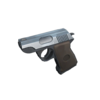
Pistol | Scout |
12 | 36 (Scout) 200 (Engineer) |
20-22 | 10-15 | 8-9 | 45 | Standard | |
|
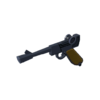
Lugermorph | 12 | 36 (Scout) 200 (Engineer) |
20-22 | 10-15 | 8-9 | 45 | Promotion | ||
|
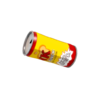
Bonk! Atomic Punch | Scout |
1 | ∞ | N/A | N/A | N/A | N/A | Låsa upp | |
|
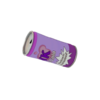
Crit-a-Cola | 1 | ∞ | N/A | N/A | N/A | N/A | Konstruering | ||
|
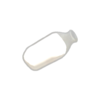
Galen Mjölk | 1 | ∞ | N/A | N/A | N/A | N/A | Konstruering | ||

|
Gevär | Soldat |
6 | 32 | 80-90 | 10-30 | 3-10 | 180 | Standard | |
|
Buff Banner | Soldier |
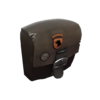
N/A | N/A | N/A | N/A | N/A | N/A | Låsa upp | |
|
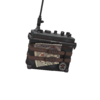
Battalion's Backup | N/A | N/A | N/A | N/A | N/A | N/A | Konstruering | ||
|
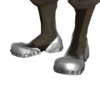
Gevärsstövlar | N/A | N/A | N/A | N/A | N/A | N/A | Konstruering | ||
|
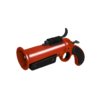
Lyss Pistol | Pyro |
16 | N/A | 27-33 | 27-33 | 27-33 | 90 | Låsa upp | |
|
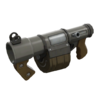
Stickybomb Launcher | 15px Demoman |
8 | 24 | 74-153 | 74-153 | 74-153 | 353 (Point Blank) | Standard | |
|
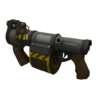
Skotska motståndet | 8 | 36 | 74-153 | 74-153 | 74-153 | 353 (Point Blank) | Låsa upp | ||
|
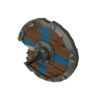
Chargin' Targe | N/A | N/A | 50 + 10 per head (up to 5 heads) | N/A | N/A | N/A | Låsa upp | ||
|
File:Killicon sticky jumper.png | Sticky Jumper | 8 | 48 | N/A | N/A | N/A | N/A | Konstruering | |
|
Macka | Heavy |
1 | ∞ | N/A | N/A | N/A | N/A | Låsa upp | |
|
Dalokohs Bar | 1 | ∞ | N/A | N/A | N/A | N/A | Konstruering | ||
|
Wrangler | Engineer |
N/A | N/A | N/A | N/A | N/A | N/A | Låsa upp | |
|
Medigun | Medic |
N/A | N/A | 24 (<10 sec after injury) | 48 (>12.5 sec after injury) | 72 (>15 sec after injury) | N/D (Invulnerability) | Standard | |
|
Kritzkrieg | N/A | N/A | 24 (<10 sec after injury) | 48 (>12.5 sec after injury) | 72 (>15 sec after injury) | N/D (100% Crit) | Låsa upp | ||
|
Kulsprutepistol | Sniper |
25 | 75 | 8-12 | 4-6 | 4-5 | 24 | Standard | |
|
Razorback | 1 | N/A | N/A | N/A | N/A | N/A | Låsa upp | ||
|
Darwins faro sköld | 1 | N/A | N/A | N/A | N/A | N/A | Konstruering | ||
|
Jarate | 1 | ∞ | N/A | N/A | N/A | N/A | Låsa upp | ||
|
Elektrisk Sappare | Spy |
1 | ∞ | 150HP = 7 sec. | 180HP = 8 sec. | 216HP = ~10 sec. | N/A | Standard | |
* Note: N/D: No Damage. - N/A: Not Available. - HP: Health. - sec.: Seconds. - N/R: No Range. - ∞: Unlimited.
Melee Weapons
| Ikon | Namn | Klass | Skada | Tillgänglighet | ||
|---|---|---|---|---|---|---|
| Ryggsäck | Död | Svart på vitt | Kritiskt | |||
|
Bat | Scout |
35 | 105 | Standard | |
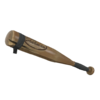
|
Sandman | 35 | 105 | Låsa upp | ||
| (Baseboll) | 15 | 45 | ||||
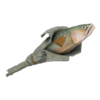
|
Holy Mackerel | 35 | 105 | Konstruering | ||

|
Shovel | Soldier |
65 | 195 | Standard | |
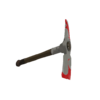
|
Equalizer | Varies | Varies | Låsa upp | ||
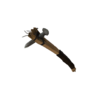
|
Pain Train | Soldier |
65 | 195 | Konstruering | |
| Frying Pan | 65 | 195 | Promotion | |||

|
Fire Axe | Pyro |
65 | 195 | Standard | |
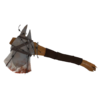
|
Axtinguisher | 33 | 195 | Låsa upp | ||
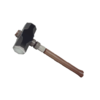
|
Homewrecker | 49 | 146 | Konstruering | ||
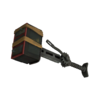
|
Powerjack | 78 | 244 | Konstruering | ||

|
Bottle | 15px Demoman |
65 | 195 | Standard | |
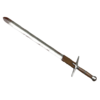
|
Eyelander | 65 | 195 | Låsa upp | ||
|
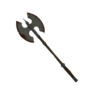
Scotsman's Skullcutter | 78 | 234 | Konstruering | ||
| Horseless Headless Horsemann's Headtaker | 65 | 195 | Konstruering | |||

|
Fists | Heavy |
65 | 195 | Standard | |
| File:Backpack KGB.png | K.G.B. | 65 | 195 | Låsa upp | ||
| File:Backpack GRU.png | G.R.U. | 33 | 98 | Drop | ||
|
Wrench | Engineer |
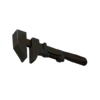
65 | 195 | Standard | |

|
Golden Wrench | 65 | 195 | Special | ||
|
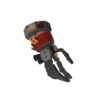
Gunslinger | 65 | 195 | Låsa upp | ||
| (Triple Punch) | 65 for first two hits (without missing the enemy) | 195 on third hit (without missing the enemy) | ||||
|
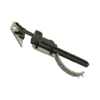
Southern Hospitality | 65 | 195 | Konstruering | ||
| (Bleed) | 3-5 damage per tick, 8.5 damage per second for 5 seconds (42.5 damage total) |
N/A | ||||
|
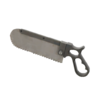
Bonesaw | Medic |
65 | 195 | Standard | |
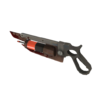
|
Übersaw | 65 | 195 | Låsa upp | ||
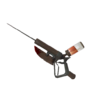
|
Vita-Saw | 65 | 195 | Drop | ||
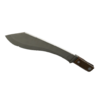
|
Kukri | Sniper |
65 | 195 | Standard | |
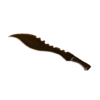
|
Tribalman's Shiv | 33 | 98 | Konstruering | ||
| (Bleed) | 3-5 damage per tick, 8.5 damage per second for 6 seconds (51 damage total) |
N/A | ||||
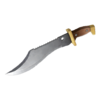
|
Bushwacka | 65 | 195 | Konstruering | ||
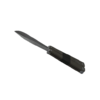
|
Knife | Spy |
40 | 120 | Standard | |
| (Backstab) | N/A | Six times the target's current health. (Backstab) | ||||
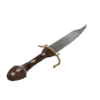
|
Your Eternal Reward | 40 | 120 | Konstruering | ||
| (Backstab) | N/A | Six times the target's current health. (Backstab) | ||||
Primary PDAs
| Ikon | Namn | Klass | Detaljer | Tillgänglighet |
|---|---|---|---|---|
| File:Backpack Builder.png | Build PDA | Engineer |
Enables the Engineer to build Buildings | Standard |
|
Disguise Kit | Spy |
Enables the Spy to Disguise himself | Standard |
Secondary PDAs
| Icon | Name | Class | Details | Availability |
|---|---|---|---|---|
| File:Backpack Destroy.png | Destroy PDA | Engineer |
Enables the Engineer to destroy his own Buildings. | Standard |
|
Invisibility Watch | Spy |
Enables the Spy to Cloak. Can be replenished by collecting metal. | Standard |
|
Cloak and Dagger | Enables the Spy to Cloak. Motion sensitive, regenerates indefinitely when Spy is standing still. | Unlock | |
|
Dead Ringer | Cloaks Spy for 6.5 seconds upon a non-lethal hit and drops a fake corpse, heavily reducing the amount of damage the Spy takes during. Can be replenished by collecting metal, but doing so nullifies damage reduction after 6.5 seconds. | Unlock |
Taunt Attacks
| Kill Icon | Taunt | Class | Weapon | Damage | Duration | Details | |
|---|---|---|---|---|---|---|---|
| File:Backpack Home Run.png | Home Run | Scout |
Sandman | 500 (Instant kill) | 5 seconds | Swings a deadly blow to an enemy, sending their torso flying. | |
| File:Backpack Kamikaze.png | Kamikaze | Soldier |
Equalizer | 500 (Instant kill) | 4 seconds | 6 ft blast radius which kills any enemies. Kills the user upon completion (except when a Rocket Jumper is equipped.) | |
| File:Backpack Hadouken.png | Hadouken | Pyro |
Shotgun Flare Gun |
500 (Instant kill) | 3 seconds | Kills an enemy with a deadly fire effect. | |
| File:Backpack Decapitation.png | Decapitation | 15px Demoman |
Eyelander | 500 (Instant kill) | 5 seconds | Adds a head to the killer's Head Count. Has a close to medium range. | |
| File:Backpack Showdown.png | Showdown | Heavy |
Fists | 500 (Instant kill) | 3 seconds | Kills the enemy that's pointed at. Has medium range. | |
| File:Backpack Dischord.png | Dischord | Engineer |
Frontier Justice | 500 (Instant kill) | 4 seconds | Instantly kills any enemy within range of the guitar. | |
| File:Backpack Organ Grinder.png | Organ Grinder | Gunslinger | 500 (Instant kill) | 4 seconds | Kills with a Gib effect. | ||
| File:Backpack Oktoberfest.png | Oktoberfest | Medic |
Kritzkrieg | None | 4 seconds | Heals the user with 11 health. | |
| File:Backpack Spinal Tap.png | Spinal Tap | Übersaw | 1 (swing) 500 (Instant kill) |
4 seconds approx. | An initial stab with a stun effect, followed by the deadly Übersaw removal. Adds 50% to the ÜberCharge meter. | ||
| File:Backpack Skewer.png | Skewer | Sniper |
Huntsman | Initial Stab: None (stun effect). Removal: 500 (Instant kill) | 4 seconds | An arrow stab with a stun effect, followed by the deadly arrow removal. Kills players even when they aren't hit with the initial stab, as long as they're in range of the arrow when the Sniper pulls it back. | |
| File:Backpack Fencing.png | Fencing | Spy |
Knife Your Eternal Reward |
50 (swings) 500 (Instant kill) |
5 seconds | Two weak swings, followed by a killing thrust. |
Notes
When switching weapons, there is a .67 second delay before it can be fired. The Degreaser reduces this time by 65%, to .2345 seconds for all weapons that that Pyro has equipped at that time.
Due to odd quirks of the item system, some weapons display in different slots:
- The Demoman's primary and secondary slots are reversed.
- The Spy's primary slot is displayed as secondary.
- The Spy's Electro Sapper, like the Engineer's toolbox, doesn't even have a slot and so is not interchangeable with any possible items yet.
- The Spy's PDA2 slot is displayed as PDA.
These do not affect gameplay, but have a bearing on crafting blueprints.
Weapon Availability
- Standard weapons are always available.
- Unlock weapons are available via Achievements, crafting, Trading, buying, or the drop system.
- Promotional weapons require participation in Valve promotions, and are not obtainable in game.
- Special weapons are only available for a period of time in/or through specific events.
- Vintage weapons are only available if they were found or crafted before the Mann-Conomy Update.
- There are only 35 different varieties of vintage weapons.