Difference between revisions of "Community Sawmill (Arena) strategy"
HitlineMiamo (talk | contribs) m (mc) |
HitlineMiamo (talk | contribs) m (mc) |
||
| Line 22: | Line 22: | ||
'''Note''': It is recommended to read the main [[Sawmill (Arena)]] article first to become familiar with the names of key map locations used in this article. | '''Note''': It is recommended to read the main [[Sawmill (Arena)]] article first to become familiar with the names of key map locations used in this article. | ||
| + | |||
| + | {{TOC limit|3}} | ||
== General strategy == | == General strategy == | ||
Revision as of 18:53, 14 April 2021
| “Sun Tzu's got nothing on us!” This article is a Community strategy stub. As such, it is not complete. You can help the Team Fortress Wiki Community Strategy Project by expanding it. Notes: Expand the "General Strategy" section to cover map locations in more detail. Potentially look at the class-specific strategies as well. |
| Community Sawmill (Arena) strategy | |
|---|---|

| |
| Basic Information | |
| Developer(s): | Unknown |
| Map Info | |
| Environment: | Alpine |
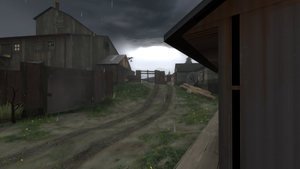
| Setting: | Cloudy, raining |
| Hazards: | Saw Blades |
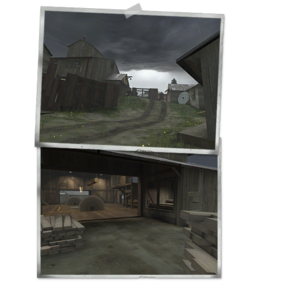
| Map Photos | |
This article is about strategy specific to the Arena variant of Sawmill. For strategy specific to the Capture the Flag variant, see Community Sawmill (Capture the Flag) strategy. For strategy specific to the King of the Hill variant, see Community Sawmill (King of the Hill) strategy.
This article is about Community Sawmill (Arena) strategy.
Note: It is recommended to read the main Sawmill (Arena) article first to become familiar with the names of key map locations used in this article.
General strategy
- Each team has access to ramps leading to the rooftops surrounding the center shed. These can be used to identify enemies coming through the adjacent areas towards the spawn. Additionally, the rooftops allow entry into the center shed. The stairs near these entrances are good for picking off enemies down on the main point.
- Remember, the saw blades will instantly kill any player who wanders into their paths. Take advantage of knockback from the Force-A-Nature, compression blast, and explosive projectiles to knock enemies into the saw blades whenever possible. This can turn a losing game into an even match.
- Unlike many Arena maps, water is abundant in Sawmill. Combined with easy access to Health pickups, the map encourages tactical retreats in the face of unlikely odds. Pyros would be well advised to chase and prevent alight enemies from reaching the water sources.
- Use the rooftops to give yourself the high ground advantage. The tops of the stairs in the central area are also good for picking off enemies down on the main point.
Class-specific strategy
 Scout
Scout
- The roof areas can be used to easily flank and ambush enemies. However, beware of Snipers watching the rooftops.
- When leaving the side entrance to the point, you may jump directly onto a rooftop by jumping to the corner of the roof. This may be aided by a crouch jump.
 Soldier
- Rocket jumping can be used to quickly traverse the roof areas.
- Whenever possible, try to use your Rocket Launcher to knock enemies into the saw blades.
- Try and get a height advantage, as it will be difficult for enemies to avoid your rockets when they're coming from above.
 Pyro
Pyro
- If you intend to use compression blast to knock enemies into the saw blades, it is usually wise to try to flank them first. Smart players will always avoid getting within range of a Pyro in the central area, so getting the drop on them can help considerably.
- There is no sense in trying to kill enemies using fire near the water. Use the Shotgun or any melee weapon.
 Demoman
- Try to lay sticky traps in unsuspecting places and knock enemies into the saw blades.
- The Loose Cannon can assist in knocking players into the saw blades!
- The Persian Persuader can be useful as the ammo from pickups will be turned to health, especially as there are only 2 small health kits in the map.
 Heavy
Heavy
- When in the middle of the map, keep checking your back while not in combat so that no one can sneak up on you.
- If you see a Pyro coming to you while you are in the center, try to get into a corner so that they cannot airblast you into the saw blades.
 Engineer
- The logs/planks on the sides of the Center Shed are great for placing a Mini-Sentry.
- The corner of the second floor in the Center Shed is also good place to put a Mini-Sentry.
 Medic
Medic
- This map contains only one small health kit on each side, making Medics an invaluable resource.
- Stick close to Heavies, Soldiers and Pyros. They will help you to survive as you are the only constant source of healing for the entire team. Don't forget to heal injured teammates.
- Try to use the Quick-Fix as it has the fastest healing rate among all the Mediguns.
 Sniper
- If a Sniper stays at the spawn, on the second floor's ledge, he will have a good view of most of the map. It could be dangerous to stay there as the enemy team might search for AFK-ers.
- A safer spot would be on the enemy's roof, near the central room. It also provides a great view of the outer side of the Control Point.
 Spy
Spy
- The Spy can be quite useful at ambushing unsuspecting opponents by jumping down from the numerous roofs on the map, backstabbing, and quickly cloaking and running away.
- The Spy can also pick off weak enemies using the Revolver.
- Avoid the water locations in this map while cloaked, as the dripping water will blow your cover.
