Difference between revisions of "Jungle Inferno Update/fi"
BrazilianNut (talk | contribs) m (→Kosmeettiset esineet) |
m (→Sotamaalit) |
||
| (4 intermediate revisions by 2 users not shown) | |||
| Line 26: | Line 26: | ||
==== Kartat ==== | ==== Kartat ==== | ||
| + | {{main|List of maps/fi|l1={{common string|List of maps}}}} | ||
{{hatnote|Community maps are identified in italics.}} | {{hatnote|Community maps are identified in italics.}} | ||
{| class="wikitable" cellpadding=2 style="text-align:center;" | {| class="wikitable" cellpadding=2 style="text-align:center;" | ||
|- style="height: 20px;" | |- style="height: 20px;" | ||
| − | ! class="header" style="background-color:#748c41;color:white;" |Name | + | ! class="header" style="background-color:#748c41;color:white;" |{{common string|Name}} |
| − | ! class="header" style="background-color:#748c41;color:white;" |Picture | + | ! class="header" style="background-color:#748c41;color:white;" |{{common string|Picture}} |
| − | ! class="header" style="background-color:#748c41;color:white;" |Game | + | ! class="header" style="background-color:#748c41;color:white;" |{{common string|Game mode}} |
| − | ! class="header" style="background-color:#748c41;color:white;" |File | + | ! class="header" style="background-color:#748c41;color:white;" |{{common string|File name}} |
|- | |- | ||
| − | | style="background-color:#b5b85c;" |'''''[[Banana Bay | + | | style="background-color:#b5b85c;" | '''''[[Banana Bay{{if lang}}|<span style="color:#000;">Banana Bay</span>]]''''' |
| − | | style="background-color:#f8d28c;" | + | | style="background-color:#f8d28c;" | [[File:Bananabay_main.jpg|160px|link=Banana Bay{{if lang}}]] |
| − | | style="background-color:#f8d28c; | + | | style="background-color:#f8d28c;" | '''[[Payload{{if lang}}|{{common string|Payload Race}}]]'''<br>[[File:RED Bombcart.png|30px|link=Payload Race{{if lang}}]][[File:BLU Bombcart.png|30px|link=Payload Race]] |
| − | | style="background-color:#f8e2a1;" | + | | style="background-color:#f8e2a1;" | {{code|plr_bananabay}} |
|- | |- | ||
| − | | style="background-color:#b5b85c;" |'''''[[Brazil | + | | style="background-color:#b5b85c;" | '''''[[Brazil{{if lang}}|<span style="color:#000;">Brazil</span>]]''''' |
| − | | style="background-color:#f8d28c;" | + | | style="background-color:#f8d28c;" | [[File:Brazil_main.jpg|160px|link=Brazil{{if lang}}]] |
| − | | style="background-color:#f8d28c; | + | | style="background-color:#f8d28c;" | '''[[King of the Hill{{if lang}}|{{common string|King of the Hill}}]]'''<br>[[File:Controlpoint.png|50px|link=King of the Hill{{if lang}}]] |
| − | | style="background-color:#f8e2a1;" | + | | style="background-color:#f8e2a1;" | {{code|koth_brazil}} |
|- | |- | ||
| − | | style="background-color:#b5b85c;" |'''''[[Enclosure | + | | style="background-color:#b5b85c;" | '''''[[Enclosure{{if lang}}|<span style="color:#000;">Enclosure</span>]]''''' |
| − | | style="background-color:#f8d28c;" | + | | style="background-color:#f8d28c;" | [[File:Enclosure_main.jpg|160px|link=Enclosure{{if lang}}]] |
| − | | style="background-color:#f8d28c; | + | | style="background-color:#f8d28c;" | '''[[Payload{{if lang}}|{{common string|Payload}}]]'''<br>[[File:BLU_Bombcart.png|50px|link=Payload{{if lang}}]] |
| − | | style="background-color:#f8e2a1;" | + | | style="background-color:#f8e2a1;" | {{code|pl_enclosure_final}} |
|- | |- | ||
| − | | style="background-color:#b5b85c;" |'''''[[Lazarus | + | | style="background-color:#b5b85c;" | '''''[[Lazarus{{if lang}}|<span style="color:#000;">Lazarus</span>]]''''' |
| − | | style="background-color:#f8d28c;" | + | | style="background-color:#f8d28c;" | [[File:Lazarus_main.jpg|160px|link=Lazarus{{if lang}}]] |
| − | | style="background-color:#f8d28c; | + | | style="background-color:#f8d28c;" | '''[[King of the Hill{{if lang}}|{{common string|King of the Hill}}]]'''<br>[[File:Controlpoint.png|50px|link=King of the Hill{{if lang}}]] |
| − | | style="background-color:#f8e2a1;" | + | | style="background-color:#f8e2a1;" | {{code|koth_lazarus}} |
|- | |- | ||
| − | | style="background-color:#b5b85c;" |'''[[Mercenary Park | + | | style="background-color:#b5b85c;" | '''[[Mercenary Park{{if lang}}|<span style="color:#000;">Mercenary Park</span>]]''' |
| − | | style="background-color:#f8d28c;" | + | | style="background-color:#f8d28c;" | [[File:Yetipark 5.png|160px|link=Mercenary Park (map){{if lang}}]] |
| − | | style="background-color:#f8d28c; | + | | style="background-color:#f8d28c;" | '''[[Control Point (game mode){{if lang}}|{{common string|Attack/Defend}}]]'''<br>[[File:Controlpoint.png|50px|link=Control Point (game mode){{if lang}}]] |
| − | | style="background-color:#f8e2a1;" | + | | style="background-color:#f8e2a1;" | {{code|cp_mercenarypark}} |
|- | |- | ||
| − | | style="background-color:#b5b85c;" |'''''[[Mossrock | + | | style="background-color:#b5b85c;" | '''''[[Mossrock{{if lang}}|<span style="color:#000;">Mossrock</span>]]''''' |
| − | | style="background-color:#f8d28c;" | + | | style="background-color:#f8d28c;" | [[File:Mossrock_main.jpg|160px|link=Mossrock{{if lang}}]] |
| − | | style="background-color:#f8d28c; | + | | style="background-color:#f8d28c;" | '''[[Control Point (game mode){{if lang}}|{{common string|Attack/Defend}}]]'''<br>[[File:Controlpoint.png|50px|link=Control Point (game mode){{if lang}}]] |
| − | | style="background-color:#f8e2a1;" | + | | style="background-color:#f8e2a1;" | {{code|cp_mossrock}} |
|} | |} | ||
==== Pilkat ==== | ==== Pilkat ==== | ||
| + | {{main|Taunts/fi|l1=Pilkat}} | ||
{| class="wikitable collapsible" cellpadding=2 style="text-align:center;" | {| class="wikitable collapsible" cellpadding=2 style="text-align:center;" | ||
|- | |- | ||
| − | | style="background: #b5b85c | + | | width="90px" style="background:#b5b85c;" rowspan="1" | '''{{class link|Pyro|br=yes|color=black}}''' |
| − | | | + | | style="background:#f8d28c;" | {{Icon item|Headcase|75px}} |
| − | | style="background: #f8e2a1 "| '''{{item link|Headcase}}''' | + | | style="background:#f8e2a1;" | '''{{item link|Headcase}}''' |
|- | |- | ||
| − | | style="background: #b5b85c | + | | style="background:#b5b85c;" rowspan="2" | '''{{class link|Heavy|br=yes|color=black}}''' |
| − | | | + | | style="background:#f8d28c;" | {{Icon item|Russian Arms Race|75px}} |
| − | | style="background: #f8e2a1 "| '''{{item link|Russian Arms Race}}''' | + | | style="background:#f8e2a1;" | '''{{item link|Russian Arms Race}}''' |
|- | |- | ||
| − | | | + | | style="background:#f8d28c;" | {{Icon item|Soviet Strongarm|75px}} |
| − | | style="background: #f8e2a1 "| '''{{item link|Soviet Strongarm}}''' | + | | style="background:#f8e2a1;" | '''{{item link|Soviet Strongarm}}''' |
|- | |- | ||
| − | | style="background: #b5b85c | + | | style="background:#b5b85c;" rowspan="2" | '''{{class link|Engineer|br=yes|color=black}}''' |
| − | | | + | | style="background:#f8d28c;" | {{Icon item|Dueling Banjo|75px}} |
| − | | style="background: #f8e2a1 "| '''{{item link|Dueling Banjo}}''' | + | | style="background:#f8e2a1;" | '''{{item link|Dueling Banjo}}''' |
|- | |- | ||
| − | | | + | | style="background:#f8d28c;" | {{Icon item|Jumping Jack|75px}} |
| − | | style="background: #f8e2a1 "| '''{{item link|Jumping Jack}}''' | + | | style="background:#f8e2a1;" | '''{{item link|Jumping Jack}}''' |
|- | |- | ||
| − | | style="background: #b5b85c | + | | style="background:#b5b85c;" rowspan="2" | '''{{class link|All Classes|br=yes|color=black}}''' |
| − | | | + | | style="background:#f8d28c;" | {{Icon item|Yeti Punch|75px}} |
| − | | style="background: #f8e2a1 "| '''{{item link|Yeti Punch}}''' | + | | style="background:#f8e2a1;" | '''{{item link|Yeti Punch}}''' |
|- | |- | ||
| − | | | + | | style="background:#f8d28c;" | {{Icon item|Yeti Smash|75px}} |
| − | | style="background: #f8e2a1 "| '''{{item link|Yeti Smash}}''' | + | | style="background:#f8e2a1;" | '''{{item link|Yeti Smash}}''' |
|} | |} | ||
| Line 103: | Line 105: | ||
{{main|Cosmetic items{{if lang}}|l1={{common string|Cosmetic items}}}} | {{main|Cosmetic items{{if lang}}|l1={{common string|Cosmetic items}}}} | ||
{| class="wikitable collapsible" cellpadding=2 style="text-align:center;" | {| class="wikitable collapsible" cellpadding=2 style="text-align:center;" | ||
| + | | width="90px" style="background:#b5b85c;" rowspan="3" | '''{{class link|Scout|br=yes|color=black}}''' | ||
| + | | style="background:#4B69FF;" | {{Icon item|Forest Footwear|75px}} | ||
| + | | style="background:#f8e2a1;" | '''{{item link|Forest Footwear}}''' | ||
|- | |- | ||
| − | | style="background: # | + | | style="background:#D32CE6;" | {{Icon item|Jungle Jersey|75px}} |
| − | + | | style="background:#f8e2a1;" | '''{{item link|Jungle Jersey}}''' | |
| − | | style="background: #f8e2a1 "| '''{{item link| | ||
|- | |- | ||
| − | | | + | | style="background:#8847FF;" | {{Icon item|Transparent Trousers|75px}} |
| − | | style="background: #f8e2a1 "| '''{{item link| | + | | style="background:#f8e2a1;" | '''{{item link|Transparent Trousers}}''' |
|- | |- | ||
| − | | | + | | style="background:#b5b85c;" rowspan="4" | '''{{class link|Soldier|br=yes|color=black}}''' |
| − | | style="background: #f8e2a1 "| '''{{item link| | + | | style="background:#4B69FF;" | {{Icon item|Attack Packs|75px}} |
| + | | style="background:#f8e2a1;" | '''{{item link|Attack Packs}}''' | ||
|- | |- | ||
| − | | style="background: # | + | | style="background:#8847FF;" | {{Icon item|Crit Cloak|75px}} |
| − | + | | style="background:#f8e2a1;" | '''{{item link|Crit Cloak}}''' | |
| − | | style="background: #f8e2a1 "| '''{{item link| | ||
|- | |- | ||
| − | | | + | | style="background:#4B69FF;" | {{Icon item|Sharp Chest Pain|75px}} |
| − | | style="background: #f8e2a1 "| '''{{item link| | + | | style="background:#f8e2a1;" | '''{{item link|Sharp Chest Pain}}''' |
|- | |- | ||
| − | | | + | | style="background:#4B69FF;" | {{Icon item|Shellmet|75px}} |
| − | | style="background: #f8e2a1 "| '''{{item link| | + | | style="background:#f8e2a1;" | '''{{item link|Shellmet}}''' |
|- | |- | ||
| − | | | + | | style="background:#b5b85c;" rowspan="6" | '''{{class link|Pyro|br=yes|color=black}}''' |
| − | | style="background: #f8e2a1 "| '''{{item link| | + | | style="background:#4B69FF;" | {{Icon item|Deity's Dress|75px}} |
| + | | style="background:#f8e2a1;" | '''{{item link|Deity's Dress}}''' | ||
|- | |- | ||
| − | | style="background: # | + | | style="background:#8847FF;" | {{Icon item|D-eye-monds|75px}} |
| − | + | | style="background:#f8e2a1;" | '''{{item link|D-eye-monds}}''' | |
| − | | style="background: #f8e2a1 "| '''{{item link| | ||
|- | |- | ||
| − | | | + | | style="background:#8847FF;" | {{Icon item|Feathered Fiend|75px}} |
| − | | style="background: #f8e2a1 "| '''{{item link| | + | | style="background:#f8e2a1;" | '''{{item link|Feathered Fiend}}''' |
|- | |- | ||
| − | | | + | | style="background:#4B69FF;" | {{Icon item|Fireman's Essentials|75px}} |
| − | | style="background: #f8e2a1 "| '''{{item link| | + | | style="background:#f8e2a1;" | '''{{item link|Fireman's Essentials}}''' |
|- | |- | ||
| − | | | + | | style="background:#8847FF;" | {{Icon item|Hot Huaraches|75px}} |
| − | | style="background: #f8e2a1 "| '''{{item link| | + | | style="background:#f8e2a1;" | '''{{item link|Hot Huaraches}}''' |
|- | |- | ||
| − | | | + | | style="background:#D32CE6;" | {{Icon item|Sacrificial Stone|75px}} |
| − | | style="background: #f8e2a1 "| '''{{item link| | + | | style="background:#f8e2a1;" | '''{{item link|Sacrificial Stone}}''' |
|- | |- | ||
| − | | | + | | style="background:#b5b85c;" rowspan="5" | '''{{class link|Heavy|br=yes|color=black}} |
| − | | style="background: #f8e2a1 "| '''{{item link| | + | | style="background:#D32CE6;" | {{Icon item|Aztec Aggressor|75px}} |
| + | | style="background:#f8e2a1;" | '''{{item link|Aztec Aggressor}}''' | ||
|- | |- | ||
| − | | style="background: # | + | | style="background:#4B69FF;" | {{Icon item|Commando Elite|75px}} |
| − | + | | style="background:#f8e2a1;" | '''{{item link|Commando Elite}}''' | |
| − | | style="background: #f8e2a1 "| '''{{item link| | ||
|- | |- | ||
| − | | | + | | style="background:#4B69FF;" | {{Icon item|Fat Man's Field Cap|75px}} |
| − | | style="background: #f8e2a1 "| '''{{item link| | + | | style="background:#f8e2a1;" | '''{{item link|Fat Man's Field Cap}}''' |
|- | |- | ||
| − | | | + | | style="background:#4B69FF;" | {{Icon item|Heavy Harness|75px}} |
| − | | style="background: #f8e2a1 "| '''{{item link| | + | | style="background:#f8e2a1;" | '''{{item link|Heavy Harness}}''' |
|- | |- | ||
| − | | | + | | style="background:#4B69FF;" | {{Icon item|Siberian Tigerstripe|75px}} |
| − | | style="background: #f8e2a1 "| '''{{item link| | + | | style="background:#f8e2a1;" | '''{{item link|Siberian Tigerstripe}}''' |
|- | |- | ||
| − | | | + | | style="background:#b5b85c;" rowspan="2" | '''{{class link|Engineer|br=yes|color=black}}''' |
| − | | style="background: #f8e2a1 "| '''{{item link| | + | | style="background:#4B69FF;" | {{Icon item|Conaghers' Utility Idol|75px}} |
| + | | style="background:#f8e2a1;" | '''{{item link|Conaghers' Utility Idol}}''' | ||
|- | |- | ||
| − | | | + | | style="background:#D32CE6;" | {{Icon item|Tropical Toad|75px}} |
| − | | style="background: #f8e2a1 "| '''{{item link| | + | | style="background:#f8e2a1;" | '''{{item link|Tropical Toad}}''' |
|- | |- | ||
| − | | | + | | style="background:#b5b85c;" rowspan="2" | '''{{class link|Medic|br=yes|color=black}}''' |
| − | | style="background: #f8e2a1 "| '''{{item link| | + | | style="background:#4B69FF;" | {{Icon item|Battle Boonie|75px}} |
| + | | style="background:#f8e2a1;" | '''{{item link|Battle Boonie}}''' | ||
|- | |- | ||
| − | | | + | | style="background:#4B69FF;" | {{Icon item|Vitals Vest|75px}} |
| − | | style="background: #f8e2a1 "| '''{{item link| | + | | style="background:#f8e2a1;" | '''{{item link|Vitals Vest}}''' |
|- | |- | ||
| − | | style="background: #b5b85c | + | | style="background:#b5b85c;" rowspan="6" | '''{{class link|Sniper|br=yes|color=black}}''' |
| − | | | + | | style="background:#4B69FF;" | {{Icon item|Bait and Bite|75px}} |
| − | | style="background: #f8e2a1 "| '''{{item link| | + | | style="background:#f8e2a1;" | '''{{item link|Bait and Bite}}''' |
|- | |- | ||
| − | | | + | | style="background:#4B69FF;" | {{Icon item|Cammy Jammies|75px}} |
| − | | style="background: #f8e2a1 "| '''{{item link| | + | | style="background:#f8e2a1;" | '''{{item link|Cammy Jammies}}''' |
|- | |- | ||
| − | | style="background: # | + | | style="background:#4B69FF;" | {{Icon item|Classy Capper|75px}} |
| − | + | | style="background:#f8e2a1;" | '''{{item link|Classy Capper}}''' | |
| − | | style="background: #f8e2a1 "| '''{{item link| | ||
|- | |- | ||
| − | | | + | | style="background:#8847FF;" | {{Icon item|Conspicuous Camouflage|75px}} |
| − | | style="background: #f8e2a1 "| '''{{item link| | + | | style="background:#f8e2a1;" | '''{{item link|Conspicuous Camouflage}}''' |
|- | |- | ||
| − | | style="background: # | + | | style="background:#4B69FF;" | {{Icon item|Most Dangerous Mane|75px}} |
| − | + | | style="background:#f8e2a1;" | '''{{item link|Most Dangerous Mane}}''' | |
| − | | style="background: #f8e2a1 "| '''{{item link| | ||
|- | |- | ||
| − | | | + | | style="background:#8847FF;" | {{Icon item|Rifleman's Regalia|75px}} |
| − | | style="background: #f8e2a1 "| '''{{item link| | + | | style="background:#f8e2a1;" | '''{{item link|Rifleman's Regalia}}''' |
|- | |- | ||
| − | | align=" | + | | align="left" style="background:#b5b85c;" | '''{{Class link|Scout|color=black}}'''<br/>'''{{Class link|Engineer|color=black}}'''<br/>'''{{Class link|Spy|color=black}}''' |
| − | | style="background: #f8e2a1 "| '''{{item link| | + | | style="background:#4B69FF;" | {{Icon item|Aloha Apparel|75px}} |
| + | | style="background:#f8e2a1;" | '''{{item link|Aloha Apparel}}''' | ||
|- | |- | ||
| − | | align=" | + | | align="left" style="background:#b5b85c;"| '''{{Class link|Soldier|color=black}}'''<br/>'''{{Class link|Pyro|color=black}}'''<br/>'''{{Class link|Demoman|color=black}}''' |
| − | | style="background: #f8e2a1 "| '''{{item link| | + | | style="background:#D32CE6;" | {{Icon item|Bananades|75px}} |
| + | | style="background:#f8e2a1;" | '''{{item link|Bananades}}''' | ||
|- | |- | ||
| − | | align=" | + | | align="left" style="background:#b5b85c;" | '''{{Class link|Soldier|color=black}}'''<br/>'''{{Class link|Demoman|color=black}}'''<br/>'''{{Class link|Heavy|color=black}}''' |
| − | | style="background: #f8e2a1 "| '''{{item link| | + | | style="background:#EB4B4B;" | {{Icon item|War Eagle|75px}} |
| + | | style="background:#f8e2a1;" | '''{{item link|War Eagle}}''' | ||
|- | |- | ||
| − | | align=" | + | | align="left" style="background:#b5b85c;" | '''{{Class link|Soldier|color=black}}'''<br/>'''{{Class link|Heavy|color=black}}''' |
| − | | style="background: #f8e2a1 "| '''{{item link| | + | | style="background:#4B69FF;" | {{Icon item|Nuke|75px}} |
| + | | style="background:#f8e2a1;" | '''{{item link|Nuke}}''' | ||
|- | |- | ||
| − | | style="background: #b5b85c; | + | | style="background:#b5b85c;" rowspan="14" | '''{{class link|All Classes|br=yes|color=black}}''' |
| − | | | + | | style="background:#EB4B4B;" | {{Icon item|Aztec Warrior|75px}} |
| − | | style="background: #f8e2a1; " | '''{{item link| | + | | style="background:#f8e2a1;" | '''{{item link|Aztec Warrior}}''' |
|- | |- | ||
| − | | style="background: # | + | | style="background:#8847FF;" | {{Icon item|Croaking Hazard|75px}} |
| − | + | | style="background:#f8e2a1;" | '''{{item link|Croaking Hazard}}''' | |
| − | | style="background: #f8e2a1; " | '''{{item link| | ||
|- | |- | ||
| − | | style="background: # | + | | style="background:#8847FF;" | {{Icon item|Hunter in Darkness|75px}} |
| − | + | | style="background:#f8e2a1;" | '''{{item link|Hunter in Darkness}}''' | |
| − | | style="background: #f8e2a1; " | '''{{item link| | ||
|- | |- | ||
| − | | style="background: # | + | | style="background:#D32CE6;" | {{Icon item|Jungle Wreath|75px}} |
| − | + | | style="background:#f8e2a1;" | '''{{item link|Jungle Wreath}}''' | |
| − | | style="background: #f8e2a1; " | '''{{item link| | ||
|- | |- | ||
| − | | style="background: # | + | | style="background:#FFD700;" | {{Icon item|Mannanas Hat|75px}} |
| − | + | | style="background:#f8e2a1;" | '''{{item link|Mannanas Hat}}''' | |
| − | | style="background: #f8e2a1 "| '''{{item link| | ||
|- | |- | ||
| − | | | + | | style="background:#FFD700;" | {{Icon item|Mercenary Park|75px}} |
| − | | style="background: #f8e2a1 "| '''{{item link| | + | | style="background:#f8e2a1;" | '''{{item link|Mercenary Park (hat)}}''' |
|- | |- | ||
| − | | | + | | style="background:#FFD700;" | {{Icon item|Monstrous Memento|75px}} |
| − | | style="background: #f8e2a1 "| '''{{item link| | + | | style="background:#f8e2a1;" | '''{{item link|Monstrous Memento}}''' |
|- | |- | ||
| − | | | + | | style="background:#FFD700;" | {{Icon item|Never Forget Hat|75px}} |
| − | | style="background: #f8e2a1 "| '''{{item link| | + | | style="background:#f8e2a1;" | '''{{item link|Never Forget Hat}}''' |
|- | |- | ||
| − | | | + | | style="background:#4B69FF;" | {{Icon item|Pithy Professional|75px}} |
| − | | style="background: #f8e2a1 "| '''{{item link| | + | | style="background:#f8e2a1;" | '''{{item link|Pithy Professional}}''' |
|- | |- | ||
| − | | | + | | style="background:#8847FF;" | {{Icon item|Pocket Saxton|75px}} |
| − | | style="background: #f8e2a1 "| '''{{item link| | + | | style="background:#f8e2a1;" | '''{{item link|Pocket Saxton}}''' |
|- | |- | ||
| − | | | + | | style="background:#EB4B4B;" | {{Icon item|Quizzical Quetzal|75px}} |
| − | | style="background: #f8e2a1 "| '''{{item link| | + | | style="background:#f8e2a1;" | '''{{item link|Quizzical Quetzal}}''' |
|- | |- | ||
| − | | | + | | style="background:#FFD700;" | {{Icon item|Saxton|75px}} |
| − | | style="background: #f8e2a1 "| '''{{item link| | + | | style="background:#f8e2a1;" | '''{{item link|Saxton}}''' |
|- | |- | ||
| − | | | + | | style="background:#EB4B4B;" | {{Icon item|Slithering Scarf|75px}} |
| − | | style="background: #f8e2a1 "| '''{{item link| | + | | style="background:#f8e2a1;" | '''{{item link|Slithering Scarf}}''' |
|- | |- | ||
| − | | | + | | style="background:#FFD700;" | {{Icon item|Yeti Park Hardhat|75px}} |
| − | + | | style="background:#f8e2a1;" | '''{{item link|Yeti Park Hardhat}}''' | |
| − | |||
| − | |||
| − | |||
| − | |||
| − | |||
| − | |||
| − | |||
| − | |||
| − | |||
| − | |||
| − | |||
| − | | style="background: #f8e2a1 "| '''{{item link|Yeti Park Hardhat}}''' | ||
|} | |} | ||
==== Sarjat ==== | ==== Sarjat ==== | ||
| + | {{main|Item sets/fi|l1=Esinesarjat}} | ||
{| class="wikitable collapsible" cellpadding="2" style="text-align:center;" | {| class="wikitable collapsible" cellpadding="2" style="text-align:center;" | ||
| − | | style="background: #b5b85c | + | | width="90px" style="background:#b5b85c;" rowspan="3" | '''{{class link|Heavy|br=yes|color=black}}''' |
| − | | style="background: #f8e2a1;" rowspan="3" | ''' | + | | style="background:#f8e2a1;" rowspan="3" | '''{{item link|Monster Mash-Up Pack}}'''<br/> |
| − | | | + | | style="background:#f8d28c;" | {{icon item|Kathman-Hairdo|80px}} |
| − | | style="background: #f8e2a1;" | '''{{item link|Kathman-Hairdo | + | | style="background:#f8e2a1;" | '''{{item link|Kathman-Hairdo}}''' |
| − | |||
| − | |||
| − | |||
|- | |- | ||
| − | | | + | | style="background:#f8d28c;" | {{item icon|Himalayan Hair Shirt|80px}} |
| − | | style="background: #f8e2a1;" | '''{{item link| | + | | style="background:#f8e2a1;" | '''{{item link|Himalayan Hair Shirt}}''' |
|- | |- | ||
| + | | style="background:#f8d28c;" | {{item icon|Abominable Snow Pants|80px}} | ||
| + | | style="background:#f8e2a1;" | '''{{item link|Abominable Snow Pants}}''' | ||
|} | |} | ||
| Line 282: | Line 274: | ||
{{main|Tools/fi|l1=Työkalut}} | {{main|Tools/fi|l1=Työkalut}} | ||
{| class="wikitable collapsible" cellpadding="3" style="text-align:center;" | {| class="wikitable collapsible" cellpadding="3" style="text-align:center;" | ||
| − | | | + | | width="90px" style="background:#f8d28c;" | {{Icon item|Abominable Cosmetic Case|75px}} |
| − | | style="background: #f8e2a1 "| '''{{item link|Abominable Cosmetic Case}}''' | + | | style="background:#f8e2a1;" | '''{{item link|Abominable Cosmetic Case}}''' |
|- | |- | ||
| − | | | + | | style="background:#f8d28c;" | {{Icon item|Abominable Cosmetic Key|75px}} |
| − | | style="background: #f8e2a1 "| '''{{item link|Abominable Cosmetic Key}}''' | + | | style="background:#f8e2a1;" | '''{{item link|Abominable Cosmetic Key}}''' |
|- | |- | ||
| − | | | + | | style="background:#f8d28c;" | {{Icon item|Unleash the Beast Cosmetic Case|75px}} |
| − | | style="background: #f8e2a1 "| '''{{item link|Unleash the Beast Cosmetic Case}}''' | + | | style="background:#f8e2a1;" | '''{{item link|Unleash the Beast Cosmetic Case}}''' |
|- | |- | ||
| − | | | + | | style="background:#f8d28c;" | {{Icon item|Unleash the Beast Cosmetic Key|75px}} |
| − | | style="background: #f8e2a1 "| '''{{item link|Unleash the Beast Cosmetic Key}}''' | + | | style="background:#f8e2a1;" | '''{{item link|Unleash the Beast Cosmetic Key}}''' |
|- | |- | ||
| − | | | + | | style="background:#f8d28c;" | {{Icon item|Jungle Inferno Campaign Pass|75px}} |
| − | | style="background: #f8e2a1 "| '''{{item link|Jungle Inferno Campaign Pass}}''' | + | | style="background:#f8e2a1;" | '''{{item link|Jungle Inferno Campaign Pass}}''' |
|- | |- | ||
| − | | | + | | style="background:#f8d28c;" | {{Icon item|Infernal Reward War Paint Case|75px}} |
| − | | style="background: #f8e2a1 "| '''{{item link| | + | | style="background:#f8e2a1;" | '''{{item link|Infernal Reward War Paint Case}}''' |
|- | |- | ||
| − | | | + | | style="background:#f8d28c;" | {{Icon item|Infernal Reward War Paint Key|75px}} |
| − | | style="background: #f8e2a1 "| '''{{item link|Infernal Reward War Paint | + | | style="background:#f8e2a1;" | '''{{item link|Infernal Reward War Paint Key}}''' |
|- | |- | ||
| − | | | + | | style="background:#f8d28c;" | {{Icon item|Jungle Jackpot War Paint Case|75px}} |
| − | | style="background: #f8e2a1 "| '''{{item link| | + | | style="background:#f8e2a1;" | '''{{item link|Jungle Jackpot War Paint Case}}''' |
|- | |- | ||
| − | | | + | | style="background:#f8d28c;" | {{Icon item|Jungle Jackpot War Paint Key|75px}} |
| − | | style="background: #f8e2a1 "| '''{{item link|Jungle Jackpot War Paint | + | | style="background:#f8e2a1;" | '''{{item link|Jungle Jackpot War Paint Key}}''' |
| − | |- | + | |} |
| − | | | + | |
| − | | style="background: #f8e2a1 "| '''{{item link|Jungle | + | ==== Toimintoesineet ==== |
| + | {{main|Action items/fi|l1=Toimintoesineet}} | ||
| + | {| class="wikitable collapsible" cellpadding="3" style="text-align:center;" | ||
| + | | width="90px" style="background:#f8d28c;" | {{Icon item|Jungle Inferno ConTracker|75px}} | ||
| + | | style="background:#f8e2a1;" | '''{{item link|Jungle Inferno ConTracker}}''' | ||
|} | |} | ||
| + | |||
| + | ==== {{item name|War Paints}} ==== | ||
| + | {{main|War Paint{{if lang}}|l1={{item name|War Paint}}}} | ||
| + | |||
| + | ===== {{decorated name|Jungle Jackpot Collection}} ===== | ||
| + | <gallery> | ||
| + | File:Backpack Park Pigmented War Paint Factory New.png|<div class="warpaint item-grade elite">{{Decorated name|park pigmented}}</div> | ||
| + | File:Backpack Sax Waxed War Paint Factory New.png|<div class="warpaint item-grade assassin">{{Decorated name|sax waxed}}</div> | ||
| + | File:Backpack Yeti Coated War Paint Factory New.png|<div class="warpaint item-grade assassin">{{Decorated name|yeti coated}}</div> | ||
| + | File:Backpack Croc Dusted War Paint Factory New.png|<div class="warpaint item-grade commando">{{Decorated name|croc dusted}}</div> | ||
| + | File:Backpack Macaw Masked War Paint Factory New.png|<div class="warpaint item-grade commando">{{Decorated name|macaw masked}}</div> | ||
| + | File:Backpack Piña Polished War Paint Factory New.png|<div class="warpaint item-grade commando">{{Decorated name|piña polished}}</div> | ||
| + | File:Backpack Anodized Aloha War Paint Factory New.png|<div class="warpaint item-grade mercenary">{{Decorated name|anodized aloha}}</div> | ||
| + | File:Backpack Bamboo Brushed War Paint Factory New.png|<div class="warpaint item-grade mercenary">{{Decorated name|bamboo brushed}}</div> | ||
| + | File:Backpack Leopard Printed War Paint Factory New.png|<div class="warpaint item-grade mercenary">{{Decorated name|leopard printed}}</div> | ||
| + | File:Backpack Mannana Peeled War Paint Factory New.png|<div class="warpaint item-grade mercenary">{{Decorated name|mannana peeled}}</div> | ||
| + | File:Backpack Tiger Buffed War Paint Factory New.png|<div class="warpaint item-grade mercenary">{{Decorated name|tiger buffed}}</div> | ||
| + | </gallery> | ||
| + | |||
| + | ===== {{decorated name|Infernal Reward Collection}} ===== | ||
| + | <gallery> | ||
| + | File:Backpack Fire Glazed War Paint Factory New.png|<div class="warpaint item-grade elite">{{Decorated name|fire glazed}}</div> | ||
| + | File:Backpack Bonk Varnished War Paint Factory New.png|<div class="warpaint item-grade assassin">{{Decorated name|bonk varnished}}</div> | ||
| + | File:Backpack Dream Piped War Paint Factory New.png|<div class="warpaint item-grade assassin">{{Decorated name|dream piped}}</div> | ||
| + | File:Backpack Freedom Wrapped War Paint Factory New.png|<div class="warpaint item-grade assassin">{{Decorated name|freedom wrapped}}</div> | ||
| + | File:Backpack Bank Rolled War Paint Factory New.png|<div class="warpaint item-grade commando">{{Decorated name|bank rolled}}</div> | ||
| + | File:Backpack Clover Camo'd War Paint Factory New.png|<div class="warpaint item-grade commando">{{Decorated name|clover camo'd}}</div> | ||
| + | File:Backpack Kill Covered War Paint Factory New.png|<div class="warpaint item-grade commando">{{Decorated name|kill covered}}</div> | ||
| + | File:Backpack Pizza Polished War Paint Factory New.png|<div class="warpaint item-grade commando">{{Decorated name|pizza polished}}</div> | ||
| + | File:Backpack Bloom Buffed War Paint Factory New.png|<div class="warpaint item-grade mercenary">{{Decorated name|bloom buffed}}</div> | ||
| + | File:Backpack Cardboard Boxed War Paint Factory New.png|<div class="warpaint item-grade mercenary">{{Decorated name|cardboard boxed}}</div> | ||
| + | File:Backpack Merc Stained War Paint Factory New.png|<div class="warpaint item-grade mercenary">{{Decorated name|merc stained}}</div> | ||
| + | File:Backpack Quack Canvassed War Paint Factory New.png|<div class="warpaint item-grade mercenary">{{Decorated name|quack canvassed}}</div> | ||
| + | File:Backpack Star Crossed War Paint Factory New.png|<div class="warpaint item-grade mercenary">{{Decorated name|star crossed}}</div> | ||
| + | </gallery> | ||
| + | |||
| + | ===== {{decorated name|Decorated War Hero Collection}} ===== | ||
| + | <gallery> | ||
| + | File:Backpack Carpet Bomber Mk.II War Paint Factory New.png|<div class="warpaint item-grade commando">{{Decorated name|carpet bomber mk.ii}}</div> | ||
| + | File:Backpack Woodland Warrior Mk.II War Paint Factory New.png|<div class="warpaint item-grade commando">{{Decorated name|woodland warrior mk.ii}}</div> | ||
| + | File:Backpack Wrapped Reviver Mk.II War Paint Factory New.png|<div class="warpaint item-grade commando">{{Decorated name|wrapped reviver mk.ii}}</div> | ||
| + | File:Backpack Forest Fire Mk.II War Paint Factory New.png|<div class="warpaint item-grade mercenary">{{Decorated name|forest fire mk.ii}}</div> | ||
| + | File:Backpack Night Owl Mk.II War Paint Factory New.png|<div class="warpaint item-grade mercenary">{{Decorated name|night owl mk.ii}}</div> | ||
| + | File:Backpack Woodsy Widowmaker Mk.II War Paint Factory New.png|<div class="warpaint item-grade mercenary">{{Decorated name|woodsy widowmaker mk.ii}}</div> | ||
| + | File:Backpack Autumn Mk.II War Paint Factory New.png|<div class="warpaint item-grade freelance">{{Decorated name|autumn mk.ii}}</div> | ||
| + | File:Backpack Plaid Potshotter Mk.II War Paint Factory New.png|<div class="warpaint item-grade freelance">{{Decorated name|plaid potshotter mk.ii}}</div> | ||
| + | File:Backpack Civil Servant Mk.II War Paint Factory New.png|<div class="warpaint item-grade civilian">{{Decorated name|civil servant mk.ii}}</div> | ||
| + | File:Backpack Civic Duty Mk.II War Paint Factory New.png|<div class="warpaint item-grade civilian">{{Decorated name|civic duty mk.ii}}</div> | ||
| + | </gallery> | ||
| + | |||
| + | ===== {{decorated name|Contract Campaigner Collection}} ===== | ||
| + | <gallery> | ||
| + | File:Backpack Bovine Blazemaker Mk.II War Paint Factory New.png|<div class="warpaint item-grade commando">{{Decorated name|bovine blazemaker mk.ii}}</div> | ||
| + | File:Backpack Dead Reckoner Mk.II War Paint Factory New.png|<div class="warpaint item-grade commando">{{Decorated name|dead reckoner mk.ii}}</div> | ||
| + | File:Backpack Backwoods Boomstick Mk.II War Paint Factory New.png|<div class="warpaint item-grade mercenary">{{Decorated name|backwoods boomstick mk.ii}}</div> | ||
| + | File:Backpack Masked Mender Mk.II War Paint Factory New.png|<div class="warpaint item-grade mercenary">{{Decorated name|masked mender mk.ii}}</div> | ||
| + | File:Backpack Iron Wood Mk.II War Paint Factory New.png|<div class="warpaint item-grade freelance">{{Decorated name|iron wood mk.ii}}</div> | ||
| + | File:Backpack Macabre Web Mk.II War Paint Factory New.png|<div class="warpaint item-grade freelance">{{Decorated name|macabre web mk.ii}}</div> | ||
| + | File:Backpack Nutcracker Mk.II War Paint Factory New.png|<div class="warpaint item-grade civilian">{{Decorated name|nutcracker mk.ii}}</div> | ||
| + | File:Backpack Smalltown Bringdown Mk.II War Paint Factory New.png|<div class="warpaint item-grade civilian">{{Decorated name|smalltown bringdown mk.ii}}</div> | ||
| + | </gallery> | ||
| + | |||
| + | ===== {{decorated name|Saxton Select Collection}} ===== | ||
| + | <gallery> | ||
| + | File:Backpack Dragon Slayer War Paint Factory New.png|<div class="warpaint item-grade elite">{{Decorated name|dragon slayer}}</div> | ||
| + | </gallery> | ||
=== Päivä 3 === | === Päivä 3 === | ||
| Line 317: | Line 379: | ||
==== Aseet ==== | ==== Aseet ==== | ||
| + | {{main|Weapons/fi|l1=Aseet}} | ||
{| class="wikitable collapsible" cellpadding=2 style="text-align:center;" | {| class="wikitable collapsible" cellpadding=2 style="text-align:center;" | ||
| + | | width="90px" style="background:#b5b85c;" rowspan="4" | '''{{class link|Pyro|br=yes|color=black}}''' | ||
| + | | style="background:#f8d28c;" | {{Icon item|Dragon's Fury|75px}} | ||
| + | | style="background:#f8e2a1;" | '''{{item link|Dragon's Fury}}''' | ||
|- | |- | ||
| − | | style="background: # | + | | style="background:#f8d28c;" | {{Icon item|Gas Passer|75px}} |
| − | + | | style="background:#f8e2a1;" | '''{{item link|Gas Passer}}''' | |
| − | |||
| − | |||
| − | |||
| − | | style="background: #f8e2a1 "| '''{{item link|Gas Passer}}''' | ||
|- | |- | ||
| − | | | + | | style="background:#f8d28c;" | {{Icon item|Hot Hand|75px}} |
| − | | style="background: #f8e2a1 "| '''{{item link|Hot Hand}}''' | + | | style="background:#f8e2a1;" | '''{{item link|Hot Hand}}''' |
|- | |- | ||
| − | | | + | | style="background:#f8d28c;" | {{Icon item|Thermal Thruster|75px}} |
| − | | style="background: #f8e2a1 "| '''{{item link|Thermal Thruster}}''' | + | | style="background:#f8e2a1;" | '''{{item link|Thermal Thruster}}''' |
|- | |- | ||
| − | | style="background: #b5b85c | + | | style="background:#b5b85c;" rowspan="1" | '''{{class link|Heavy|br=yes|color=black}}''' |
| − | | | + | | style="background:#f8d28c;" | {{Icon item|Second Banana|75px}} |
| − | | style="background: #f8e2a1 "| '''{{item link|Second Banana}}''' | + | | style="background:#f8e2a1;" | '''{{item link|Second Banana}}''' |
|} | |} | ||
==== Muutetut Luokat ==== | ==== Muutetut Luokat ==== | ||
{| class="wikitable" | {| class="wikitable" | ||
| − | ! style="background: #748c41;" class="header" | <span style="color: white;"> Class | + | ! style="background:#748c41;" class="header" | <span style="color: white;"> Class |
| − | ! style="background: #748c41;" class="header" | <span style="color: white;"> Changes | + | ! style="background:#748c41;" class="header" | <span style="color: white;"> Changes |
| − | |||
| − | |||
| − | |||
|- | |- | ||
| − | | style="background: #f8e2a1" | {{c|+|Changed:}} Airblast | + | ! width="90px" style="background:#b5b85c;" rowspan="6" | {{class link|Pyro|br=yes|color=black}} |
| + | | style="background:#f8e2a1;" | {{c|+|Changed:}} Airblast hit detection for both players and projectiles is now a consistent cone | ||
|- | |- | ||
| − | | style="background: #f8e2a1" | {{c| | + | | style="background:#f8e2a1;" | {{c|+|Changed:}} Airblast strength increased |
|- | |- | ||
| − | | style="background: #f8e2a1" | {{c| | + | | style="background:#f8e2a1;" | {{c|-|Changed:}} Airblast now causes the target player to have reduced footing and air control for a short period, rather than losing all control |
|- | |- | ||
| − | | style="background: #f8e2a1" | {{c|=|Changed:}} Airblast now factors in the | + | | style="background:#f8e2a1;" | {{c|=|Changed:}} Airblast now factors in the momentum of the Pyro and target, giving both more control over the interaction |
|- | |- | ||
| − | | style="background: #f8e2a1" | {{c|=|Changed:}} | + | | style="background:#f8e2a1;" | {{c|=|Changed:}} Airblast now factors in the upward angle of the airblast, rather than having a fixed upward force |
|- | |- | ||
| + | | style="background:#f8e2a1;" | {{c|=|Changed:}} Afterburn duration now based on how long the flamethrower was actively hitting an enemy | ||
|} | |} | ||
==== Muutetut aseet ==== | ==== Muutetut aseet ==== | ||
{| class="wikitable" | {| class="wikitable" | ||
| − | ! style="background: #748c41;" class="header" | <span style="color: white;"> Class | + | ! style="background:#748c41;" class="header" | <span style="color: white;"> Class |
| − | ! style="background: #748c41;" class="header" | <span style="color: white;"> Weapon | + | ! style="background:#748c41;" class="header" | <span style="color: white;"> Weapon |
| − | ! style="background: #748c41;" class="header" | <span style="color: white;"> Changes | + | ! style="background:#748c41;" class="header" | <span style="color: white;"> Changes |
|- | |- | ||
| − | ! style="background: #b5b85c;" rowspan=7| {{ | + | ! width="90px" style="background:#b5b85c;" rowspan=7 | {{class link|Pyro|br=yes|color=black}} |
| − | ! style="background: #f8d28c;" rowspan=2 | {{Icon item|Flame Thrower|icon-size=75px}} <br /> {{item link|Flame Thrower}} + Variants | + | ! style="background:#f8d28c;" rowspan=2 | {{Icon item|Flame Thrower|icon-size=75px}} <br /> {{item link|Flame Thrower}} + Variants |
| − | | style="background: #f8e2a1;" | {{c|=|Changed:}} Better visual sync, more consistent (no visuals/damage mismatch) | + | | style="background:#f8e2a1;" | {{c|=|Changed:}} Better visual sync, more consistent (no visuals/damage mismatch) |
|- | |- | ||
| − | | style="background: #f8e2a1;" | {{c|=|Changed:}} New particle effects | + | | style="background:#f8e2a1;" | {{c|=|Changed:}} New particle effects |
|} | |} | ||
| Line 373: | Line 434: | ||
Päivä 4 julkaisi päivitysmuutokset Jungle Inferno -päivitykselle, sisältäen erilaisia asemuutoksia, tietoa uusista aseista, useita bugikorjauksia ja korjauksia pelihakuun. Se myös lisäsi ensimmäisen persoonan tutkimismekaniikan kaikkiin aseisiin. | Päivä 4 julkaisi päivitysmuutokset Jungle Inferno -päivitykselle, sisältäen erilaisia asemuutoksia, tietoa uusista aseista, useita bugikorjauksia ja korjauksia pelihakuun. Se myös lisäsi ensimmäisen persoonan tutkimismekaniikan kaikkiin aseisiin. | ||
| − | ====Muutetut Luokat==== | + | ==== Muutetut Luokat ==== |
{| class="wikitable" | {| class="wikitable" | ||
| − | ! style="background: #748c41;" class="header" | <span style="color: white;"> Class | + | ! style="background:#748c41;" class="header" | <span style="color: white;"> Class |
| − | ! style="background: #748c41;" class="header" | <span style="color: white;"> Changes | + | ! style="background:#748c41;" class="header" | <span style="color: white;"> Changes |
| − | |||
| − | |||
| − | |||
|- | |- | ||
| − | | style="background: #f8e2a1;" | {{c|+|Changed:}} | + | ! width="90px" style="background:#b5b85c;" rowspan="2" | {{class link|Heavy|br=yes|color=black}} |
| + | | style="background:#f8e2a1;" | {{c|+|Changed:}} The 1-second damage and accuracy penalty now applies to the first second of spun-up time, whether or not the Heavy is firing. Previously, the 1-second damage penalty only be removed after 1 second of firing. | ||
|- | |- | ||
| − | + | | style="background:#f8e2a1;" | {{c|+|Changed:}} Accuracy and damage penalties now reset when the Heavy spins down, rather than when the Heavy stops firing. This means if you stay spun up beyond one second, and fire in bursts, damage and accuracy will remain at 100%. | |
| − | | style="background: #f8e2a1;" | {{c|+| | ||
|- | |- | ||
| + | ! style="background:#b5b85c;" | {{class link|Engineer|br=yes|color=black}} | ||
| + | | style="background:#f8e2a1;" | {{c|+|Added:}} Doubled the amount of metal applied (per {{botignore|wrench}} hit) when upgrading buildings during the "Setup" period. | ||
|} | |} | ||
==== Muutetut aseet ==== | ==== Muutetut aseet ==== | ||
{| class="wikitable" | {| class="wikitable" | ||
| − | ! style="background: #748c41;" class="header" | <span style="color: white;"> Class | + | ! style="background:#748c41;" class="header" | <span style="color: white;"> Class |
| − | ! style="background: #748c41;" class="header" colspan=2 | <span style="color: white;"> Weapon | + | ! style="background:#748c41;" class="header" colspan=2 | <span style="color: white;"> Weapon |
| − | ! style="background: #748c41;" class="header" | <span style="color: white;"> Changes | + | ! style="background:#748c41;" class="header" | <span style="color: white;"> Changes |
| − | |||
| − | |||
| − | |||
| − | |||
| − | |||
| − | |||
|- | |- | ||
| − | ! style="background: #f8d28c;" colspan=2 rowspan= | + | ! width="90px" style="background:#b5b85c;" rowspan=25 | {{class link|Scout|br=yes|color=black}} |
| − | | style="background: #f8e2a1;" | {{c| | + | ! style="background:#f8d28c;" colspan=2 rowspan=2 | {{Icon item|Bonk! Atomic Punch|icon-size=75px}} <br /> {{item link|Bonk! Atomic Punch}} |
| + | | style="background:#f8e2a1;" | {{c|-|Added:}} Apply a slow effect to the player after phasing wears off, based on the amount of damage they absorbed, from -25% at low damage, to -50% at 200+ damage. | ||
|- | |- | ||
| − | | style="background: #f8e2a1;" | {{c| | + | | style="background:#f8e2a1;" | {{c|=|Note:}} The slow effect lasts 5 seconds |
|- | |- | ||
| − | | style="background: #f8e2a1;" | {{c| | + | ! style="background:#f8d28c;" colspan=2 rowspan=4 | {{Icon item|Crit-A-Cola|icon-size=75px}} <br /> {{item link|Crit-A-Cola}} |
| + | | style="background:#f8e2a1;" | {{c|+|Removed:}} Marked-For-Death when effect expires | ||
|- | |- | ||
| − | | style="background: #f8e2a1;" | {{c| | + | | style="background:#f8e2a1;" | {{c|+|Removed:}} +10% damage taken penalty |
|- | |- | ||
| − | + | | style="background:#f8e2a1;" | {{c|-|Added:}} Each attack while active adds Marked-For-Death debuff for 5 seconds (does not stack) | |
| − | | style="background: #f8e2a1;" | {{c| | ||
|- | |- | ||
| − | | style="background: #f8e2a1;" | {{c| | + | | style="background:#f8e2a1;" | {{c|-|Removed:}} +25% move speed bonus |
|- | |- | ||
| − | | style="background: #f8e2a1;" | {{c|+| | + | ! style="background:#f8d28c;" colspan=2 rowspan=5 | {{Icon item|Pretty Boy's Pocket Pistol|icon-size=75px}} <br /> {{item link|Pretty Boy's Pocket Pistol}} |
| + | | style="background:#f8e2a1;" | {{c|+|Changed:}} +15% firing speed (from 25% slower firing speed) | ||
|- | |- | ||
| − | | style="background: #f8e2a1;" | {{c| | + | | style="background:#f8e2a1;" | {{c|+|Changed:}} Increased max health on hit to +7 (from +5) |
|- | |- | ||
| − | | style="background: #f8e2a1;" | {{c| | + | | style="background:#f8e2a1;" | {{c|+|Removed:}} 20% damage vulnerability on wearer |
|- | |- | ||
| − | + | | style="background:#f8e2a1;" | {{c|-|Removed:}} Wearer never takes falling damage | |
| − | | style="background: #f8e2a1;" | {{c| | ||
|- | |- | ||
| − | | style="background: #f8e2a1;" | {{c| | + | | style="background:#f8e2a1;" | {{c|-|Added:}} -25% clip size penalty |
|- | |- | ||
| − | | style="background: #f8e2a1;" | {{c| | + | ! style="background:#f8d28c;" colspan=2 rowspan=4 | {{Icon item|Flying Guillotine|icon-size=75px}} <br /> {{item link|Flying Guillotine}} |
| + | | style="background:#f8e2a1;" | {{c|+|Added:}} Long range hits reduce recharge time (by 1.5 seconds) | ||
|- | |- | ||
| − | | style="background: #f8e2a1;" | {{c| | + | | style="background:#f8e2a1;" | {{c|+|Changed:}} Distance considered "long range" reduced by half of the previous value when determining mini-crits |
|- | |- | ||
| − | + | | style="background:#f8e2a1;" | {{c|-|Removed:}} Crit vs stunned players | |
| − | | style="background: #f8e2a1;" | {{c| | ||
|- | |- | ||
| − | | style="background: #f8e2a1;" | {{c| | + | | style="background:#f8e2a1;" | {{c|-|Removed:}} Mini-crits at long range |
|- | |- | ||
| − | | style="background: #f8e2a1;" | {{c|+|Changed:}} | + | ! style="background:#f8d28c;" colspan=2 rowspan=4 | {{Icon item|Sandman|icon-size=75px}} <br /> {{item link|Sandman}} |
| + | | style="background:#f8e2a1;" | {{c|+|Changed:}} Max range balls now do 50% increased damage (from a base of 15) | ||
|- | |- | ||
| − | | style="background: #f8e2a1;" | {{c| | + | | style="background:#f8e2a1;" | {{c|+|Changed:}} The flight time required to trigger the "max" effect has been reduced by 20% |
|- | |- | ||
| − | + | | style="background:#f8e2a1;" | {{c|+|Changed:}} Ball regeneration time reduced to 10 seconds (from 15) | |
| − | | style="background: #f8e2a1;" | {{c|+| | ||
|- | |- | ||
| − | | style="background: #f8e2a1;" | {{c| | + | | style="background:#f8e2a1;" | {{c|-|Changed:}} Long-range ball impacts no longer remove the victim's ability to fire their weapons (but the victim is still slowed) |
|- | |- | ||
| − | | style="background: #f8e2a1;" | {{c|+| | + | ! style="background:#f8d28c;" colspan=2 rowspan=6 | {{Icon item|Atomizer|icon-size=75px}} <br /> {{item link|Atomizer}} |
| + | | style="background:#f8e2a1;" | {{c|+|Added:}} Melee attacks done while airborne mini-crit | ||
|- | |- | ||
| − | | style="background: #f8e2a1;" | {{c|+| | + | | style="background:#f8e2a1;" | {{c|+|Changed:}} Reduce damage penalty vs players to -15% (from -20%) |
|- | |- | ||
| − | | style="background: #f8e2a1;" | {{c| | + | | style="background:#f8e2a1;" | {{c|+|Removed:}} Self-inflicted damage when performing a triple jump |
|- | |- | ||
| − | | style="background: #f8e2a1;" | {{c| | + | | style="background:#f8e2a1;" | {{c|+|Removed:}} Attack speed penalty |
|- | |- | ||
| − | + | | style="background:#f8e2a1;" | {{c|-|Added:}} 50% slower deploy speed penalty | |
| − | |||
| − | | style="background: #f8e2a1;" | {{c| | ||
|- | |- | ||
| − | | style="background: #f8e2a1;" | {{c|-| | + | | style="background:#f8e2a1;" | {{c|-|Changed:}} Triple-jump is now only possible while the {{botignore|bat}} is deployed |
|- | |- | ||
| − | ! style="background: #f8d28c;" colspan=2 rowspan=2 | {{Icon item| | + | ! style="background:#b5b85c;" rowspan=8 | {{class link|Soldier|br=yes|color=black}} |
| − | | style="background: #f8e2a1;" | {{c|+| | + | ! style="background:#f8d28c;" colspan=2 rowspan=2 | {{Icon item|Cow Mangler 5000|icon-size=75px}} <br /> {{item link|Cow Mangler 5000}} |
| + | | style="background:#f8e2a1;" | {{c|+|Removed:}} Cannot be crit boosted | ||
|- | |- | ||
| − | | style="background: #f8e2a1;" | {{c| | + | | style="background:#f8e2a1;" | {{c|-|Added:}} Granted/earned crits will converted to mini-crits instead |
|- | |- | ||
| − | ! style="background: #f8d28c;" colspan=2 rowspan= | + | ! style="background:#f8d28c;" colspan=2 rowspan=2 | {{Icon item|Mantreads|icon-size=75px}} <br /> {{item link|Mantreads}} |
| − | | style="background: #f8e2a1;" | {{c| | + | | style="background:#f8e2a1;" | {{c|+|Added:}} +200% air control when blast jumping |
|- | |- | ||
| − | | style="background: #f8e2a1;" | {{c|+|Changed:}} | + | | style="background:#f8e2a1;" | {{c|+|Changed:}} +75% push-force reduction now includes airblast |
|- | |- | ||
| − | | style="background: #f8e2a1;" | {{c| | + | ! style="background:#f8d28c;" colspan=2 rowspan=4 | {{Icon item|Righteous Bison|icon-size=75px}} <br /> {{item link|Righteous Bison}} |
| + | | style="background:#f8e2a1;" | {{c|=|Note:}} This weapon has been reverted to its previous design | ||
|- | |- | ||
| − | | style="background: #f8e2a1;" | {{c| | + | | style="background:#f8e2a1;" | {{c|+|Changed:}} Projectiles are no longer limited on the number of times they can hit the same target(s) |
|- | |- | ||
| − | + | | style="background:#f8e2a1;" | {{c|+|Changed:}} Projectile velocity increased to 1200hu (from 840hu) | |
| − | |||
| − | | style="background: #f8e2a1;" | {{c| | ||
|- | |- | ||
| − | | style="background: #f8e2a1;" | {{c| | + | | style="background:#f8e2a1;" | {{c|-|Changed:}} Reduced damage per tick to 20 (from 45) |
|- | |- | ||
| − | | style="background: #f8e2a1;" | {{c| | + | ! style="background:#b5b85c;" rowspan=3 | {{class link|Demoman|br=yes|color=black}} |
| + | ! style="background:#f8d28c;" colspan=2 rowspan=3 | {{Icon item|Claidheamh Mòr|icon-size=75px}} <br /> {{item link|Claidheamh Mòr}} | ||
| + | | style="background:#f8e2a1;" | {{c|=|Note:}} This weapon has been reverted to its previous design | ||
|- | |- | ||
| − | + | | style="background:#f8e2a1;" | {{c|+|Added:}} 0.5 second increase in charge duration | |
| − | |||
| − | |||
| − | | style="background: #f8e2a1;" | {{c|+| | ||
|- | |- | ||
| − | | style="background: #f8e2a1;" | {{c| | + | | style="background:#f8e2a1;" | {{c|-|Removed:}} +25 health on kill |
|- | |- | ||
| − | | style="background: #f8e2a1;" | {{c| | + | ! style="background:#b5b85c;" rowspan=11 | {{class link|Heavy|br=yes|color=black}} |
| + | ! style="background:#f8d28c;" rowspan=5 width=128px | {{Icon item|Gloves of Running Urgently|icon-size=75px}} <br /> {{item link|Gloves of Running Urgently}} | ||
| + | ! style="background:#f8d28c;" rowspan=5 width=128px | {{Icon item|Bread Bite|icon-size=75px}} <br /> {{item link|Bread Bite}} | ||
| + | | style="background:#f8e2a1;" | {{c|+|Removed:}} Marked-For-Death effect while active | ||
|- | |- | ||
| − | | style="background: #f8e2a1;" | {{c| | + | | style="background:#f8e2a1;" | {{c|+|Removed:}} 25% damage penalty |
|- | |- | ||
| − | | style="background: #f8e2a1;" | {{c| | + | | style="background:#f8e2a1;" | {{c|-|Added:}} Max health is drained while item is active (-10/sec), and regenerated while holstered |
|- | |- | ||
| − | + | | style="background:#f8e2a1;" | {{c|=|Note:}} Health will regenerate only the amount drained while active - minus any damage taken during that time | |
| − | | style="background: #f8e2a1;" | {{c| | ||
|- | |- | ||
| − | | style="background: #f8e2a1;" | {{c| | + | | style="background:#f8e2a1;" | {{c|=|Note:}} Each time the gloves are deployed, the drain rate is accelerated for a brief period of time. |
|- | |- | ||
| − | ! style="background: #f8d28c;" colspan=2 rowspan= | + | ! style="background:#f8d28c;" colspan=2 rowspan=2 | {{Icon item|Fists of Steel|icon-size=75px}} <br /> {{item link|Fists of Steel}} |
| − | | style="background: #f8e2a1;" | {{c| | + | | style="background:#f8e2a1;" | {{c|-|Added:}} 40% overheal reduction while active |
|- | |- | ||
| − | | style="background: #f8e2a1;" | {{c|-|Added:}} | + | | style="background:#f8e2a1;" | {{c|-|Added:}} 40% healing rate penalty while active |
|- | |- | ||
| − | | style="background: #f8e2a1;" | {{c| | + | ! style="background:#f8d28c;" colspan=2 rowspan=4 | {{Icon item|Eviction Notice|icon-size=75px}} <br /> {{item link|Eviction Notice}} |
| + | | style="background:#f8e2a1;" | {{c|+|Removed:}} 20% damage vulnerability | ||
|- | |- | ||
| − | | style="background: #f8e2a1;" | {{c| | + | | style="background:#f8e2a1;" | {{c|-|Added:}} Max health is drained while item is active (-5/sec), and regenerated while holstered |
|- | |- | ||
| − | + | | style="background:#f8e2a1;" | {{c|=|Note:}} Health will regenerate only the amount drained while active - minus any damage taken during that time | |
| − | |||
| − | | style="background: #f8e2a1;" | {{c| | ||
|- | |- | ||
| − | + | | style="background:#f8e2a1;" | {{c|=|Note:}} Each time the gloves are deployed, the drain rate is accelerated for a brief period of time. | |
| − | |||
| − | | style="background: #f8e2a1;" | {{c| | ||
|- | |- | ||
| − | | style="background: #f8e2a1;" | {{c| | + | ! style="background:#b5b85c;" | {{class link|Engineer|br=yes|color=black}} |
| + | ! style="background:#f8d28c;" colspan=2 | {{Icon item|Rescue Ranger|icon-size=75px}} <br /> {{item link|Rescue Ranger}} | ||
| + | | style="background:#f8e2a1;" | {{c|-|Changed:}} Ranged repairs now consume metal (at a 4-to-1 health-to-metal ratio) | ||
|- | |- | ||
| − | ! style="background: #f8d28c;" colspan=2 rowspan= | + | ! style="background:#b5b85c;" rowspan=5 | {{class link|Medic|br=yes|color=black}} |
| − | | style="background: #f8e2a1;" | {{c| | + | ! style="background:#f8d28c;" colspan=2 rowspan=2 | {{Icon item|Crusader's Crossbow|icon-size=75px}} <br /> {{item link|Crusader's Crossbow}} |
| + | | style="background:#f8e2a1;" | {{c|-|Changed:}} ÜberCharge gain rate reduced in the same way that the Medi Gun's healing (and therefore, ÜberCharge build rate) is - based on the last time the target was in combat | ||
|- | |- | ||
| − | | style="background: #f8e2a1;" | {{c| | + | | style="background:#f8e2a1;" | {{c|=|Note:}} Reduced by a third when 1 - 10 seconds outside of combat, and scales up to normal over 10 - 15 seconds |
|- | |- | ||
| − | | style="background: #f8e2a1;" | {{c| | + | ! style="background:#f8d28c;" colspan=2 rowspan=3 | {{Icon item|Vita-Saw|icon-size=75px}} <br /> {{item link|Vita-Saw}} |
| + | | style="background:#f8e2a1;" | {{c|+|Added:}} Each hit with the Vita-Saw harvests the victim's organs (shown on the HUD) | ||
|- | |- | ||
| − | + | | style="background:#f8e2a1;" | {{c|+|Added:}} On-death, preserve 15% ÜberCharge per Organ harvested. This effect caps at 60%. | |
| − | |||
| − | | style="background: #f8e2a1;" | {{c|+|Added:}} | ||
|- | |- | ||
| − | | style="background: #f8e2a1;" | {{c|-| | + | | style="background:#f8e2a1;" | {{c|-|Removed:}} On death up to 20% of your stored ÜberCharge is retained |
|- | |- | ||
| − | ! style="background: #f8d28c;" colspan=2 rowspan= | + | ! style="background:#b5b85c;" rowspan=7 | {{class link|Sniper|br=yes|color=black}} |
| − | | style="background: #f8e2a1;" | {{c|+|Added:}} | + | ! style="background:#f8d28c;" colspan=2 rowspan=2 | {{Icon item|Razorback|icon-size=75px}} <br /> {{item link|Razorback}} |
| + | | style="background:#f8e2a1;" | {{c|+|Added:}} Shield regenerated after 30 seconds | ||
|- | |- | ||
| − | | style="background: #f8e2a1;" | {{c| | + | | style="background:#f8e2a1;" | {{c|-|Added:}} -100% overheal penalty |
|- | |- | ||
| − | | style="background: #f8e2a1;" | {{c|+| | + | ! style="background:#f8d28c;" colspan=2 rowspan=5 | {{Icon item|Darwin's Danger Shield|icon-size=75px}} <br /> {{item link|Darwin's Danger Shield}} |
| + | | style="background:#f8e2a1;" | {{c|+|Added:}} Afterburn immunity on wearer | ||
|- | |- | ||
| − | | style="background: #f8e2a1;" | {{c| | + | | style="background:#f8e2a1;" | {{c|+|Added:}} +50% fire resistance on wearer |
|- | |- | ||
| − | | style="background: #f8e2a1;" | {{c| | + | | style="background:#f8e2a1;" | {{c|+|Removed:}} 20% explosive damage vulnerability on wearer |
|- | |- | ||
| − | + | | style="background:#f8e2a1;" | {{c|-|Removed:}} +25 max health on wearer | |
| − | |||
| − | | style="background: #f8e2a1;" | {{c|-| | ||
|- | |- | ||
| − | | style="background: #f8e2a1;" | {{c|-| | + | | style="background:#f8e2a1;" | {{c|-|Removed:}} +15% bullet damage resistance on wearer |
|- | |- | ||
| − | ! style="background: # | + | ! style="background:#b5b85c;" rowspan=8 | {{class link|Spy|br=yes|color=black}} |
| − | ! style="background: #f8d28c;" rowspan= | + | ! style="background:#f8d28c;" colspan=2 rowspan=2 | {{Icon item|Ambassador|icon-size=75px}} <br /> {{item link|Ambassador}} |
| − | | style="background: #f8e2a1;" | {{c| | + | | style="background:#f8e2a1;" | {{c|-|Changed:}} Headshot damage is now subjected to distance falloff effects |
|- | |- | ||
| − | | style="background: #f8e2a1;" | {{c|-| | + | | style="background:#f8e2a1;" | {{c|-|Changed:}} Headshots beyond 1200 world units do normal (non-crit) damage |
|- | |- | ||
| − | | style="background: #f8e2a1;" | {{c| | + | ! style="background:#f8d28c;" rowspan=3 | {{Icon item|Your Eternal Reward|icon-size=75px}} <br /> {{item link|Your Eternal Reward}} |
| + | ! style="background:#f8d28c;" rowspan=3 | {{Icon item|Wanga Prick|icon-size=75px}} <br /> {{item link|Wanga Prick}} | ||
| + | | style="background:#f8e2a1;" | {{c|+|Removed:}} Cannot disguise penalty | ||
|- | |- | ||
| − | + | | style="background:#f8e2a1;" | {{c|-|Added:}} Non-kill disguises require (and consume) a full cloak meter | |
| − | | style="background: #f8e2a1;" | {{c| | ||
|- | |- | ||
| − | | style="background: #f8e2a1;" | {{c| | + | | style="background:#f8e2a1;" | {{c|-|Added:}} +33% faster cloak drain rate |
|- | |- | ||
| − | | style="background: #f8e2a1;" | {{c| | + | ! style="background:#f8d28c;" colspan=2 rowspan=3 | {{Icon item|Dead Ringer|icon-size=75px}} <br /> {{item link|Dead Ringer}} |
| + | | style="background:#f8e2a1;" | {{c|+|Removed:}} No cloak meter from ammo boxes when invisible | ||
|- | |- | ||
| − | + | | style="background:#f8e2a1;" | {{c|+|Removed:}} -35% cloak meter from ammo boxes | |
| − | |||
| − | | style="background: #f8e2a1;" | {{c|+| | ||
|- | |- | ||
| − | | style="background: #f8e2a1;" | {{c|-| | + | | style="background:#f8e2a1;" | {{c|-|Added:}} Ammo kits and Dispensers no longer refill the Spy's cloak meter |
|- | |- | ||
| − | ! style="background: #b5b85c;" rowspan=2 | {{ | + | ! style="background:#b5b85c; text-align:left;" rowspan=2 | {{class link|Soldier|color=black}}<br />{{class link|Pyro|color=black}} |
| − | ! style="background: #f8d28c;" colspan=2 rowspan=2 | {{Icon item| | + | ! style="background:#f8d28c;" colspan=2 rowspan=2 | {{Icon item|Reserve Shooter|icon-size=75px}} <br /> {{item link|Reserve Shooter}} |
| − | | style="background: #f8e2a1;" | {{c| | + | | style="background:#f8e2a1;" | {{c|+|Added:}} Attacks on targets flying via the Thermal Thruster mini-crit |
|- | |- | ||
| − | | style="background: #f8e2a1;" | {{c|-|Changed:}} | + | | style="background:#f8e2a1;" | {{c|-|Changed:}} Attacks on targets knocked into the air by Pyro airblast no longer mini-crit |
|- | |- | ||
| − | ! style="background: #b5b85c;" rowspan= | + | ! style="background:#b5b85c; text-align:left;" rowspan=2 | {{class link|Soldier|color=black}}<br />{{class link|Demoman|color=black}} |
| − | ! style="background: #f8d28c;" colspan=2 rowspan= | + | ! style="background:#f8d28c;" colspan=2 rowspan=2 | {{Icon item|B.A.S.E. Jumper|icon-size=75px}} <br /> {{item link|B.A.S.E. Jumper}} |
| − | | style="background: #f8e2a1;" | {{c| | + | | style="background:#f8e2a1;" | {{c|-|Changed:}} Reduced amount of air control while deployed by 50% |
|- | |- | ||
| − | | style="background: #f8e2a1;" | {{c| | + | | style="background:#f8e2a1;" | {{c|-|Changed:}} Removed the ability to re-deploy the parachute once retracted (until the player lands on the ground again) |
|- | |- | ||
| − | | style="background: #f8e2a1;" | {{c|+| | + | ! style="background:#b5b85c; text-align:left;" rowspan=8 | {{class link|Soldier|color=black}}<br />{{class link|Pyro|color=black}}<br />{{class link|Heavy|color=black}}<br />{{class link|Engineer|color=black}} |
| + | ! style="background:#f8d28c;" colspan=2 rowspan=8 | {{Icon item|Panic Attack|icon-size=75px}} <br /> {{item link|Panic Attack}} | ||
| + | | style="background:#f8e2a1;" | {{c|+|Added:}} +50% more pellets per shot | ||
|- | |- | ||
| − | | style="background: #f8e2a1;" | {{c| | + | | style="background:#f8e2a1;" | {{c|+|Added:}} Fires a wide, fixed shot pattern (regardless of server settings) |
|- | |- | ||
| − | | style="background: #f8e2a1;" | {{c|-| | + | | style="background:#f8e2a1;" | {{c|-|Removed:}} 50% faster reload speed |
|- | |- | ||
| − | | style="background: #f8e2a1;" | {{c|-| | + | | style="background:#f8e2a1;" | {{c|-|Added:}} -30% damage penalty |
|- | |- | ||
| − | | style="background: #f8e2a1;" | {{c| | + | | style="background:#f8e2a1;" | {{c|-|Removed:}} Fire rate increases as health decreases |
|- | |- | ||
| − | | style="background: #f8e2a1;" | {{c|=| | + | | style="background:#f8e2a1;" | {{c|=|Changed:}} Shot pattern grows with successive shots, but resets after you stop firing or reload (previously, weapon spread increased as health decreased) |
|- | |- | ||
| + | | style="background:#f8e2a1;" | {{c|=|Removed:}} Hold fire to load up to 4 shells | ||
|} | |} | ||
| Line 614: | Line 671: | ||
</gallery> | </gallery> | ||
| − | == | + | == Katso myös == |
* {{item link|Jungle Inferno Contracts Pass}} | * {{item link|Jungle Inferno Contracts Pass}} | ||
== Ulkoiset linkit == | == Ulkoiset linkit == | ||
| − | * [http://www.teamfortress.com/post.php?id=33662 Welcome to... Mercenary Park!] | + | * [http://www.teamfortress.com/post.php?id=33662 Welcome to... Mercenary Park!] {{lang icon|en}} |
| − | * [http://www.teamfortress.com/post.php?id=33689 Hit the Campaign Trail!] | + | * [http://www.teamfortress.com/post.php?id=33689 Hit the Campaign Trail!] {{lang icon|en}} |
| − | * [http://www.teamfortress.com/post.php?id=33731 Hot Stuff!] | + | * [http://www.teamfortress.com/post.php?id=33731 Hot Stuff!] {{lang icon|en}} |
| − | * [http://www.teamfortress.com/post.php?id=33776 We're Almost Live!] | + | * [http://www.teamfortress.com/post.php?id=33776 We're Almost Live!] {{lang icon|en}} |
| − | * [http://www.teamfortress.com/post.php?id=33847 Jungle Inferno is Live!] | + | * [http://www.teamfortress.com/post.php?id=33847 Jungle Inferno is Live!] {{lang icon|en}} |
| − | * [http://www.teamfortress.com/jungleinferno/ Jungle Inferno Update Day 1] | + | * [http://www.teamfortress.com/jungleinferno/ Jungle Inferno Update Day 1] {{lang icon|en}} |
| − | * [http://www.teamfortress.com/jungleinferno/campaign.php Update Day 2] | + | * [http://www.teamfortress.com/jungleinferno/campaign.php Update Day 2] {{lang icon|en}} |
| − | * [http://www.teamfortress.com/jungleinferno/pyro.php Update Day 3] | + | * [http://www.teamfortress.com/jungleinferno/pyro.php Update Day 3] {{lang icon|en}} |
| − | * [http://www.teamfortress.com/jungleinferno/notes.php Update Day 4] | + | * [http://www.teamfortress.com/jungleinferno/notes.php Update Day 4] {{lang icon|en}} |
| + | |||
{{Jungle Inferno Update Nav}} | {{Jungle Inferno Update Nav}} | ||
{{Major updates nav}} | {{Major updates nav}} | ||
Latest revision as of 03:25, 25 October 2021
 | Tätä sivua ollaan kääntämässä suomeksi. Jos pystyt puhumaan suomea, kirjoita keskustelusivulle tai puhu niille jotka ovat parantaneet sivua (katsomalla sivuhistoriaa). |

| “ | Jos Jurassic Park on opettanut meille jotain, niin se on se että elämä löytää tien. Jos Jurassic Park on opettanut meille kaksi asiaa, niin se on se että elämä löytää tien ja Jurassic Park on hyvä varastaa päivitystä varten. Ja jos Valven lakitiimi on opettanut meille jotain, niin se on se että huutamalla meille siitä he jättivät kertomatta toisen asian minkä Jurassic Park opetti meille.
Jos ihmisten huutaminen on opettanut meille jotain, niin se on se että kovat äänet tekevät meistä niin ahdistuneita että unohdamme missä takaisinpalautinnappi on, joten me painamme vain eteenpäin ja julistamme iloisesti kokonaan alkuperäisidean innoittaman päivityksen jossa tappavan vaaralliset eläimet pakenevat huvipuistosta. Sillä elämä löytää tien, ja se on ainoa asia jonka — TF2 virallinen nettisivu
|
” |
Jungle Inferno -päivitys oli merkittävä päivitys Team Fortress 2:een joka kesti 4 päivää, alkaen 16. lokakuuta 2017 ja lopulta se julkaistiin 20. lokakuuta 2017 päivän viivytyksen jälkeen. Se lisäsi 5 uutta asetta, 5 uutta yhteisön luomaa karttaa, 1 uuden Valven luoman kartan, 7 uutta pilkkaa, 1 uuden tappopilkan, 49 uutta kosmeettista esinettä (tosin 4 kaikkien luokkien esinettä ovat tällä hetkellä julkaisematta), ja useita tasapainotuksia olemassaoleviin aseisiin ja lisäksi myös Pyro-luokkaan. Se myös toi muutoksen sopimusjärjestelmään Sopseuraimella, ja lisäsi sotamaalin asepintojen sijaan.
Sisällysluettelo
Video
Ilmoitukset
Jungle Inferno -päivityksen sivu alkoi virallisesti 16 lokakuuta 2017 niin kuin se ilmoitettiin TF2 virallisen blogin julkaisussa "Welcome to... Mercenary Park!"
Päivituksen kulku
Jungle Inferno -päivitys julkaistiin neljän päivän kuluessa.
- Päivä 1 sisälsi 7 uutta pilkkaa, 6 uutta karttaa, ja lyhyen SFM trailerin.
- Päivä 2 sisälsi sotamaalit ja uuden sopimus-PDAn ilmaisilla ja maksullisilla sopimuksilla, ilmaiset sopimukset antoivat uusia aseita ja maksulliset antoivat verirahaa ja sotamaaleja.
- Päivä 3 sisälsi uudet aseet: Leppymättömän lohikäärme (ensisijainen ase/liekinheitin), Liekittäjän lentoreppu (toissijainen ase/rakettireppu tappopilkalla), Löpölevitin (toissijainen ase/myrkyllinen kaasu), Kuuma korvapuusti (lähitaisteluase/hanska), ja ainoan ei-Pyron aseen päivityksessä, Lohdutusbanaani (toissijainen välipala-ase Heavylle).
- Päivä 4 oli viimeinen päivä, jossa julkaistiin blogipostaus kokonaisilla päivitysmuutoksilla ja julkaisupäivä oli yhden päivän päässä.
Päivä 1
Jungle Inferno -päivitys paljasti yhden uuden Valve-kartan ja 5 yhteisön luomaa karttaa, kuin myös 2 uutta Valve-pilkkaa ja 5 yhteisön luomaa pilkkaa.
Kartat
| Nimi | Kuva | Pelimoodi | Tiedostonimi |
|---|---|---|---|
| Banana Bay | 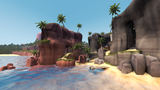
|
Pommilastikisa |
plr_bananabay
|
| Brazil | 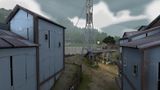
|
Kukkulan kuningas |
koth_brazil
|
| Enclosure | 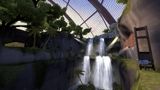
|
Pommilasti
|
pl_enclosure_final
|
| Lazarus | 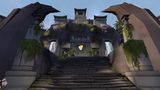
|
Kukkulan kuningas |
koth_lazarus
|
| Mercenary Park | 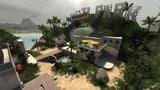
|
Hyökkäys/Puolustus |
cp_mercenarypark
|
| Mossrock | 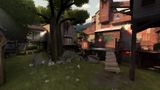
|
Hyökkäys/Puolustus |
cp_mossrock
|
Pilkat
| Pääkokki | ||
| Slaavilainen etunoja | ||
| Punainen puntinnosto | ||
| Banjokilpa | ||
| Pomppiva pora | ||
| Jetijysäytys | ||
| Lumimiesläimäys |
Päivä 2
Päivä 2 paljasti Jungle Inferno -kampanjan ja sotamaalilaatikot jotka tulisivat kampanjan aselöytöjen tilalle ja aselaatikot, 2 uutta kosmetiikkalaatikkoa ja uuden kampanjajärjestelmän. Kampanjassa on 36 uutta sopimusta jotka voidaan tehdä yhteistyössä. Sopimusten tekeminen antaa palkinnoksi joko kampanjakohtaisen esineen tai "verirahaa" jota voidaan käyttää sotamaalien ja laatikoiden ostamiseen.
Kampanja
Jungle Inferno -kampanja vaatii Jungle Inferno -kampanjapassin ostamisen. Sopseurain PDA julkaistiin, joka mahdollistaa kustomoidun sopimusten etenemisen ja pääsyn Palkkasoturipuiston lahjapuotiin. Kaveritulitus on uusi ominaisuus jonka kampanja ja uusi seuruejärjestelmä toi, ja se mahdollistaa sen että pelaajat voivat pelata ystäviensä kanssa/heitä vastaan ja auttaa toisiaan sopimusten tekemisessä jos he ovat samassa Valve serverissä keskenään.
Kosmeettiset esineet
Sarjat
| Monsterimuussaaja |
Kathman-tukka | ||
| Himalajan karvapaita | |||
| Hirmuiset lumihousut |
Työkalut
Toimintoesineet
| Jungle Inferno -SopSeurain |
Sotamaalit
Viidakon verohelpotukset
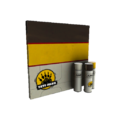 Puistopigmentöity
 Saxton-siloteltu
 Lumimiehekäs
 Lacostettu
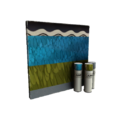 Kaijakuvioitu
 Hedelmäinen
 Anodisoitu aloha
 Bambutettu
 Pantteripilkutettu
 Mannaanankuorinen
 Raivoraitainen


Hornan heräteostokset
 Tulella maalattu
 Limuinen
 Eläinunelma
 Isänmaallinen
 Pätäkkäpäällystetty
 Onnekas
 Tappomerkitty
 Pitsainen
 Kukkakuosinen
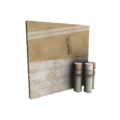 Pahvinen
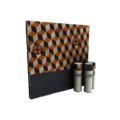 Palkkispläästitty
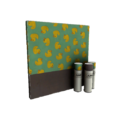 Kumiankkainen
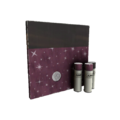 Tähtikuvioinen


Veteraanin iltakokoelma
 Räsymaton räjäyttäjä II
 Metsäsissi II
 Kääritty ylösnousemus II
 Metsäpalo II
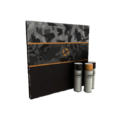 Yölintu II
 Metsien möyhentäjä II
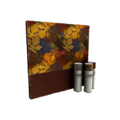 Syksy II
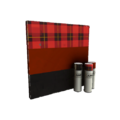 Skottiruutuinen sihtaaja II
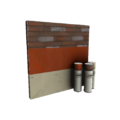 Yhteiskunnan palvelija II
 Kansalaisvelvollisuus II


Sopimussuorittajan välineistö
 Lehmänliekittäjä II
 Ruumiiden räknääjä II
 Perämetsien pumppuhaulikko II
 Hunnutettu hoitaja II
 Terästammi II
 Synkkä seitti II
 Pähkinänsärkijä II
 Pikkupitäjän pettymys II


Saxtonin parhaat
 Lohikäärmeen surma

Päivä 3
Päivä 3 julkaisi 4 uutta asetta Pyrolle, tappopilkan yhdelle Pyron aseista (Liekittäjän lentoreppu), ja välipalaesineen Heaylle, ja muutoksia liekinheittimeen.
Aseet
| Leppymätön lohikäärme | ||
| Löpölevitin | ||
| Kuuma korvapuusti | ||
| Liekittäjän lentoreppu | ||
| Lohdutusbanaani |
Muutetut Luokat
| Class | Changes |
|---|---|
Muutetut aseet
| Class | Weapon | Changes |
|---|---|---|
Liekinheitin + Variants |
||
Päivä 4
Päivä 4 julkaisi päivitysmuutokset Jungle Inferno -päivitykselle, sisältäen erilaisia asemuutoksia, tietoa uusista aseista, useita bugikorjauksia ja korjauksia pelihakuun. Se myös lisäsi ensimmäisen persoonan tutkimismekaniikan kaikkiin aseisiin.
Muutetut Luokat
| Class | Changes |
|---|---|
Muutetut aseet
| Class | Weapon | Changes | |
|---|---|---|---|
Bonk! Atomic Punch |
|||
Krittikola |
|||
Söpönassun sormipyssy |
|||
Lentävä giljotiini |
|||
Nukkumatti |
|||
Atomisoija |
|||
Karjankäristin 5000 |
|||
Miehenpolkijat |
|||
Biisoninpaimennin |
|||
Claidheamh Mòr |
|||
Pikajuoksuhanskat |
Mutanttimuhku |
||
Teräsnyrkit |
|||
Häätöilmoitus |
|||
Pelastuspartiolainen |
|||
Vapahtajan varsijousi |
|||
Vita-saha |
|||
Selkäsuoja |
|||
Darwinin vaarakilpi |
|||
Suurlähettiläs |
|||
Ikuinen palkkiosi |
Mustan magian piikki |
||
Kuolemankello |
|||
Reserviräiskijä |
|||
Liitäjän laskuvarjo |
|||
Paniikkikohtaus |
|||
Päivityksen viivästyminen
Päivityksen odotettuna julkaisupäivänä, Päivä 4, blogipostaus ilmoitti päivityksen viivästymisestä yhdellä päivällä niin että TF-tiimi pystyi tekemään lisää rasitetestaamista.
Trivia
- Viimeisin päivitys jossa oli neljän päivän pituinen järjestelmä päivittäisiä sisältöesikatseluja oli Über-päivitys vuonna 2011.
- Tämä päivitys vaati pisimmän odotuksen kaikista TF2 historian aikana julkaistuista merkittävistä päivityksistä, kestäen 10 kuukautta ja 29 päivää (yhteensä 272 päivää) sen jälkeen kun Smissmas 2016 julkaistiin.
- Useita uusia aseita teasattiin päivinä ennen niiden paljastamista:
- Päivä 1 -päivityssivun lopussa on Löpölevitin maassa, ja taustalla voi nähdä Pyron lentämässä Liekittäjän lentorepulla.
- Päivä 2 -päivityssivulla, asekasassa missä nähdään mihin sotamaalin voi asettaa, taustalla näkyy Leppymätön lohikäärme. Lisäksi rivissä jossa tiimi esittelee uusia kosmeettisia esineitä, Pyron voi nähdä pitelemässä Leppymätöntä lohikäärmettä ja Heavylla on Lohdutusbanaani.
- Päivä 2 -päivityssivun lopussa, Saxton Halen voi nähdä pitelemässä Sopseurainta. Sen ruudussa on kaksi nimeä. Yksi niistä on "Mercenary Park", ja toinen on "Pyroland". Myöhemmin paljastettiin että "Pyroland"-vaihtoehdolla, pelaajat pystyisivät tienaamaan kaikki 4 uutta Pyron asetta ja Heavyn aseen tekemällä kaikki kuusi ilmaista sopimusta. Lisäksi, Saxton Halen olalla voi nähdä papukaijan. Papukaijan päästä heijastuu kolme laseria. Kursorin siirtäminen papukaijan lähelle räjäyttää sen pään jättäen sarjakuvamaisen luun pystyyn, hieman verta Halen olalle ja sulkia leijumaan ilmaan. Kolmoislasertähtäin on viittaus Predator elokuvasarjaan, sillä eponyymiset alienien metsästäjät käyttävät samanlaisia tähtäimiä Plasmacasteriensa tähtäämiseen. Ensimmäisessä Predator-elokuvassa ihmisiä metsästettiin viidakossa. Käytettäessä tarkasteluelementtiä nettisivulla näyttää kuvan nimeksi "parroter."
Galleria

Pelinsisäinen ilmoitus päivityksen julkaisusta.

Day 1. Maps and taunts.

Day 2. Campaign Pass and cosmetics.

Day 4. Final Patch-notes.

Jungle Infernon otsikko Halloween-tapahtuman aikana.

Katso myös
Ulkoiset linkit
- Welcome to... Mercenary Park! (englanniksi)
- Hit the Campaign Trail! (englanniksi)
- Hot Stuff! (englanniksi)
- We're Almost Live! (englanniksi)
- Jungle Inferno is Live! (englanniksi)
- Jungle Inferno Update Day 1 (englanniksi)
- Update Day 2 (englanniksi)
- Update Day 3 (englanniksi)
- Update Day 4 (englanniksi)
| ||||||||||||||||||||||||||||||||||||||||||||||||||||
| ||||||||||||||||||||||||||||||||||||||||||||||||||||||||||||||||||||||||||||||||||||||||||||||||||