Difference between revisions of "Environmental death"
(Added Snowplow on the list of maps with crushing with the details) |
Slimyboi500 (talk | contribs) (→Instant death hazards) |
||
| (323 intermediate revisions by 52 users not shown) | |||
| Line 1: | Line 1: | ||
| − | {{Quotation|'''The | + | {{Redirects here|Hazards|Hazard (disambiguation)|for=other hazards}} |
| − | + | ||
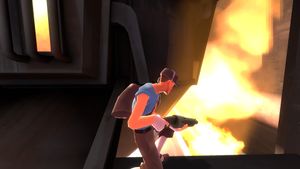
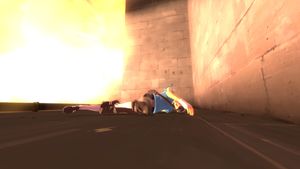
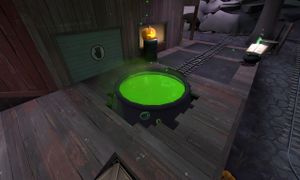
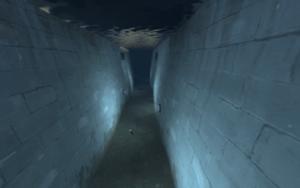
| + | [[File:Foundry envdeath1.jpeg|thumb|right|A naïve [[Scout]] decides to step in the [[Foundry|cauldron]]...]][[File:Foundry envdeath2.jpeg|thumb|...and meets an unfortunate end.]] | ||
| + | {{Quotation|'''The Scout'''|(screaming) Holy crap, this goes on forever.|sound=scout_sf12_falling03.wav}} | ||
| + | |||
| + | '''Enviromental hazards''' are many forms of map effects that can injure, kill, or simply annoy or interfere with players. These effects range from instant kill to health drain to mere distraction. Any [[death]] caused by such map elements, commonly known as an '''environmental death''' or abbreviated '''env death''', can have distinctive [[kill icon]]s and kill messages. Any map effects causing health damage rather than instant death are refered to as '''environmental damage'''. | ||
| + | |||
| + | These hazards have potential use as weapons or deterrents against the enemy team, and many map hazards grant a tactical advantage to those mindful of them. Awareness of these hazards not only prevents needless (and potentially embarrassing) deaths on all levels of play, but can even be taken advantage of to bait or push enemies into a quick demise. | ||
| + | |||
| + | == Instant death hazards == | ||
| + | The following hazards cause instant death regardless of the player's health. They also affect players who are under the effects of invincibility, such as [[Bonk! Atomic Punch]] or an [[ÜberCharge]]. | ||
| − | |||
=== Saw blades === | === Saw blades === | ||
[[File:Environmental death Saw Blades.png|300px|thumb|right|Saw blades found near the middle point of [[Sawmill]].]] | [[File:Environmental death Saw Blades.png|300px|thumb|right|Saw blades found near the middle point of [[Sawmill]].]] | ||
| + | [[File:Gravestone flying saw blade.jpg|300px|thumb|right|Flying saw blade in [[Gravestone]].]] | ||
| − | {{main|Saw | + | {{main|Saw blade}} |
{{Kill notice|extend = yes|width = 25%|weapon = saw|victim = Heavy}} | {{Kill notice|extend = yes|width = 25%|weapon = saw|victim = Heavy}} | ||
| − | '''Saw blades''' are neutral entities that were officially introduced on [[Sawmill]], and would later appear on a number of custom maps. | + | '''Saw blades''' are neutral entities that were officially introduced on [[Sawmill]], and would later appear on a number of [[custom maps]], most notably [[Trainsawlaser]]. They move back and forth along a designated path and instantly kill anyone that comes in contact with them. Cosmetically, a saw blade gets permanently coated in blood if it kills someone, which persists until a new round starts. |
| + | |||
| + | A variant type of saw blade, the '''Flying Saw Blade''' appears in [[Gravestone]]. This hazard flies various routes through the Sawmill, gives short sound cues of its approach, instantly kill players that it hit, and becomes covered in blood after killing someone. | ||
; Maps with saw blades | ; Maps with saw blades | ||
| − | * | + | * {{map link|Bonesaw|Bonesaw (map)}} <small>(Hell)</small> |
| + | * {{map link|Gravestone}} | ||
| + | * {{map link|Odyssey}} (Excavator blade) | ||
| + | * {{map link|Sawmill}} | ||
| + | * {{map link|Soul-Mill}} | ||
{{clr}} | {{clr}} | ||
| − | |||
=== Trains === | === Trains === | ||
[[File:Environmental_death_Train.png|300px|thumb|right|A Train on one track within the middle point of [[Well (Control Point)|Well]].]] | [[File:Environmental_death_Train.png|300px|thumb|right|A Train on one track within the middle point of [[Well (Control Point)|Well]].]] | ||
| Line 24: | Line 38: | ||
{{Kill notice|extend = yes|width = 25%|weapon = train|victim = Medic}} | {{Kill notice|extend = yes|width = 25%|weapon = train|victim = Medic}} | ||
| − | '''Trains''' are neutral entities that | + | '''Trains''' are neutral entities that instantly kill anyone who stands in their path. The arrival of a Train is usually signified by flashing lights at each end of the track and a [[Media:Railroad_bells.wav|bell sound]] playing, which can be heard if players are close enough. In addition, Trains often [[Media:Trainsound.wav|sound horns]] immediately upon arrival, most likely as a final warning for players to get off the track. The train appears to be an EMD [[w:GP38-2|GP38-2]], and its paint scheme strongly resembles [[w:Southern Pacific Transportation Company|Southern Pacific]], which once operated these. |
| + | |||
| + | It should be noted that touching the sides of a train does not damage players; in fact, players can safely ride on top of trains. This is more prominent on [[Freight]], as trains on said map tow multiple carriages which act as occasional blockages. The carriages come in two variations: shipping containers the same size as the train itself, or flat carts which allow players to jump on top of them. | ||
| − | A notable variation of sorts is "Lil' Chew-Chew", the unique, rideable [[Payload#Carts|cart]] on the map [[Frontier]]. If escorted by three or more BLU players, it | + | A notable variation of sorts is "Lil' Chew-Chew", the unique, rideable [[Payload#Carts|cart]] on the map [[Frontier]]. If escorted by three or more BLU players, it "chews" and instantly kills any unfortunate players standing in front of it, regardless of team. |
; Maps with trains | ; Maps with trains | ||
| − | * | + | * {{map link|Banana Bay}} |
| − | * [[ | + | * {{map link|Cactus Canyon}} |
| − | * | + | * {{map link|District}} <small>(as [[w:Subway trains|subway trains]])</small> |
| − | * | + | * {{map link|Freight}} |
| − | * | + | * {{map link|Frontier}} <small>(as rideable cart "Lil' Chew Chew")</small> |
| − | * | + | * {{map link|Megalo}} |
| + | * {{map link|Mossrock}} | ||
| + | * {{map link|Rotunda}} | ||
| + | * {{map link|Snowplow}} | ||
| + | * {{map link|Well (Control Point)}} | ||
| + | * {{map link|Well (Capture the Flag)}} | ||
{{clr}} | {{clr}} | ||
| − | + | === {{anchor|Pitfall}} Pitfalls === | |
| − | === Pitfalls === | ||
[[File:Environmental_death_Fall.png|300px|thumb|right|The Pit on [[Upward]]'s Terminus.]] | [[File:Environmental_death_Fall.png|300px|thumb|right|The Pit on [[Upward]]'s Terminus.]] | ||
{{Kill notice|extend = yes|width = 45%|weapon = skull|victim = Soldier <span style="color:#3e3923;">fell to a clumsy, painful death</span>}} | {{Kill notice|extend = yes|width = 45%|weapon = skull|victim = Soldier <span style="color:#3e3923;">fell to a clumsy, painful death</span>}} | ||
| − | A ''' | + | A '''Pitfall''' is a common environmental hazard that results from a fall into a pit or off of a ledge or cliff into an area that causes Pitfall death. Common Pitfalls include cliffs at map edges, large open pits at the end of certain [[Payload]] tracks, pits that open just before or during [[#Payload Cart explosion|Payload Cart explosions]], and various smaller pit traps set on several maps. |
| + | |||
| + | Different from [[fall damage]], the amount of which is determined by distance falling on to a playable surface, Pitfall acts as an instant kill regardless of the distance fallen or any specific contact with the ground or an object. Pitfalls kill players by way of a {{ent|trigger_hurt}} entity, which constantly and rapidly deals damage once within its area. | ||
| + | |||
| + | The point or depth of a Pitfall death in a fall area is not necessarily the visible surface at the bottom, as Pitfall death can be set at an invisible plane through which the player's ragdoll, [[gibs]], weapon, or [[Ammo|ammo drop]] may continue to fall. | ||
| + | |||
| + | Once the level of death is reached, there is no chance of survival in a Pitfall, not even if the player is under the effect of an [[ÜberCharge]]. Effects that can delay or slow a fall (e.g., [[Jumping]] or [[B.A.S.E. Jumper|Parachute]]) have no effect on a Pitfall, other than to delay the inevitable, unless the area of the Pitfall can be avoided entirely. | ||
| + | |||
| + | Certain items are treated differently in Pitfall deaths, since they cannot be collected once they fall into a Pitfall. The [[Capture the Flag|Intelligence]] is reset if the player dies in a Pitfall while carrying the Intelligence, which also applies to the bomb in [[Mann vs. Machine]], the briefcases in [[Special Delivery (game mode)|Special Delivery]], the reactor core in [[Robot Destruction]], and the JACK in [[PASS Time]]. [[Credits]] that fall down pits are considered collected and are immediately credited to the players. [[Ball-Kicking Boots#Soccer Ball|Soccer Balls]] that fall into Pitfalls remain there for the rest of the round. | ||
| + | |||
| + | ; Maps with Pitfalls<!-- Note to translators: Don't forget to translate the side notes. --> | ||
| + | <div style=display:inline-table><!-- 15 maps per column --> | ||
| + | * {{map link|Altitude}} | ||
| + | * {{map link|Asteroid}} | ||
| + | * {{map link|Bigrock}} | ||
| + | * {{map link|Bloodwater}} | ||
| + | * {{map link|Brazil}} | ||
| + | * {{map link|Bread Space}} | ||
| + | * {{map link|Cactus Canyon}} | ||
| + | * {{map link|Carnival of Carnage}} | ||
| + | * {{map link|Cashworks}} | ||
| + | * {{map link|Cauldron}} | ||
| + | * {{map link|Chilly}} | ||
| + | * {{map link|Coal Town}} | ||
| + | * {{map link|Cursed Cove}} <small>(in Davy Jones's Locker)</small> | ||
| + | * {{map link|DeGroot Keep}} | ||
| + | * {{map link|Double Cross}} | ||
| + | </div><div style=display:inline-table> | ||
| + | * {{map link|Doublefrost}} | ||
| + | * {{map link|Doomsday}} | ||
| + | * {{map link|Enclosure}} | ||
| + | * {{map link|Erebus}} | ||
| + | * {{map link|Frontier}} | ||
| + | * {{map link|Ghost Fort}} | ||
| + | * {{map link|Ghost Town}} | ||
| + | * {{map link|Gorge Event}} | ||
| + | * {{map link|Gravestone}} | ||
| + | * {{map link|Graveyard}} | ||
| + | * {{map link|Hardwood}} | ||
| + | * {{map link|Hassle Castle}} | ||
| + | * {{map link|Hellstone}} | ||
| + | * {{map link|Helltower}} | ||
| + | * {{map link|Hightower}} | ||
| + | </div><div style=display:inline-table> | ||
| + | * {{map link|Hydro}} <small>(Power Plant vs. Radar Dish configuration)</small> | ||
| + | * {{map link|Lazarus}} | ||
| + | * {{map link|Los Muertos}} | ||
| + | * {{map link|Lumberyard}} | ||
| + | * {{map link|Mann Manor}} | ||
| + | * {{map link|Megalo}} | ||
| + | * {{map link|Mercenary Park}} | ||
| + | * {{map link|Moldergrove}} <small>(Underworld)</small> | ||
| + | * {{map link|Monster Bash}} | ||
| + | * {{map link|Mossrock}} | ||
| + | * {{map link|Mountain Lab}} | ||
| + | * {{map link|Nightfall}} <small>(third stage)</small> | ||
| + | * {{map link|Nucleus}} | ||
| + | * {{map link|Offblast}} | ||
| + | * {{map link|Phoenix}} | ||
| + | </div><div style=display:inline-table> | ||
| + | * {{map link|Pit of Death}} | ||
| + | * {{map link|Polar}} | ||
| + | * {{map link|Precipice}} | ||
| + | * {{map link|Rottenburg}} | ||
| + | * {{map link|Sinshine}} | ||
| + | * {{map link|Sinthetic}} | ||
| + | * {{map link|Slasher}} | ||
| + | * {{map link|Snowplow}} | ||
| + | * {{map link|Snowycoast}} | ||
| + | * {{map link|Steel}} | ||
| + | * {{map link|Suijin}} | ||
| + | * {{map link|Thunder Mountain}} <small>(first and third stages)</small> | ||
| + | * {{map link|Upward}} | ||
| + | * {{map link|Wutville}} | ||
| + | </div> | ||
| + | |||
| + | {{clr}} | ||
| + | === {{anchor|Lava}} Infernal Lava === | ||
| + | [[File:Plr hightower event hell left side.jpg|300px|thumb|right|Infernal Lava flowing through [[Helltower#Hell|Hell]].]] | ||
| + | |||
| + | {{Kill notice|extend = yes|width = 25%|weapon = skull|victim = Pyro}} | ||
| − | + | Introduced in [[Helltower]], '''Lava''' is a hazard that appears on several maps, mostly [[Halloween map]]s where it generally represents the infernal fires of Hell. | |
| − | + | Except for the lava flow animation, Lava is indistinguishable from a [[#Pitfall|Pitfall]] in most cases. Death is instant regardless of how short the fall may be. The death animation can be the same as for a Pitfall, but can vary with the particular map. | |
| − | ; Maps with | + | ; Maps with Lava (excluding the extended Halloween Pitfalls, e.g. [[Ghost Fort]]) |
| − | + | * {{map link|Bloodwater}} | |
| − | + | * {{map link|Brimstone|Brimstone (map)}} | |
| − | + | * {{map link|Erebus}} | |
| − | + | * {{map link|Hellstone}} | |
| − | + | * {{map link|Helltower}} | |
| − | + | * {{map link|Sinshine}} | |
| − | + | * {{map link|Skirmish}} | |
| − | + | * {{map link|Terror}} | |
| − | |||
| − | |||
| − | |||
| − | |||
| − | |||
| − | |||
| − | * | ||
| − | * | ||
| − | |||
| − | |||
| − | * | ||
| − | * | ||
| − | * | ||
| − | * | ||
| − | * | ||
| − | * | ||
| − | |||
{{clr}} | {{clr}} | ||
| + | === {{anchor|Underworld waters}} Deadly waters === | ||
| + | [[File:Eyeaduct Loot Island.png|300px|thumb|right|The deadly waters around [[Eyeaduct]]'s Loot Island.]] | ||
| + | |||
| + | {{Kill notice|extend = yes|width = 25%|weapon = skull|victim = Heavy}} | ||
| + | |||
| + | Certain waters in some maps are deadly to the touch. The kill mechanics are similar to a [[#Pitfall|Pitfall]], but, like Lava, no great fall height is necessarily part of the kill zone design. The death animation is a corpse bobbing in the water. | ||
| − | + | Stygian waters surround islands in some [[Underworld]] locations. | |
| − | [[ | ||
| − | + | Whitewater rapids instantly kill anyone stepping or jumping in. | |
| − | + | ; Maps with deadly waters | |
| + | * {{map link|Cauldron}} | ||
| + | * {{map link|Eyeaduct}} | ||
| + | * {{map link|Ghost Fort}} | ||
| + | * {{map link|Gravestone}} | ||
| + | * {{map link|Moonshine Event}} | ||
| + | * {{map link|Pit of Death}} | ||
| + | * {{map link|Terror}} | ||
| − | ; Maps with | + | ; Maps with whitewater: |
| − | * | + | * {{map link|Enclosure}} |
| − | === | + | {{clr}} |
| − | [[File: | + | === Crocodiles === |
| + | [[File:Mercenary_Park_Crocodiles.png|300px|thumb|right|The Crocodile area near First Point in [[Mercenary Park]].]] | ||
| − | {{ | + | {{Kill notice|extend = yes|width = 25%|weapon = crocodile|victim = Heavy}} |
| − | + | '''Crocodiles''', introduced in [[Mercenary Park]], are an animated water hazard with sound effects. | |
| − | + | Coming in contact with water swarming with Crocodiles causes certain death, as a Crocodile leaps out of the water and chomps down, instantly [[Gibs|gibbing]] the player regardless of their health or if under the influence of an [[ÜberCharge]] from a Medic. | |
| − | ; Maps with | + | ; Maps with Crocodiles<sup>*</sup> |
| − | + | * {{map link|Mercenary Park}} | |
| − | + | * {{map link|Laughter}} | |
| − | + | * {{map link|Skirmish}} | |
| − | * | + | * {{map link|Toxic}} |
| − | * | + | * {{map link|Terror}} <small>(inside of [[Non-player characters#Gonzo|Gonzo's]] mouth)</small> |
| − | * | + | :<small><sup>*</sup> excluding maps with inaccessible crocodile props.</small> |
| − | * | ||
| − | * [[ | ||
| − | |||
| − | |||
| − | |||
| − | |||
| − | |||
| − | * | ||
| − | |||
{{clr}} | {{clr}} | ||
| + | === Sharks === | ||
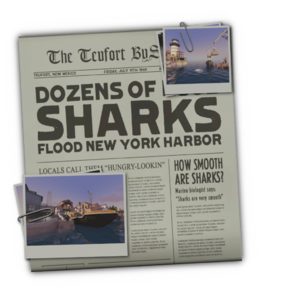
| + | [[File:Menu_photos_koth_sharkbay.png|300px|thumb|right|A news report from the ''The Teufort Bystander'' indicates that there are plenty of sharks around this area.]] | ||
| − | === | + | {{Kill notice|extend = yes|width = 25%|weapon = sharks|victim = Spy}} |
| − | |||
| − | {{ | + | '''Sharks''', introduced in {{map link|Sharkbay}}, are an animated water hazard with sound effects. |
| − | + | Similar to crocodiles, when players attempt to jump into the water, they are killed immediately and [[Gibs|gibbed]]. | |
| − | + | ; Maps with Sharks | |
| + | * {{map link|Sharkbay}} | ||
| − | + | {{clr}} | |
| + | === Piranhas === | ||
| + | '''Piranhas''', introduced in {{map link|Cachoeira}}, are an animated water hazard with sound effects. | ||
| − | + | Similar to crocodiles and sharks, when players attempt to jump into the water, they are killed immediately and [[Gibs|gibbed]]. | |
| − | ; Maps with | + | ; Maps with Piranhas |
| − | * | + | * {{map link|Cachoeira}} |
| − | |||
| − | |||
| − | |||
| − | |||
| − | |||
{{clr}} | {{clr}} | ||
| + | === Gator === | ||
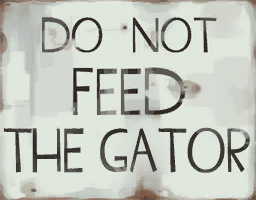
| + | [[File:Gator.png|thumb|right|Sound advice.]] | ||
| − | === Payload Cart explosion === | + | {{Kill notice|extend = yes|width = 25%|weapon = skull|victim = Demoman}} |
| + | |||
| + | A Gator cutout can be found underwater. Contacting the Gator's mouth causes instant death. | ||
| + | |||
| + | ; Maps with Gator | ||
| + | * {{map link|Moonshine Event}} <small>(beneath the Bayou Shipping House)</small> | ||
| + | |||
| + | {{clr}} | ||
| + | === {{Anchor|Cart explosion|cart explosion}} Payload Cart explosion === | ||
[[File:Environmental death Cart Explosion.png|300px|thumb|right|A Payload cart exploding in [[Badwater Basin]].]] | [[File:Environmental death Cart Explosion.png|300px|thumb|right|A Payload cart exploding in [[Badwater Basin]].]] | ||
| Line 146: | Line 242: | ||
{{Kill notice|extend = yes|width = 25%|weapon = skull|victim = Scout}} | {{Kill notice|extend = yes|width = 25%|weapon = skull|victim = Scout}} | ||
| − | During the final (or sole) round of any [[Payload]] or [[Payload Race]] map, the '''[[Payload Cart]]''' | + | During the final (or sole) round of any [[Payload]] or [[Payload Race]] map, the '''[[Payload Cart]]''' explodes either when it reaches the final point, or shortly after, triggering a Payload Cart explosion which kills all players in the surrounding area. In some maps, the resulting explosion creates a crater; falling into it results in a [[#Pitfalls|Pitfall death]]. |
; Maps with Payload Cart explosions | ; Maps with Payload Cart explosions | ||
| − | * | + | <div style=display:inline-table><!-- 15 maps per column --> |
| − | * | + | * {{map link|Badwater Basin}} |
| − | * | + | * {{map link|Banana Bay}} |
| − | * | + | * {{map link|Barnblitz}} |
| − | * | + | * {{map link|Bloodwater}} |
| − | * | + | * {{map link|Bread Space}} |
| − | * | + | * {{map link|Chilly}} |
| − | * | + | * {{map link|Enclosure}} |
| − | * | + | * {{map link|Frontier}} |
| − | * | + | * {{map link|Gold Rush}} |
| − | * | + | * {{map link|Gravestone}} |
| + | * {{map link|Hassle Castle}} | ||
| + | * {{map link|Hellstone}} | ||
| + | * {{map link|Helltower}} | ||
| + | * {{map link|Hightower}} | ||
| + | * {{map link|Hoodoo}} | ||
| + | </div><div style=display:inline-table> | ||
| + | * {{map link|Nightfall}} | ||
| + | * {{map link|Phoenix}} | ||
| + | * {{map link|Pier}} | ||
| + | * {{map link|Pipeline}} | ||
| + | * {{map link|Polar}} | ||
| + | * {{map link|Precipice}} | ||
| + | * {{map link|Snowycoast}} | ||
| + | * {{map link|Thunder Mountain}} | ||
| + | * {{map link|Upward}} | ||
| + | * {{map link|Venice}} | ||
| + | * {{map link|Wutville}} | ||
| + | </div> | ||
{{clr}} | {{clr}} | ||
| − | |||
=== Crushing === | === Crushing === | ||
| − | [[File: | + | [[File:Enviromental death gate.png|300px|thumb|right|The gate of [[DeGroot Keep]].]] |
{{Kill notice|extend = yes|width = 25%|weapon = skull|victim = Demoman}} | {{Kill notice|extend = yes|width = 25%|weapon = skull|victim = Demoman}} | ||
| − | The gate of [[DeGroot Keep]], which opens when points A and B are captured, closes after a certain amount of time, provided the last point isn't captured | + | '''Crushing''' causes instant death to any players unfortunate enough to be trapped between two hard surfaces. |
| + | |||
| + | The gate of [[DeGroot Keep]], which opens when points A and B are both captured, closes after a certain amount of time, provided the last point isn't captured. If a player is standing underneath the gate when it lowers or is too close to the gate when it opens, they are crushed to death. | ||
| − | On Stage 3 of [[Dustbowl]], if the BLU team captures the first control point, the spawn gate in the left spawn leading out to the first control point | + | On Stage 3 of [[Dustbowl]], if the BLU team captures the first control point, the spawn gate in the left spawn leading out to the first control point crushes all players unlucky enough to be caught underneath. |
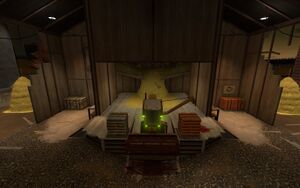
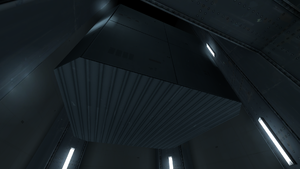
| − | + | On [[Doomsday]] and [[Carnival of Carnage]], the platform that raises the player up to the rocket hatch or ticket lock can crush the player if one is unlucky enough to be standing under it if the Australium or ticket carrier is knocked off, or after the rocket is launched or ticket is captured. | |
| − | + | On [[Egypt]], all gates open and close slowly, and may crush players. Additionally, on Stage 1, there is an interior room on the path from the RED spawn to point A in which the player may get stuck between two doors if the BLU team captures the first control point. A short while after the capture, the ceiling of that room falls slowly and crushes all players unlucky enough to be underneath. | |
| − | + | On [[Hightower]] and [[Helltower]], if one team can prevent the other from pushing the cart to the top of the Capture platform, the platform falls down and crushes any player below it. | |
| − | + | On [[Carnival of Carnage]], if a player walks over the red strongman button, the giant hammer is swung down on top of it, crushing any players too slow to move away in time. The hammer strike also causes a shock wave that launches nearby players into the air, possibly causing a death by [[fall damage]]. | |
| − | In [[Mann vs. Machine]], the [[Tank Robot]]s can crush any players | + | In [[Mann vs. Machine]], the [[Tank Robot]]s can crush any players that are unlucky enough to be caught between it and a wall or prop as it turns. |
| − | + | On [[Snowplow]], the large device used to damage the train can crush players standing below it. | |
| + | On [[Enclosure]], Gate 01 can crush players when it closes after Capture point (B) is captured. | ||
| + | On [[Megalo]], standing under the turntable while it is lowering crushes players. | ||
| − | ; Maps with crushing | + | ; Maps with crushing<!-- Note to translators: Don't forget to translate the side notes. --> |
| − | * | + | <div style=display:inline-table><!-- 15 maps per column --> |
| − | * | + | * {{map link|Bigrock}} |
| − | * | + | * {{map link|Carnival of Carnage}} |
| − | * | + | * {{map link|Coal Town}} |
| − | * | + | * {{map link|Decoy}} |
| − | * | + | * {{map link|DeGroot Keep}} |
| − | * | + | * {{map link|Doomsday}} |
| − | * | + | * {{map link|Dustbowl}} <small>(third stage)</small> |
| − | * | + | * {{map link|Egypt}} |
| − | * | + | * {{map link|Enclosure}} <small>(Gate 01)</small> |
| − | * | + | * {{map link|Farmageddon}} <small>(Gourdon closing)</small> |
| − | * | + | * {{map link|Ghost Town}} |
| − | * | + | * {{map link|Helltower}} |
| − | * | + | * {{map link|Hightower}} |
| + | * {{map link|Mannworks}} | ||
| + | * {{map link|Megalo}} | ||
| + | </div><div style=display:inline-table> | ||
| + | * {{map link|Rottenburg}} | ||
| + | * {{map link|Rotunda}} | ||
| + | * {{map link|Snowplow}} | ||
| + | * {{map link|Sanitarium}} | ||
| + | </div> | ||
{{clr}} | {{clr}} | ||
| − | |||
=== Cauldron fire === | === Cauldron fire === | ||
[[File:Foundry-cauldron-BLU.png|300px|thumb|right|The BLU team's Cauldron in [[Foundry]].]] | [[File:Foundry-cauldron-BLU.png|300px|thumb|right|The BLU team's Cauldron in [[Foundry]].]] | ||
| + | |||
{{Kill notice|extend = yes|width = 25%|weapon = skull|victim = Heavy}} | {{Kill notice|extend = yes|width = 25%|weapon = skull|victim = Heavy}} | ||
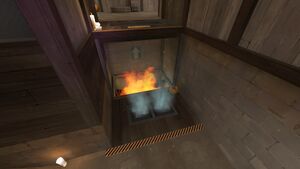
| − | + | The '''cauldron''' is an environmental hazard specific to [[Foundry]], located next to each team's first spawns. Any player who steps into it is instantly killed while aesthetically on [[fire]]. A player that manages to push an enemy into the cauldron receives the [[Foundry achievements|Terminated, Too]] achievement. | |
| − | ; Maps with cauldron | + | ; Maps with cauldron fires |
| − | * | + | * {{map link|Foundry (Control Point)}} |
| − | * | + | * {{map link|Foundry (Capture the Flag)}} |
{{clr}} | {{clr}} | ||
| − | |||
=== Rocket exhaust path === | === Rocket exhaust path === | ||
[[File:Rocket Exhaust.png|300px|thumb|right|The Rocket exhaust path after taking off on [[Doomsday]].]] | [[File:Rocket Exhaust.png|300px|thumb|right|The Rocket exhaust path after taking off on [[Doomsday]].]] | ||
| + | |||
{{Kill notice|extend = yes|width = 25%|weapon = skull|victim = Soldier}} | {{Kill notice|extend = yes|width = 25%|weapon = skull|victim = Soldier}} | ||
| − | The map [[Doomsday]] features a path where, at the end of the round, the | + | The map [[Doomsday]] features a path where, at the end of the round, the exhaust of the rocket emits from the base of the launch pad, pushing any player in the way into a pit located at the end of the route wherein the player suffers a Pitfall. A player from the winning team that manages to push an enemy into this pit receives the [[Astro-chievements|Lift-offed]] achievement. There no injury or push directly underneath the rising rocket, but players that step into the open launch pit suffer a Pitfall. |
| + | |||
| + | On [[Galleria]]. those players that manage to evade the Falling Debris may walk into the launch pit to suffer a Pitfall just as on Doomsday. | ||
| + | |||
| + | On [[Steel]], if RED successfully defends point E until the end of the game, the rocket above the final point ignites and kills anyone underneath its exhaust (players are sucked into the Pitfall). | ||
| − | On [[ | + | On [[Canaveral]], when the rocket launches, players under the rocket's exhaust are killed, however this kill effect is activated even for [[stalemate]]s when the rocket does not launch. |
| − | ; Maps with Rocket exhaust | + | ; Maps with Rocket exhaust paths |
| − | * | + | * {{map link|Canaveral}} |
| − | * | + | * {{map link|Doomsday}} |
| + | * {{map link|Galleria}}<!-- according to developer --> | ||
| + | * {{map link|Steel}} | ||
{{clr}} | {{clr}} | ||
| − | |||
=== Grinder === | === Grinder === | ||
[[File:Environmental death grinder.jpg|300px|thumb|right|The grinder seen on [[Mannhattan]].]] | [[File:Environmental death grinder.jpg|300px|thumb|right|The grinder seen on [[Mannhattan]].]] | ||
| + | [[File:Farmageddon_Combine.jpeg|300px|thumb|right|The Combine Harvester.]] | ||
| + | |||
{{Kill notice|extend = yes|width = 25%|weapon = skull|victim = Pyro}} | {{Kill notice|extend = yes|width = 25%|weapon = skull|victim = Pyro}} | ||
| − | The | + | The '''Grinder''' (and reskins) is an environmental death that happens when a player gets sucked into a grinding machine. Players killed in this way cause one of two [[Media:grinderhuman_01.wav|loud]] [[Media:grinderhuman_02.wav|sounds]] of flesh being crushed to play. |
| + | |||
| + | On [[Mannhattan]], this death can also happen to [[Robots]], which causes one of three [[Media:Grinderbot_01.wav|unique]] [[Media:Grinderbot_02.wav|death]] [[Media:Grinderbot_03.wav|sounds]] of grinding metal to play. Additionally, the Manhattan and Distillery grinders feature an inconspicuous [[#Banana Peel|Banana Peel]] positioned near the machine, which pushes players (or robots) directly into the grinder. | ||
; Maps with Grinders | ; Maps with Grinders | ||
| − | * | + | * {{map link|Distillery}} |
| + | * {{map link|Enclosure}} <small>(hidden under the plants in the "raptor" enclosure)</small> | ||
| + | * {{map link|Farmageddon}} <small>(Combine Harvester reel)</small> | ||
| + | * {{map link|Mannhattan}} | ||
| + | * {{map link|Snowplow}} | ||
| + | * {{map link|Sinthetic}} | ||
| + | * {{map link|Rumford}} | ||
{{clr}} | {{clr}} | ||
| + | === Tyrannosaurus Rex === | ||
| + | [[File:Enclosure T-Rex closing roar.png|300px|thumb|right|T-Rex encounter on [[Enclosure]].]]<!-- It kills after the payload explosion, sharing features with Saw blades, Cauldron fire, and Train --> | ||
| + | {{Kill notice|extend = yes|width = 25%|weapon = skull|victim = Scout}} | ||
| + | |||
| + | '''Tyrannosaurus Rex''' is an environmental death specific to the final point "T-REX" of the third stage of [[Enclosure]]. When the cart has been pushed a short distance onto the platform in front of the Tyrannosaurus Rex enclosure's gate, an immediate [[#Payload Cart explosion|Payload Cart explosion]] is triggered. A second or so later, the T-Rex slams the gate open, killing and knocking back anyone who has rushed up to see Rexxy. T-Rex steps halfway into the room, amidst smoke and flames, killing any close players and letting out a climatic roar. Any player that then runs up to the Tyrannosaurus Rex during [[Match outcomes#Humiliation|Humiliation]] is instantly killed and knocked back. | ||
| + | |||
| + | ; Maps with Tyrannosaurus Rex | ||
| + | * {{map link|Enclosure}} | ||
| + | |||
| + | {{clr}} | ||
| + | === Big Mama === | ||
| + | {{Kill notice|extend = yes|width = 25%|weapon = skull|victim = Pyro}}<!-- | ||
| + | no need to repeat what is more appropriately said on the map page. | ||
| + | -->'''[[Bread Space#BigMama|Big Mama]]''' is an environmental death specific to the final point of [[Bread Space]] that causes instant death when asleep, as well as [[Gibs|gibbing]] players when awake ([[Bread Space#BigMama|''See map page'']]). | ||
| + | |||
| + | ; Maps with Big Mama | ||
| + | * {{map link|Bread Space}} | ||
| + | |||
| + | {{clr}} | ||
| + | === Bubbling Cauldron === | ||
| + | [[File:Bubbling Cauldron.jpeg|300px|thumb|right|Bubbling Cauldron.]] | ||
| + | |||
| + | {{Kill notice|extend = yes|width = 25%|weapon = skull|victim = Heavy}} | ||
| + | |||
| + | '''Bubbling Cauldron''' is a Halloween environmental death hazard. Any player that steps around the Bubbling Cauldron suffers health drain, while falling into the Bubbling Cauldron suffers instant death and knock back. When the Bubbling Cauldron is used as the final point on a Payload map, the Bubbling Cauldron has a unique [[#Payload Cart explosion|killing explosion]]. | ||
| + | |||
| + | In [[Cauldron]], standing on or jumping into the Cauldron as it is spewing out [[#Fireballs|Fireballs]] instantly kills the player. | ||
| + | |||
| + | ; Maps with a Bubbling Cauldron | ||
| + | * {{map link|Cauldron}} | ||
| + | * {{map link|Gravestone}} | ||
| + | |||
| + | {{clr}} | ||
| + | === Pendulum Blades === | ||
| + | [[File:Pendulum_Blades.jpeg|300px|thumb|right|Hallway of Pendulum Blades.]] | ||
| + | |||
| + | {{Kill notice|extend = yes|width = 25%|weapon = skull|victim = Pyro}} | ||
| + | |||
| + | '''Pendulum Blades''' are neutral entities that were officially introduced on [[Monster Bash]]. They swing back and forth and instantly kill anyone that comes in contact with them. Cosmetically, a blade gets permanently coated in blood if it kills someone, which persists until a new round starts. | ||
| + | |||
| + | ; Maps with a Pendulum Blade | ||
| + | * {{map link|Monster Bash}} | ||
| + | |||
| + | {{clr}} | ||
| + | === Fire Pit === | ||
| + | [[File:20181030140854_1.jpg|300px|thumb|right|The Fire Pits]] | ||
| + | |||
| + | {{Kill notice|extend = yes|width = 25%|weapon = skull|victim = Pyro}} | ||
| + | |||
| + | '''Fire Pit''' is a Halloween environmental death hazard found on [[Cauldron]]. Any player that steps into it is instantly killed. | ||
| + | |||
| + | ; Maps with a Fire Pit | ||
| + | * {{map link|Cauldron}} | ||
| + | |||
| + | {{clr}} | ||
| + | === Falling Elevator === | ||
| + | [[File:Breadspace_elevator_falling.png|300px|thumb|right|The Falling Elevator]] | ||
| + | |||
| + | {{Kill notice|extend = yes|width = 25%|weapon = skull|victim = Pyro}} | ||
| + | |||
| + | '''Elevator''' is a environmental death hazard found on [[Bread Space]]. It is a malfunctioning elevator falling down at high speeds. Any player that is hit by the bottom of the elevator instantly dies from the impact, and standing on the elevator drags the player down into a death pit. | ||
| + | |||
| + | ; Maps with a Falling Elevator | ||
| + | * {{map link|Bread Space}} | ||
| + | |||
| + | === Helicopter Blades === | ||
| + | [[File:Cachoeira helipad.png|300px|thumb|right|The helicopter on [[Cachoeira]].]] | ||
| + | |||
| + | {{Kill notice|extend = yes|width = 30%|weapon = helicopter blades|victim = Soldier}} | ||
| + | |||
| + | The spinning blades of a helicopter are present on the maps [[Cachoeira]] and [[Embargo]]. On Cachoeira, the helicopter's blades will remain stained red for the rest of the round. | ||
| + | |||
| + | ; Maps with Helicopter Blades | ||
| + | * {{map link|Cachoeira}} | ||
| + | * {{map link|Embargo}} | ||
| + | |||
| + | === Nuclear Bomb Explosion === | ||
| + | [[File:Megaton Nuke.png|300px|thumb|right|The Explosion on [[Megaton]].]] | ||
| + | |||
| + | {{Kill notice|extend = yes|width = 30%|weapon = megaton explosion|victim = Demoman}} | ||
| + | |||
| + | The nuclear bomb explosion is present on the map [[Megaton]]. At the end of the round, a nuclear bomb is dropped on to the map, killing everyone that is still alive. | ||
| + | |||
| + | ; Maps with a Nuclear Bomb Explosion | ||
| + | * {{map link|Megaton}} | ||
| + | |||
| + | {{clr}} | ||
| + | |||
| + | == Non-instant death hazards == | ||
| + | These environmental hazards do not kill players instantly, but can eventually cause environmental death. | ||
=== Lasers === | === Lasers === | ||
[[File:Environmental death lasers.jpg|300px|thumb|right|The lasers seen on [[Asteroid]].]] | [[File:Environmental death lasers.jpg|300px|thumb|right|The lasers seen on [[Asteroid]].]] | ||
| + | |||
{{Kill notice|extend = yes|width = 25%|weapon = skull|victim = Medic}} | {{Kill notice|extend = yes|width = 25%|weapon = skull|victim = Medic}} | ||
| − | + | '''Lasers''' are an environmental death specific to [[Asteroid]] that move up and down along a designated path. Players who come into contact with them let off visible "sparks" and have 200 damage dealt to them, though it can partially be resisted with the [[Battalion's Backup]] buff to deal less damage. | |
| + | |||
| + | They can also be harmlessly passed through while under the effects of the standard ÜberCharge or Bonk! Atomic Punch. | ||
; Maps with Lasers | ; Maps with Lasers | ||
| − | * [[Asteroid]] | + | * {{map link|Asteroid}} |
| + | |||
| + | {{clr}} | ||
| + | === {{anchor|Health drain lava|Lava fire}} Lava fire === | ||
| + | {{Kill notice|extend = yes|width = 25%|weapon = skull|victim = Heavy}} | ||
| + | {{Kill notice|extend = yes|width = 25%|weapon = fire|victim = Heavy}} | ||
| + | |||
| + | Introduced in [[Hellfire]], '''Lava fire''' is a [[Fire]] effect rather than an instant kill. When touching this type of Lava, death is not instant for players at full health, but can occur within a very few seconds allowing a chance to walk, [[jump]], or [[Grappling Hook|grapple]] out. In direct contact with this Lava, players are set on fire, suffering rapid damage similar to a [[Flame Thrower]]. Players that succeed in leaving this Lava suffer seconds of [[afterburn]]; as such, the kill notice can indicate a fire kill. Naturaly, Pyros have some resistance and do not suffer Lava fire afterburn. | ||
| + | |||
| + | ; Maps with Lava fire | ||
| + | * {{map link|Hellfire}} | ||
| + | * {{map link|Skirmish}} | ||
| + | |||
| + | {{clr}} | ||
| + | === Fire === | ||
| + | [[File:Egypt_03.png|300px|thumb|right|Torches and braziers at the BLU spawn point on [[Egypt]].]] | ||
| + | |||
| + | {{Kill notice|extend = yes|width = 25%|weapon = skull|victim = Spy}} | ||
| + | |||
| + | '''Environmental fire''' is different from [[Flame Thrower]] fire or other fire damage produced by players, as it does not result in an [[Fire|afterburn]] effect. Instead, environmental fire slowly damages the player's health only as long as they stand directly in the hazardous zone. | ||
| + | |||
| + | Environmental fire does not ignite [[Sniper]] arrows. | ||
| + | |||
| + | ; Maps with environmental fires | ||
| + | * {{map link|Bonesaw|Bonesaw (map)}} <small>(flaming barrels)</small> | ||
| + | * {{map link|Egypt}} <small>(torches and braziers)</small> | ||
| + | * {{map link|Coal Pit}} <small>(flaming barrels)</small> | ||
| + | * {{map link|Toxic}} <small>(flaming barrels)</small> | ||
| + | |||
| + | {{clr}} | ||
| + | === Fireballs === | ||
| + | {{Redirects here|Fireballs|Magic spells#Regular Magic Spells|l1=the Fireball magic spell}} | ||
| + | [[File:Hellfire plume 01.PNG|300px|thumb|right|A "Fireball" plume in [[Hellfire]].]] | ||
| + | |||
| + | {{Kill notice|extend = yes|width = 25%|weapon = skull|victim = Pyro}} | ||
| + | |||
| + | '''Fireballs''', introduced in [[Hellfire]], are rising plumes of [[Projectiles#Flame|Flame]] that cause [[fire]] damage to any player coming in contact with it. | ||
| + | |||
| + | The amount of damage a player receives from a Fireball broadly corresponds to the player's base class health; that is, each player that stands in full contact with the center of the entire plume loses over half of its health regardless of class. Each class (except [[Pyro]]) also suffers brief [[afterburn]] from even the slightest contact with the plume. | ||
| + | |||
| + | Fireballs do not ignite [[Sniper]] arrows. | ||
| + | |||
| + | Another type of Fireball, introduced in [[Cauldron]], has a chance of spewing out of the cauldron when the point is capped. These Fireballs rain over a large portion of the map, dealing large amounts of damage to unsuspecting players. However, these Fireballs do not cause [[afterburn]]. | ||
| + | |||
| + | ; Maps with Fireballs | ||
| + | * {{map link|Cauldron}} | ||
| + | * {{map link|Hellfire}} | ||
| + | |||
| + | {{clr}} | ||
| + | === Drowning === | ||
| + | [[File:Environmental death Drowning.png|300px|thumb|right|Water corridors on Well.]] | ||
| + | |||
| + | {{main|Water}} | ||
| + | |||
| + | {{Kill notice|extend = yes|width = 25%|weapon = skull|victim = Pyro}} | ||
| + | |||
| + | Players under deep '''water''' (water in which the player is completely submerged) have a period of approximately 12 seconds before they begin to suffocate. Failure to rise above water causes them to continually lose 5 health every second until they drown. Any health lost by suffocation slowly regenerates at a rate of 10 health every 2 seconds as soon as a player reaches the surface. Going back underwater, however, ceases health regeneration until the player surfaces again. | ||
| + | |||
| + | ; Maps with deep water<!-- Note to translators: Don't forget to translate the side notes. --> | ||
| + | <div style=display:inline-table><!-- 15 maps per column --> | ||
| + | * {{map link|2Fort}} | ||
| + | * {{map link|2Fort Invasion}} | ||
| + | * {{map link|Asteroid}} | ||
| + | * {{map link|Badlands (Arena)}} | ||
| + | * {{map link|Badlands (King of the Hill)}} | ||
| + | * {{map link|Banana Bay}} | ||
| + | * {{map link|Canaveral}} | ||
| + | * {{map link|Carnival of Carnage}} | ||
| + | * {{map link|Doomsday}} | ||
| + | * {{map link|Freight}} | ||
| + | * {{map link|Lakeside}} | ||
| + | * {{map link|Moonshine Event}} | ||
| + | * {{map link|Nightfall}} <small>(third stage)</small> | ||
| + | * {{map link|Pipeline}} <small>(third stage)</small> | ||
| + | * {{map link|Powerhouse}} | ||
| + | * {{map link|Ravine}} | ||
| + | </div><div style=display:inline-table> | ||
| + | * {{map link|Sawmill}} | ||
| + | * {{map link|Thunder Mountain}} <small>(second stage)</small> | ||
| + | * {{map link|Watergate}} | ||
| + | * {{map link|Well (Control Point)}} | ||
| + | </div> | ||
| + | |||
| + | {{clr}} | ||
| + | === Shrinking Water === | ||
| + | {{Kill notice|extend = yes|width = 25%|weapon = skull|victim = Heavy}} | ||
| + | |||
| + | '''Shrinking Water''' is a fast-moving wall of water that closes in, shrinking the playable space. When entered, the player starts to drown at a rapid rate; if not acted upon quickly, the player soon drowns. | ||
| + | |||
| + | ; Maps with Shrinking Water | ||
| + | * {{map link|Cursed Cove}} | ||
| + | |||
| + | {{clr}} | ||
| + | === Health drain === | ||
| + | {{Kill notice|extend = yes|width = 25%|weapon = skull|victim = Demoman}} | ||
| + | |||
| + | '''Health drain''' is a steady or increasing rate of health loss experienced in one or more specific areas of particular maps. Basic examples are Underworld locations in certain [[Halloween map]]s. The effect is also experienced inside the flying saucer in [[Probed]]. The drain is a damage-over-time effect similar to the effects of [[bleeding]] or [[Fire|afterburn]]; but, it is neither triggered nor time-limited. Health drain occurs only when a player enters a specific area and continues only as long as the player does not leave the area or until the player is killed. | ||
| + | |||
| + | ; Maps with Health drain<!-- Note to translators: Don't forget to translate the side notes. --> | ||
| + | <div style=display:inline-table><!-- 15 maps per column --> | ||
| + | * {{map link|Bloodwater}} <small>(Purgatory)</small> | ||
| + | * {{map link|Brimstone|Brimstone (map)}} <small>(Hell Island)</small> | ||
| + | * {{map link|Cauldron}} <small>(Underworld)</small> | ||
| + | * {{map link|Eyeaduct}} <small>(Purgatory)</small> | ||
| + | * {{map link|Erebus}} <small>(Underworld)</small> | ||
| + | * {{map link|Gravestone}} <small>(Underworld and Cauldron Edge)</small> | ||
| + | * {{map link|Hellstone}} <small>(Underworld)</small> | ||
| + | * {{map link|Krampus}} <small>(Forest)</small> | ||
| + | * {{map link|Los Muertos}} <small>(Underworld)</small> | ||
| + | * {{map link|Monster Bash}} <small>(Underworld)</small> | ||
| + | * {{map link|Moonshine Event}} <small>(Underworld)</small> | ||
| + | * {{map link|Pit of Death}} <small>(Underworld)</small> | ||
| + | * {{map link|Probed}} <small>(Flying Saucer)</small> | ||
| + | * {{map link|Slasher}} <small>(Underworld)</small> | ||
| + | * {{map link|Spookeyridge}} <small>(Underworld)</small> | ||
| + | * {{map link|Terror}} <small>(Underworld)</small> | ||
| + | </div> | ||
| + | |||
| + | {{clr}} | ||
| + | === Boiling waters === | ||
| + | [[File:Sulfur_Point_D.png|300px|thumb|right|The boiling water at point D on [[Sulfur]].]] | ||
| + | |||
| + | {{Kill notice|extend = yes|width = 25%|weapon = skull|victim = Heavy}} | ||
| + | |||
| + | Boiling water emits steam and bubbles from its surface. As long as a player is in contact with the boiling water, the player's health is drained until killing them. | ||
| + | |||
| + | All players are invulnerable to the boiling water after the Point A is captured. | ||
| + | |||
| + | ; Maps with Boiling waters | ||
| + | * {{map link|Sulfur}} | ||
| + | |||
| + | {{clr}} | ||
| + | === Steam === | ||
| + | [[File:Brimstone Steam 03.png|300px|thumb|right|Hellish cloud of lethal steam on [[Brimstone (map)|Brimstone]].]] | ||
| + | |||
| + | {{Kill notice|extend = yes|width = 25%|weapon = skull|victim = Heavy}} | ||
| + | |||
| + | '''Steam''', '''volcanic gas''', or '''poison gas''' is a damage-over-time effect introduced on [[Brimstone (map)|Brimstone]]. The time and area of effect are indicated by a rising cloud of vapor and fluid splashes (compare with [[Pumpkin bomb]] explosion splash). Players that enter the cloud suffer damage-over-time so long as they survive and remain in the cloud. | ||
| + | |||
| + | ; Maps with steam | ||
| + | * {{map link|Brimstone|Brimstone (map)}} | ||
| + | |||
| + | {{clr}} | ||
| + | === Acid === | ||
| + | {{Kill notice|extend = yes|width = 25%|weapon = skull|victim = Heavy}} | ||
| + | |||
| + | '''Acid''' is a bright green liquid inside the Giant Pumpkin. As long as a player is in contact with the acid, the player's health is drained until killing them. | ||
| + | |||
| + | ; Maps with Acid | ||
| + | * {{map link|Farmageddon}} | ||
{{clr}} | {{clr}} | ||
| + | === Toxic Waste === | ||
| + | [[File:VSH Nucleus 01.png|300px|thumb|right|Deadly pit of toxic waste on [[Nucleus VSH]].]] | ||
| + | |||
| + | {{Kill notice|extend = yes|width = 25%|weapon = skull|victim = Medic}} | ||
| + | |||
| + | '''Toxic Waste''' is a bright green liquid filling the central area, but also spilled in places around the map, each just as deadly. | ||
| + | |||
| + | Damage taken increases exponentially based on time spent in contact with toxic waste as opposed to a fixed amount over time. This accumulated damage per tick persists even after having left the toxic waste, meaning that entering the toxic waste again continues dealing damage from where the amount stopped. | ||
| − | === | + | ; Maps with Toxic Waste |
| − | {{ | + | * {{map link|Nucleus VSH}} |
| − | [[File: | + | |
| − | {{Kill notice|extend = yes|width = 25%|weapon = | + | {{clr}} |
| + | === Saw Blade Cart === | ||
| + | {{Kill notice|extend = yes|width = 25%|weapon = saw|victim = Scout}} | ||
| + | |||
| + | '''Saw Blade Carts''' are a type of [[Payload#Carts|Payload cart]] equipped with a saw blade on its front. While the sides of the saw blades are harmless (as well as the rest of the cart), the front and top deal 45 damage per tick to any players who make contact with them, regardless of their teams. | ||
| + | |||
| + | A player who is hurt by a cart's saw blade causes it to become bloodied (a purely cosmetic effect), and those who die from it are turned into [[gibs]]. | ||
| + | |||
| + | ; Maps with Saw Blade Carts | ||
| + | * {{map link|Bonesaw|Bonesaw (map)}} | ||
| + | * {{map link|Hacksaw}} | ||
| + | |||
| + | {{clr}} | ||
| + | === {{anchor|Pumpkin bombs}} Pumpkin Bombs === | ||
| + | {{merge|Pumpkin bomb|section=Talk:Environmental death#Merge Pumpkin bomb and all of the reskins with Pumpkin bomb}} | ||
| + | [[File:Environmental death Pumpkinbomb.png|300px|thumb|right|A Pumpkin bomb on [[Harvest Event]] exploding.]] | ||
| + | |||
| + | {{main|Pumpkin bomb}} | ||
| + | |||
| + | {{Kill notice|extend = yes|width = 25%|weapon = pumpkin|victim = Sniper}} | ||
| + | |||
| + | '''Pumpkin Bombs''' and reskins are special objects found on all [[Halloween map]]s except [[Ghost Town]] ([[Mann vs. Machine]]) and [[Monster Bash]].<!-- Halloween event activation is not necessary for Pumpkin Bombs. --> Pumpkin Bombs are rigged with explosives and detonators visible on their exteriors from certain angles. Their detonators occasionally [[Self-illumination|glow]]. | ||
| + | |||
| + | Once a Pumpkin Bomb receives any amount of damage from any source, or is hit by a projectile which would not normally damage anything (for example, the [[Rocket Jumper]]'s projectiles and [[Mad Milk]]), it triggers an explosion, dealing heavy damage to all players near it. Rather than instant kill, each type does a set damage; Salmann egg sacks doing some of the lightest damage and Explosive Barrels doing very heavy damage. Therefore, each type is survivable given either invulnerability or sufficient health plus overheal and can be used for an explosive [[Jumping|jump]]. | ||
| + | |||
| + | Pumpkin Bombs should not be confused with [[Halloween pumpkin]]s. A simple way to tell them apart is that Pumpkin Bombs do not move, whereas Halloween Pumpkins rotate similar to Health packs or Ammo crates. Pumpkin Bombs always spawn in the same spots, while Halloween Pumpkins drop where a player is killed. | ||
| + | |||
| + | Pumpkin Bombs should also not be confused with [[Magic spells#Regular Magic Spells|Pumpkin MIRV]], a [[Magic spells|magic spell]]. | ||
| + | |||
| + | ; Maps with Pumpkin Bombs | ||
| + | <div style=display:inline-table><!-- 15 maps per column --> | ||
| + | * {{map link|Bloodwater}} | ||
| + | * {{map link|Brimstone|Brimstone (map)}} | ||
| + | * {{map link|Carnival of Carnage}} | ||
| + | * {{map link|Cauldron}} | ||
| + | * {{map link|Eyeaduct}} | ||
| + | * {{map link|Erebus}} | ||
| + | * {{map link|Farmageddon}} | ||
| + | * {{map link|Ghost Fort}} | ||
| + | * {{map link|Gorge Event}} | ||
| + | * {{map link|Gravestone}} | ||
| + | * {{map link|Graveyard}} | ||
| + | * {{map link|Los Muertos}} | ||
| + | * {{map link|Harvest Event}} | ||
| + | * {{map link|Hellstone}} | ||
| + | * {{map link|Helltower}} | ||
| + | </div><div style=display:inline-table> | ||
| + | * {{map link|Mann Manor}} | ||
| + | * {{map link|Maple Ridge Event}} | ||
| + | * {{map link|Megalo}} | ||
| + | * {{map link|Moldergrove}} | ||
| + | * {{map link|Moonshine Event}} | ||
| + | * {{map link|Pit of Death}} | ||
| + | * {{map link|Precipice}} | ||
| + | * {{map link|Sinshine}} | ||
| + | * {{map link|Sinthetic}} | ||
| + | * {{map link|Slasher}} | ||
| + | * {{map link|Terror}} | ||
| + | </div> | ||
| + | |||
| + | |||
| + | ; Pumpkin Bomb reskinned variants | ||
| + | <gallery> | ||
| + | File:Pumpkinbomb laughter.png|200px|thumb|right|A Dynamite Balloon on [[Laughter]]. | ||
| + | File:Explosive_Barrel.png|200px|thumb|right|An Explosive Barrel on [[Cursed Cove]]. | ||
| + | File:Alien_walker_environmental_death.png|200px|thumb|right|An Alien Walker on [[2Fort Invasion]]. | ||
| + | File:Coal Pit explosive snowman.png|200px|thumb|right|A Snowman Bomb on [[Coal Pit]]. | ||
| + | File:Slime_salmann_eggs.png|200px|thumb|right|Some Salmann egg sacks on [[Slime]]. | ||
| + | </gallery> | ||
| + | |||
| + | {{clr}} | ||
| + | ==== Dynamite Balloons ==== | ||
| + | {{Kill notice|extend = yes|width = 25%|weapon = skull|victim = Sniper}} | ||
| + | |||
| + | '''Dynamite Balloons''' or '''TNT Bombs''' appear in [[Laughter]]. They explode when damaged, similar to the [[#Pumpkin Bombs|Pumpkin bombs]] and produce the sound of children laughing when destroyed. | ||
| + | |||
| + | ; Maps with Dynamite Balloons | ||
| + | * {{map link|Laughter}} | ||
| + | |||
| + | {{clr}} | ||
| + | ==== Explosive Barrels ==== | ||
| + | {{Kill notice|extend = yes|width = 25%|weapon = skull|victim = Heavy}} | ||
| − | + | '''Explosive Barrels''' appear in [[Cursed Cove]]. They explode when damaged, similar to the [[#Pumpkin bombs|Pumpkin bombs]]. However, their damage is much greater, capable of instantly killing anyone albeit in a smaller range. [[Jumping]] from the explosion is only possible under the effects of [[ÜberCharge|Invulnerability]]. | |
| − | + | '''Maps with Explosive Barrels''' | |
| − | * | + | * {{map link|Cursed Cove}} |
| − | |||
{{clr}} | {{clr}} | ||
| + | ==== Alien Walkers ==== | ||
| + | {{Kill notice|extend = yes|width = 25%|weapon = skull|victim = Sniper}} | ||
| − | === | + | '''Alien Walkers''' are placed around the Invasion maps, which explode after being damaged, similar to [[#Pumpkin Bombs|Pumpkin bombs]]. |
| − | {{ | + | |
| − | [[ | + | ; Maps with Alien Walkers |
| − | {{Kill notice|extend = yes|width = | + | * {{map link|2Fort Invasion}} |
| + | * {{map link|Probed}} | ||
| + | |||
| + | {{clr}} | ||
| + | ==== {{anchor|Explosive Snowmenn|Explosive Snowmann|Snowmann|Snowmenn|Snowman Bomb}} Snowman Bombs ==== | ||
| + | {{Kill notice|extend = yes|width = 25%|weapon = skull|victim = Pyro}} | ||
| + | |||
| + | '''Snowman Bombs''', also known as '''Snowmenn''', appear in some [[Christmas map]]s. They explode when damaged, similar to the [[#Pumpkin Bombs|Pumpkin bombs]]. | ||
| + | |||
| + | ; Maps with Snowman Bombs | ||
| + | * {{map link|Coal Pit}} | ||
| + | * {{map link|Frostwatch}} | ||
| + | |||
| + | {{clr}} | ||
| + | ==== {{anchor|Salmann egg sacks}} Salmann egg sacks ==== | ||
| + | {{Kill notice|extend = yes|width = 25%|weapon = pumpkin|victim = Scout}} | ||
| − | ''' | + | '''Salmann egg sacks''' appear in the map [[Slime]]. They explode when hit, causing damage to nearby players and soaking them in slime, which marks them for death for 5 seconds. |
| − | ; Maps | + | ; Maps with Salmann egg sacks |
| − | * | + | * {{map link|Slime}} |
| − | |||
{{clr}} | {{clr}} | ||
| − | === | + | === Area Explosion === |
| − | {{ | + | '''Area Explosion''' occurs in order to punish players who have stayed for too long in certain Underworlds. A while after the gates to the exit back to the main portion of the map have lowered, the place is engulfed in a series of explosions that instantly kill anyone still there. |
| − | + | ||
| − | {{ | + | ; Maps with Area Explosion |
| + | * {{map link|Bloodwater}} <small>(Skull Island)</small> | ||
| + | * {{map link|Eyeaduct}} <small>(Loot Island)</small> | ||
| + | * {{map link|Ghost Fort}} <small>(Skull Island)</small> | ||
| + | |||
| + | {{clr}} | ||
| + | == Non-injurous hazards == | ||
| + | A few hazards have no direct injurous effects, but can reduce any player's combat effectiveness, whether by impacting players' world view, aim, movement or other consequences. | ||
| − | + | === Shake === | |
| + | '''[[vdc:Env_shake|Shake]]''', '''tremor''', or '''earthquake''' is a visible and audible cue effect that shakes a player's world view and aim. While the effect causes no direct damage, the effect can be somewhat disorienting and otherwise interferes with a player's ability to attack, defend, and navigate. The effect can serve as a warning of a monster or another effect, while also impeding abilty to avoid an oncoming monster. The world violently shakes for players as the Horseless Headless Horsemann chases them down. On [[Eyeaduct]], shaking accompanies the spawning of MONOCULUS. Strong shaking is a map-wide cue of the [[Skeleton|Skeleton King]] on [[Helltower]], while only very weak tremors warn of a Baby Skeleton spawning nearby. Earthquakes warn of the release of hellish [[#Steam|steam]] on [[Brimstone (map)|Brimstone]]. | ||
| − | ; Maps | + | ; Maps with shaking<!-- Note to translators: Don't forget to translate the side notes. --> |
| − | * | + | * {{map link|Bloodwater}} <small>(Horsemann charging, MONOCULUS spawning)</small> |
| + | * {{map link|Brimstone|Brimstone (map)}} <small>(Horsemann charging, Skeleton spawnings, Steam release cue)</small> | ||
| + | * {{map link|Carnival of Carnage}} <small>(end of play)</small> | ||
| + | * {{map link|Doomsday}} <small>(rocket launch and crash after play)</small> | ||
| + | * {{map link|Eyeaduct}} <small>(MONOCULUS spawning)</small> | ||
| + | * {{map link|Gorge Event}} <small>(skeleton spawnings)</small> | ||
| + | * {{map link|Gravestone}} <small>(Horsemann charging)</small> | ||
| + | * {{map link|Hellstone}} <small>(Horsemann charging, Skeleton spawnings)</small> | ||
| + | * {{map link|Helltower}} <small>(map-wide Skeleton King cue)</small> | ||
| + | * {{map link|Mann Manor}} <small>(Horsemann charging)</small> | ||
| + | * {{map link|Pit of Death}} <small>(localized cue of the Underworld portal opening or closing)</small> | ||
| + | * {{map link|Slasher}} <small>(Horsemann charging, MONOCULUS spawning)</small> | ||
| − | === | + | {{clr}} |
| + | === Ice === | ||
| + | '''Ice''' surfaces decrease player friction by 90%, resulting in much more slippery ground. | ||
| − | + | ; Maps with Ice | |
| + | * {{map link|Doublefrost}} | ||
| + | * {{map link|Galleria}} | ||
| − | + | {{clr}} | |
| − | + | === Banana Peel === | |
| − | + | A '''Banana Peel''' is a prop that causes an irresistible push on players that step on it, accompanied by a slip [[Media:Banana slip.wav|sound effect]]. This push is typically in the direction of an instant kill effect. While the Banana Peel does not directly cause a death, the instant kill surface is very difficult to avoid. | |
| + | ; Maps with a Banana Peel | ||
| + | * {{map link|Carrier}} | ||
| + | * {{map link|Distillery}} | ||
| + | * {{map link|Mannhattan}} | ||
| + | |||
{{clr}} | {{clr}} | ||
| + | == Bosses == | ||
| + | === {{anchor|HHH}} Horseless Headless Horsemann === | ||
| + | [[File:HHH.png|300px|thumb|right|The Horseless Headless Horsemann.]] | ||
| + | |||
| + | {{main|Horseless Headless Horsemann}} | ||
| + | {{Kill notice|extend = yes|width = 25%|weapon = Horseless Headless Horsemann's Headtaker|victim = Engineer}} | ||
| + | |||
| + | The '''Horseless Headless Horsemann''' was the first boss enemy in ''Team Fortress 2''. Introduced in [[Mann Manor]], it now appears in other Halloween maps as well. He rises out of the ground or floor and proceeds to hunt down and kill players on both teams. The Horseless Headless Horsemann deals heavy damage to any player or [[Buildings|building]] that he strikes. He continues his massacre until killed by a player (or players). All kills by the Horsemann count as environmental deaths and trigger the relevant achievements. | ||
| + | |||
| + | On [[Carnival of Carnage]], the Horseless Headless Horsemann appears during the "Bumper Car Soccer" and "Falling Platforms" bumper car duels, wielding a gigantic blood-spattered [[Necro Smasher]]. While he can be killed as usual, he is unable to directly damage players, and can only knock players back with his swings in an attempt to send them into the map's [[#Pitfall|Pitfalls]]. | ||
| + | |||
| + | ; Maps with the Horseless Headless Horsemann | ||
| + | * {{map link|Bonesaw|Bonesaw (map)}} <small>(Hellishly Hollow Horseman)</small> | ||
| + | * {{map link|Brimstone|Brimstone (map)}} | ||
| + | * {{map link|Carnival of Carnage}} <small>(Falling Platforms and Bumper Car Soccer)</small> | ||
| + | * {{map link|Gravestone}} | ||
| + | * {{map link|Graveyard}} | ||
| + | * {{map link|Hellstone}} | ||
| + | * {{map link|Mann Manor}} | ||
| + | * {{map link|Slasher}} | ||
| + | |||
| + | {{clr}} | ||
=== Merasmus === | === Merasmus === | ||
| + | [[File:Merasmus.png|300px|thumb|right|Merasmus.]] | ||
| + | |||
{{main|Merasmus}} | {{main|Merasmus}} | ||
| − | + | ||
{{Kill notice|extend = yes|width = 35%|killer = MERASMUS!|friendlyfire=green|weapon = merasmus|victim = Soldier}} | {{Kill notice|extend = yes|width = 35%|killer = MERASMUS!|friendlyfire=green|weapon = merasmus|victim = Soldier}} | ||
{{Kill notice|extend = yes|width = 35%|killer = MERASMUS!|friendlyfire=green|weapon = merasmus2|victim = Sniper}} | {{Kill notice|extend = yes|width = 35%|killer = MERASMUS!|friendlyfire=green|weapon = merasmus2|victim = Sniper}} | ||
{{Kill notice|extend = yes|width = 35%|killer = MERASMUS!|friendlyfire=green|weapon = merasmus3|victim = Scout}} | {{Kill notice|extend = yes|width = 35%|killer = MERASMUS!|friendlyfire=green|weapon = merasmus3|victim = Scout}} | ||
| − | {{Kill notice|extend = yes|width = 35% | + | {{Kill notice|extend = yes|width = 35%|weapon = merasmus4|victim = Spy}} |
{{Kill notice|extend = yes|width = 35%|weapon = fire|victim = Heavy}} | {{Kill notice|extend = yes|width = 35%|weapon = fire|victim = Heavy}} | ||
| − | '''Merasmus''' | + | '''Merasmus''' first appeared as a boss in [[Ghost Fort]], but now can be found in other Halloween maps as well. [[Merasmus]] is the former roommate of the [[RED]] [[Soldier]] on a vendetta since the Soldier [[Doom-Mates|ruined his home]]. On Ghost Fort, Merasmus spawns near the [[control point (objective)|control point]] after a pre-determined amount of time. A spawned Merasmus kills players on both teams using a variety of spells and attacks. Merasmus continues rampaging until he is defeated or his time runs out. Any death caused by Merasmus is classed as environmental. |
| + | |||
| + | ; Maps with Merasmus | ||
| + | * {{map link|Brimstone|Brimstone (map)}} | ||
| + | * {{map link|Ghost Fort}} | ||
| + | * {{map link|Gravestone}} | ||
| + | * {{map link|Slasher}} | ||
| + | |||
| + | {{clr}} | ||
| + | === Bomb Head === | ||
| + | {{Kill notice|extend = yes|width = 25%|weapon = merasmus4|victim = Spy}} | ||
| + | |||
| + | During battles against [[#Merasmus|Merasmus]], the Bombinomicon turns random players' heads into bombs, forcing their view into third person and temporarily removing their weapons, and instructs them to run into Merasmus to blow him up. If they take too long to run into Merasmus, the bombs on their heads explode, causing a lot of damage and rocketing them skyward if they survive the explosion, which may also cause them to take [[fall damage]] once they land. If they manage to run into Merasmus and explode on him, they are still thrown high up, but are granted temporary Invulnerability and [[Critical hits|Crits]]. | ||
| + | |||
| + | On [[Carnival of Carnage]] or [[Gravestone]], during the bumper cart race picking up [[Magic spells]] might give the player a Bomb Head spell which does 50% damage upon exploding to the user and nearby enemies. It explodes either when its timer runs out or the user makes a head-on collision with an enemy. | ||
| + | |||
| + | On [[Laughter]], players who stay too long in the Underworld have their heads turned into bombs as an incentive to speed things up and return to the regular map. If they fail to leave the Underworld, the bomb explodes, [[Gibs|gibbing]] them. | ||
| − | ; Maps | + | ;Maps with Bomb Heads |
| − | * | + | * {{map link|Brimstone|Brimstone (map)}} |
| + | * {{map link|Carnival of Carnage}} | ||
| + | * {{map link|Ghost Fort}} | ||
| + | * {{map link|Gravestone}} | ||
| + | * {{map link|Laughter}} | ||
| + | * {{map link|Slasher}} | ||
{{clr}} | {{clr}} | ||
| + | === MONOCULUS === | ||
| + | [[File:Monoculus_normal.png|300px|thumb|right|MONOCULUS.]] | ||
| + | |||
| + | {{main|MONOCULUS}} | ||
| + | |||
| + | {{Kill notice|extend = yes|width = 35%|killer = MONOCULUS!|friendlyfire=purple|weapon = MONOCULUS|victim = Sniper}} | ||
| + | |||
| + | '''MONOCULUS''' is a boss that first appeared in [[Eyeaduct]], but can now be found in other Halloween maps as well. [[MONOCULUS]] takes the form of the [[RED]] [[Demoman]]'s missing eye, haunted by the [[Bombinomicon (character)|Bombinomicon]]. MONOCULUS spawns out of the contested [[control point (objective)|control point]] or other locations under various conditions, which also instantly kills any players unfortunate enough to be standing there at the time. A spawned MONOCULUS proceeds to kill players on both teams using rocket-like eyeball projectiles, which are always [[Critical hits]] and can kill any class (apart from the [[Soldier]] and the [[Heavy]]) with a direct hit. Such rockets can be reflected by a Pyro's compression blast. MONOCULUS continues attacking until it is killed or its time is up. Any death caused by MONOCULUS is classed as environmental. | ||
| + | |||
| + | The boss MONOCULUS should not be confused with "''invokum monoculus''", the [[Magic spells|magic spell]] that summons a team-loyal MONOCULUS. | ||
| + | |||
| + | ; Maps with MONOCULUS | ||
| + | * {{map link|Bloodwater}} | ||
| + | * {{map link|Brimstone|Brimstone (map)}} | ||
| + | * {{map link|Eyeaduct}} | ||
| + | * {{map link|Gravestone}} | ||
| + | * {{map link|Hellstone}} | ||
| + | * {{map link|Slasher}} | ||
| + | {{clr}} | ||
=== Skeletons === | === Skeletons === | ||
| + | [[File:Skeleton King.png|250px|thumb|right|The Skeleton King.]] | ||
| + | |||
{{main|Skeletons}} | {{main|Skeletons}} | ||
| − | + | ||
{{Kill notice|extend = yes|width = 35%|killer = Skeleton|friendlyfire=green|weapon = skeletons|victim = Engineer}} | {{Kill notice|extend = yes|width = 35%|killer = Skeleton|friendlyfire=green|weapon = skeletons|victim = Engineer}} | ||
| − | '''Skeletons''' | + | '''Skeletons''' were introduced in [[Helltower]] and appear on several other Halloween maps. They are animated skeletons that can appear in varying circumstances. Green skeletons attack everyone, while team-loyal ones can be summoned by [[Magic spells]]. They come in different sizes, from tiny ones, medium-sized skeletons which split into smaller ones when killed, to the huge and durable Skeleton King who is guaranteed to drop a rare magic spell upon death. Any death caused by neutral (green) Skeletons is classed as environmental. |
| − | ; Maps | + | ; Maps with skeletons |
| − | * | + | <div style=display:inline-table><!-- 15 maps per column --> |
| + | * {{map link|Bloodwater}} | ||
| + | * {{map link|Brimstone|Brimstone (map)}} | ||
| + | * {{map link|Cauldron}} | ||
| + | * {{map link|Erebus}} | ||
| + | * {{map link|Farmageddon}} <small>(reskinned as scarecrows)</small> | ||
| + | * {{map link|Gravestone}} | ||
| + | * {{map link|Graveyard}} | ||
| + | * {{map link|Gorge Event}} | ||
| + | * {{map link|Hassle Castle}} | ||
| + | * {{map link|Hellstone}} | ||
| + | * {{map link|Helltower}} | ||
| + | * {{map link|Los Muertos}} | ||
| + | * {{map link|Precipice}} | ||
| + | * {{map link|Sinthetic}} <small>(reskinned as the Toastmaster)</small> | ||
| + | * {{map link|Slasher}} | ||
| + | </div><div style=display:inline-table> | ||
| + | * {{map link|Slime}} <small>(reskinned as Salmann)</small> | ||
| + | * {{map link|Spineyard}} | ||
| + | * {{map link|Terror}} | ||
| + | </div> | ||
{{clr}} | {{clr}} | ||
| + | === Krampus === | ||
| + | [[File:Krampus.png|250px|thumb|right|Krampus.]] | ||
| + | {{main|Krampus#Krampus|l1=Krampus}} | ||
| + | |||
| + | {{Kill notice|extend = yes|width = 35%|invert = yes|killer = KRAMPUS|friendlyfire=purple|weapon = krampus|victim = Heavy}} | ||
| + | {{Kill notice|extend = yes|width = 35%|killer = KRAMPUS|friendlyfire=purple|weapon = krampus2|victim = Scout}} | ||
| + | |||
| + | '''Krampus''' is the boss of [[Krampus|the homonymous map]]. He jumps onto the map's control point and picks a player to pursue, being capable of both melee and ranged attacks, as well as causing a barrage of flaming coal to rain down on the area surrounding the point. | ||
| + | |||
| + | ; Maps with Krampus | ||
| + | * {{map link|Krampus}} | ||
| + | |||
| + | {{clr}} | ||
== Related achievements == | == Related achievements == | ||
=== {{Class link|scout}} === | === {{Class link|scout}} === | ||
| Line 333: | Line 946: | ||
| {{Show achievement|Scout|Foul Territory}} | | {{Show achievement|Scout|Foul Territory}} | ||
}} | }} | ||
| + | |||
=== {{Class link|Demoman}} === | === {{Class link|Demoman}} === | ||
| Line 338: | Line 952: | ||
| {{Show achievement|Demoman|He Who Celt It}} | | {{Show achievement|Demoman|He Who Celt It}} | ||
}} | }} | ||
| + | |||
=== {{Class link|Medic}} === | === {{Class link|Medic}} === | ||
| Line 344: | Line 959: | ||
}} | }} | ||
| − | === | + | |
| + | === {{Achiev type link|scarechievements}} === | ||
{{Achievement table | {{Achievement table | ||
| {{Show achievement|Halloween|Attack o' Lantern}} | | {{Show achievement|Halloween|Attack o' Lantern}} | ||
}} | }} | ||
| − | === | + | |
| + | === {{Achiev type link|foundry}} === | ||
{{Achievement table | {{Achievement table | ||
| {{Show achievement|Foundry|Terminated, Too}} | | {{Show achievement|Foundry|Terminated, Too}} | ||
}} | }} | ||
| − | === | + | |
| + | === {{Achiev type link|astro-chievements}} === | ||
{{Achievement table | {{Achievement table | ||
| {{Show achievement|Astro-chievements|lift offed}} | | {{Show achievement|Astro-chievements|lift offed}} | ||
}} | }} | ||
| − | === | + | |
| + | === {{Achiev type link|bereavements}} === | ||
{{Achievement table | {{Achievement table | ||
| {{Show achievement|Halloween|Helltower- Mine Games}} | | {{Show achievement|Halloween|Helltower- Mine Games}} | ||
}} | }} | ||
| − | === | + | |
| + | === {{Achiev type link|merasmachievements}} === | ||
{{Achievement table | {{Achievement table | ||
| {{Show achievement|Halloween|Carnival of Carnage- Bumper Crop}} | | {{Show achievement|Halloween|Carnival of Carnage- Bumper Crop}} | ||
| + | }} | ||
| + | |||
| + | |||
| + | === {{Achiev type link|mvm}} === | ||
| + | {{Achievement table | ||
| + | | {{Show achievement|Mann vs. Machievements|Now Legal To Eat}} | ||
}} | }} | ||
== See also == | == See also == | ||
* [[Death]] | * [[Death]] | ||
| + | * [[List of maps]] | ||
| + | [[Category:Environmental hazards]] | ||
[[Category:Gameplay]] | [[Category:Gameplay]] | ||
Latest revision as of 05:32, 15 November 2024
| “ | (screaming) Holy crap, this goes on forever.
Click to listen
— The Scout
|
” |
Enviromental hazards are many forms of map effects that can injure, kill, or simply annoy or interfere with players. These effects range from instant kill to health drain to mere distraction. Any death caused by such map elements, commonly known as an environmental death or abbreviated env death, can have distinctive kill icons and kill messages. Any map effects causing health damage rather than instant death are refered to as environmental damage.
These hazards have potential use as weapons or deterrents against the enemy team, and many map hazards grant a tactical advantage to those mindful of them. Awareness of these hazards not only prevents needless (and potentially embarrassing) deaths on all levels of play, but can even be taken advantage of to bait or push enemies into a quick demise.
Contents
- 1 Instant death hazards
- 1.1 Saw blades
- 1.2 Trains
- 1.3 Pitfalls
- 1.4 Infernal Lava
- 1.5 Deadly waters
- 1.6 Crocodiles
- 1.7 Sharks
- 1.8 Piranhas
- 1.9 Gator
- 1.10 Payload Cart explosion
- 1.11 Crushing
- 1.12 Cauldron fire
- 1.13 Rocket exhaust path
- 1.14 Grinder
- 1.15 Tyrannosaurus Rex
- 1.16 Big Mama
- 1.17 Bubbling Cauldron
- 1.18 Pendulum Blades
- 1.19 Fire Pit
- 1.20 Falling Elevator
- 1.21 Helicopter Blades
- 1.22 Nuclear Bomb Explosion
- 2 Non-instant death hazards
- 3 Non-injurous hazards
- 4 Bosses
- 5 Related achievements
- 6 See also
Instant death hazards
The following hazards cause instant death regardless of the player's health. They also affect players who are under the effects of invincibility, such as Bonk! Atomic Punch or an ÜberCharge.
Saw blades

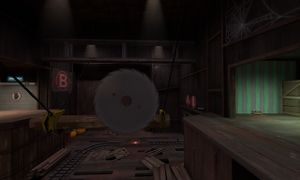
Saw blades are neutral entities that were officially introduced on Sawmill, and would later appear on a number of custom maps, most notably Trainsawlaser. They move back and forth along a designated path and instantly kill anyone that comes in contact with them. Cosmetically, a saw blade gets permanently coated in blood if it kills someone, which persists until a new round starts.
A variant type of saw blade, the Flying Saw Blade appears in Gravestone. This hazard flies various routes through the Sawmill, gives short sound cues of its approach, instantly kill players that it hit, and becomes covered in blood after killing someone.
- Maps with saw blades
- Bonesaw (Hell)
- Gravestone
- Odyssey (Excavator blade)
- Sawmill
- Soul-Mill
Trains
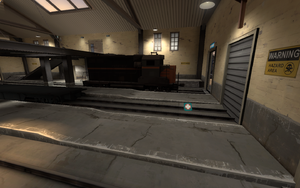
Trains are neutral entities that instantly kill anyone who stands in their path. The arrival of a Train is usually signified by flashing lights at each end of the track and a bell sound playing, which can be heard if players are close enough. In addition, Trains often sound horns immediately upon arrival, most likely as a final warning for players to get off the track. The train appears to be an EMD GP38-2, and its paint scheme strongly resembles Southern Pacific, which once operated these.
It should be noted that touching the sides of a train does not damage players; in fact, players can safely ride on top of trains. This is more prominent on Freight, as trains on said map tow multiple carriages which act as occasional blockages. The carriages come in two variations: shipping containers the same size as the train itself, or flat carts which allow players to jump on top of them.
A notable variation of sorts is "Lil' Chew-Chew", the unique, rideable cart on the map Frontier. If escorted by three or more BLU players, it "chews" and instantly kills any unfortunate players standing in front of it, regardless of team.
- Maps with trains
- Banana Bay
- Cactus Canyon
- District (as subway trains)
- Freight
- Frontier (as rideable cart "Lil' Chew Chew")
- Megalo
- Mossrock
- Rotunda
- Snowplow
- Well (Control Point)
- Well (Capture the Flag)
Pitfalls
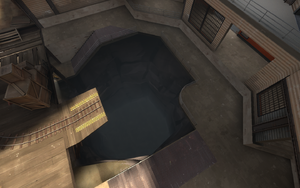
A Pitfall is a common environmental hazard that results from a fall into a pit or off of a ledge or cliff into an area that causes Pitfall death. Common Pitfalls include cliffs at map edges, large open pits at the end of certain Payload tracks, pits that open just before or during Payload Cart explosions, and various smaller pit traps set on several maps.
Different from fall damage, the amount of which is determined by distance falling on to a playable surface, Pitfall acts as an instant kill regardless of the distance fallen or any specific contact with the ground or an object. Pitfalls kill players by way of a trigger_hurt entity, which constantly and rapidly deals damage once within its area.
The point or depth of a Pitfall death in a fall area is not necessarily the visible surface at the bottom, as Pitfall death can be set at an invisible plane through which the player's ragdoll, gibs, weapon, or ammo drop may continue to fall.
Once the level of death is reached, there is no chance of survival in a Pitfall, not even if the player is under the effect of an ÜberCharge. Effects that can delay or slow a fall (e.g., Jumping or Parachute) have no effect on a Pitfall, other than to delay the inevitable, unless the area of the Pitfall can be avoided entirely.
Certain items are treated differently in Pitfall deaths, since they cannot be collected once they fall into a Pitfall. The Intelligence is reset if the player dies in a Pitfall while carrying the Intelligence, which also applies to the bomb in Mann vs. Machine, the briefcases in Special Delivery, the reactor core in Robot Destruction, and the JACK in PASS Time. Credits that fall down pits are considered collected and are immediately credited to the players. Soccer Balls that fall into Pitfalls remain there for the rest of the round.
- Maps with Pitfalls
- Altitude
- Asteroid
- Bigrock
- Bloodwater
- Brazil
- Bread Space
- Cactus Canyon
- Carnival of Carnage
- Cashworks
- Cauldron
- Chilly
- Coal Town
- Cursed Cove (in Davy Jones's Locker)
- DeGroot Keep
- Double Cross
- Hydro (Power Plant vs. Radar Dish configuration)
- Lazarus
- Los Muertos
- Lumberyard
- Mann Manor
- Megalo
- Mercenary Park
- Moldergrove (Underworld)
- Monster Bash
- Mossrock
- Mountain Lab
- Nightfall (third stage)
- Nucleus
- Offblast
- Phoenix
- Pit of Death
- Polar
- Precipice
- Rottenburg
- Sinshine
- Sinthetic
- Slasher
- Snowplow
- Snowycoast
- Steel
- Suijin
- Thunder Mountain (first and third stages)
- Upward
- Wutville
Infernal Lava
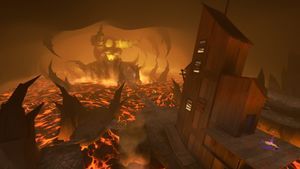
Introduced in Helltower, Lava is a hazard that appears on several maps, mostly Halloween maps where it generally represents the infernal fires of Hell.
Except for the lava flow animation, Lava is indistinguishable from a Pitfall in most cases. Death is instant regardless of how short the fall may be. The death animation can be the same as for a Pitfall, but can vary with the particular map.
- Maps with Lava (excluding the extended Halloween Pitfalls, e.g. Ghost Fort)
Deadly waters
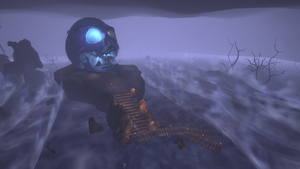
Certain waters in some maps are deadly to the touch. The kill mechanics are similar to a Pitfall, but, like Lava, no great fall height is necessarily part of the kill zone design. The death animation is a corpse bobbing in the water.
Stygian waters surround islands in some Underworld locations.
Whitewater rapids instantly kill anyone stepping or jumping in.
- Maps with deadly waters
- Maps with whitewater
Crocodiles
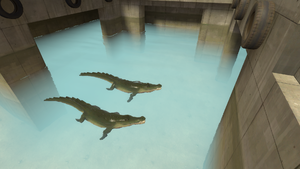
Crocodiles, introduced in Mercenary Park, are an animated water hazard with sound effects.
Coming in contact with water swarming with Crocodiles causes certain death, as a Crocodile leaps out of the water and chomps down, instantly gibbing the player regardless of their health or if under the influence of an ÜberCharge from a Medic.
- Maps with Crocodiles*
- * excluding maps with inaccessible crocodile props.
Sharks
Sharks, introduced in Sharkbay, are an animated water hazard with sound effects.
Similar to crocodiles, when players attempt to jump into the water, they are killed immediately and gibbed.
- Maps with Sharks
Piranhas
Piranhas, introduced in Cachoeira, are an animated water hazard with sound effects.
Similar to crocodiles and sharks, when players attempt to jump into the water, they are killed immediately and gibbed.
- Maps with Piranhas
Gator
A Gator cutout can be found underwater. Contacting the Gator's mouth causes instant death.
- Maps with Gator
- Moonshine Event (beneath the Bayou Shipping House)
Payload Cart explosion
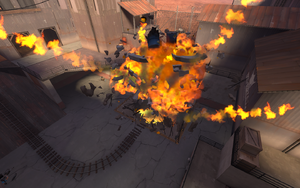
During the final (or sole) round of any Payload or Payload Race map, the Payload Cart explodes either when it reaches the final point, or shortly after, triggering a Payload Cart explosion which kills all players in the surrounding area. In some maps, the resulting explosion creates a crater; falling into it results in a Pitfall death.
- Maps with Payload Cart explosions
Crushing

Crushing causes instant death to any players unfortunate enough to be trapped between two hard surfaces.
The gate of DeGroot Keep, which opens when points A and B are both captured, closes after a certain amount of time, provided the last point isn't captured. If a player is standing underneath the gate when it lowers or is too close to the gate when it opens, they are crushed to death.
On Stage 3 of Dustbowl, if the BLU team captures the first control point, the spawn gate in the left spawn leading out to the first control point crushes all players unlucky enough to be caught underneath.
On Doomsday and Carnival of Carnage, the platform that raises the player up to the rocket hatch or ticket lock can crush the player if one is unlucky enough to be standing under it if the Australium or ticket carrier is knocked off, or after the rocket is launched or ticket is captured.
On Egypt, all gates open and close slowly, and may crush players. Additionally, on Stage 1, there is an interior room on the path from the RED spawn to point A in which the player may get stuck between two doors if the BLU team captures the first control point. A short while after the capture, the ceiling of that room falls slowly and crushes all players unlucky enough to be underneath.
On Hightower and Helltower, if one team can prevent the other from pushing the cart to the top of the Capture platform, the platform falls down and crushes any player below it.
On Carnival of Carnage, if a player walks over the red strongman button, the giant hammer is swung down on top of it, crushing any players too slow to move away in time. The hammer strike also causes a shock wave that launches nearby players into the air, possibly causing a death by fall damage.
In Mann vs. Machine, the Tank Robots can crush any players that are unlucky enough to be caught between it and a wall or prop as it turns.
On Snowplow, the large device used to damage the train can crush players standing below it.
On Enclosure, Gate 01 can crush players when it closes after Capture point (B) is captured.
On Megalo, standing under the turntable while it is lowering crushes players.
- Maps with crushing
- Bigrock
- Carnival of Carnage
- Coal Town
- Decoy
- DeGroot Keep
- Doomsday
- Dustbowl (third stage)
- Egypt
- Enclosure (Gate 01)
- Farmageddon (Gourdon closing)
- Ghost Town
- Helltower
- Hightower
- Mannworks
- Megalo
Cauldron fire
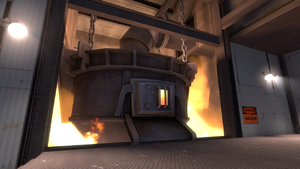
The cauldron is an environmental hazard specific to Foundry, located next to each team's first spawns. Any player who steps into it is instantly killed while aesthetically on fire. A player that manages to push an enemy into the cauldron receives the Terminated, Too achievement.
- Maps with cauldron fires
Rocket exhaust path
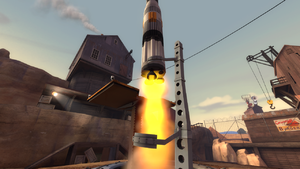
The map Doomsday features a path where, at the end of the round, the exhaust of the rocket emits from the base of the launch pad, pushing any player in the way into a pit located at the end of the route wherein the player suffers a Pitfall. A player from the winning team that manages to push an enemy into this pit receives the Lift-offed achievement. There no injury or push directly underneath the rising rocket, but players that step into the open launch pit suffer a Pitfall.
On Galleria. those players that manage to evade the Falling Debris may walk into the launch pit to suffer a Pitfall just as on Doomsday.
On Steel, if RED successfully defends point E until the end of the game, the rocket above the final point ignites and kills anyone underneath its exhaust (players are sucked into the Pitfall).
On Canaveral, when the rocket launches, players under the rocket's exhaust are killed, however this kill effect is activated even for stalemates when the rocket does not launch.
- Maps with Rocket exhaust paths
Grinder
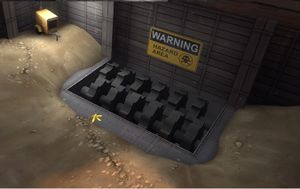
The Grinder (and reskins) is an environmental death that happens when a player gets sucked into a grinding machine. Players killed in this way cause one of two loud sounds of flesh being crushed to play.
On Mannhattan, this death can also happen to Robots, which causes one of three unique death sounds of grinding metal to play. Additionally, the Manhattan and Distillery grinders feature an inconspicuous Banana Peel positioned near the machine, which pushes players (or robots) directly into the grinder.
- Maps with Grinders
- Distillery
- Enclosure (hidden under the plants in the "raptor" enclosure)
- Farmageddon (Combine Harvester reel)
- Mannhattan
- Snowplow
- Sinthetic
- Rumford
Tyrannosaurus Rex
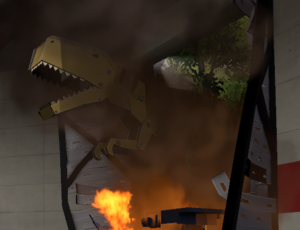
Tyrannosaurus Rex is an environmental death specific to the final point "T-REX" of the third stage of Enclosure. When the cart has been pushed a short distance onto the platform in front of the Tyrannosaurus Rex enclosure's gate, an immediate Payload Cart explosion is triggered. A second or so later, the T-Rex slams the gate open, killing and knocking back anyone who has rushed up to see Rexxy. T-Rex steps halfway into the room, amidst smoke and flames, killing any close players and letting out a climatic roar. Any player that then runs up to the Tyrannosaurus Rex during Humiliation is instantly killed and knocked back.
- Maps with Tyrannosaurus Rex
Big Mama
Big Mama is an environmental death specific to the final point of Bread Space that causes instant death when asleep, as well as gibbing players when awake (See map page).
- Maps with Big Mama
Bubbling Cauldron
Bubbling Cauldron is a Halloween environmental death hazard. Any player that steps around the Bubbling Cauldron suffers health drain, while falling into the Bubbling Cauldron suffers instant death and knock back. When the Bubbling Cauldron is used as the final point on a Payload map, the Bubbling Cauldron has a unique killing explosion.
In Cauldron, standing on or jumping into the Cauldron as it is spewing out Fireballs instantly kills the player.
- Maps with a Bubbling Cauldron
Pendulum Blades
Pendulum Blades are neutral entities that were officially introduced on Monster Bash. They swing back and forth and instantly kill anyone that comes in contact with them. Cosmetically, a blade gets permanently coated in blood if it kills someone, which persists until a new round starts.
- Maps with a Pendulum Blade
Fire Pit
Fire Pit is a Halloween environmental death hazard found on Cauldron. Any player that steps into it is instantly killed.
- Maps with a Fire Pit
Falling Elevator
Elevator is a environmental death hazard found on Bread Space. It is a malfunctioning elevator falling down at high speeds. Any player that is hit by the bottom of the elevator instantly dies from the impact, and standing on the elevator drags the player down into a death pit.
- Maps with a Falling Elevator
Helicopter Blades

The spinning blades of a helicopter are present on the maps Cachoeira and Embargo. On Cachoeira, the helicopter's blades will remain stained red for the rest of the round.
- Maps with Helicopter Blades
Nuclear Bomb Explosion

The nuclear bomb explosion is present on the map Megaton. At the end of the round, a nuclear bomb is dropped on to the map, killing everyone that is still alive.
- Maps with a Nuclear Bomb Explosion
Non-instant death hazards
These environmental hazards do not kill players instantly, but can eventually cause environmental death.
Lasers
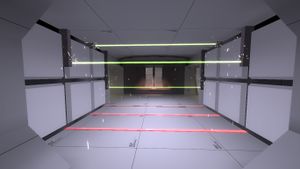
Lasers are an environmental death specific to Asteroid that move up and down along a designated path. Players who come into contact with them let off visible "sparks" and have 200 damage dealt to them, though it can partially be resisted with the Battalion's Backup buff to deal less damage.
They can also be harmlessly passed through while under the effects of the standard ÜberCharge or Bonk! Atomic Punch.
- Maps with Lasers
Lava fire
Introduced in Hellfire, Lava fire is a Fire effect rather than an instant kill. When touching this type of Lava, death is not instant for players at full health, but can occur within a very few seconds allowing a chance to walk, jump, or grapple out. In direct contact with this Lava, players are set on fire, suffering rapid damage similar to a Flame Thrower. Players that succeed in leaving this Lava suffer seconds of afterburn; as such, the kill notice can indicate a fire kill. Naturaly, Pyros have some resistance and do not suffer Lava fire afterburn.
- Maps with Lava fire
Fire
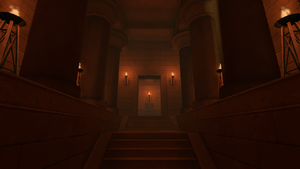
Environmental fire is different from Flame Thrower fire or other fire damage produced by players, as it does not result in an afterburn effect. Instead, environmental fire slowly damages the player's health only as long as they stand directly in the hazardous zone.
Environmental fire does not ignite Sniper arrows.
- Maps with environmental fires
- Bonesaw (flaming barrels)
- Egypt (torches and braziers)
- Coal Pit (flaming barrels)
- Toxic (flaming barrels)
Fireballs
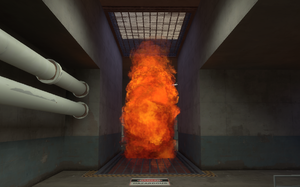
Fireballs, introduced in Hellfire, are rising plumes of Flame that cause fire damage to any player coming in contact with it.
The amount of damage a player receives from a Fireball broadly corresponds to the player's base class health; that is, each player that stands in full contact with the center of the entire plume loses over half of its health regardless of class. Each class (except Pyro) also suffers brief afterburn from even the slightest contact with the plume.
Fireballs do not ignite Sniper arrows.
Another type of Fireball, introduced in Cauldron, has a chance of spewing out of the cauldron when the point is capped. These Fireballs rain over a large portion of the map, dealing large amounts of damage to unsuspecting players. However, these Fireballs do not cause afterburn.
- Maps with Fireballs
Drowning
Players under deep water (water in which the player is completely submerged) have a period of approximately 12 seconds before they begin to suffocate. Failure to rise above water causes them to continually lose 5 health every second until they drown. Any health lost by suffocation slowly regenerates at a rate of 10 health every 2 seconds as soon as a player reaches the surface. Going back underwater, however, ceases health regeneration until the player surfaces again.
- Maps with deep water
- Sawmill
- Thunder Mountain (second stage)
- Watergate
- Well (Control Point)
Shrinking Water
Shrinking Water is a fast-moving wall of water that closes in, shrinking the playable space. When entered, the player starts to drown at a rapid rate; if not acted upon quickly, the player soon drowns.
- Maps with Shrinking Water
Health drain
Health drain is a steady or increasing rate of health loss experienced in one or more specific areas of particular maps. Basic examples are Underworld locations in certain Halloween maps. The effect is also experienced inside the flying saucer in Probed. The drain is a damage-over-time effect similar to the effects of bleeding or afterburn; but, it is neither triggered nor time-limited. Health drain occurs only when a player enters a specific area and continues only as long as the player does not leave the area or until the player is killed.
- Maps with Health drain
- Bloodwater (Purgatory)
- Brimstone (Hell Island)
- Cauldron (Underworld)
- Eyeaduct (Purgatory)
- Erebus (Underworld)
- Gravestone (Underworld and Cauldron Edge)
- Hellstone (Underworld)
- Krampus (Forest)
- Los Muertos (Underworld)
- Monster Bash (Underworld)
- Moonshine Event (Underworld)
- Pit of Death (Underworld)
- Probed (Flying Saucer)
- Slasher (Underworld)
- Spookeyridge (Underworld)
- Terror (Underworld)
Boiling waters
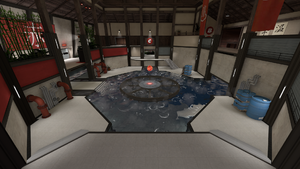
Boiling water emits steam and bubbles from its surface. As long as a player is in contact with the boiling water, the player's health is drained until killing them.
All players are invulnerable to the boiling water after the Point A is captured.
- Maps with Boiling waters
Steam
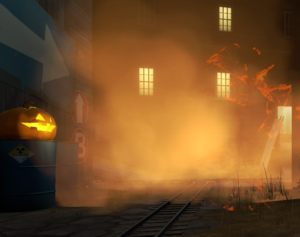
Steam, volcanic gas, or poison gas is a damage-over-time effect introduced on Brimstone. The time and area of effect are indicated by a rising cloud of vapor and fluid splashes (compare with Pumpkin bomb explosion splash). Players that enter the cloud suffer damage-over-time so long as they survive and remain in the cloud.
- Maps with steam
Acid
Acid is a bright green liquid inside the Giant Pumpkin. As long as a player is in contact with the acid, the player's health is drained until killing them.
- Maps with Acid
Toxic Waste
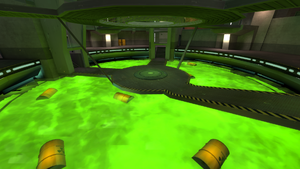
Toxic Waste is a bright green liquid filling the central area, but also spilled in places around the map, each just as deadly.
Damage taken increases exponentially based on time spent in contact with toxic waste as opposed to a fixed amount over time. This accumulated damage per tick persists even after having left the toxic waste, meaning that entering the toxic waste again continues dealing damage from where the amount stopped.
- Maps with Toxic Waste
Saw Blade Cart
Saw Blade Carts are a type of Payload cart equipped with a saw blade on its front. While the sides of the saw blades are harmless (as well as the rest of the cart), the front and top deal 45 damage per tick to any players who make contact with them, regardless of their teams.
A player who is hurt by a cart's saw blade causes it to become bloodied (a purely cosmetic effect), and those who die from it are turned into gibs.
- Maps with Saw Blade Carts
Pumpkin Bombs
| It has been suggested that this article or section be merged with Pumpkin bomb. Discussion to support or oppose the merge should be on this article's talk page under the heading "Talk:Environmental death#Merge Pumpkin bomb and all of the reskins with Pumpkin bomb". |
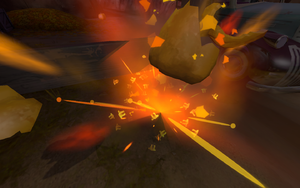
Pumpkin Bombs and reskins are special objects found on all Halloween maps except Ghost Town (Mann vs. Machine) and Monster Bash. Pumpkin Bombs are rigged with explosives and detonators visible on their exteriors from certain angles. Their detonators occasionally glow.
Once a Pumpkin Bomb receives any amount of damage from any source, or is hit by a projectile which would not normally damage anything (for example, the Rocket Jumper's projectiles and Mad Milk), it triggers an explosion, dealing heavy damage to all players near it. Rather than instant kill, each type does a set damage; Salmann egg sacks doing some of the lightest damage and Explosive Barrels doing very heavy damage. Therefore, each type is survivable given either invulnerability or sufficient health plus overheal and can be used for an explosive jump.
Pumpkin Bombs should not be confused with Halloween pumpkins. A simple way to tell them apart is that Pumpkin Bombs do not move, whereas Halloween Pumpkins rotate similar to Health packs or Ammo crates. Pumpkin Bombs always spawn in the same spots, while Halloween Pumpkins drop where a player is killed.
Pumpkin Bombs should also not be confused with Pumpkin MIRV, a magic spell.
- Maps with Pumpkin Bombs
- Pumpkin Bomb reskinned variants
A Dynamite Balloon on Laughter.
An Explosive Barrel on Cursed Cove.
An Alien Walker on 2Fort Invasion.
A Snowman Bomb on Coal Pit.
Some Salmann egg sacks on Slime.
Dynamite Balloons
Dynamite Balloons or TNT Bombs appear in Laughter. They explode when damaged, similar to the Pumpkin bombs and produce the sound of children laughing when destroyed.
- Maps with Dynamite Balloons
Explosive Barrels
Explosive Barrels appear in Cursed Cove. They explode when damaged, similar to the Pumpkin bombs. However, their damage is much greater, capable of instantly killing anyone albeit in a smaller range. Jumping from the explosion is only possible under the effects of Invulnerability.
Maps with Explosive Barrels
Alien Walkers
Alien Walkers are placed around the Invasion maps, which explode after being damaged, similar to Pumpkin bombs.
- Maps with Alien Walkers
Snowman Bombs
Snowman Bombs, also known as Snowmenn, appear in some Christmas maps. They explode when damaged, similar to the Pumpkin bombs.
- Maps with Snowman Bombs
Salmann egg sacks
Salmann egg sacks appear in the map Slime. They explode when hit, causing damage to nearby players and soaking them in slime, which marks them for death for 5 seconds.
- Maps with Salmann egg sacks
Area Explosion
Area Explosion occurs in order to punish players who have stayed for too long in certain Underworlds. A while after the gates to the exit back to the main portion of the map have lowered, the place is engulfed in a series of explosions that instantly kill anyone still there.
- Maps with Area Explosion
- Bloodwater (Skull Island)
- Eyeaduct (Loot Island)
- Ghost Fort (Skull Island)
Non-injurous hazards
A few hazards have no direct injurous effects, but can reduce any player's combat effectiveness, whether by impacting players' world view, aim, movement or other consequences.
Shake
Shake, tremor, or earthquake is a visible and audible cue effect that shakes a player's world view and aim. While the effect causes no direct damage, the effect can be somewhat disorienting and otherwise interferes with a player's ability to attack, defend, and navigate. The effect can serve as a warning of a monster or another effect, while also impeding abilty to avoid an oncoming monster. The world violently shakes for players as the Horseless Headless Horsemann chases them down. On Eyeaduct, shaking accompanies the spawning of MONOCULUS. Strong shaking is a map-wide cue of the Skeleton King on Helltower, while only very weak tremors warn of a Baby Skeleton spawning nearby. Earthquakes warn of the release of hellish steam on Brimstone.
- Maps with shaking
- Bloodwater (Horsemann charging, MONOCULUS spawning)
- Brimstone (Horsemann charging, Skeleton spawnings, Steam release cue)
- Carnival of Carnage (end of play)
- Doomsday (rocket launch and crash after play)
- Eyeaduct (MONOCULUS spawning)
- Gorge Event (skeleton spawnings)
- Gravestone (Horsemann charging)
- Hellstone (Horsemann charging, Skeleton spawnings)
- Helltower (map-wide Skeleton King cue)
- Mann Manor (Horsemann charging)
- Pit of Death (localized cue of the Underworld portal opening or closing)
- Slasher (Horsemann charging, MONOCULUS spawning)
Ice
Ice surfaces decrease player friction by 90%, resulting in much more slippery ground.
- Maps with Ice
Banana Peel
A Banana Peel is a prop that causes an irresistible push on players that step on it, accompanied by a slip sound effect. This push is typically in the direction of an instant kill effect. While the Banana Peel does not directly cause a death, the instant kill surface is very difficult to avoid.
- Maps with a Banana Peel
Bosses
Horseless Headless Horsemann
The Horseless Headless Horsemann was the first boss enemy in Team Fortress 2. Introduced in Mann Manor, it now appears in other Halloween maps as well. He rises out of the ground or floor and proceeds to hunt down and kill players on both teams. The Horseless Headless Horsemann deals heavy damage to any player or building that he strikes. He continues his massacre until killed by a player (or players). All kills by the Horsemann count as environmental deaths and trigger the relevant achievements.
On Carnival of Carnage, the Horseless Headless Horsemann appears during the "Bumper Car Soccer" and "Falling Platforms" bumper car duels, wielding a gigantic blood-spattered Necro Smasher. While he can be killed as usual, he is unable to directly damage players, and can only knock players back with his swings in an attempt to send them into the map's Pitfalls.
- Maps with the Horseless Headless Horsemann
- Bonesaw (Hellishly Hollow Horseman)
- Brimstone
- Carnival of Carnage (Falling Platforms and Bumper Car Soccer)
- Gravestone
- Graveyard
- Hellstone
- Mann Manor
- Slasher
Merasmus
Merasmus first appeared as a boss in Ghost Fort, but now can be found in other Halloween maps as well. Merasmus is the former roommate of the RED Soldier on a vendetta since the Soldier ruined his home. On Ghost Fort, Merasmus spawns near the control point after a pre-determined amount of time. A spawned Merasmus kills players on both teams using a variety of spells and attacks. Merasmus continues rampaging until he is defeated or his time runs out. Any death caused by Merasmus is classed as environmental.
- Maps with Merasmus
Bomb Head
During battles against Merasmus, the Bombinomicon turns random players' heads into bombs, forcing their view into third person and temporarily removing their weapons, and instructs them to run into Merasmus to blow him up. If they take too long to run into Merasmus, the bombs on their heads explode, causing a lot of damage and rocketing them skyward if they survive the explosion, which may also cause them to take fall damage once they land. If they manage to run into Merasmus and explode on him, they are still thrown high up, but are granted temporary Invulnerability and Crits.
On Carnival of Carnage or Gravestone, during the bumper cart race picking up Magic spells might give the player a Bomb Head spell which does 50% damage upon exploding to the user and nearby enemies. It explodes either when its timer runs out or the user makes a head-on collision with an enemy.
On Laughter, players who stay too long in the Underworld have their heads turned into bombs as an incentive to speed things up and return to the regular map. If they fail to leave the Underworld, the bomb explodes, gibbing them.
- Maps with Bomb Heads
MONOCULUS
MONOCULUS is a boss that first appeared in Eyeaduct, but can now be found in other Halloween maps as well. MONOCULUS takes the form of the RED Demoman's missing eye, haunted by the Bombinomicon. MONOCULUS spawns out of the contested control point or other locations under various conditions, which also instantly kills any players unfortunate enough to be standing there at the time. A spawned MONOCULUS proceeds to kill players on both teams using rocket-like eyeball projectiles, which are always Critical hits and can kill any class (apart from the Soldier and the Heavy) with a direct hit. Such rockets can be reflected by a Pyro's compression blast. MONOCULUS continues attacking until it is killed or its time is up. Any death caused by MONOCULUS is classed as environmental.
The boss MONOCULUS should not be confused with "invokum monoculus", the magic spell that summons a team-loyal MONOCULUS.
- Maps with MONOCULUS
Skeletons
Skeletons were introduced in Helltower and appear on several other Halloween maps. They are animated skeletons that can appear in varying circumstances. Green skeletons attack everyone, while team-loyal ones can be summoned by Magic spells. They come in different sizes, from tiny ones, medium-sized skeletons which split into smaller ones when killed, to the huge and durable Skeleton King who is guaranteed to drop a rare magic spell upon death. Any death caused by neutral (green) Skeletons is classed as environmental.
- Maps with skeletons
- Bloodwater
- Brimstone
- Cauldron
- Erebus
- Farmageddon (reskinned as scarecrows)
- Gravestone
- Graveyard
- Gorge Event
- Hassle Castle
- Hellstone
- Helltower
- Los Muertos
- Precipice
- Sinthetic (reskinned as the Toastmaster)
- Slasher
Krampus
Krampus is the boss of the homonymous map. He jumps onto the map's control point and picks a player to pursue, being capable of both melee and ranged attacks, as well as causing a barrage of flaming coal to rain down on the area surrounding the point.
- Maps with Krampus
Related achievements
 Scout
Scout
|
|
 Demoman
|
 Medic
Medic
|
 Scarechievements
|
 Foundry achievements
|
 Astro-chievements
|
 Bereavements
|
 Merasmachievements
|
 Mann vs. Machievements
|
