Difference between revisions of "Demoman"
(Barbarian Swing>Decapitation) |
(Reworked description to outline Stock Demo's close-range weakness and added a section on Demoknight) |
||
| Line 9: | Line 9: | ||
{{Quotation|'''The Demoman''' on occupational hazards|One crossed wire, one wayward pinch of potassium chlorate, one errant twitch... And '''kablooie'''!|sound=Demomanquote.wav}} | {{Quotation|'''The Demoman''' on occupational hazards|One crossed wire, one wayward pinch of potassium chlorate, one errant twitch... And '''kablooie'''!|sound=Demomanquote.wav}} | ||
| − | The '''Demoman''' is a self-described black Scottish cyclops and a [[Bottle|scrumpy]]-swilling demolitions expert from [[w:Ullapool|Ullapool]], [[w:Scotland|Scotland]], | + | The '''Demoman''' is a self-described black Scottish cyclops and a [[Bottle|scrumpy]]-swilling demolitions expert from [[w:Ullapool|Ullapool]], [[w:Scotland|Scotland]], and is one of the most powerful members of his [[team]], dealing massive amounts of direct and indirect mid-range splash damage. Armed with his [[Grenade Launcher]] and [[Stickybomb Launcher]], the Demoman uses his one good eye and knowledge of his surrounding environment for well-timed stickybomb detonations and precise grenade impacts that send enemies skyward, often in many pieces. However, his weapons' large splash radius can also be a detriment; if an enemy manages to catch him at close range, he will often take damage from his own explosives as he struggles to defend himself. |
| − | The Demoman excels at swift destruction; he can | + | Should he tire of this metaphorical double-edged sword, the Demoman can forgo his explosives in favor of a literal sword (and shield), transforming him into the deadliest melee user in the game - the Demoknight. With a variety of powerful weapons in his arsenal that grant powerful boons after each melee kill, the Demoknight can rapidly charge at an opponent and land a devastating melee blow, at the cost of being vulnerable at mid-to-long range. Alternatively, he may choose to strike a balance between bombs and blades, dispatching enemies at a distance with his grenades while decapitating those who draw too close. |
| + | |||
| + | The Demoman excels at swift destruction; he can launch grenades and stickybombs at creative angles to wreak havoc on enemy encampments and [[Sentry Gun]]s while remaining out of the line of fire, or simply blast his enemies into a red mist with a seemingly-endless stream of these explosives. His stickybombs are also a perfect tool for area denial, and are effective at keeping opponents away from [[Payload#Carts|carts]], [[Control point (objective)|control points]], [[Capture the Flag#Intelligence|Intelligence]], or any other location he deems off-limits. | ||
The Demoman is [[Voice actors|voiced]] by [[Gary Schwartz]]. | The Demoman is [[Voice actors|voiced]] by [[Gary Schwartz]]. | ||
Revision as of 03:45, 23 March 2024
| Demoman | |
|---|---|
https://wiki.teamfortress.com/w/images/e/ec/Demoman_RED_3D.jpg?1701879328.7142653640,276,280,1,0,277,57,126,275,69,255,272,69,397,268,69,546,267,69,708,269,73,890,270,81,1079,269,92,1263,268,106,1428,267,106,1581,264,101,1720,261,97,1840,258,96,1949,254,86,2069,250,74,2201,248,64,2343,249,57,2489,254,49,2636,259,29,2795,265,13,2958,270,2,3123,274,0,3295,277,7,3464,278,27https://wiki.teamfortress.com/w/images/9/9d/Demoman_BLU_3D.jpg?1701879407.3076783640,276,280,1,0,277,57,126,275,69,255,272,69,397,268,69,546,267,69,708,269,73,890,270,81,1079,269,92,1263,268,106,1428,267,106,1581,264,101,1720,261,97,1840,258,96,1949,254,86,2069,250,74,2201,248,64,2343,249,57,2489,254,49,2636,259,29,2795,265,13,2958,270,2,3123,274,0,3295,277,7,3464,278,27https://wiki.teamfortress.com/w/images/1/19/Demoman_%C3%9CberCharged_RED_3D.jpg?1701879498.5408563640,276,280,1,0,277,57,126,275,69,255,272,69,397,268,69,546,267,69,708,269,73,890,270,81,1079,269,92,1263,268,106,1428,267,106,1581,264,101,1720,261,97,1840,258,96,1949,254,86,2069,250,74,2201,248,64,2343,249,57,2489,254,49,2636,259,29,2795,265,13,2958,270,2,3123,274,0,3295,277,7,3464,278,27https://wiki.teamfortress.com/w/images/d/dc/Demoman_%C3%9CberCharged_BLU_3D.jpg?1701879655.225733640,276,280,1,0,277,57,126,275,69,255,272,69,397,268,69,546,267,69,708,269,73,890,270,81,1079,269,92,1263,268,106,1428,267,106,1581,264,101,1720,261,97,1840,258,96,1949,254,86,2069,250,74,2201,248,64,2343,249,57,2489,254,49,2636,259,29,2795,265,13,2958,270,2,3123,274,0,3295,277,7,3464,278,27 | |
| Basic Information | |
| Icon: | |
| Type: | Defensive |
| Health: | 175 / (See Health below for further details) |
| Speed: | 93% (See Speed below for further details) |
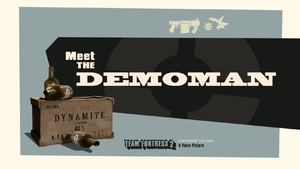
| Meet the Demoman | |
| |
| “ | One crossed wire, one wayward pinch of potassium chlorate, one errant twitch... And kablooie!
Click to listen
— The Demoman on occupational hazards
|
” |
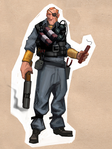
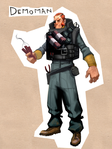
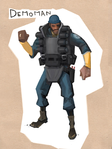
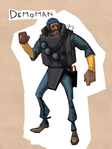
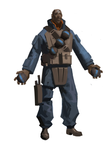
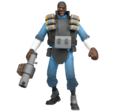
The Demoman is a self-described black Scottish cyclops and a scrumpy-swilling demolitions expert from Ullapool, Scotland, and is one of the most powerful members of his team, dealing massive amounts of direct and indirect mid-range splash damage. Armed with his Grenade Launcher and Stickybomb Launcher, the Demoman uses his one good eye and knowledge of his surrounding environment for well-timed stickybomb detonations and precise grenade impacts that send enemies skyward, often in many pieces. However, his weapons' large splash radius can also be a detriment; if an enemy manages to catch him at close range, he will often take damage from his own explosives as he struggles to defend himself.
Should he tire of this metaphorical double-edged sword, the Demoman can forgo his explosives in favor of a literal sword (and shield), transforming him into the deadliest melee user in the game - the Demoknight. With a variety of powerful weapons in his arsenal that grant powerful boons after each melee kill, the Demoknight can rapidly charge at an opponent and land a devastating melee blow, at the cost of being vulnerable at mid-to-long range. Alternatively, he may choose to strike a balance between bombs and blades, dispatching enemies at a distance with his grenades while decapitating those who draw too close.
The Demoman excels at swift destruction; he can launch grenades and stickybombs at creative angles to wreak havoc on enemy encampments and Sentry Guns while remaining out of the line of fire, or simply blast his enemies into a red mist with a seemingly-endless stream of these explosives. His stickybombs are also a perfect tool for area denial, and are effective at keeping opponents away from carts, control points, Intelligence, or any other location he deems off-limits.
The Demoman is voiced by Gary Schwartz.
Contents
Bio
|
Health
| Class | Health | Overheal | Quick-Fix Overheal |
|---|---|---|---|
| 175 | 260 | 220 | |
| With weapon slot boots equipped | 200 | 300 | 251 |
| With a head-taking melee weapon equipped with 0 heads | 150 | 225 | 189 |
| With a head-taking melee weapon equipped with 1 head | 165 | 245 | 208 |
| With a head-taking melee weapon equipped with 2 heads | 180 | 270 | 226 |
| With a head-taking melee weapon equipped with 3 heads | 195 | 290 | 245 |
| With a head-taking melee weapon with 4 or more heads | 210 | 315 | 264 |
| With weapon slot boots and a head-taking melee weapon equipped with 0 heads | 175 | 260 | 220 |
| With weapon slot boots and a head-taking melee weapon equipped with 1 head | 190 | 285 | 239 |
| With weapon slot boots and a head-taking melee weapon equipped with 2 heads | 205 | 305 | 258 |
| With weapon slot boots and a head-taking melee weapon equipped with 3 heads | 220 | 330 | 276 |
| With weapon slot boots and a head-taking melee weapon equipped with 4 or more heads | 235 | 350 | 295 |
Speed
| Condition | Normal | Backward | Crouched | Swimming | ||||||||
|---|---|---|---|---|---|---|---|---|---|---|---|---|
|
|
|
| |||||||||
| With weapon slot boots and a shield equipped |
|
|
|
| ||||||||
| With a head-taking melee weapon equipped with 0 heads |
|
|
|
| ||||||||
| With a head-taking melee weapon equipped with 1 head |
|
|
|
| ||||||||
| With a head-taking melee weapon equipped with 2 heads |
|
|
|
| ||||||||
| With a head-taking melee weapon equipped with 3 heads |
|
|
|
| ||||||||
| With a head-taking melee weapon equipped with 4 or more heads |
|
|
|
| ||||||||
| With weapon slot boots, a shield, and a head-taking melee weapon equipped with 0 heads |
|
|
|
| ||||||||
| With weapon slot boots, a shield, and a head-taking melee weapon equipped with 1 head |
|
|
|
| ||||||||
| With weapon slot boots, a shield, and a head-taking melee weapon equipped with 2 heads |
|
|
|
| ||||||||
| With weapon slot boots, a shield, and a head-taking melee weapon equipped with 3 heads |
|
|
|
| ||||||||
| With weapon slot boots, a shield, and a head-taking melee weapon equipped with 4 or more heads |
|
|
|
| ||||||||
| Wielding the Scotsman's Skullcutter |
|
|
|
| ||||||||
| Wielding the Scotsman's Skullcutter with weapon slot boots and a shield equipped |
|
|
|
| ||||||||
| Charging with a shield |
|
N/A | N/A |
| ||||||||
| Charging with a shield and wielding the Scotsman's Skullcutter |
|
N/A | N/A |
| ||||||||
| Charging with a shield and wielding the Scotsman's Skullcutter with weapon slot boots equipped |
|
N/A | N/A |
|
Basic strategy
- Hit MOUSE1 to fire Stickybombs and then press MOUSE2 to detonate them later.
- Press E to call for a Medic if you get hurt. Nearby Medics will be notified of your need.
- With the Stickybomb Launcher, the longer you hold down the fire button, the farther the shot will go.
- Set off Stickybombs beneath your feet to sticky jump up to great heights.
- Shoot Stickybombs onto walls and ceilings where they're hard to spot.
Weapons
Note: Weapon damage is approximate and listed at base value. See individual weapon pages for additional figures.
Primary
| Weapon | Kill icon | Ammo Loaded |
Ammo Carried |
Damage Range | Notes / Special Abilities |
|---|---|---|---|---|---|
Stock Grenade Launcher |
4 / 6 | 16 / 30 | On direct hit:
Base: 100
Base: 22–64 |
| |
Craft Loch-n-Load |
3 | 16 | On direct hit:
Base: 100
|
| |
Craft Ali Baba's Wee Booties |
N/A | N/A | N/A | N/A |
|
Craft Bootlegger | |||||
Craft Loose Cannon |
4 | 16 | On direct hit:
Base: 30-50
Base: 29-47 |
| |
Craft B.A.S.E. Jumper |
N/A | N/A | N/A | N/A | |
Craft Iron Bomber |
4 | 16 | On direct hit:
Base: 100
Base: 29-47 |
|
Secondary
| Weapon | Kill icon | Ammo Loaded |
Ammo Carried |
Damage Range | Notes / Special Abilities |
|---|---|---|---|---|---|
Stock Stickybomb Launcher |
8 | 24 | Base: 103—138 Crit: 353 |
| |
Unlock Chargin' Targe |
N/A | N/A | Full charge: 50 + 5 per head (up to 5 heads) |
| |
Unlock Scottish Resistance |
8 | 36 | Base: 103—138 Crit: 353 |
| |
Craft Sticky Jumper |
N/A | 8 | 72 | Base: 0 Crit: 0 |
|
Craft Splendid Screen |
N/A | N/A | Full charge: 85 + 8.5 per head (up to 5 heads) |
| |
Craft Tide Turner |
N/A | N/A | Full charge: 50 + 5 per head (up to 5 heads) |
| |
Craft Quickiebomb Launcher |
4 | 24 | Base: 88-117/109-147 Crit: 300/375 |
|
Melee
| Weapon | Kill icon | Ammo Loaded |
Ammo Carried |
Damage Range | Notes / Special Abilities |
|---|---|---|---|---|---|
Stock Bottle |
N/A | N/A | Base: 65 Crit: 195 |
||
Craft Scottish Handshake |
|||||
Promotional Frying Pan |
|||||
Craft Conscientious Objector |
|||||
Promotional / Craft Freedom Staff |
|||||
Drop Bat Outta Hell |
|||||
Distributed Memory Maker |
|||||
Promotional Ham Shank |
|||||
Unlock Necro Smasher |
|||||
Uncrate Crossing Guard |
|||||
Promotional Prinny Machete |
|||||
Distributed Saxxy |
Limited item from the Replay Update.
| ||||
Distributed Golden Frying Pan |
Limited item from the Two Cities Update.
| ||||
Unlock Eyelander |
N/A | N/A | Base: 65 Crit: 195 |
| |
Craft Horseless Headless Horsemann's Headtaker |
|||||
Craft Nessie's Nine Iron |
|||||
Craft Pain Train |
N/A | N/A | Base: 65 Crit: 195 |
| |
Craft Scotsman's Skullcutter |
N/A | N/A | Base: 78 Crit: 234 |
| |
Craft Claidheamh Mòr |
N/A | N/A | Base: 65 Crit: 195 |
| |
Craft Ullapool Caber |
N/A | N/A | Base: 55 + 75
|
| |
Promotional / Craft Half-Zatoichi |
N/A | N/A | Base: 65 Crit: 195 |
| |
Craft Persian Persuader |
N/A | N/A | Base: 65 Crit: 195 |
|
Taunt Attack
 |
Associated items | Description | Kill icon |
|---|---|---|---|
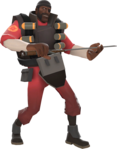
Main article: Barbarian Swing
The Demoman swings his sword around, gathering momentum, and then slashes in front of him, cleaning the blade with his hand afterwards. |
Item sets
| The Expert's Ordnance | |
|---|---|

|
|
| Effect |
No effect |
| One Thousand and One Demoknights | |
|---|---|
| Effect |
No effect |
| Swashbuckler's Swag | |
|---|---|
| Effect |
No effect |
| The Highland Hound | |
|---|---|
| Effect |
Allows the Demoman to perform the Wolf Howl taunt. |
| The Count Tavish | |
|---|---|
| Effect |
No effect |
| The Cursed Captain | |
|---|---|
| Effect |
No effect |
| The South of the Border Pack | |
|---|---|
| Effect |
No effect |
| The Forgotten King | |
|---|---|
| Effect |
No effect |
Cosmetic items
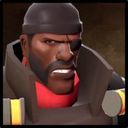
Official class avatars
| Official class avatars | ||
|---|---|---|
| Original set | RED ÜberCharged set | BLU ÜberCharged set |
|

|

|
| Get TF2 avatars on Steam: Original | ||
Achievements
Main article: Demoman achievements
|
Update history
- Made some small changes to the Demoman viewmodel that were causing performance problems.
- Reduced Demoman's maximum Grenade Launcher reserve ammo from 30 to 16.
- Reduced Demoman's maximum Sticky bomb launcher reserve ammo from 40 to 24.
April 29, 2008 Patch (Gold Rush Update)
- Added new speech.
May 21, 2009 Patch (Sniper vs. Spy Update)
August 13, 2009 Patch (Classless Update)
- Removed self-inflicted minicrits. Fixes Jarate'd Soldiers/Demomen having ineffective rocket/grenade jumps.
- Restored LOD for the Demoman player model.
- Added counters to the HUDs of Demomen to keep count of how many of either Demomen killed as Soldier or Soldiers killed as Demoman that person has contributed to the War.
December 17, 2009 Patch (WAR! Update)
- Added 35 Demoman achievements.
- Added Demoman Domination lines.
- Added backstab death animation.
- [Undocumented] Demoman's arm emblem changed to a Stickybomb Launcher sticky bomb.
- Fixed the Demoman not using the correct animations for some of his weapons.
- [Undocumented] Updated Demoman two-handed melee weapon 3rd-person views in the loadout screen.
April 14, 2011 Patch (Hatless Update)
- Added Training for the Demoman.
- [Undocumented] New laughing taunt animations have been added but are currently unused.
October 13, 2011 Patch (Manniversary Update & Sale)
- Added achievement award response
- Removed "I didn't need your help y'know" line if being healed by a Medic.
October 27, 2011 Patch (Very Scary Halloween Special)
- [Undocumented] Added a Wolf Howl taunt for the Demoman which plays when wearing The Highland Hound set.
August 15, 2012 Patch (Mann vs. Machine)
- [Undocumented] Added voice lines for Demoman.
- Fixed the Demoman charge sound being clipped by the weapon crit sound.
- Fixed the Demoman charge sound being played multiple times simultaneously.
- Added missing payload audio for the Medic, Soldier, Demoman, and Spy.
June 18, 2014 Patch (Love & War Update)
- All Demoman stickybombs now have damage ramp up. Full damage is reached 2 seconds after firing.
- Updated Loch-n-Load reload animation.
- Removed damage ramp up mechanic from stickybombs.
December 22, 2014 Patch (Smissmas 2014)
- Damage variance on grenades and stickybombs reduced from +/- 10% damage to +/-2%.
- Grenades and Stickybombs now have the same base blast radius as rockets. Changed to 146 from 159.
- Added Iron Bomber and the Quickiebomb Launcher.
- Fixed a bug related to the Demoman's charge meter.
- Fixed
AE_CL_BODYGROUP_SET_VALUEanimation events not working properly.- Fixes the Demoman's sticky note not drawing.
[Unknown date]
- Sped up world animations for the Demoman's sword-based weapons.
Bugs
- When taunting with a primary weapon out, the smiley bodygroup may not show up.
- Crouch-walking while holding an all class melee weapon causes the Demoman's arm to bend at an unorthodox angle.
Trivia
- The Demoman's voice actor, Gary Schwartz, also voices the Heavy class.
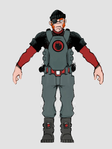
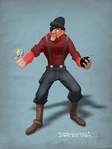
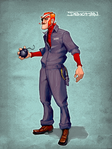
- The beta prototype of the Demoman was supposed to have a stereotypical Scottish appearance, consisting of pale skin and red hair. It was later dropped for a black Scottish character both because the former lacked originality and because the latter was easier to differentiate from the other classes.[1]
- The ethnic Scottish, Irish, and Dutch names in his full name, Tavish Finnegan DeGroot, collectively reference the antiquated cultural terms Black Scot, Black Irish, and Black Dutch.
- Black Irish and Black Dutch referred to people living in, having descendancy from, or claiming descendancy from Ireland or the Netherlands, respectively, but who were not actually ethnic Irish or Dutch.
- Black Scot was used in much the same sense as above; however, Black Scots also referred specifically to numerous Scottish descendants of freed African house servants that remained in Scotland.
- Just like the rest of the classes, the Demoman makes an appearance in the Saints Row: The Third in the form of a wearable head mask.
- According to his biography, the Demoman lost his eye before being found by his real parents, but in the WAR! comic, there is a portrait of him with both eyes and his parents.
- According to the Bombinomicon comic, the Demoman lost his eye due to a magical spell to stop the Bombinomicon from possessing him. As this event occurred due to his mother asking him to get a job, it's likely this incident happened after he met his real parents.
- The DeGroot family's seal in the portrait of the aforementioned comic states in Latin, "In Regionem Caecorum Rex Est Luscus." In English, this is roughly translated to, "In the land of the blind, the one-eyed man is king". Scottish clans typically have mottos, often in prestigious languages like Latin.
- The Demoman was originally going to have a pack of dynamite presumably instead of the Stickybomb Launcher, as referenced to in a 2006 trailer. The mechanics were similar to those of the MIRV Grenade from Team Fortress Classic.
- The first BLU team Demoman resembled Alfred Nobel.
- The emblem on the Demoman's arm was originally a stick of dynamite, which was later changed to a bomb. It is currently a sticky bomb as of November 19, 2010 Patch. Other in-game appearances of the logo, such as the 119th Medals, Scoreboard Class icon, Class Token, Mann vs. Machine trailer, the Carouser's Capotain, and Spy's Tailored Terminal special taunt remain unchanged.
- On several promotional posters, the Demoman lacks any class icon on the patch on his sleeve. This can be seen on the Scream Fortress page, the Shogun page and the Australian Christmas page. This is also apparent in Meet the Demoman.
- Furthermore, the Demoman's alternative dynamite logo can be seen on the promo pages of Halloween 2009, the Demoman's page on the WAR! Update, in Meet the Pyro, on the backdrop image for Team Fortress 2 on Steam, as well on the PS3 and Xbox 360 versions of the game.
- On several promotional posters, the Demoman lacks any class icon on the patch on his sleeve. This can be seen on the Scream Fortress page, the Shogun page and the Australian Christmas page. This is also apparent in Meet the Demoman.
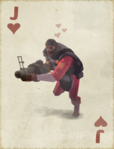
- In Poker Night at the Inventory, an image of the Demoman makes a cameo as the Jack of Hearts & Diamonds in the "Team Fortress 2" deck.
- The Demoman's eyepatch and beanie make an appearance in Worms: Reloaded as one of the hats selectable for the player's worms.
- The Assault class in Monday Night Combat has a promo item with the Demoman's eyepatch and beanie named "Eye Lad".
- The Demoman can play the piano, as seen in Expiration Date.
Gallery
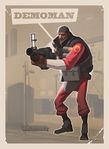
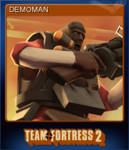
Trading card front.
The Demoman Jack of Hearts card from Poker Night at The Inventory.
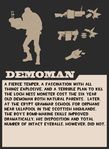
Contract drawer photo.
Related merchandise
See also
- Demoman match-ups
- Anti-Demoman Strategy
- Demoman taunts
- Demoman responses
- Demoman voice commands
- Basic Demoman strategy
- Community Demoman strategy
- Demoman (Classic)
Reference
- ↑ a b Team Fortress 2 Trailer 2, released in September 2006.
External links
- Demoman page on the Official TF2 Website
- WAR! Update
- WAR! Update - Demoman Update
- The Demoman comic
- TF2 Official Website - A Grim Bloody Fable!
- TF2 Official Website - Attention Employees...
- TF2 Official Website - The War Update!
- TF2 Official Website - It's a Bloodbath!
- TF2 Official Website - War, Day 2
- TF2 Official Website - Casualties of War!
| |||||


