Difference between revisions of "Scream Fortress 2016/pl"
(→Mapy) |
BrazilianNut (talk | contribs) m |
||
| Line 13: | Line 13: | ||
{{main|Cosmetic items/pl|l1=Przedmioty kosmetyczne}} | {{main|Cosmetic items/pl|l1=Przedmioty kosmetyczne}} | ||
{| class="wikitable collapsible" cellpadding="3" style="text-align:center;" | {| class="wikitable collapsible" cellpadding="3" style="text-align:center;" | ||
| − | | width="60px" style="background: #6A5587;" rowspan="1" | {{icon class|Scout}}<br/>'''[[Scout | + | | width="60px" style="background: #6A5587;" rowspan="1" | {{icon class|Scout}}<br/>'''[[Scout{{if lang}}|<span style="color: #FFF;">{{class name|Scout}}</span>]]''' |
| − | | align="center" style="background: # | + | | align="center" style="background: #4B69FF;" | {{item icon|Wing Mann|75px}} |
| style="background: #F1ECF7;"| '''{{item link|Wing Mann}}''' | | style="background: #F1ECF7;"| '''{{item link|Wing Mann}}''' | ||
|- | |- | ||
| − | | width="60px" style="background: #6A5587;" rowspan="3" | {{icon class|Pyro}}<br/>'''[[Pyro | + | | width="60px" style="background: #6A5587;" rowspan="3" | {{icon class|Pyro}}<br/>'''[[Pyro{{if lang}}|<span style="color: #FFF;">{{class name|Pyro}}</span>]]''' |
| − | | align="center" style="background: # | + | | align="center" style="background: #EB4B4B;" | {{item icon|Combustible Cutie|75px}} |
| style="background: #F1ECF7;"| '''{{item link|Combustible Cutie}}''' | | style="background: #F1ECF7;"| '''{{item link|Combustible Cutie}}''' | ||
|- | |- | ||
| − | | align="center" style="background: # | + | | align="center" style="background: #4B69FF;" | {{item icon|Cranial Carcharodon|75px}} |
| style="background: #F1ECF7;"| '''{{item link|Cranial Carcharodon}}''' | | style="background: #F1ECF7;"| '''{{item link|Cranial Carcharodon}}''' | ||
|- | |- | ||
| − | | align="center" style="background: # | + | | align="center" style="background: #FFD700;" | {{item icon|Hovering Hotshot|75px}} |
| style="background: #F1ECF7;"| '''{{item link|Hovering Hotshot}}''' | | style="background: #F1ECF7;"| '''{{item link|Hovering Hotshot}}''' | ||
|- | |- | ||
| − | | width="60px" style="background: #6A5587;" rowspan="2" | {{icon class|Demoman}}<br/>'''[[Demoman | + | | width="60px" style="background: #6A5587;" rowspan="2" | {{icon class|Demoman}}<br/>'''[[Demoman{{if lang}}|<span style="color: #FFF;">{{class name|Demoman}}</span>]]''' |
| − | | align="center" style="background: # | + | | align="center" style="background: #FFD700;" | {{item icon|Aerobatics Demonstrator|75px}} |
| style="background: #F1ECF7;"| '''{{item link|Aerobatics Demonstrator}}''' | | style="background: #F1ECF7;"| '''{{item link|Aerobatics Demonstrator}}''' | ||
|- | |- | ||
| − | | align="center" style="background: # | + | | align="center" style="background: #8847FF;" | {{item icon|Spirit of the Bombing Past|75px}} |
| style="background: #F1ECF7;"| '''{{item link|Spirit of the Bombing Past}}''' | | style="background: #F1ECF7;"| '''{{item link|Spirit of the Bombing Past}}''' | ||
|- | |- | ||
| − | | width="60px" style="background: #6A5587;" rowspan="3" | {{icon class|Heavy}}<br/>'''[[Heavy | + | | width="60px" style="background: #6A5587;" rowspan="3" | {{icon class|Heavy}}<br/>'''[[Heavy{{if lang}}|<span style="color: #FFF;">{{class name|Heavy}}</span>]]''' |
| − | | align="center" style="background: # | + | | align="center" style="background: #8847FF;" | {{item icon|Heavy Tourism|75px}} |
| style="background: #F1ECF7;"| '''{{item link|Heavy Tourism}}''' | | style="background: #F1ECF7;"| '''{{item link|Heavy Tourism}}''' | ||
|- | |- | ||
| − | | align="center" style="background: # | + | | align="center" style="background: #4B69FF;" | {{item icon|Mad Mask|75px}} |
| style="background: #F1ECF7;"| '''{{item link|Mad Mask}}''' | | style="background: #F1ECF7;"| '''{{item link|Mad Mask}}''' | ||
|- | |- | ||
| − | | align="center" style="background: # | + | | align="center" style="background: #D32CE6;" | {{item icon|Mo'Horn|75px}} |
| style="background: #F1ECF7;"| '''{{item link|Mo'Horn}}''' | | style="background: #F1ECF7;"| '''{{item link|Mo'Horn}}''' | ||
|- | |- | ||
| − | | width="60px" style="background: #6A5587;" rowspan="4" | {{icon class|Engineer}}<br/>'''[[Engineer | + | | width="60px" style="background: #6A5587;" rowspan="4" | {{icon class|Engineer}}<br/>'''[[Engineer{{if lang}}|<span style="color: #FFF;">{{class name|Engineer}}</span>]]''' |
| − | | align="center" style="background: # | + | | align="center" style="background: #8847FF;" | {{item icon|Corpus Christi Cranium|75px}} |
| style="background: #F1ECF7;"| '''{{item link|Corpus Christi Cranium}}''' | | style="background: #F1ECF7;"| '''{{item link|Corpus Christi Cranium}}''' | ||
|- | |- | ||
| − | | align="center" style="background: # | + | | align="center" style="background: #4B69FF;" | {{item icon|El Paso Poncho|75px}} |
| style="background: #F1ECF7;"| '''{{item link|El Paso Poncho}}''' | | style="background: #F1ECF7;"| '''{{item link|El Paso Poncho}}''' | ||
|- | |- | ||
| − | | align="center" style="background: # | + | | align="center" style="background: #FFD700;" | {{item icon|Final Frontier Freighter|75px}} |
| style="background: #F1ECF7;"| '''{{item link|Final Frontier Freighter}}''' | | style="background: #F1ECF7;"| '''{{item link|Final Frontier Freighter}}''' | ||
|- | |- | ||
| − | | align="center" style="background: # | + | | align="center" style="background: #4B69FF;" | {{item icon|Wide-Brimmed Bandito|75px}} |
| style="background: #F1ECF7;"| '''{{item link|Wide-Brimmed Bandito}}''' | | style="background: #F1ECF7;"| '''{{item link|Wide-Brimmed Bandito}}''' | ||
|- | |- | ||
| − | | width="60px" style="background: #6A5587;" rowspan="3" | {{icon class|Medic}}<br/>'''[[Medic | + | | width="60px" style="background: #6A5587;" rowspan="3" | {{icon class|Medic}}<br/>'''[[Medic{{if lang}}|<span style="color: #FFF;">{{class name|Medic}}</span>]]''' |
| − | | align="center" style="background: # | + | | align="center" style="background: #D32CE6;" | {{item icon|Burly Beast|75px}} |
| style="background: #F1ECF7;"| '''{{item link|Burly Beast}}''' | | style="background: #F1ECF7;"| '''{{item link|Burly Beast}}''' | ||
|- | |- | ||
| − | | align="center" style="background: # | + | | align="center" style="background: #4B69FF;" | {{item icon|Colossal Cranium|75px}} |
| style="background: #F1ECF7;"| '''{{item link|Colossal Cranium}}''' | | style="background: #F1ECF7;"| '''{{item link|Colossal Cranium}}''' | ||
|- | |- | ||
| − | | align="center" style="background: # | + | | align="center" style="background: #4B69FF;" | {{item icon|Surgeon's Sidearms|75px}} |
| style="background: #F1ECF7;"| '''{{item link|Surgeon's Sidearms}}''' | | style="background: #F1ECF7;"| '''{{item link|Surgeon's Sidearms}}''' | ||
|- | |- | ||
| − | | width="60px" style="background: #6A5587;" rowspan="2" | {{icon class|Spy}}<br/>'''[[Spy | + | | width="60px" style="background: #6A5587;" rowspan="2" | {{icon class|Spy}}<br/>'''[[Spy{{if lang}}|<span style="color: #FFF;">{{class name|Spy}}</span>]]''' |
| − | | align="center" style="background: # | + | | align="center" style="background: #8847FF;" | {{item icon|Big Topper|75px}} |
| style="background: #F1ECF7;"| '''{{item link|Big Topper}}''' | | style="background: #F1ECF7;"| '''{{item link|Big Topper}}''' | ||
|- | |- | ||
| − | | align="center" style="background: # | + | | align="center" style="background: #4B69FF;" | {{item icon|Showstopper|75px}} |
| style="background: #F1ECF7;"| '''{{item link|Showstopper}}''' | | style="background: #F1ECF7;"| '''{{item link|Showstopper}}''' | ||
|- | |- | ||
| − | | width="60px" style="background: #6A5587;" rowspan="1" | {{icon class|Scout}}<br/>'''[[Scout | + | | width="60px" style="background: #6A5587;" rowspan="1" | {{icon class|Scout}}<br/>'''[[Scout{{if lang}}|<span style="color: #FFF;">{{class name|Scout}}</span>]]'''<br>{{icon class|Soldier}}<br/>'''[[Soldier{{if lang}}|<span style="color: #FFF;">{{class name|Soldier}}</span>]]'''<br>{{icon class|Pyro}}<br/>'''[[Pyro{{if lang}}|<span style="color: #FFF;">{{class name|Pyro}}</span>]]'''<br>{{icon class|Heavy}}<br/>'''[[Heavy{{if lang}}|<span style="color: #FFF;">{{class name|Heavy}}</span>]]''' |
| − | | align="center" style="background: # | + | | align="center" style="background: #D32CE6;" | {{item icon|Pestering Jester|75px}} |
| style="background: #F1ECF7;"| '''{{item link|Pestering Jester}}''' | | style="background: #F1ECF7;"| '''{{item link|Pestering Jester}}''' | ||
|- | |- | ||
| − | | width="60px" style="background: #6A5587;" rowspan="5" | {{icon class|All Classes}}<br/>'''[[Classes | + | | width="60px" style="background: #6A5587;" rowspan="5" | {{icon class|All Classes}}<br/>'''[[Classes{{if lang}}|<span style="color: #FFF;">{{class name|All Classes}}</span>]]''' |
| − | | align="center" style="background: # | + | | align="center" style="background: #EB4B4B;" | {{item icon|Class Crown|75px}} |
| style="background: #F1ECF7;"| '''{{item link|Class Crown}}''' | | style="background: #F1ECF7;"| '''{{item link|Class Crown}}''' | ||
|- | |- | ||
| − | | align="center" style="background: # | + | | align="center" style="background: #8847FF;" | {{item icon|Lil' Bitey|75px}} |
| style="background: #F1ECF7;"| '''{{item link|Lil' Bitey}}''' | | style="background: #F1ECF7;"| '''{{item link|Lil' Bitey}}''' | ||
|- | |- | ||
| − | | align="center" style="background: # | + | | align="center" style="background: #4B69FF;" | {{item icon|Nasty Norsemann|75px}} |
| style="background: #F1ECF7;"| '''{{item link|Nasty Norsemann}}''' | | style="background: #F1ECF7;"| '''{{item link|Nasty Norsemann}}''' | ||
|- | |- | ||
| − | | align="center" style="background: # | + | | align="center" style="background: #4B69FF;" | {{item icon|Spooktacles|75px}} |
| style="background: #F1ECF7;"| '''{{item link|Spooktacles}}''' | | style="background: #F1ECF7;"| '''{{item link|Spooktacles}}''' | ||
|- | |- | ||
| − | | align="center" style="background: # | + | | align="center" style="background: #8847FF;" | {{item icon|Toadstool Topper|75px}} |
| style="background: #F1ECF7;"| '''{{item link|Toadstool Topper}}''' | | style="background: #F1ECF7;"| '''{{item link|Toadstool Topper}}''' | ||
| − | |||
|} | |} | ||
| Line 118: | Line 117: | ||
| align="center" style="background: #AD9DC3;" | {{item icon|Unusualifier|75px}} | | align="center" style="background: #AD9DC3;" | {{item icon|Unusualifier|75px}} | ||
| style="background: #F1ECF7;"| '''[[Unusualifier/pl|Uniezwyklacz]]''' | | style="background: #F1ECF7;"| '''[[Unusualifier/pl|Uniezwyklacz]]''' | ||
| − | |||
|} | |} | ||
=== Mapy === | === Mapy === | ||
| − | {{main| | + | {{main|List of maps{{if lang}}|l1=List of maps}} |
{|class="wikitable" cellpadding=2 style="text-align:center;" | {|class="wikitable" cellpadding=2 style="text-align:center;" | ||
|-style="height:20px;" | |-style="height:20px;" | ||
| Line 131: | Line 129: | ||
|- | |- | ||
|style="background-color:#AD9DC3;" |'''[[Brimstone (map)/pl|Brimstone]]''' | |style="background-color:#AD9DC3;" |'''[[Brimstone (map)/pl|Brimstone]]''' | ||
| − | |width="100px" style="background:#F1ECF7" |[[File:Pl_fifthcurve_event.png|160px|link=Brimstone (map)]] | + | |width="100px" style="background:#F1ECF7" |[[File:Pl_fifthcurve_event.png|160px|link=Brimstone (map)/pl]] |
|align="center" style="background:#F1ECF7" | '''[[Payload/pl|Ładunek]]'''<br>[[File:Hoodoo Bombcart.png|50px|link=Payload/pl]] | |align="center" style="background:#F1ECF7" | '''[[Payload/pl|Ładunek]]'''<br>[[File:Hoodoo Bombcart.png|50px|link=Payload/pl]] | ||
|width="60px" |{{code|pl_fifthcurve_event}} | |width="60px" |{{code|pl_fifthcurve_event}} | ||
|- | |- | ||
|style="background-color:#AD9DC3;" |'''[[Maple Ridge Event/pl|Maple Ridge Event]]''' | |style="background-color:#AD9DC3;" |'''[[Maple Ridge Event/pl|Maple Ridge Event]]''' | ||
| − | |width="100px" style="background:#F1ECF7" |[[File:Koth_maple_ridge_event.png|160px|link=Maple Ridge Event]] | + | |width="100px" style="background:#F1ECF7" |[[File:Koth_maple_ridge_event.png|160px|link=Maple Ridge Event/pl]] |
|align="center" style="background:#F1ECF7" |'''[[King of the Hill/pl|Król wzgórza]]'''<br>[[File:Controlpoint.png|50px|link=King of the Hill/pl]] | |align="center" style="background:#F1ECF7" |'''[[King of the Hill/pl|Król wzgórza]]'''<br>[[File:Controlpoint.png|50px|link=King of the Hill/pl]] | ||
|width="60px" |{{code|koth_maple_ridge_event}} | |width="60px" |{{code|koth_maple_ridge_event}} | ||
|- | |- | ||
|style="background-color:#AD9DC3;" |'''[[Pit of Death/pl|Pit of Death]]''' | |style="background-color:#AD9DC3;" |'''[[Pit of Death/pl|Pit of Death]]''' | ||
| − | |width="100px" style="background:#F1ECF7" |[[File:Pd_pit_of_death_event.png|160px|link=Pit of Death]] | + | |width="100px" style="background:#F1ECF7" |[[File:Pd_pit_of_death_event.png|160px|link=Pit of Death/pl]] |
|align="center" style="background:#F1ECF7" |'''[[Player Destruction/pl|Wyniszczenie]]'''<br>[[File:Hud_invasion_bottle.png|50px|link=Player Destruction/pl]] | |align="center" style="background:#F1ECF7" |'''[[Player Destruction/pl|Wyniszczenie]]'''<br>[[File:Hud_invasion_bottle.png|50px|link=Player Destruction/pl]] | ||
|width="60px" |{{code|pd_pit_of_death_event}} | |width="60px" |{{code|pd_pit_of_death_event}} | ||
| Line 167: | Line 165: | ||
{{Scream Fortress 2016 Nav}} | {{Scream Fortress 2016 Nav}} | ||
| + | {{Scream Fortress Events Nav}} | ||
{{Major updates nav}} | {{Major updates nav}} | ||
Revision as of 05:53, 3 November 2019

Ten artykuł dotyczy nowej zawartości wydanej w aktualizacji. Dane dotyczące aktualizacji samej w sobie znajdziesz tutaj: Aktualizacja z 21 października 2016.
Scream Fortress 2016 było główną aktualizacją wydaną 21 października 2016. Dodała 2 nowe drwiny, 3 nowe mapy, 24 nowe przedmioty kosmetyczne, nowe narzędzie, Uniezwyklacz oraz przywróciła Merasmisje z poprzednich lat.
Spis treści
Przebieg wydarzenia
Scream Fortress 2016 trwało pierwotnie od 21 października 2016 do 9 listopada 2016, ale zostało przedłużone do 16 listopada 2016.
Zawartość
Przedmioty kosmetyczne
Osobny artykuł: Przedmioty kosmetyczne
Drwiny
Osobny artykuł: Drwiny
Wszystkie klasy |
Czary z drugiej ręki | |
| Zwycięskie okrążenie |
Narzędzia
Osobny artykuł: Narzędzia
| Skrzynia Gęsiej Skórki | |
| Klucz Gęsiej Skórki | |
| Uniezwyklacz |
Mapy
Osobny artykuł: List of maps
| Nazwa | Zdjęcie | Tryb gry | Nazwa pliku |
|---|---|---|---|
| Brimstone | 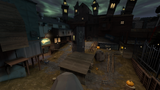
|
Ładunek
|
pl_fifthcurve_event
|
| Maple Ridge Event | 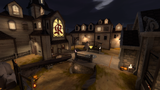
|
Król wzgórza |
koth_maple_ridge_event
|
| Pit of Death | 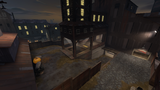
|
Wyniszczenie
|
pd_pit_of_death_event
|
Nietypowe efekty
Osobny artykuł: Nietypowe efekty
Gwiazda Neutronowa

Transformator Tesli

Gwiaździsta Bezsenność
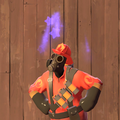
Gwieździsty Sen

Piekielne Piekło
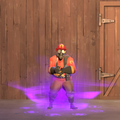
Widmowy Wir
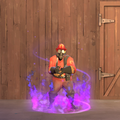
Piekielne Płomienie

Piekielny Dym


Galeria
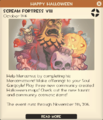
Powiadomienie w grze na temat rozpoczęcia wydarzenia.
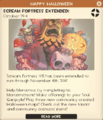
Powiadomienie w grze na temat przedłużenia wydarzenia.
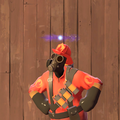
- User Twolfe Halloween2016.png
Przed-wydarzeniowa zapowiedź w postaci obrazka.


| |||||
| ||||||||||||||||||||||||||||||||||||||||||||||||||||||||||||||||||||||||||||||||||||||||||||||||||