Difference between revisions of "Dustbowl/pt-br"
BrazilianNut (talk | contribs) m (→{{common string|Helpful overview}}) |
|||
| (33 intermediate revisions by 15 users not shown) | |||
| Line 1: | Line 1: | ||
| − | |||
{{trans}} | {{trans}} | ||
| + | |||
| + | {{DISPLAYTITLE:Dustbowl}} | ||
{{Map infobox | {{Map infobox | ||
| − | | game-type= | + | | map-status = official |
| − | | file-name=cp_dustbowl | + | | map-game-type = Control Point |
| − | | map-image=TF2 Dustbowl Map.jpg | + | | map-file-name = cp_dustbowl |
| − | | map- | + | | map-image = TF2 Dustbowl Map.jpg |
| − | | map-environment = Deserto | + | | map-released = {{Patch name|10|10|2007|date-only=yes}} |
| − | | map-setting = | + | | map-released-major = Launch |
| − | | map- | + | | map-has-n-stages = 3 |
| − | | map-health | + | | map-environment = Deserto |
| − | | map-health | + | | map-setting = Dia, ensolarado |
| − | | map-ammo | + | | map-hazards = [[Environmental death/pt-br#Crushing|Esmagamento]] |
| − | | map-ammo | + | | map-has-pyrovision = yes |
| − | | map-ammo | + | | map-pickups-health-small = 7 |
| + | | map-pickups-health-medium = 8 | ||
| + | | map-pickups-health-large = 10 | ||
| + | | map-pickups-ammo-small = 4 | ||
| + | | map-pickups-ammo-medium = 12 | ||
| + | | map-pickups-ammo-large = 7 | ||
| + | | map-has-bots = yes | ||
}} | }} | ||
| − | '''Dustbowl''' é um mapa | + | {{Quotation|'''O Engineer''' sobre o calor do deserto|Estou queimando.|sound=Engineer autoonfire03.wav|en-sound=yes}} |
| + | |||
| + | '''Dustbowl''' é um mapa de [[Control Point (game mode)/pt-br#Ataque/Defesa|Pontos de Controle de Ataque/Defesa]] e uma recriação do mapa de [[Team Fortress Classic/pt-br|''Team Fortress Classic'']] de mesmo nome. Ele e {{map link|Gravel Pit}} foram os primeiros mapas de Ataque/Defesa para [[Team Fortress 2/pt-br|''Team Fortress 2'']] e foi um dos 6 mapas iniciais incluídos com o lançamento do jogo. Dustbowl é o único mapa para o qual um [[Dustbowl (Training)/pt-br|modo de treinamento]] foi criado. | ||
| − | Em Dustbowl, | + | Em Dustbowl, o objetivo dos atacantes (a equipe [[BLU/pt-br|BLU]]) é vencer uma série de estágios a fim de vencer o mapa. Em cada estágio, os atacantes devem capturar dois [[Control point (objective)/pt-br|pontos de controle]], A e B, de posse dos defensores (a equipe [[RED/pt-br|RED]]). O ponto A deve ser capturado antes que os atacantes possam avançar capturar o ponto B. A contagem regressiva do mapa aumenta em 4 minutos e 30 segundos para cada captura e, uma vez que um ponto é capturado, ele é bloqueado e não pode ser retomado pelos defensores. |
| − | + | Assim como todos os mapas de Ataque/Defesa, a BLU joga como os atacantes enquanto a RED joga como os defensores. {{map link|Egypt}} e {{map link|Gorge}} compartilham um desenho similar ao de Dustbowl. | |
| − | == | + | == Vídeo de introdução == |
{{youtube|YJ1olXe1Feo}} | {{youtube|YJ1olXe1Feo}} | ||
| − | == | + | == Locais == |
| − | BLU | + | {{HelpfulOverviewNote}} |
| + | As direções são descritas da perspectiva da BLU. | ||
| + | |||
| + | === Estágio 1, Ponto A === | ||
| + | [[File:Dustbowl_stage_one.png|thumb|150px|right|Detalhes do estágio 1.]] | ||
| + | [[File:Dustbowl s1c1.jpg|thumb|150px|right|Dustbowl, 1º estágio, ponto A.]] | ||
| + | [[File:Dustbowl s1c2.jpg|thumb|150px|right|Dustbowl, 1º estágio, ponto B.]] | ||
| + | O ponto de controle A fica dentro de um prédio pequeno à esquerda. | ||
| + | |||
| + | * '''Base BLU''': Possui 3 saídas: esquerda, meio e direita. A saída esquerda tem um armário de reabastecimento e uma rampa que leva à saída. A saída esquerda é particularmente vulnerável a ataques inimigos. | ||
| + | |||
| + | * '''Vale''': O caminho longo e reto a partir da porta do meio da base leva direto à porta dos fundos do ponto de controle A. | ||
| − | + | * '''Galpão Esquerdo''': Próximo à porta da esquerda, um galpão pequeno com uma porta abriga um kit médico e uma caixa de munição grandes. O caminho leva direto à entrada frontal do prédio do ponto de controle. Uma escada leva ao telhado do galpão. | |
| − | |||
| − | |||
| − | |||
| − | + | * '''Galpão Direito''': Perto da porta da direita, um galpão pequeno de duas portas contém um kit médico e uma caixa de munição grandes. | |
| − | * ''' | ||
| − | * ''' | + | * '''Ponto de Controle A''': O Ponto de Controle A fica abrigado dentro de um prédio pequeno. Ele contém um kit médico e uma caixa de munição grandes. Escadas levam a um túnel de mina, o qual possui um kit médico grande e leva ao Ponto de Controle B. O prédio possui duas portas e uma sacada. |
| − | * ''' | + | * '''Entradas do Túnel''': O túnel possui 3 entradas que levam a um sistema de túneis que levam ao Ponto de Controle B. A entrada principal, acessível do nível do chão, se divide para a esquerda e para a direita. Uma terceira entrada só é acessível pelo prédio guardando o Ponto de Controle A. |
| − | + | <gallery widths=150px heights=90px> | |
| + | File:Dustbowl1.png|O Vale. | ||
| + | File:Dustbowl2.png|O Galpão Direito. | ||
| + | File:Dustbowl3.png|Vista interna do prédio do ponto de controle. | ||
| + | </gallery> | ||
| − | * ''' | + | === Estágio 1, Ponto B === |
| + | * '''Túnel Superior''': Acessado do prédio do ponto de controle A, ele possui duas saídas. Uma saída é um portão de mão única que fornece acesso ao Ponto de Controle B e a segunda saída é desbloqueada, situada mais para trás, com alguns baldes e pneus servido de cobertura. A caverna contém um kit médico e uma caixa de munição médios. | ||
| − | * ''' | + | * '''Túnel Esquerdo''': Pegar o caminho esquerdo da bifurcação do túnel principal fornece um caminho direto até o Ponto de Controle B. |
| − | + | * '''Túnel Direito''': Pegar o caminho direito da bifurcação do túnel principal leva a uma caverna espaçosa com saídas em dois andares. A saída superior leva à Ponte, enquanto a saída inferior é um caminho direto até o Ponto de Controle. Ele contém um kit médico e uma caixa de munição médios. | |
| − | |||
| − | + | * '''Ponte''': Uma ponte que leva da saída superior da caverna direita até o portão bloqueando a caverna esquerda. Há uma entrada para o prédio do Ponto de Controle à esquerda do final da ponte. | |
| − | * ''' | + | * '''Plataforma''': Há um prédio plano de madeira do lado direito oposto ao túnel e após a ponte. É possível subir no telhado deste prédio para obter uma vista do ponto B. Há também algumas caixas de madeira de cobertura. |
| − | + | * '''Ponto de Controle B''': O Ponto de Controle B também fica abrigado dentro de um prédio. Ele contém um kit médico e uma caixa de munição pequenos e é acessado diretamente da saída do meio da caverna. À esquerda do ponto de controle fica um corredor estreito com uma saída no nível do chão e uma saída acima de uma escada que dá no portão de mão única à esquerda. | |
| − | |||
| − | |||
| − | + | * '''Telhado da Base''': O telhado acima da base RED é dividido em duas partes conectadas pela ponte dos Snipers e possui um kit médico e uma caixa de munição pequenos em um dos lados. | |
| − | * ''' | + | * '''Base RED''': A Base RED tem uma saída central localizada diretamente em frente (ou levemente à esquerda/direita, dependendo de onde os jogadores nascem). A saída central fica entre dois armários de reabastecimento. Esses tipos de base são vulneráveis a ''spam'' inimigo, visto que só têm 1 saída. A base RED fica virada para o lado oposto ao campo de batalha e os jogadores devem fazer uma curva em U para alcançá-lo, adicionando certa demora a suas defesas. |
| − | + | <gallery widths=150px heights=90px> | |
| + | File:Dustbowl4.png|Saídas do Túnel Superior. | ||
| + | File:Dustbowl5.png|A Plataforma. | ||
| + | File:Dustbowl6.png|Estágio 1, Ponto de Controle B. | ||
| + | File:Dustbowl7.png|O Telhado da Base. | ||
| + | </gallery> | ||
| − | + | === Estágio 2, Ponto A === | |
| + | [[File:Dustbowl stagetwo.png|thumb|150px|right|Detalhes do estágio 2.]] | ||
| + | [[File:Dustbowl s2c1.jpg|thumb|150px|right|Dustbowl, 2º estágio, ponto A.]] | ||
| + | [[File:Dustbowl s2c2.jpg|thumb|150px|right|Dustbowl, 2º estágio, ponto B.]] | ||
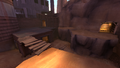
| + | O primeiro ponto fica no topo de um prédio à esquerda (perspectiva da BLU). | ||
| − | + | * '''Base BLU''': Um prédio pequeno que dá no Túnel. A equipe BLU ocupa a base RED do primeiro estágio. | |
| − | |||
| − | + | * '''Túnel''': Duas entradas emergem da base, uma levando à esquerda e uma à direita. Os defensores podem entrar livremente após os portões do tempo de preparação se abrirem. | |
| − | * ''' | + | * '''Galpão''': No lado direito ficam dois kit médicos e caixas de munição grandes. A escada nos fundos leva ao telhado do prédio. |
| − | * ''' | + | * '''Prédio do Ponto de Controle''': O ponto de controle fica no topo do segundo andar do prédio. O segundo andar possui uma cabana pequena que contém um kit médico grande e uma caixa de munição média. O primeiro andar tem uma sala pequena e aberta de frente para a base BLU com um kit médico e uma caixa de munição médios. Ela tem duas portas e também pode ser entrada através de uma janela e através de caixas localizadas na frente à esquerda e pneus nos fundos à esquerda. |
| − | * ''' | + | * '''Escritório''': Os fundos desta área. Há duas salas, sendo que a da direita contém um kit médico médio e uma caixa de munição grande. A segunda sala possui uma janela voltada para o Túnel. |
| − | * ''' | + | * '''Placa''': Um kit médico grande e uma caixa de munição pequena se encontram à esquerda do Escritório. |
| − | * ''' | + | * '''Saídas''': Uma à esquerda e uma à direita, ambas levando ao ponto B. |
| − | + | <gallery widths=150px heights=90px> | |
| + | File:Dustbowl8.png|O Galpão com suprimentos. | ||
| + | File:Dustbowl10.png|Vista interna do prédio do ponto de controle. | ||
| + | File:Dustbowl18.png|Ponto A do estágio 2. | ||
| + | File:Dustbowl11.png|A Placa. | ||
| + | File:Dustbowl9.png|O Escritório. | ||
| + | File:Dustbowl12.png|As Saídas. | ||
| + | </gallery> | ||
| − | + | === Estágio 2, Ponto B === | |
| + | O segundo ponto de controle fica em uma plataforma perto da base RED. | ||
| − | + | * '''O Túnel da Mina''': Um túnel longo e estreito que começa atrás e à direita do prédio do Escritório. Pode-se dizer que esta é a entreada esquerda para a área do ponto B. | |
| − | |||
| − | + | * '''Túneis Duplos''': Dois túneis curtos paralelos um ao outro. | |
| − | * ''' | + | * '''Túnel com Portão''': Bifurcando-se dos Túneis Duplos à esquerda fica o Túnel com Portão. É um túnel com um portão de mão única ao final. |
| − | * ''' | + | * '''O Portão''': À extrema direita das saídas duplas fica um portão de mão única através de outro túnel. Há um kit médico grande ao final, perto do portão. |
| − | * ''' | + | * '''O Pátio''': A área aberta fora dos Túneis Duplos e a saída do túnel de mina longo, situado perto do prédio do meio. |
| − | * ''' | + | * '''Prédio do Meio''': Um prédio grande no meio da área do Pátio. O segundo andar contém dois kits médicos e caixas de munição médios. Um corredor no nível do chão passa pelo prédio e dá no outro lado, diretamente em frente ao ponto de controle final. Há também um caminho ao redor do lado de fora com algumas pedras, atrás das quais fica um kit médico grande. |
| − | * ''' | + | * '''Ponto de Controle B''': O ponto de controle fica em uma plataforma perto da base dos defensores e é acessível por escadas do outro lado. |
| − | * ''' | + | * '''Prédio da Base RED''': A base da equipe RED defensora, atrás do ponto de controle. A estrutura desta base é idêntica à da base RED no estágio 1. |
| − | + | <gallery widths=150px heights=90px> | |
| + | File:Dustbowl13.png|Saída do Túnel de Mina e dos Túneis Duplos. | ||
| + | File:Dustbowl14.png|Saída do Túnel com Portão. | ||
| + | File:Dustbowl15.png|Ponto B do estágio 2. | ||
| + | </gallery> | ||
| − | === | + | === Estágio 3, Ponto A === |
| − | The first control point is on a platform straight across from BLU's exit. | + | [[File:Dustbowl stage three.png|thumb|150px|right|Detalhes do estágio 3 (arquivo grande).]] |
| − | RED has a shortcut from one of their spawn rooms to this point. This shortcut is sealed once BLU captures this point. | + | [[File:Dustbowl s3c1.jpg|thumb|150px|right|Dustbowl, 3º estágio, ponto A.]] |
| − | + | [[File:Dustbowl s3c2.jpg|thumb|150px|right|Dustbowl, 3º estágio, ponto B.]] | |
| + | The first control point is on a platform straight across from BLU's exit. RED has a shortcut from one of their spawn rooms to this point. This shortcut is sealed once BLU captures this point. | ||
| − | * ''' | + | * '''BLU Spawn''': This spawn occupies the RED Spawn from Stage 2. Upon leaving, players can take an immediate right turn and go up a long corridor to the right-hand locked gate, or take either the left or the right stairs. Both will lead to the double gate exits. |
| − | * ''' | + | * '''Three Exits''': Left, Middle, and Right all behind gates that open at the start of the round defenders can then move towards spawn. |
| − | * ''' | + | * '''Pillbox''': A small building containing a large Ammo and small Health pack. The building stands between the gates and the control point and has two wide windows which look toward the double gates. |
* '''Control point A''': Located at the back of the area on a slightly raised platform. | * '''Control point A''': Located at the back of the area on a slightly raised platform. | ||
| − | * ''' | + | * '''Loading Dock''': A ledge at the end of the defenders' shortcut to control point A. Once the first control point has been taken, the doorway from RED’s spawn is locked. |
| − | == | + | <gallery widths=150px heights=90px> |
| − | + | File:Dustbowl16.png|Exit of Blu spawn | |
| + | File:Dustbowl17.png|Pillbox | ||
| + | File:Dustbowl19.png|Stage 3, control point A | ||
| + | </gallery> | ||
| − | + | === Estágio 3, Ponto B === | |
| + | The final control point is the base of a launch pad, under a rocket, in the center of RED's base. | ||
| − | * '''The Alleys''': These are the narrow alleyways that lead from control point A to control point B. They consist of two levels with the main road having no | + | * '''The Alleys''': These are the narrow alleyways that lead from control point A to control point B. They consist of two levels, with the main road having no Health or Ammo packs, and the side rooms on the upper level having two small Health and medium Ammo packs. |
* '''Downstairs''': Side doorway leading down underneath the base and into the valley under control point B area. | * '''Downstairs''': Side doorway leading down underneath the base and into the valley under control point B area. | ||
| − | * '''The Balcony House''': Has a bridge over the alley and small | + | * '''The Balcony House''': Has a bridge over the alley and a small Health and large Ammo pack. It faces control point B. |
| − | |||
| − | |||
| − | |||
| − | |||
| − | * ''' | + | * '''The Sniper House''': Opposite the Balcony House. Has a medium Health and large Ammo pack on the second level. On the first level, there is a bunker with windows facing down the long alley. There are two doors, one in the alley, the other at the back. These can be accessed from outside by defenders via a tiny ledge. |
* '''Equipment Room''': In front of the control point, a long room with an Ammo pack at the front and a medium Health pack in the back. Accessible by stairs. | * '''Equipment Room''': In front of the control point, a long room with an Ammo pack at the front and a medium Health pack in the back. Accessible by stairs. | ||
| Line 140: | Line 178: | ||
* '''The Valley''': Located underneath the final bridge, the Valley has one entrance, and a flight of stairs leading up to the bridge. | * '''The Valley''': Located underneath the final bridge, the Valley has one entrance, and a flight of stairs leading up to the bridge. | ||
| − | + | * '''Control point B''': This is the final control point for this map and is situated between RED's two spawn exits, underneath a large rocket. | |
| − | + | * '''RED Spawn''': There are two individual RED spawns that are único in design from its last two RED spawns in stages one and two respectively. One spawn is located to the left of control point B, and one on the right. The one on the left is significantly larger than the right RED spawn and has two different exits. One, which is in front of the RED team is the shortcut to control point A. The other exit spirals around and leads to Control Point B. The right RED sala de renascimento is shaped like a rectangular prism, then has a curve to its only single exit. There are equal chances that the RED team player can spawn in any of these two locations. See the image "Map Overview" to see the interiors of the spawns. | |
| − | + | <gallery widths=150px heights=90px> | |
| − | + | File:Dustbowl20.png|Alleys | |
| + | File:Dustbowl24.png|Downstairs | ||
| + | File:Dustbowl21.png|The Balcony House | ||
| + | File:Dustbowl23.png|Inside view of sniper house | ||
| + | File:Dustbowl22.png|Stage 3, control point B | ||
| + | </gallery> | ||
| − | == | + | == {{common string|Helpful overview}} == |
| + | [[File:Dustbowl overview with lines.png|left|Os locais de Dustbowl.|750px]] | ||
| + | <small>1.Right Exit Shed | ||
| + | 2.Canyon | ||
| + | 3.Left Exit Shed | ||
| + | 4.Platform | ||
| + | 5.Bridge | ||
| + | 6.Tunnels | ||
| + | 7.Dugout | ||
| + | 8.Large Shed | ||
| + | 9.Control Point Building | ||
| + | 10.The Office | ||
| + | 11.Mining Tunnel | ||
| + | 12.Double Tunnels | ||
| + | 13.Gated Tunnel | ||
| + | 14.Courtyard | ||
| + | 15.Middle Building | ||
| + | 16.Pillbox | ||
| + | 17.Loading Dock | ||
| + | 18.Alleys | ||
| + | 19.Valley | ||
| − | + | Red/blue diagonal lines: Red/Blu first spawn | |
| − | + | Red/blue double diagonal lines: Red/Blu second spawn | |
| − | + | Red/blue double diagonal lines w/ a rectangle: Red/Blu third spawn | |
| − | + | (Red '''and''' blue diagonal lines indicate that that room was once a Red spawnroom before becoming the Blu's second, third... spawn.) | |
| − | |||
| − | |||
| − | |||
| − | |||
| − | |||
| + | Red circle: First capture point Stage 1 | ||
| + | Blue circle: Second capture point Stage 1 | ||
| + | Green circle: First capture point Stage 2 | ||
| + | Black circle: Second capture point Stage 2 | ||
| + | Yellow circle: First capture point Stage 3 | ||
| + | White circle: Second/final capture point Stage 3</small> | ||
| + | {{clr}} | ||
| − | == | + | == {{common string|Strategy}} == |
| + | {{map strategy link|Dustbowl|main=yes}} | ||
| − | + | == Tempos dos pontos de controle == | |
| − | + | Todos os pontos de controle têm os mesmo tempos de captura. | |
| + | {{Control Point Timing/Official Map}} | ||
| − | + | == {{common string|Related achievements}} == | |
| + | === {{Achiev type link|general}} === | ||
| + | {{Achievement table | ||
| + | | {{Show achievement|General|Impenetrable Defense}} | ||
| + | | {{Show achievement|General|World Traveler}} | ||
| + | }} | ||
| − | + | == {{common string|Update history}} == | |
| − | + | {{Update history| | |
| − | * | + | '''{{Patch name|10|2|2007}}''' |
| + | * Fixed players being able to use spectator points in Dustbowl that were not in play. | ||
| − | + | '''{{Patch name|10|25|2007}}''' | |
| + | * Fixed issues on Dustbowl that could occur when a server emptied in the middle of a round. | ||
| + | '''{{Patch name|12|20|2007}}''' | ||
| + | * Now waits until either team wins fully before changing to another map on server timelimit expiring. | ||
| + | * Teams now score a point per captured control point, rather than per sub round. | ||
| + | * Prevented Demomen being able to launch grenades into the stage three alleys while standing at the final cap point. | ||
| + | * Fixed gaps in stage gates that allowed Snipers to kill defenders during setup. | ||
| + | * Fixed several model and brush perch exploits in stage three. | ||
| + | * Added stair access to the upper area in stage three after the first cap. | ||
| + | * Limited line-of-sight at the first control point in stage 3 to remove a [[Griefing|griefable]] Sniper spot. | ||
| + | * {{Undocumented}} Fixed model exploit in stage one allowing Sentry Gun/Teleporter to be placed behind chain link fence. | ||
| − | + | '''{{Patch name|12|21|2007}}''' | |
| − | * | + | * Fixed the problem with {{code|mp_maxrounds}} not correctly counting the number of rounds for Dustbowl after the scoring change. |
| − | * | + | '''{{Patch name|2|14|2008}}''' |
| + | * Added a new access point to the stage 2 attacker gates (drop-down left from spawn), allowing attackers a way to reach the left route without being subjected to the spam and Sentry Gun fire. | ||
| + | * Fixed a gap in stage 3, cap 1 that allowed a player with to wiggle above the "ceiling" clip. | ||
| + | * Fixed a gap behind stage 1, cap 1 house. | ||
| + | * Fixed a high perch on stage 1, cap 1 house roof. | ||
| + | * Fixed a perch offering view of nodraw textures and the skybox (stage1 cap2 rock barrier). | ||
| + | * Fixed a few places where rockets/Demoman pipes could pass through non-solid models. | ||
| + | * Sealed up a gap over stage 1 lower startgate. | ||
| + | * Clipped off tall windows in stage 3 to prevent Sentry Guns from being built behind them. | ||
| − | + | '''{{Patch name|3|20|2008}}''' | |
| − | + | * Updated Dustbowl with several exploit fixes. | |
| − | * | ||
| − | * | + | '''{{Patch name|2|23|2012}}''' |
| + | * Adjusted Blue team's {{code|func_respawnroom}} in stage 1 to be flush against the door. | ||
| + | '''{{Patch name|7|10|2013}}''' | ||
| + | * Fixed players building in Blu's first spawn | ||
| + | * Fixed players shooting through rocks in stage 2 | ||
| + | * Fixed collision in tunnels in stage 2 | ||
| + | * Fixed textures not displaying properly in [[Pyroland|Pyrovision]] | ||
| + | * Fixed lighting on cliff faces | ||
| + | * Fixed skybox error in stage 3 | ||
| + | * Fixed players getting killed through the ceiling under stage 2 cap 1 | ||
| + | * Adjusted ceiling height in stage 3 tunnel for better clearance | ||
| + | * Cleaned up prop collision | ||
| − | + | '''{{Patch name|3|5|2014}}''' | |
| − | * | + | * Fixed Red team's stage 1 spawn door pushing players in the air. |
| + | * Fixed collision on windows, props, and rooflines. | ||
| + | * Fixed floating props. | ||
| + | * Fixed players building inside the alternate exit from the Red spawn in stage 3. | ||
| − | * | + | '''{{Patch name|4|24|2014}}''' |
| + | * Fixed players standing in sky over the beginning of stage 1. | ||
| + | * Fixed collision on rocks in the front of stage 1 where stickybombs could be placed inside them. | ||
| − | * | + | '''{{Patch name|9|10|2015}}''' |
| + | * {{Undocumented}} Added [[saucers]] and posters to Dustbowl. | ||
| − | * | + | '''{{Patch name|11|25|2015}}''' |
| + | * {{Undocumented}} Removed [[saucers]] and posters from Dustbowl. | ||
| + | '''{{Patch name|3|28|2018}} #1''' | ||
| + | * Fixed Pyros shooting through the stage 3 doors. | ||
| + | * Updated some entities that were disabled but shouldn't have been (func_nobuilds, soundscapes, powerlines in the 3dskybox). | ||
| + | }} | ||
| − | === | + | == {{common string|Bugs}} == |
| − | + | * Nas versões de console, Snipers e outras classes são capazes de atirar através das grades e eliminar inimigos (veja [[Differences between platforms/pt-br|Diferenças entre as plataformas]]). | |
| − | + | * Dentro dos portões duplos da base BLU no estágio 3 entre os dois portões, stickies explodidas junto à parede do lado de fora matam jogadores do lado de dentro. | |
| + | * O ruído de projetor presente na sala de reabastecimento RED final é reproduzido de forma inconsistente. | ||
| + | * Jogadores são capazes de atirar através das portas das bases se ficarem diretamente em frente a elas. | ||
| − | * | + | == {{common string|Trivia}} == |
| + | * Devido ao mapa estar no jogo desde o lançamento, Dustbowl era inicialmente considerado um mapa de [[Control Point (game mode)/pt-br|Pontos de Controle]], mas foi posteriormente alterado para [[Attack/Defend/pt-br|Ataque/Defesa]]. | ||
| + | * Dustbowl é um dos mapas desenhados com base em mapas que já existiam em [[Team Fortress Classic/pt-br|''Team Fortress Classic'']], os outros sendo {{map link|2Fort}}, {{map link|Well|Well (Control Point)}} e {{map link|Badlands|Badlands (Control Point)}}. A jogabilidade da versão original era similar ao modo Capture a Bandeira unilateral, em que um jogador na equipe BLU deve levar uma bandeira aos pontos de controle da equipe RED, com apenas um ponto de controle por estágio. | ||
| + | * Os vários barris espalhados pelo mapa são móveis e quebram em pedaços quando atacados. | ||
| + | * A chaminé perto do foguete para de emitir fumaça em certo ponto no estágio 3. | ||
| + | * Dustbowl foi o mapa apresentado na cena de encerramento de ''[[Meet the Heavy/pt-br|Conheça o Heavy]]'', com uma cena quase idêntica reaparecendo em ''[[Meet the Sandvich/pt-br|Conheça o Sandviche]]''. A área mostrada é a área do lado de fora da base BLU no primeiro estágio. | ||
| + | * Os logos da companhia Cornwell espalhados pelo mapa são uma referência a Dean Cornwell, um artista que serviu de forte inspiração para o estilo visual de ''Team Fortress 2''.<ref>''Jason Mitchell'', [[Moby Francke/pt-br|Moby Francke]], [[Dhabih Eng/pt-br|Dhabih Eng]], [https://steamcdn-a.akamaihd.net/apps/valve/2007/NPAR07_IllustrativeRenderingInTeamFortress2.pdf {{tooltip|Illustrative Rendering in ''Team Fortress 2''|Renderização Ilustrativa em Team Fortress 2}}] {{lang icon|en}} (2007), recuperado em 23 de outubro de 2010.</ref> | ||
| + | * Dustbowl aparece em ''[[Worms Reloaded/pt-br|Worms Reloaded]]'' como um dos fortes. | ||
| + | * [[w:pt:Dust Bowl|''Dust Bowl'']] ("tijela de poeira") foi uma crise econômica que ocorreu nos anos 1930 no centro-oeste dos Estados Unidos e Canadá. | ||
| + | * De acordo com o Selo de Bronze na página da {{update link|Tough Break Update}}, Dustbowl foi onde surgiu a [[w:pt:Pneumoconiose|pneumoconiose]], uma doença causada por inalar poeira conhecida por causar tosse, inflamação pulmonar e cicatrizes/engrossamento dos tecidos conectivos dos pulmões. | ||
| − | + | == {{common string|Gallery}} == | |
| + | {{botignore| | ||
| − | + | === Artes conceituais === | |
| + | <gallery> | ||
| + | File:Desert concept.jpg|Conceito ambiental de Dustbowl. | ||
| + | File:Dustbowl concept2.jpg|Conceito ambiental de Dustbowl. | ||
| + | </gallery> | ||
| − | + | === Pré-lançamento === | |
| + | <gallery> | ||
| + | File:Dustbowl concept.jpg|Uma das primeiras versões de Dustbowl. | ||
| + | File:0000002575.1920x1080.jpg|Versão antiga da área do ponto A do estágio 1. | ||
| + | File:Dustbowl old roots.jpg|Saídas antigas para o ponto B do estágio 1. | ||
| + | File:Dustbowlunusedcaveroom p3build.jpg|Saída não utilizada do ponto B do estágio 1. | ||
| + | File:Dustbowlunusedcaveroom2 p3build.png|Saída não utilizada do ponto B do estágio 1, parte de cima da escada. | ||
| + | File:Dustbowlunuseddropdown.png|Saída não utilizada do ponto B do estágio 1, queda para a segunda entrada da casa. | ||
| + | File:Dustbowl unused dropdown exit.png|Saída não utilizada do ponto B do estágio 1, vista da segunda entrada da casa. | ||
| + | File:0000002574.1920x1080.jpg|Exterior antigo do prédio perto do ponto B do estágio 1. | ||
| + | File:Dustbowl old control point1b.png|Local antigo do ponto B do estágio 1. | ||
| + | File:DustbowlunusedspawnSDK.png|Bases não utilizadas sob o ponto A do estágio 2. | ||
| + | File:Dustbowl old control point3b.png|Plataforma não utilizada do ponto B do estágio 3. | ||
| + | </gallery> | ||
| + | === Lançamento === | ||
| + | <gallery> | ||
| + | File:Dustbowl BLU Team Starting Spawn.jpg|A base BLU inicial localizada no estágio 1. | ||
| + | File:Dustbowl - BLU Forward Spawn 1 and RED Spawn 1.jpg|Base RED do estágio 1 e RED do estágio 2. | ||
| + | File:Dustbowl - BLU Forward Spawn 2 and RED Spawn 2.jpg|Base RED do estágio 2 e BLU do estágio 3. | ||
| + | File:Dustbowl - RED Spawn 3a.jpg|Uma das bases RED do estágio 3. | ||
| + | File:Dustbowl - RED Spawn 3b.jpg|Uma das bases RED do estágio 3. | ||
| + | File:Smissmas 2013 Bulletin Board.png|O quadro de avisos na área da base RED inicial/segunda base BLU desde a atualização {{update link|Smissmas 2013}}. | ||
| + | </gallery> | ||
| − | + | === Imagens promocionais === | |
| − | + | <gallery> | |
| − | + | File:Worms reloaded tf2 heavy fort.jpg|O {{cl|Heavy}} e Dustbowl como um forte jogável em ''[[Worms Reloaded/pt-br|Worms Reloaded]]''. | |
| − | |||
| − | |||
| − | |||
| − | |||
| − | |||
| − | === | ||
| − | |||
| − | |||
| − | |||
| − | |||
| − | |||
| − | |||
| − | |||
| − | |||
| − | |||
| − | |||
| − | |||
| − | |||
| − | |||
| − | |||
| − | |||
| − | |||
| − | |||
| − | |||
| − | |||
| − | |||
| − | |||
| − | |||
| − | |||
| − | |||
| − | |||
| − | |||
| − | |||
| − | |||
| − | |||
| − | |||
| − | |||
| − | |||
| − | |||
| − | |||
| − | |||
| − | |||
| − | |||
| − | |||
| − | |||
| − | |||
| − | |||
| − | |||
| − | |||
| − | |||
| − | |||
| − | |||
| − | |||
| − | |||
| − | |||
| − | |||
| − | |||
| − | |||
| − | |||
| − | |||
| − | |||
| − | |||
| − | |||
| − | |||
| − | |||
| − | |||
| − | |||
| − | |||
| − | |||
| − | |||
| − | |||
| − | <gallery | ||
| − | File: | ||
| − | |||
| − | |||
| − | |||
| − | |||
</gallery> | </gallery> | ||
| − | |||
| − | |||
| − | |||
| − | |||
| − | |||
| − | |||
}} | }} | ||
| − | == | + | == {{common string|See also}} == |
| − | + | * [[Dustbowl (Training)/pt-br|Dustbowl (Treinamento)]] | |
| − | + | * [[Dustbowl (Classic)/pt-br|Dustbowl (Classic)]] | |
| − | |||
| − | |||
| − | |||
| − | |||
| − | |||
| − | |||
| − | |||
| − | |||
| − | |||
| − | |||
| − | * | ||
| − | |||
| − | |||
| − | |||
| − | |||
| − | |||
| − | |||
| − | |||
| − | |||
| − | |||
| − | |||
| − | |||
| − | |||
| − | |||
| − | |||
| − | |||
| − | |||
| − | |||
| − | == | + | == {{common string|References}} == |
| − | + | <references/> | |
| − | |||
| − | |||
| − | |||
| − | |||
| − | |||
| − | |||
| − | |||
| − | + | {{Maps Nav}} | |
| − | |||
| − | |||
| − | |||
| − | |||
| − | |||
| − | |||
| − | + | [[Category:Quickplay maps/pt-br]] | |
Latest revision as of 15:15, 6 May 2024
 | Esta página está no processo de tradução (em inglês) para português do Brasil. Fluente em inglês e português? Ajude-nos a terminar a tradução deixando uma mensagem na página de discussão ou entrando em contato com quem já contribuiu para a tradução (disponível no histórico da página). |
| Dustbowl | |
|---|---|

| |
| Informações básicas | |
| Tipo de mapa: | Pontos de Controle |
| Nome do arquivo: | cp_dustbowl
|
| Adicionado em: | 10 de outubro de 2007 (Lançamento do jogo) |
| Variantes: | Modo de Treinamento |
| Desenvolvedor(es): | Valve |
| Informações do mapa | |
| Nº de estágios: | 3 |
| Ambiente: | Deserto |
| Cenário: | Dia, ensolarado |
| Perigos: | Esmagamento |
| Pyrovisão: | Sim |
| Compatível com bots: | Sim |
| Itens do mapa | |
| Imagens do mapa | |
 | |
| Vista aérea | |
 | |
| “ | Estou queimando.
Clique para escutar (em inglês)
— O Engineer sobre o calor do deserto
|
” |
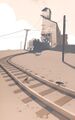
Dustbowl é um mapa de Pontos de Controle de Ataque/Defesa e uma recriação do mapa de Team Fortress Classic de mesmo nome. Ele e Gravel Pit foram os primeiros mapas de Ataque/Defesa para Team Fortress 2 e foi um dos 6 mapas iniciais incluídos com o lançamento do jogo. Dustbowl é o único mapa para o qual um modo de treinamento foi criado.
Em Dustbowl, o objetivo dos atacantes (a equipe BLU) é vencer uma série de estágios a fim de vencer o mapa. Em cada estágio, os atacantes devem capturar dois pontos de controle, A e B, de posse dos defensores (a equipe RED). O ponto A deve ser capturado antes que os atacantes possam avançar capturar o ponto B. A contagem regressiva do mapa aumenta em 4 minutos e 30 segundos para cada captura e, uma vez que um ponto é capturado, ele é bloqueado e não pode ser retomado pelos defensores.
Assim como todos os mapas de Ataque/Defesa, a BLU joga como os atacantes enquanto a RED joga como os defensores. Egypt e Gorge compartilham um desenho similar ao de Dustbowl.
Índice
Vídeo de introdução
Locais
Note: If you are having trouble with finding the locations listed here, see the Helpful overview section to see their exact position marked on the map. As direções são descritas da perspectiva da BLU.
Estágio 1, Ponto A


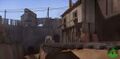
O ponto de controle A fica dentro de um prédio pequeno à esquerda.
- Base BLU: Possui 3 saídas: esquerda, meio e direita. A saída esquerda tem um armário de reabastecimento e uma rampa que leva à saída. A saída esquerda é particularmente vulnerável a ataques inimigos.
- Vale: O caminho longo e reto a partir da porta do meio da base leva direto à porta dos fundos do ponto de controle A.
- Galpão Esquerdo: Próximo à porta da esquerda, um galpão pequeno com uma porta abriga um kit médico e uma caixa de munição grandes. O caminho leva direto à entrada frontal do prédio do ponto de controle. Uma escada leva ao telhado do galpão.
- Galpão Direito: Perto da porta da direita, um galpão pequeno de duas portas contém um kit médico e uma caixa de munição grandes.
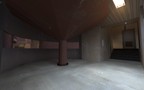
- Ponto de Controle A: O Ponto de Controle A fica abrigado dentro de um prédio pequeno. Ele contém um kit médico e uma caixa de munição grandes. Escadas levam a um túnel de mina, o qual possui um kit médico grande e leva ao Ponto de Controle B. O prédio possui duas portas e uma sacada.
- Entradas do Túnel: O túnel possui 3 entradas que levam a um sistema de túneis que levam ao Ponto de Controle B. A entrada principal, acessível do nível do chão, se divide para a esquerda e para a direita. Uma terceira entrada só é acessível pelo prédio guardando o Ponto de Controle A.
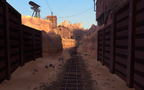
O Vale.
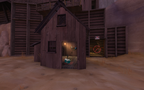
O Galpão Direito.
Vista interna do prédio do ponto de controle.


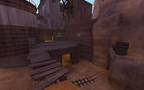
Estágio 1, Ponto B
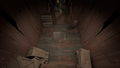
- Túnel Superior: Acessado do prédio do ponto de controle A, ele possui duas saídas. Uma saída é um portão de mão única que fornece acesso ao Ponto de Controle B e a segunda saída é desbloqueada, situada mais para trás, com alguns baldes e pneus servido de cobertura. A caverna contém um kit médico e uma caixa de munição médios.
- Túnel Esquerdo: Pegar o caminho esquerdo da bifurcação do túnel principal fornece um caminho direto até o Ponto de Controle B.
- Túnel Direito: Pegar o caminho direito da bifurcação do túnel principal leva a uma caverna espaçosa com saídas em dois andares. A saída superior leva à Ponte, enquanto a saída inferior é um caminho direto até o Ponto de Controle. Ele contém um kit médico e uma caixa de munição médios.
- Ponte: Uma ponte que leva da saída superior da caverna direita até o portão bloqueando a caverna esquerda. Há uma entrada para o prédio do Ponto de Controle à esquerda do final da ponte.
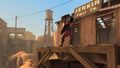
- Plataforma: Há um prédio plano de madeira do lado direito oposto ao túnel e após a ponte. É possível subir no telhado deste prédio para obter uma vista do ponto B. Há também algumas caixas de madeira de cobertura.
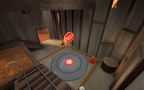
- Ponto de Controle B: O Ponto de Controle B também fica abrigado dentro de um prédio. Ele contém um kit médico e uma caixa de munição pequenos e é acessado diretamente da saída do meio da caverna. À esquerda do ponto de controle fica um corredor estreito com uma saída no nível do chão e uma saída acima de uma escada que dá no portão de mão única à esquerda.
- Telhado da Base: O telhado acima da base RED é dividido em duas partes conectadas pela ponte dos Snipers e possui um kit médico e uma caixa de munição pequenos em um dos lados.
- Base RED: A Base RED tem uma saída central localizada diretamente em frente (ou levemente à esquerda/direita, dependendo de onde os jogadores nascem). A saída central fica entre dois armários de reabastecimento. Esses tipos de base são vulneráveis a spam inimigo, visto que só têm 1 saída. A base RED fica virada para o lado oposto ao campo de batalha e os jogadores devem fazer uma curva em U para alcançá-lo, adicionando certa demora a suas defesas.
Saídas do Túnel Superior.
A Plataforma.
Estágio 1, Ponto de Controle B.
O Telhado da Base.


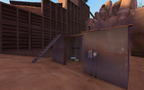
Estágio 2, Ponto A


O primeiro ponto fica no topo de um prédio à esquerda (perspectiva da BLU).
- Base BLU: Um prédio pequeno que dá no Túnel. A equipe BLU ocupa a base RED do primeiro estágio.
- Túnel: Duas entradas emergem da base, uma levando à esquerda e uma à direita. Os defensores podem entrar livremente após os portões do tempo de preparação se abrirem.
- Galpão: No lado direito ficam dois kit médicos e caixas de munição grandes. A escada nos fundos leva ao telhado do prédio.
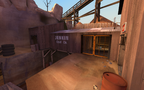
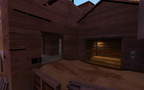
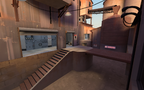
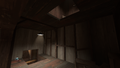
- Prédio do Ponto de Controle: O ponto de controle fica no topo do segundo andar do prédio. O segundo andar possui uma cabana pequena que contém um kit médico grande e uma caixa de munição média. O primeiro andar tem uma sala pequena e aberta de frente para a base BLU com um kit médico e uma caixa de munição médios. Ela tem duas portas e também pode ser entrada através de uma janela e através de caixas localizadas na frente à esquerda e pneus nos fundos à esquerda.
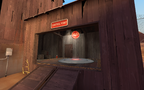
- Escritório: Os fundos desta área. Há duas salas, sendo que a da direita contém um kit médico médio e uma caixa de munição grande. A segunda sala possui uma janela voltada para o Túnel.
- Placa: Um kit médico grande e uma caixa de munição pequena se encontram à esquerda do Escritório.
- Saídas: Uma à esquerda e uma à direita, ambas levando ao ponto B.
O Galpão com suprimentos.
Vista interna do prédio do ponto de controle.
Ponto A do estágio 2.
A Placa.

O Escritório.

As Saídas.


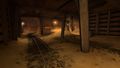
Estágio 2, Ponto B
O segundo ponto de controle fica em uma plataforma perto da base RED.
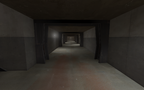
- O Túnel da Mina: Um túnel longo e estreito que começa atrás e à direita do prédio do Escritório. Pode-se dizer que esta é a entreada esquerda para a área do ponto B.
- Túneis Duplos: Dois túneis curtos paralelos um ao outro.
- Túnel com Portão: Bifurcando-se dos Túneis Duplos à esquerda fica o Túnel com Portão. É um túnel com um portão de mão única ao final.
- O Portão: À extrema direita das saídas duplas fica um portão de mão única através de outro túnel. Há um kit médico grande ao final, perto do portão.
- O Pátio: A área aberta fora dos Túneis Duplos e a saída do túnel de mina longo, situado perto do prédio do meio.
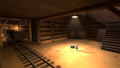
- Prédio do Meio: Um prédio grande no meio da área do Pátio. O segundo andar contém dois kits médicos e caixas de munição médios. Um corredor no nível do chão passa pelo prédio e dá no outro lado, diretamente em frente ao ponto de controle final. Há também um caminho ao redor do lado de fora com algumas pedras, atrás das quais fica um kit médico grande.
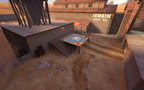
- Ponto de Controle B: O ponto de controle fica em uma plataforma perto da base dos defensores e é acessível por escadas do outro lado.
- Prédio da Base RED: A base da equipe RED defensora, atrás do ponto de controle. A estrutura desta base é idêntica à da base RED no estágio 1.
Saída do Túnel de Mina e dos Túneis Duplos.
Saída do Túnel com Portão.
Ponto B do estágio 2.


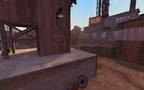
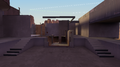
Estágio 3, Ponto A


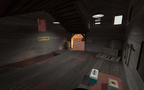
The first control point is on a platform straight across from BLU's exit. RED has a shortcut from one of their spawn rooms to this point. This shortcut is sealed once BLU captures this point.
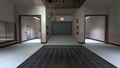
- BLU Spawn: This spawn occupies the RED Spawn from Stage 2. Upon leaving, players can take an immediate right turn and go up a long corridor to the right-hand locked gate, or take either the left or the right stairs. Both will lead to the double gate exits.
- Three Exits: Left, Middle, and Right all behind gates that open at the start of the round defenders can then move towards spawn.
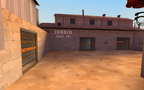
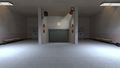
- Pillbox: A small building containing a large Ammo and small Health pack. The building stands between the gates and the control point and has two wide windows which look toward the double gates.
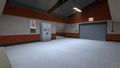
- Control point A: Located at the back of the area on a slightly raised platform.
- Loading Dock: A ledge at the end of the defenders' shortcut to control point A. Once the first control point has been taken, the doorway from RED’s spawn is locked.
Exit of Blu spawn

Pillbox

Stage 3, control point A


Estágio 3, Ponto B
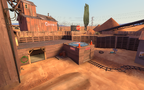
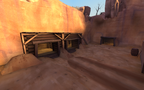
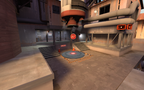
The final control point is the base of a launch pad, under a rocket, in the center of RED's base.
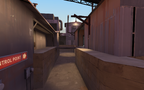
- The Alleys: These are the narrow alleyways that lead from control point A to control point B. They consist of two levels, with the main road having no Health or Ammo packs, and the side rooms on the upper level having two small Health and medium Ammo packs.
- Downstairs: Side doorway leading down underneath the base and into the valley under control point B area.
- The Balcony House: Has a bridge over the alley and a small Health and large Ammo pack. It faces control point B.
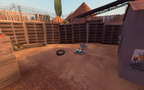
- The Sniper House: Opposite the Balcony House. Has a medium Health and large Ammo pack on the second level. On the first level, there is a bunker with windows facing down the long alley. There are two doors, one in the alley, the other at the back. These can be accessed from outside by defenders via a tiny ledge.
- Equipment Room: In front of the control point, a long room with an Ammo pack at the front and a medium Health pack in the back. Accessible by stairs.
- The Valley: Located underneath the final bridge, the Valley has one entrance, and a flight of stairs leading up to the bridge.
- Control point B: This is the final control point for this map and is situated between RED's two spawn exits, underneath a large rocket.
- RED Spawn: There are two individual RED spawns that are único in design from its last two RED spawns in stages one and two respectively. One spawn is located to the left of control point B, and one on the right. The one on the left is significantly larger than the right RED spawn and has two different exits. One, which is in front of the RED team is the shortcut to control point A. The other exit spirals around and leads to Control Point B. The right RED sala de renascimento is shaped like a rectangular prism, then has a curve to its only single exit. There are equal chances that the RED team player can spawn in any of these two locations. See the image "Map Overview" to see the interiors of the spawns.
Alleys
Downstairs
The Balcony House
Inside view of sniper house
Stage 3, control point B


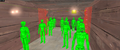
Helpful overview

1.Right Exit Shed
2.Canyon
3.Left Exit Shed
4.Platform
5.Bridge
6.Tunnels
7.Dugout
8.Large Shed
9.Control Point Building
10.The Office
11.Mining Tunnel
12.Double Tunnels
13.Gated Tunnel
14.Courtyard
15.Middle Building
16.Pillbox
17.Loading Dock
18.Alleys
19.Valley
Red/blue diagonal lines: Red/Blu first spawn
Red/blue double diagonal lines: Red/Blu second spawn
Red/blue double diagonal lines w/ a rectangle: Red/Blu third spawn
(Red and blue diagonal lines indicate that that room was once a Red spawnroom before becoming the Blu's second, third... spawn.)
Red circle: First capture point Stage 1
Blue circle: Second capture point Stage 1
Green circle: First capture point Stage 2
Black circle: Second capture point Stage 2
Yellow circle: First capture point Stage 3
White circle: Second/final capture point Stage 3
Estratégia
Tempos dos pontos de controle
Todos os pontos de controle têm os mesmo tempos de captura.
| Pontos de Controle | Multiplicador | Segundos | ||
|---|---|---|---|---|
| Todos os pontos de controle | ×1 |
| ||
| ×2 |
| |||
| ×3 |
| |||
| ×4 |
|
Conquistas relacionadas
 Conquistas gerais
|
|


Histórico de atualizações
- Fixed players being able to use spectator points in Dustbowl that were not in play.
Atualização de 25 de outubro de 2007
- Fixed issues on Dustbowl that could occur when a server emptied in the middle of a round.
Atualização de 20 de dezembro de 2007
- Now waits until either team wins fully before changing to another map on server timelimit expiring.
- Teams now score a point per captured control point, rather than per sub round.
- Prevented Demomen being able to launch grenades into the stage three alleys while standing at the final cap point.
- Fixed gaps in stage gates that allowed Snipers to kill defenders during setup.
- Fixed several model and brush perch exploits in stage three.
- Added stair access to the upper area in stage three after the first cap.
- Limited line-of-sight at the first control point in stage 3 to remove a griefable Sniper spot.
- [Não documentado] Fixed model exploit in stage one allowing Sentry Gun/Teleporter to be placed behind chain link fence.
Atualização de 21 de dezembro de 2007
- Fixed the problem with
mp_maxroundsnot correctly counting the number of rounds for Dustbowl after the scoring change.
Atualização de 14 de fevereiro de 2008
- Added a new access point to the stage 2 attacker gates (drop-down left from spawn), allowing attackers a way to reach the left route without being subjected to the spam and Sentry Gun fire.
- Fixed a gap in stage 3, cap 1 that allowed a player with to wiggle above the "ceiling" clip.
- Fixed a gap behind stage 1, cap 1 house.
- Fixed a high perch on stage 1, cap 1 house roof.
- Fixed a perch offering view of nodraw textures and the skybox (stage1 cap2 rock barrier).
- Fixed a few places where rockets/Demoman pipes could pass through non-solid models.
- Sealed up a gap over stage 1 lower startgate.
- Clipped off tall windows in stage 3 to prevent Sentry Guns from being built behind them.
Atualização de 20 de março de 2008
- Updated Dustbowl with several exploit fixes.
Atualização de 23 de fevereiro de 2012
- Adjusted Blue team's
func_respawnroomin stage 1 to be flush against the door.
Atualização de 10 de julho de 2013
- Fixed players building in Blu's first spawn
- Fixed players shooting through rocks in stage 2
- Fixed collision in tunnels in stage 2
- Fixed textures not displaying properly in Pyrovision
- Fixed lighting on cliff faces
- Fixed skybox error in stage 3
- Fixed players getting killed through the ceiling under stage 2 cap 1
- Adjusted ceiling height in stage 3 tunnel for better clearance
- Cleaned up prop collision
Atualização de 5 de março de 2014
- Fixed Red team's stage 1 spawn door pushing players in the air.
- Fixed collision on windows, props, and rooflines.
- Fixed floating props.
- Fixed players building inside the alternate exit from the Red spawn in stage 3.
Atualização de 24 de abril de 2014
- Fixed players standing in sky over the beginning of stage 1.
- Fixed collision on rocks in the front of stage 1 where stickybombs could be placed inside them.
Atualização de 10 de setembro de 2015
- [Não documentado] Added saucers and posters to Dustbowl.
Atualização de 25 de novembro de 2015
- [Não documentado] Removed saucers and posters from Dustbowl.
Atualização de 28 de março de 2018 #1
- Fixed Pyros shooting through the stage 3 doors.
- Updated some entities that were disabled but shouldn't have been (func_nobuilds, soundscapes, powerlines in the 3dskybox).
Bugs
- Nas versões de console, Snipers e outras classes são capazes de atirar através das grades e eliminar inimigos (veja Diferenças entre as plataformas).
- Dentro dos portões duplos da base BLU no estágio 3 entre os dois portões, stickies explodidas junto à parede do lado de fora matam jogadores do lado de dentro.
- O ruído de projetor presente na sala de reabastecimento RED final é reproduzido de forma inconsistente.
- Jogadores são capazes de atirar através das portas das bases se ficarem diretamente em frente a elas.
Curiosidades
- Devido ao mapa estar no jogo desde o lançamento, Dustbowl era inicialmente considerado um mapa de Pontos de Controle, mas foi posteriormente alterado para Ataque/Defesa.
- Dustbowl é um dos mapas desenhados com base em mapas que já existiam em Team Fortress Classic, os outros sendo 2Fort, Well e Badlands. A jogabilidade da versão original era similar ao modo Capture a Bandeira unilateral, em que um jogador na equipe BLU deve levar uma bandeira aos pontos de controle da equipe RED, com apenas um ponto de controle por estágio.
- Os vários barris espalhados pelo mapa são móveis e quebram em pedaços quando atacados.
- A chaminé perto do foguete para de emitir fumaça em certo ponto no estágio 3.
- Dustbowl foi o mapa apresentado na cena de encerramento de Conheça o Heavy, com uma cena quase idêntica reaparecendo em Conheça o Sandviche. A área mostrada é a área do lado de fora da base BLU no primeiro estágio.
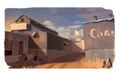
- Os logos da companhia Cornwell espalhados pelo mapa são uma referência a Dean Cornwell, um artista que serviu de forte inspiração para o estilo visual de Team Fortress 2.[1]
- Dustbowl aparece em Worms Reloaded como um dos fortes.
- Dust Bowl ("tijela de poeira") foi uma crise econômica que ocorreu nos anos 1930 no centro-oeste dos Estados Unidos e Canadá.
- De acordo com o Selo de Bronze na página da Atualização Férias Frustradas, Dustbowl foi onde surgiu a pneumoconiose, uma doença causada por inalar poeira conhecida por causar tosse, inflamação pulmonar e cicatrizes/engrossamento dos tecidos conectivos dos pulmões.
Galeria
Artes conceituais
Conceito ambiental de Dustbowl.
Conceito ambiental de Dustbowl.


Pré-lançamento
Uma das primeiras versões de Dustbowl.
Versão antiga da área do ponto A do estágio 1.
Saídas antigas para o ponto B do estágio 1.
Saída não utilizada do ponto B do estágio 1.

Saída não utilizada do ponto B do estágio 1, parte de cima da escada.
Saída não utilizada do ponto B do estágio 1, queda para a segunda entrada da casa.
Saída não utilizada do ponto B do estágio 1, vista da segunda entrada da casa.
Exterior antigo do prédio perto do ponto B do estágio 1.

Local antigo do ponto B do estágio 1.
Bases não utilizadas sob o ponto A do estágio 2.
Plataforma não utilizada do ponto B do estágio 3.


Lançamento
A base BLU inicial localizada no estágio 1.
Base RED do estágio 1 e RED do estágio 2.
Base RED do estágio 2 e BLU do estágio 3.
Uma das bases RED do estágio 3.

Uma das bases RED do estágio 3.
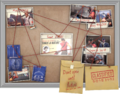
O quadro de avisos na área da base RED inicial/segunda base BLU desde a atualização Natal de 2013.


Imagens promocionais
O Heavy e Dustbowl como um forte jogável em Worms Reloaded.

Veja também
Referências
- ↑ Jason Mitchell, Moby Francke, Dhabih Eng, Illustrative Rendering in Team Fortress 2 (em inglês) (2007), recuperado em 23 de outubro de 2010.