Difference between revisions of "Two Cities Update"
m (→Weapons) |
GrampaSwood (talk | contribs) |
||
| (6 intermediate revisions by 5 users not shown) | |||
| Line 1: | Line 1: | ||
| + | {{Redirects here|Two Cities|Operation Two Cities}} | ||
{{patch info|11|21|2013}} | {{patch info|11|21|2013}} | ||
| − | {{Quotation|Two Cities Update publicity blurb|"It was the best of times. It was the best of times." | + | {{Quotation|'''Two Cities Update''' publicity blurb|"It was the best of times. It was the best of times." |
So opens Charles Dickens' feel-good surf classic Super Good Times, and Dickens' words are as true today as they were at the beach cabana where he wrote them: The best of times, you guys. Let's have some.}} | So opens Charles Dickens' feel-good surf classic Super Good Times, and Dickens' words are as true today as they were at the beach cabana where he wrote them: The best of times, you guys. Let's have some.}} | ||
| − | The '''Two Cities Update''' was a [[Patches# | + | |
| + | The '''Two Cities Update''' was a [[Patches#Major updates|major update]] for ''Team Fortress 2'' that was announced on November 20, 2013 and released the following day. | ||
[[File:Two Cities update.png|410px|right|link=http://www.teamfortress.com/twocities/mannhattan/]] | [[File:Two Cities update.png|410px|right|link=http://www.teamfortress.com/twocities/mannhattan/]] | ||
== Additions == | == Additions == | ||
| − | + | The first of the cities introduced was [[Mannhattan]], a bustling, pollution-pumping city in the USA. | |
| − | The first of the cities introduced was [[Mannhattan]] | ||
The second city announced was [[Rottenburg]]. A quiet, calm village in Germany, known to be the home town of the [[Medic]]. | The second city announced was [[Rottenburg]]. A quiet, calm village in Germany, known to be the home town of the [[Medic]]. | ||
| − | Another map, [[Snakewater]] was also released. Unlike the other two, however, this is a [[Control Point (game mode)|Control Point]] map. | + | Another map, [[Snakewater]], was also released. Unlike the other two, however, this is a [[Control Point (game mode)|Control Point]] map. |
| − | The update introduces new items that can be obtained from a Two Cities Tour. These include the [[Killstreak | + | The update introduces new items that can be obtained from a Two Cities Tour. These include the [[Killstreak Kit]], which applies weapon effects to whichever weapon it is applied to, along with a rare set of [[Australium weapons]]. Among the new upgrades that the player may unlock are '''Mad Milk Syringes''' and the '''[[Projectile Shield]]''' for the [[Medic]], and the '''Rocket Specialist''' for the [[Soldier]]. The [[Reanimator]] was also introduced as a way for Medics to revive allies on the battlefield directly. |
| − | A new feature allows the player to view raw damage numbers on the scoreboard in [[ | + | A new feature allows the player to view raw damage numbers on the scoreboard in [[Mann vs. Machine]]. This includes counters for how much money a player has on them at any given time, along with the total damage they have done, the amount of damage done to [[Tank Robot|tanks]], the amount of healing one has received, among others. In addition, these are also the first MvM maps to feature moving spawn points and robots that can introduce additional bombs to the game. Also, players are now able to refund all of their credits spent on upgrades, so long as a certain quota is reached. |
=== Maps === | === Maps === | ||
| Line 23: | Line 24: | ||
{| class="wikitable" cellpadding="2" style="text-align:center;" | {| class="wikitable" cellpadding="2" style="text-align:center;" | ||
|- | |- | ||
| − | ! class="header" style="background:#7d8790;" | <span style="color: white;"> Name | + | ! class="header" style="background:#7d8790;" | <span style="color: white;"> {{common string|Name}} |
| − | ! class="header" style="background:#7d8790;" | <span style="color: white;"> Picture | + | ! class="header" style="background:#7d8790;" | <span style="color: white;"> {{common string|Picture}} |
| − | ! class="header" style="background:#7d8790;" | <span style="color: white;"> Game | + | ! class="header" style="background:#7d8790;" | <span style="color: white;"> {{common string|Game mode}} |
| − | ! class="header" style="background:#7d8790;" | <span style="color: white;"> File | + | ! class="header" style="background:#7d8790;" | <span style="color: white;"> {{common string|File name}} |
|- | |- | ||
| − | | style="background:#a7bdc8;" | '''[[Snakewater{{if lang}}| <span style="color: black;"> Snakewater]]''' | + | | style="background:#a7bdc8;" | '''[[Snakewater{{if lang}}|<span style="color: black;">Snakewater]]''' |
| − | | [[File:Snakewater mid. | + | | [[File:Snakewater mid.png|250px|link=Snakewater{{if lang}}]] |
| − | | '''[[Control Point ( | + | | '''[[Control Point (game mode){{if lang}}|{{common string|Control Point}}]]'''<br>[[File:Controlpoint.png|50px|link=Control Point (game mode){{if lang}}]] |
| {{code|cp_snakewater_final1}} | | {{code|cp_snakewater_final1}} | ||
|- | |- | ||
| − | | style="background:#a7bdc8;" | '''[[Mannhattan{{if lang}}| <span style="color: black;"> Mannhattan]]''' | + | | style="background:#a7bdc8;" | '''[[Mannhattan{{if lang}}|<span style="color: black;">Mannhattan]]''' |
| [[File:Mannhattan preview.png|250px|link=Mannhattan{{if lang}}]] | | [[File:Mannhattan preview.png|250px|link=Mannhattan{{if lang}}]] | ||
| − | | '''[[Mann vs. Machine | + | | '''[[Mann vs. Machine{{if lang}}|{{common string|Mann vs. Machine}}]]'''<br>[[File:Mvm navicon.png|50px|link=Mann vs. Machine{{if lang}}]] |
| {{code|mvm_mannhattan}} | | {{code|mvm_mannhattan}} | ||
|- | |- | ||
| − | | style="background:#a7bdc8;" | '''[[Rottenburg{{if lang}}| <span style="color: black;"> Rottenburg]]''' | + | | style="background:#a7bdc8;" | '''[[Rottenburg{{if lang}}|<span style="color: black;">Rottenburg]]''' |
| [[File:Rottenburg.png|250px|link=Rottenburg{{if lang}}]] | | [[File:Rottenburg.png|250px|link=Rottenburg{{if lang}}]] | ||
| − | | '''[[Mann vs. Machine | + | | '''[[Mann vs. Machine{{if lang}}|{{common string|Mann vs. Machine}}]]'''<br>[[File:Mvm navicon.png|50px|link=Mann vs. Machine{{if lang}}]] |
| {{code|mvm_rottenburg}} | | {{code|mvm_rottenburg}} | ||
|} | |} | ||
| Line 54: | Line 55: | ||
| style="background:#d5e1e7;" | '''[[Australium Force-A-Nature{{if lang}}|{{common string|australium item|Force-A-Nature}}]]''' | | style="background:#d5e1e7;" | '''[[Australium Force-A-Nature{{if lang}}|{{common string|australium item|Force-A-Nature}}]]''' | ||
|- | |- | ||
| − | | | + | | style="background:#333333;" rowspan="2" | '''{{Class link|Soldier|br=yes|color=white}}''' |
| style="background:#a7bdc8;" | {{icon item|Australium Rocket Launcher|link=Australium Rocket Launcher{{if lang}}|75px}} | | style="background:#a7bdc8;" | {{icon item|Australium Rocket Launcher|link=Australium Rocket Launcher{{if lang}}|75px}} | ||
| style="background:#d5e1e7;" | '''[[Australium Rocket Launcher{{if lang}}|{{common string|australium item|Rocket Launcher}}]]''' | | style="background:#d5e1e7;" | '''[[Australium Rocket Launcher{{if lang}}|{{common string|australium item|Rocket Launcher}}]]''' | ||
| Line 61: | Line 62: | ||
| style="background:#d5e1e7;" | '''[[Australium Black Box{{if lang}}|{{common string|australium item|Black Box}}]]''' | | style="background:#d5e1e7;" | '''[[Australium Black Box{{if lang}}|{{common string|australium item|Black Box}}]]''' | ||
|- | |- | ||
| − | | | + | | style="background:#333333;" rowspan="2" | '''{{Class link|Pyro|br=yes|color=white}}''' |
| style="background:#a7bdc8;" | {{icon item|Australium Flame Thrower|link=Australium Flame Thrower{{if lang}}|75px}} | | style="background:#a7bdc8;" | {{icon item|Australium Flame Thrower|link=Australium Flame Thrower{{if lang}}|75px}} | ||
| style="background:#d5e1e7;" | '''[[Australium Flame Thrower{{if lang}}|{{common string|australium item|Flame Thrower}}]]''' | | style="background:#d5e1e7;" | '''[[Australium Flame Thrower{{if lang}}|{{common string|australium item|Flame Thrower}}]]''' | ||
| Line 68: | Line 69: | ||
| style="background:#d5e1e7;" | '''[[Australium Axtinguisher{{if lang}}|{{common string|australium item|Axtinguisher}}]]''' | | style="background:#d5e1e7;" | '''[[Australium Axtinguisher{{if lang}}|{{common string|australium item|Axtinguisher}}]]''' | ||
|- | |- | ||
| − | | | + | | style="background:#333333;" rowspan="3" | '''{{Class link|Demoman|br=yes|color=white}}''' |
| style="background:#a7bdc8;" | {{icon item|Australium Grenade Launcher|link=Australium Grenade Launcher{{if lang}}|75px}} | | style="background:#a7bdc8;" | {{icon item|Australium Grenade Launcher|link=Australium Grenade Launcher{{if lang}}|75px}} | ||
| style="background:#d5e1e7;" | '''[[Australium Grenade Launcher{{if lang}}|{{common string|australium item|Grenade Launcher}}]]''' | | style="background:#d5e1e7;" | '''[[Australium Grenade Launcher{{if lang}}|{{common string|australium item|Grenade Launcher}}]]''' | ||
| Line 78: | Line 79: | ||
| style="background:#d5e1e7;" | '''[[Australium Eyelander{{if lang}}|{{common string|australium item|Eyelander}}]]''' | | style="background:#d5e1e7;" | '''[[Australium Eyelander{{if lang}}|{{common string|australium item|Eyelander}}]]''' | ||
|- | |- | ||
| − | | | + | | style="background:#333333;" rowspan="2" | '''{{Class link|Heavy|br=yes|color=white}}''' |
| style="background:#a7bdc8;" | {{icon item|Australium Minigun|link=Australium Minigun{{if lang}}|75px}} | | style="background:#a7bdc8;" | {{icon item|Australium Minigun|link=Australium Minigun{{if lang}}|75px}} | ||
| style="background:#d5e1e7;" | '''[[Australium Minigun{{if lang}}|{{common string|australium item|Minigun}}]]''' | | style="background:#d5e1e7;" | '''[[Australium Minigun{{if lang}}|{{common string|australium item|Minigun}}]]''' | ||
| Line 85: | Line 86: | ||
| style="background:#d5e1e7;" | '''[[Australium Tomislav{{if lang}}|{{common string|australium item|Tomislav}}]]''' | | style="background:#d5e1e7;" | '''[[Australium Tomislav{{if lang}}|{{common string|australium item|Tomislav}}]]''' | ||
|- | |- | ||
| − | | | + | | style="background:#333333;" rowspan="2" | '''{{Class link|Engineer|br=yes|color=white}}''' |
| style="background:#a7bdc8;" | {{icon item|Australium Frontier Justice|link=Australium Frontier Justice{{if lang}}|75px}} | | style="background:#a7bdc8;" | {{icon item|Australium Frontier Justice|link=Australium Frontier Justice{{if lang}}|75px}} | ||
| style="background:#d5e1e7;" | '''[[Australium Frontier Justice{{if lang}}|{{common string|australium item|Frontier Justice}}]]''' | | style="background:#d5e1e7;" | '''[[Australium Frontier Justice{{if lang}}|{{common string|australium item|Frontier Justice}}]]''' | ||
| Line 92: | Line 93: | ||
| style="background:#d5e1e7;" | '''[[Australium Wrench{{if lang}}|{{common string|australium item|Wrench}}]]''' | | style="background:#d5e1e7;" | '''[[Australium Wrench{{if lang}}|{{common string|australium item|Wrench}}]]''' | ||
|- | |- | ||
| − | | | + | | style="background:#333333;" rowspan="2" | '''{{Class link|Medic|br=yes|color=white}}''' |
| style="background:#a7bdc8;" | {{icon item|Australium Blutsauger|link=Australium Blutsauger{{if lang}}|75px}} | | style="background:#a7bdc8;" | {{icon item|Australium Blutsauger|link=Australium Blutsauger{{if lang}}|75px}} | ||
| style="background:#d5e1e7;" | '''[[Australium Blutsauger{{if lang}}|{{common string|australium item|Blutsauger}}]]''' | | style="background:#d5e1e7;" | '''[[Australium Blutsauger{{if lang}}|{{common string|australium item|Blutsauger}}]]''' | ||
| Line 99: | Line 100: | ||
| style="background:#d5e1e7;" | '''[[Australium Medi Gun{{if lang}}|{{common string|australium item|Medi Gun}}]]''' | | style="background:#d5e1e7;" | '''[[Australium Medi Gun{{if lang}}|{{common string|australium item|Medi Gun}}]]''' | ||
|- | |- | ||
| − | | | + | | style="background:#333333;" rowspan="2" | '''{{Class link|Sniper|br=yes|color=white}}''' |
| style="background:#a7bdc8;" | {{icon item|Australium Sniper Rifle|link=Australium Sniper Rifle{{if lang}}|75px}} | | style="background:#a7bdc8;" | {{icon item|Australium Sniper Rifle|link=Australium Sniper Rifle{{if lang}}|75px}} | ||
| style="background:#d5e1e7;" | '''[[Australium Sniper Rifle{{if lang}}|{{common string|australium item|Sniper Rifle}}]]''' | | style="background:#d5e1e7;" | '''[[Australium Sniper Rifle{{if lang}}|{{common string|australium item|Sniper Rifle}}]]''' | ||
| Line 106: | Line 107: | ||
| style="background:#d5e1e7;" | '''[[Australium SMG{{if lang}}|{{common string|australium item|SMG}}]]''' | | style="background:#d5e1e7;" | '''[[Australium SMG{{if lang}}|{{common string|australium item|SMG}}]]''' | ||
|- | |- | ||
| − | | | + | | style="background:#333333;" rowspan="2" | '''{{Class link|Spy|br=yes|color=white}}''' |
| style="background:#a7bdc8;" | {{icon item|Australium Ambassador|link=Australium Ambassador{{if lang}}|75px}} | | style="background:#a7bdc8;" | {{icon item|Australium Ambassador|link=Australium Ambassador{{if lang}}|75px}} | ||
| style="background:#d5e1e7;" | '''[[Australium Ambassador{{if lang}}|{{common string|australium item|Ambassador}}]]''' | | style="background:#d5e1e7;" | '''[[Australium Ambassador{{if lang}}|{{common string|australium item|Ambassador}}]]''' | ||
| Line 121: | Line 122: | ||
{{main|Cosmetic items}} | {{main|Cosmetic items}} | ||
{| class="wikitable collapsible" cellpadding=2 style="text-align:center;" | {| class="wikitable collapsible" cellpadding=2 style="text-align:center;" | ||
| − | | style="background:#333333;" | '''{{class link|All Classes|br=yes|color=white}}''' | + | | width="85px" style="background:#333333;" | '''{{class link|All Classes|br=yes|color=white}}''' |
| style="background:#a7bdc8;" | {{Icon item|Operation Two Cities Badge|75px}} | | style="background:#a7bdc8;" | {{Icon item|Operation Two Cities Badge|75px}} | ||
| style="background:#d5e1e7;" | '''{{item link|Operation Two Cities Badge}}''' | | style="background:#d5e1e7;" | '''{{item link|Operation Two Cities Badge}}''' | ||
|} | |} | ||
| − | === Tweaked | + | === Tweaked weapons === |
{| class="wikitable" | {| class="wikitable" | ||
| − | ! style="background:#7d8790;" class="header" colspan=1 | <span style="color: white;"> Class | + | ! width="85px" style="background:#7d8790;" class="header" colspan=1 | <span style="color: white;"> Class |
! style="background:#7d8790;" class="header" colspan=3 | <span style="color: white;"> Weapon | ! style="background:#7d8790;" class="header" colspan=3 | <span style="color: white;"> Weapon | ||
! style="background:#7d8790;" class="header" colspan=1 | <span style="color: white;"> Changes | ! style="background:#7d8790;" class="header" colspan=1 | <span style="color: white;"> Changes | ||
| Line 167: | Line 168: | ||
{{main|Tools}} | {{main|Tools}} | ||
{| class="wikitable collapsible" cellpadding=2 style="text-align:center;" | {| class="wikitable collapsible" cellpadding=2 style="text-align:center;" | ||
| − | | style="background:#a7bdc8;" | {{Icon item|Killstreak Kit|75px}} | + | | width="85px" style="background:#a7bdc8;" | {{Icon item|Killstreak Kit|75px}} |
| style="background:#d5e1e7;" | '''{{item link|Killstreak Kit}}''' | | style="background:#d5e1e7;" | '''{{item link|Killstreak Kit}}''' | ||
|- | |- | ||
| Line 201: | Line 202: | ||
Twenty-one new achievements were introduced in the update. | Twenty-one new achievements were introduced in the update. | ||
| − | === Snakewater | + | === Snakewater achievements === |
{{Snakewater achievements list}} | {{Snakewater achievements list}} | ||
| − | === Mannhattan and Rottenburg | + | |
| + | === Mannhattan and Rottenburg achievements === | ||
{{Achievement table | {{Achievement table | ||
| col1 = | | col1 = | ||
| Line 224: | Line 226: | ||
}} | }} | ||
| − | === Process | + | |
| + | === Process achievements === | ||
{{Process achievements list}} | {{Process achievements list}} | ||
| − | === Standin | + | === Standin achievements === |
{{Standin achievements list}} | {{Standin achievements list}} | ||
| Line 235: | Line 238: | ||
File:Two Cities Update Rottenburg.png|The update page for day 2 | File:Two Cities Update Rottenburg.png|The update page for day 2 | ||
</gallery> | </gallery> | ||
| + | |||
| + | == See also == | ||
| + | * [[Operation Two Cities]] | ||
== External links == | == External links == | ||
| − | * ''[ | + | * ''[https://www.teamfortress.com/twocities/mannhattan/ Two Cities Update]'' on the [[TF2 Official Website]]. |
{{Two Cities Update Nav}} | {{Two Cities Update Nav}} | ||
{{Major Updates Nav}} | {{Major Updates Nav}} | ||
{{Medic Nav}} | {{Medic Nav}} | ||
| + | |||
[[Category:Major updates]] | [[Category:Major updates]] | ||
Latest revision as of 22:30, 29 December 2024
| “ | "It was the best of times. It was the best of times."
So opens Charles Dickens' feel-good surf classic Super Good Times, and Dickens' words are as true today as they were at the beach cabana where he wrote them: The best of times, you guys. Let's have some.
— Two Cities Update publicity blurb
|
” |
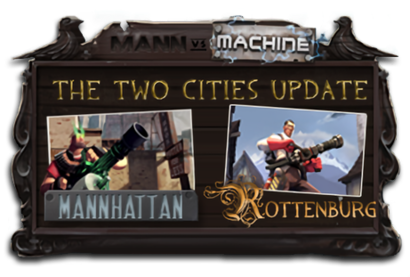
The Two Cities Update was a major update for Team Fortress 2 that was announced on November 20, 2013 and released the following day.
Contents
Additions
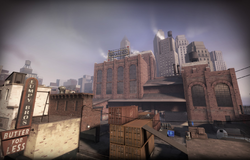
The first of the cities introduced was Mannhattan, a bustling, pollution-pumping city in the USA.
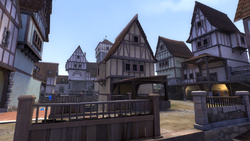
The second city announced was Rottenburg. A quiet, calm village in Germany, known to be the home town of the Medic.
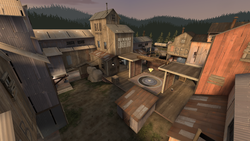
Another map, Snakewater, was also released. Unlike the other two, however, this is a Control Point map.
The update introduces new items that can be obtained from a Two Cities Tour. These include the Killstreak Kit, which applies weapon effects to whichever weapon it is applied to, along with a rare set of Australium weapons. Among the new upgrades that the player may unlock are Mad Milk Syringes and the Projectile Shield for the Medic, and the Rocket Specialist for the Soldier. The Reanimator was also introduced as a way for Medics to revive allies on the battlefield directly.
A new feature allows the player to view raw damage numbers on the scoreboard in Mann vs. Machine. This includes counters for how much money a player has on them at any given time, along with the total damage they have done, the amount of damage done to tanks, the amount of healing one has received, among others. In addition, these are also the first MvM maps to feature moving spawn points and robots that can introduce additional bombs to the game. Also, players are now able to refund all of their credits spent on upgrades, so long as a certain quota is reached.
Maps
| Name | Picture | Game mode | File name |
|---|---|---|---|
| Snakewater | 
|
Control Point |
cp_snakewater_final1
|
| Mannhattan | 
|
Mann vs. Machine |
mvm_mannhattan
|
| Rottenburg | 
|
Mann vs. Machine |
mvm_rottenburg
|
Weapons
Cosmetic items
| Operation Two Cities Badge |
Tweaked weapons
| Class | Weapon | Changes | ||
|---|---|---|---|---|
Baby Face's Blaster |
||||
Liberty Launcher |
||||
Eyelander |
Nessie's Nine Iron |
Horseless Headless Horsemann's Headtaker |
||
Crusader's Crossbow |
||||
Amputator |
||||
Tools
Achievements
Twenty-one new achievements were introduced in the update.
Snakewater achievements
|
|
Mannhattan and Rottenburg achievements
|
|
Process achievements
| Process of Elimination Win 140 Rounds. |
Standin achievements
| Stand and Deliver Win 139 Rounds. |
Gallery
See also
External links
| ||||||||||||||||||||||||||||||||||||
| ||||||||||||||||||||||||||||||||||||||||||||||||||||||||||||||||||||||||||||||||||||||||||||||||||


