Difference between revisions of "Dustbowl"
m (New file name) |
|||
| (267 intermediate revisions by more than 100 users not shown) | |||
| Line 1: | Line 1: | ||
| − | {{Map | + | {{Map infobox |
| − | | | + | | map-status = official |
| − | | | + | | map-game-type = Control Point (attack/defend) |
| − | | | + | | map-file-name = cp_dustbowl |
| + | | map-image = TF2 Dustbowl Map.jpg | ||
| + | | map-released = {{Patch name|10|10|2007|date-only=yes}} | ||
| + | | map-released-major = Launch | ||
| + | | map-has-n-stages = 3 | ||
| + | | map-environment = Desert | ||
| + | | map-setting = Daylight, sunny | ||
| + | | map-hazards = [[Environmental death#Crushing|Crushing]] | ||
| + | | map-has-pyrovision = yes | ||
| + | | map-pickups-health-small = 7 | ||
| + | | map-pickups-health-medium = 8 | ||
| + | | map-pickups-health-large = 10 | ||
| + | | map-pickups-ammo-small = 4 | ||
| + | | map-pickups-ammo-medium = 12 | ||
| + | | map-pickups-ammo-large = 7 | ||
| + | | map-has-bots = yes | ||
}} | }} | ||
| − | ''' | + | {{Quotation|'''The Engineer''' on the desert heat|I'm burnin' up.|sound=Engineer autoonfire03.wav}} |
| − | + | '''Dustbowl''' is an [[Control Point (game mode)#Attack/Defend|Attack/Defend Control Point]] map, and is the subsequent remake of the ''[[Team Fortress Classic]]'' map of the same name. It and [[Gravel Pit]] were the first Attack/Defend Control Point maps for ''[[Team Fortress 2]]'' and was one of the six initial maps included with the game's release. Dustbowl is the only map for which a [[Dustbowl (Training)|training mode]] has been created. | |
| − | Like all Attack/Defend maps, BLU plays the attackers | + | In Dustbowl, the goal of the attackers, [[BLU]], is to win through a series of stages in order to win the map. Within each stage, the attackers must capture two [[control point (objective)|control points]], A and B, which are held by the defenders, [[RED]]. Point A must be captured before the attackers can assault B. The timer is increased by 4 minutes and 30 seconds for every point capture and once a point is captured it is locked and cannot be retaken by the defenders. |
| + | |||
| + | Like all Attack/Defend maps, BLU plays the attackers while RED plays the defenders. [[Egypt]] and [[Gorge]] share a similar design with Dustbowl. | ||
== Introduction video == | == Introduction video == | ||
| − | + | {{youtube|YJ1olXe1Feo}} | |
| − | |||
| − | |||
| − | |||
== Locations == | == Locations == | ||
| − | + | {{HelpfulOverviewNote}} | |
| − | + | Directions are described from BLU's perspective. | |
| − | |||
| − | [[ | + | === Stage 1, Point A === |
| − | + | [[File:Dustbowl_stage_one.png|thumb|150px|right|Details of stage 1.]] | |
| + | [[File:Dustbowl s1c1.jpg|thumb|150px|right|Dustbowl, first stage, point A]] | ||
| + | [[File:Dustbowl s1c2.jpg|thumb|150px|right|Dustbowl, first stage, point B]] | ||
| + | Control point A Is inside a small building on the left. | ||
| − | * ''' | + | * '''BLU spawn''': There are three exits, left, middle, and right. The left exit has a resupply cabinet, and a ramp leading to the exit. The left exit is particularly vulnerable to enemy fire. |
| − | * ''' | + | * '''Canyon''': The long straight pathway from the middle spawn door leads right to the back door of Control Point A. |
| − | * ''' | + | * '''Left exit shed''': Next to the left door, a small shed with one doorway contains a large Health and Ammo pack. The path leads straight to the front entrance of the Control point building. A ladder leads to the roof of the shed. |
| − | * ''' | + | * '''Right exit shed''': Next to the right exit door, a small shed contains a large Health and Ammo pack. It has two doorways. |
| − | + | * '''Control Point A''': Control Point A is housed in a small building. It contains a large Health and Ammo pack. Stairs lead into a mining tunnel, which has a large Health pack and leads to Control Point B. The building has two doorways and a balcony. | |
| − | Control | ||
| − | + | * '''Tunnel entrances''': There are three tunnel entrances, leading to a system of tunnels that lead to Control Point B. The main entrance, accessible from the ground, splits left and right. A third entrance is only accessible from the building housing Control Point A. | |
| − | + | <gallery widths=150px heights=90px> | |
| + | File:Dustbowl1.png|The canyon | ||
| + | File:Dustbowl2.png|Right exit shed | ||
| + | File:Dustbowl3.png|Inside view of control point building | ||
| + | </gallery> | ||
| − | * ''' | + | === Stage 1, Point B === |
| + | * '''Upper tunnel''': Accessed from the building housing Control Point A, there are two exits. One exit is a one-way gate that provides access to Control Point B, and the second exit is unblocked, situated further back, with some buckets and tires as a shelter. The cave contains a medium Health and Ammo Pack. | ||
| − | * ''' | + | * '''Left tunnel''': Taking the left fork from the main tunnel entrance provides a direct path to Control Point B. |
| − | * ''' | + | * '''Right tunnel''': Taking the right fork from the main tunnel entrance leads to a large cave, with exits on two levels. The upper exit leads to the Bridge while the lower exit is a direct path to the Control Point. It contains a medium Health and Ammo pack. |
| − | * ''' | + | * '''Bridge''': A bridge leads from the upper exit of the right cave to the gate blocking the left cave. There is an entrance to the Control Point building at the left end of the bridge. |
| − | * ''' | + | * '''Platform''': There is a flat wooden building on the right side just opposite of the tunnel and across the bridge. It is possible to stand on the roof of this building and get an overview of the second control point. There are also some wooden crates as shelter here. |
| − | + | * '''Control Point B''': Control Point B is also housed in a building. It contains a small Health and Ammo pack and is directly accessible from the middle cave exit. To the left of the Control Point is a narrow walkway with an exit on the ground and an exit that goes upstairs to the one-way gate on the left. | |
| − | |||
| − | + | * '''Spawn roof''': The roof above RED spawn is split into two parts connected by the Snipers' bridge, and has a small Health and Ammo pack on one side. | |
| − | * ''' | + | * '''RED spawn''': The Red Spawn has one central exit which is located directly to the front (or slightly to the left/right depending on where the players spawn). The central exit is between two supply cabinet rooms. These types of spawns are vulnerable to spawn camping, as there is only one exit. The RED spawn faces away from the battlefield, and players have to make a U-turn to reach the battlefields, adding some delay to their defenses. |
| − | + | <gallery widths=150px heights=90px> | |
| + | File:Dustbowl4.png|Exits of upper tunnel | ||
| + | File:Dustbowl5.png|Platform | ||
| + | File:Dustbowl6.png|Stage 1, control Point B | ||
| + | File:Dustbowl7.png|Spawn roof | ||
| + | </gallery> | ||
| − | + | === Stage 2, Point A === | |
| + | [[File:Dustbowl stage two.png|thumb|150px|right|Details of stage 2.]] | ||
| + | [[File:Dustbowl s2c1.jpg|thumb|150px|right|Dustbowl, second stage, point A]] | ||
| + | [[File:Dustbowl s2c2.jpg|thumb|150px|right|Dustbowl, second stage, point B]] | ||
| + | The first point is on top of a building on the left (from BLU's perspective). | ||
| − | * ''' | + | * '''BLU Spawn''': This is a small building that opens into the Dugout. The BLU team occupy the spawn the RED team had in the first stage. |
| − | * ''' | + | * '''Dugout''': Two entryways emerge from the spawn, one leading left, and one right. Defenders are free to enter after the setup gates open. |
| − | + | * '''Large Shed''': On the right-hand side are two large Health and medium Ammo packs. The ladder at the back leads to the roof of the building. | |
| − | The | ||
| − | + | * '''Control Point Building''': Control point is on top of the second level of the building. The second level has a small hut that contains a large Health and medium Ammo pack. The first floor has a small, open room facing the BLU spawn with a medium Health and Ammo pack. It has two doorways, and may also be entered through a window and via crates located at the front-left and tires at the rear-left. | |
| − | * '''The | + | * '''The Office''': At the back of this area. There are two rooms; the one to the right contains a large Ammo and medium Health pack. The second room has a window facing the dugout. |
| − | * ''' | + | * '''Signpost''': A large Health pack and a small Ammo pack are located to the left of The Office. |
| − | * ''' | + | * '''Exits''': One on the left and one on the right, both leading to point B. |
| − | + | <gallery widths=150px heights=90px> | |
| + | File:Dustbowl8.png|Large Shed with supplies inside it | ||
| + | File:Dustbowl10.png|Inside view of control point building | ||
| + | File:Dustbowl18.png|Stage 2, control point A | ||
| + | File:Dustbowl11.png|Signpost | ||
| + | File:Dustbowl9.png|The Office | ||
| + | File:Dustbowl12.png|Exits | ||
| + | </gallery> | ||
| − | + | === Stage 2, Point B === | |
| + | The second control point is on a platform next to RED's spawn. | ||
| − | * ''' | + | * '''The Mining Tunnel''': A long narrow tunnel which starts at the back right of the office building. One could say that this is the left entrance to the checkpoint 2 area. |
| − | * ''' | + | * '''Double Tunnels''': There are two short tunnels that are parallel to each other. |
| − | + | * '''Gated Tunnel''': Branching from the double tunnels to the left is the gated tunnel. It is a long tunnel with a one-way gate at the end of it. | |
| − | |||
| − | |||
| − | + | * '''The Gate''': Far right from the double exits lies a one-way gate via another tunnel. There is a large Health pack at the end, near the grate. | |
| − | * ''' | + | * '''The Courtyard''': The open area right outside the double tunnels and the exit of the long mining tunnel. It is situated next to the middle building. |
| − | *''' | + | * '''The Middle Building''': A large building in the middle of the Courtyard area. The second floor contains two medium Health and Ammo packs. A ground-level corridor runs through the building which exits on the other side, directly in front of the final control point. There is also a path around the outside, sporting some tall boulders. Behind the boulders is a large Health pack. |
| − | * '''Control | + | * '''Control Point B''': The control point sits on a platform that is near the defenders' spawn and is accessible by stairs on either side. |
| − | * ''' | + | * '''RED Spawn Building''': This is the spawn point for the defending RED team and is behind the control point. This spawn is identical in structure to the RED Spawn in Stage One. |
| − | == | + | <gallery widths=150px heights=90px> |
| − | + | File:Dustbowl13.png|Exit of mining tunnel and double tunnels | |
| + | File:Dustbowl14.png|Exit of gated tunnel | ||
| + | File:Dustbowl15.png|Stage 2, control point B | ||
| + | </gallery> | ||
| − | [[ | + | === Stage 3, Point A === |
| + | [[File:Dustbowl stage three.png|thumb|150px|right|Details of stage 3.(Large file)]] | ||
| + | [[File:Dustbowl s3c1.jpg|thumb|150px|right|Dustbowl, third stage, point A.]] | ||
| + | [[File:Dustbowl s3c2.jpg|thumb|150px|right|Dustbowl, third stage, point B.]] | ||
| + | The first control point is on a platform straight across from BLU's exit. RED has a shortcut from one of their spawn rooms to this point. This shortcut is sealed once BLU captures this point. | ||
| − | *''' | + | * '''BLU Spawn''': This spawn occupies the RED Spawn from Stage 2. Upon leaving, players can take an immediate right turn and go up a long corridor to the right-hand locked gate, or take either the left or the right stairs. Both will lead to the double gate exits. |
| − | * ''' | + | * '''Three Exits''': Left, Middle, and Right all behind gates that open at the start of the round defenders can then move towards spawn. |
| − | * ''' | + | * '''Pillbox''': A small building containing a large Ammo and small Health pack. The building stands between the gates and the control point and has two wide windows which look toward the double gates. |
| − | * '''Control point | + | * '''Control point A''': Located at the back of the area on a slightly raised platform. |
| − | * ''' | + | * '''Loading Dock''': A ledge at the end of the defenders' shortcut to control point A. Once the first control point has been taken, the doorway from RED’s spawn is locked. |
| − | + | <gallery widths=150px heights=90px> | |
| + | File:Dustbowl16.png|Exit of Blu spawn | ||
| + | File:Dustbowl17.png|Pillbox | ||
| + | File:Dustbowl19.png|Stage 3, control point A | ||
| + | </gallery> | ||
| − | + | === Stage 3, Point B === | |
| − | === | + | The final control point is the base of a launch pad, under a rocket, in the center of RED's base. |
| − | |||
| − | + | * '''The Alleys''': These are the narrow alleyways that lead from control point A to control point B. They consist of two levels, with the main road having no Health or Ammo packs, and the side rooms on the upper level having two small Health and medium Ammo packs. | |
| − | + | * '''Downstairs''': Side doorway leading down underneath the base and into the valley under control point B area. | |
| − | + | * '''The Balcony House''': Has a bridge over the alley and a small Health and large Ammo pack. It faces control point B. | |
| − | + | * '''The Sniper House''': Opposite the Balcony House. Has a medium Health and large Ammo pack on the second level. On the first level, there is a bunker with windows facing down the long alley. There are two doors, one in the alley, the other at the back. These can be accessed from outside by defenders via a tiny ledge. | |
| − | + | * '''Equipment Room''': In front of the control point, a long room with an Ammo pack at the front and a medium Health pack in the back. Accessible by stairs. | |
| − | |||
| − | + | * '''The Valley''': Located underneath the final bridge, the Valley has one entrance, and a flight of stairs leading up to the bridge. | |
| − | + | * '''Control point B''': This is the final control point for this map and is situated between RED's two spawn exits, underneath a large rocket. | |
| − | + | * '''RED Spawn''': There are two individual RED spawns that are unique in design from its last two RED spawns in stages one and two respectively. One spawn is located to the left of control point B, and one on the right. The one on the left is significantly larger than the right RED spawn and has two different exits. One, which is in front of the RED team is the shortcut to control point A. The other exit spirals around and leads to Control Point B. The right RED respawn room is shaped like a rectangular prism, then has a curve to its only single exit. There are equal chances that the RED team player can spawn in any of these two locations. See the image "Map Overview" to see the interiors of the spawns. | |
| − | + | <gallery widths=150px heights=90px> | |
| − | + | File:Dustbowl20.png|Alleys | |
| − | + | File:Dustbowl24.png|Downstairs | |
| − | + | File:Dustbowl21.png|The Balcony House | |
| − | + | File:Dustbowl23.png|Inside view of sniper house | |
| − | + | File:Dustbowl22.png|Stage 3, control point B | |
| − | |||
| − | |||
| − | : | ||
| − | |||
| − | : | ||
| − | |||
| − | : | ||
| − | |||
| − | : | ||
| − | |||
| − | |||
| − | |||
| − | |||
</gallery> | </gallery> | ||
| − | + | == Helpful overview == | |
| + | [[File:Dustbowl overview with lines.png|left|Dustbowl's locations|750px]] | ||
| + | <small>1.Right Exit Shed | ||
| + | 2.Canyon | ||
| + | 3.Left Exit Shed | ||
| + | 4.Platform | ||
| + | 5.Bridge | ||
| + | 6.Tunnels | ||
| + | 7.Dugout | ||
| + | 8.Large Shed | ||
| + | 9.Control Point Building | ||
| + | 10.The Office | ||
| + | 11.Mining Tunnel | ||
| + | 12.Double Tunnels | ||
| + | 13.Gated Tunnel | ||
| + | 14.Courtyard | ||
| + | 15.Middle Building | ||
| + | 16.Pillbox | ||
| + | 17.Loading Dock | ||
| + | 18.Alleys | ||
| + | 19.Valley | ||
| − | : | + | Red/blue diagonal lines: Red/Blu first spawn |
| − | : | + | Red/blue double diagonal lines: Red/Blu second spawn |
| − | + | Red/blue double diagonal lines w/ a rectangle: Red/Blu third spawn | |
| − | + | (Red '''and''' blue diagonal lines indicate that that room was once a Red spawnroom before becoming the Blu's second, third... spawn.) | |
| − | |||
| − | |||
| − | |||
| − | + | Red circle: First capture point Stage 1 | |
| − | + | Blue circle: Second capture point Stage 1 | |
| + | Green circle: First capture point Stage 2 | ||
| + | Black circle: Second capture point Stage 2 | ||
| + | Yellow circle: First capture point Stage 3 | ||
| + | White circle: Second/final capture point Stage 3</small> | ||
| + | {{clr}} | ||
| + | == Strategy == | ||
| + | {{map strategy link|Dustbowl|main=yes}} | ||
| − | + | == Control point timing == | |
| + | All control points have the same capture times. | ||
| + | {{Control Point Timing/Official Map}} | ||
| − | + | == Related achievements == | |
| + | === {{Achiev type link|general}} === | ||
| + | {{Achievement table | ||
| + | | {{Show achievement|General|Impenetrable Defense}} | ||
| + | | {{Show achievement|General|World Traveler}} | ||
| + | }} | ||
| − | === | + | == Update history == |
| − | + | {{Update history| | |
| + | '''{{Patch name|10|2|2007}}''' | ||
| + | * Fixed players being able to use spectator points in Dustbowl that were not in play. | ||
| − | + | '''{{Patch name|10|25|2007}}''' | |
| + | * Fixed issues on Dustbowl that could occur when a server emptied in the middle of a round. | ||
| − | + | '''{{Patch name|12|20|2007}}''' | |
| + | * Now waits until either team wins fully before changing to another map on server timelimit expiring. | ||
| + | * Teams now score a point per captured control point, rather than per sub round. | ||
| + | * Prevented Demomen being able to launch grenades into the stage three alleys while standing at the final cap point. | ||
| + | * Fixed gaps in stage gates that allowed Snipers to kill defenders during setup. | ||
| + | * Fixed several model and brush perch exploits in stage three. | ||
| + | * Added stair access to the upper area in stage three after the first cap. | ||
| + | * Limited line-of-sight at the first control point in stage 3 to remove a [[Griefing|griefable]] Sniper spot. | ||
| + | * {{Undocumented}} Fixed model exploit in stage one allowing Sentry Gun/Teleporter to be placed behind chain link fence. | ||
| − | + | '''{{Patch name|12|21|2007}}''' | |
| + | * Fixed the problem with {{code|mp_maxrounds}} not correctly counting the number of rounds for Dustbowl after the scoring change. | ||
| − | + | '''{{Patch name|2|14|2008}}''' | |
| + | * Added a new access point to the stage 2 attacker gates (drop-down left from spawn), allowing attackers a way to reach the left route without being subjected to the spam and Sentry Gun fire. | ||
| + | * Fixed a gap in stage 3, cap 1 that allowed a player with to wiggle above the "ceiling" clip. | ||
| + | * Fixed a gap behind stage 1, cap 1 house. | ||
| + | * Fixed a high perch on stage 1, cap 1 house roof. | ||
| + | * Fixed a perch offering view of nodraw textures and the skybox (stage1 cap2 rock barrier). | ||
| + | * Fixed a few places where rockets/Demoman pipes could pass through non-solid models. | ||
| + | * Sealed up a gap over stage 1 lower startgate. | ||
| + | * Clipped off tall windows in stage 3 to prevent Sentry Guns from being built behind them. | ||
| − | + | '''{{Patch name|3|20|2008}}''' | |
| − | + | * Updated Dustbowl with several exploit fixes. | |
| − | + | '''{{Patch name|2|23|2012}}''' | |
| + | * Adjusted Blue team's {{code|func_respawnroom}} in stage 1 to be flush against the door. | ||
| − | + | '''{{Patch name|7|10|2013}}''' | |
| + | * Fixed players building in Blu's first spawn | ||
| + | * Fixed players shooting through rocks in stage 2 | ||
| + | * Fixed collision in tunnels in stage 2 | ||
| + | * Fixed textures not displaying properly in [[Pyroland|Pyrovision]] | ||
| + | * Fixed lighting on cliff faces | ||
| + | * Fixed skybox error in stage 3 | ||
| + | * Fixed players getting killed through the ceiling under stage 2 cap 1 | ||
| + | * Adjusted ceiling height in stage 3 tunnel for better clearance | ||
| + | * Cleaned up prop collision | ||
| − | + | '''{{Patch name|3|5|2014}}''' | |
| + | * Fixed Red team's stage 1 spawn door pushing players in the air. | ||
| + | * Fixed collision on windows, props, and rooflines. | ||
| + | * Fixed floating props. | ||
| + | * Fixed players building inside the alternate exit from the Red spawn in stage 3. | ||
| − | + | '''{{Patch name|4|24|2014}}''' | |
| + | * Fixed players standing in sky over the beginning of stage 1. | ||
| + | * Fixed collision on rocks in the front of stage 1 where stickybombs could be placed inside them. | ||
| − | + | '''{{Patch name|9|10|2015}}''' | |
| + | * {{Undocumented}} Added [[saucers]] and posters to Dustbowl. | ||
| − | + | '''{{Patch name|11|25|2015}}''' | |
| + | * {{Undocumented}} Removed [[saucers]] and posters from Dustbowl. | ||
| − | + | '''{{Patch name|3|28|2018}} #1''' | |
| + | * Fixed Pyros shooting through the stage 3 doors. | ||
| + | * Updated some entities that were disabled but shouldn't have been (func_nobuilds, soundscapes, powerlines in the 3dskybox). | ||
| + | }} | ||
| − | + | == Bugs == | |
| + | * On the console versions, Snipers and other classes are able to shoot through the grating and pick off enemies (see [[Differences between platforms]]). | ||
| + | * Inside the double gates of BLU spawn at Stage 3 between the two gates, stickies exploded alongside the wall on the outside kill those standing inside. | ||
| + | * The projector noise present in the RED final spawn room plays inconsistently. | ||
| + | * Players are able to shoot through spawn doors if standing right in front of it. | ||
| − | + | == Trivia == | |
| + | * Due to the map being in the game since release, Dustbowl was initially considered a [[Control Point (game mode)|control point]] map, but was later changed to [[Attack/Defend]]. | ||
| + | * Dustbowl is one of the maps designed after existing ''[[Team Fortress Classic]]'' maps, the others being [[2Fort]], [[Well (Control Point)|Well]], and [[Badlands (Control Point)|Badlands]]. The gameplay of the original version was similar to one-sided Capture the Flag, in which one player on the BLU team must take a flag to the RED team's control points, with only one control point per stage. | ||
| + | * The various barrels throughout the stage are movable and break into smaller pieces when attacked. | ||
| + | * A smaller detail, the smokestack next to the rocket stops producing smoke at a certain point into Stage 3. | ||
| + | * Dustbowl was the map featured in the closing scene of ''[[Meet the Heavy]]'', with the same scene featured in ''[[Meet the Sandvich]]''. The area featured was the area just outside BLU's spawn on the first stage. | ||
| + | * The Cornwell company logos scattered around the map are a reference to Dean Cornwell, an artist who greatly inspired the visual design of ''Team Fortress 2''.<ref>''Jason Mitchell'', [[Moby Francke]], [[Dhabih Eng]], [https://steamcdn-a.akamaihd.net/apps/valve/2007/NPAR07_IllustrativeRenderingInTeamFortress2.pdf Illustrative Rendering in ''Team Fortress 2''] (2007), retrieved 2010-10-23.</ref> | ||
| + | * Dustbowl appears in ''[[Worms Reloaded]]'' as one of the forts. | ||
| + | * The [[w:Dust Bowl|Dust Bowl]] was an economic crisis that occurred during the 1930s in the Midwestern United States and Canada. | ||
| + | * According to the Bronze Stamp on the Tough Break Update Page, Dustbowl was the birthplace of [[w:pneumoconiosis|pneumoconiosis]], a disease caused by inhaling dust known for causing coughing, lung inflammation, and scarring/thickening of lung connective tissues. | ||
| − | + | == Gallery == | |
| + | {{botignore| | ||
| − | + | === Concept art === | |
| + | <gallery> | ||
| + | File:Desert concept.jpg|Dustbowl environment concept | ||
| + | File:Dustbowl concept2.jpg|Ditto | ||
| + | </gallery> | ||
| − | === | + | === Pre-release === |
| − | + | <gallery> | |
| + | File:Dustbowl concept.jpg|One of the first versions of Dustbowl | ||
| + | File:0000002575.1920x1080.jpg|Early Stage 1, Control point A area | ||
| + | File:Dustbowl old roots.jpg|Early exits to Stage 1, Control point B | ||
| + | File:Dustbowlunusedcaveroom p3build.jpg|Stage 1, Control point B, unused exit | ||
| + | File:Dustbowlunusedcaveroom2 p3build.png|Ditto, upstairs | ||
| + | File:Dustbowlunuseddropdown.png|Ditto, Drop down to the second entrance of house | ||
| + | File:Dustbowl unused dropdown exit.png|Ditto, view from the second entrance of house | ||
| + | File:0000002574.1920x1080.jpg|Early building exterior near old Control point B, Stage 1 | ||
| + | File:Dustbowl old control point1b.png|Old location of Control point B, Stage 1 | ||
| + | File:DustbowlunusedspawnSDK.png|Stage 2, under Control point A, unused spawn points | ||
| + | File:Dustbowl old control point3b.png|Stage 3, Control Point B, unused platform | ||
| + | </gallery> | ||
| − | + | === Release === | |
| + | <gallery> | ||
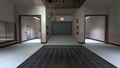
| + | File:Dustbowl BLU Team Starting Spawn.jpg|The starting spawn for the BLU team located in Dustbowl Stage 1 | ||
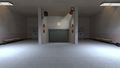
| + | File:Dustbowl - BLU Forward Spawn 1 and RED Spawn 1.jpg|BLU team spawn for Dustbowl Stage 2 and RED team spawn for Dustbowl Stage 1. | ||
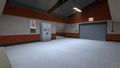
| + | File:Dustbowl - BLU Forward Spawn 2 and RED Spawn 2.jpg|BLU team spawn for Dustbowl Stage 3 and RED team spawn for Dustbowl Stage 2. | ||
| + | File:Dustbowl - RED Spawn 3a.jpg|One of the RED team spawns for Dustbowl Stage 3. | ||
| + | File:Dustbowl - RED Spawn 3b.jpg|One of the RED team spawns for Dustbowl Stage 3. | ||
| + | File:Smissmas 2013 Bulletin Board.png|The bulletin board that appears in the first RED spawn area and the second BLU spawn area, as of [[Smissmas 2013]]. | ||
| + | </gallery> | ||
| − | + | === Promotional === | |
| − | + | <gallery> | |
| − | + | File:Worms reloaded tf2 heavy fort.jpg|[[Heavy]] and Dustbowl as a playable fort in ''[[Worms Reloaded]]''. | |
| − | + | </gallery> | |
| − | |||
| − | |||
| − | |||
| − | |||
| − | |||
| − | |||
| − | |||
| − | |||
| − | |||
| − | |||
| − | |||
| − | |||
| − | |||
| − | < | ||
| − | |||
| − | |||
| − | |||
| − | |||
| − | |||
| − | |||
| − | |||
| − | |||
| − | |||
| − | |||
| − | |||
| − | |||
| − | |||
| − | |||
| − | |||
| − | |||
| − | |||
| − | |||
| − | |||
| − | |||
| − | |||
| − | |||
| − | |||
| − | |||
| − | |||
| − | |||
| − | |||
| − | |||
| − | |||
| − | |||
}} | }} | ||
| − | ==See also== | + | == See also == |
| − | *[[ | + | * [[Dustbowl (Training)]] |
| + | * [[Dustbowl (Classic)]] | ||
| + | == References == | ||
| + | <references/> | ||
| − | {{Maps | + | {{Maps Nav}} |
| − | |||
| − | [[Category: | + | [[Category:Quickplay maps]] |
Latest revision as of 10:12, 31 July 2024
| Dustbowl | |
|---|---|

| |
| Basic Information | |
| Map type: | Attack/Defend |
| File name: | cp_dustbowl
|
| Released: | October 10, 2007 (Launch) |
| Variants: | Training Mode |
| Developer(s): | Valve |
| Map Info | |
| No. of Stages: | 3 |
| Environment: | Desert |
| Setting: | Daylight, sunny |
| Hazards: | Crushing |
| Pyrovision Support: | Yes |
| Bot support: | Yes |
| Map Items | |
| Map Photos | |
 | |
| Map Overview | |
 | |
| “ | I'm burnin' up.
Click to listen
— The Engineer on the desert heat
|
” |
Dustbowl is an Attack/Defend Control Point map, and is the subsequent remake of the Team Fortress Classic map of the same name. It and Gravel Pit were the first Attack/Defend Control Point maps for Team Fortress 2 and was one of the six initial maps included with the game's release. Dustbowl is the only map for which a training mode has been created.
In Dustbowl, the goal of the attackers, BLU, is to win through a series of stages in order to win the map. Within each stage, the attackers must capture two control points, A and B, which are held by the defenders, RED. Point A must be captured before the attackers can assault B. The timer is increased by 4 minutes and 30 seconds for every point capture and once a point is captured it is locked and cannot be retaken by the defenders.
Like all Attack/Defend maps, BLU plays the attackers while RED plays the defenders. Egypt and Gorge share a similar design with Dustbowl.
Contents
Introduction video
Locations
Note: If you are having trouble with finding the locations listed here, see the Helpful overview section to see their exact position marked on the map. Directions are described from BLU's perspective.
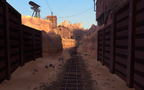
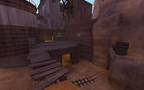
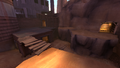
Stage 1, Point A


Control point A Is inside a small building on the left.
- BLU spawn: There are three exits, left, middle, and right. The left exit has a resupply cabinet, and a ramp leading to the exit. The left exit is particularly vulnerable to enemy fire.
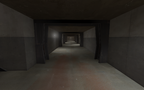
- Canyon: The long straight pathway from the middle spawn door leads right to the back door of Control Point A.
- Left exit shed: Next to the left door, a small shed with one doorway contains a large Health and Ammo pack. The path leads straight to the front entrance of the Control point building. A ladder leads to the roof of the shed.
- Right exit shed: Next to the right exit door, a small shed contains a large Health and Ammo pack. It has two doorways.
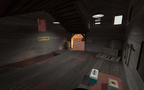
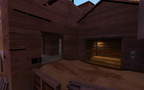
- Control Point A: Control Point A is housed in a small building. It contains a large Health and Ammo pack. Stairs lead into a mining tunnel, which has a large Health pack and leads to Control Point B. The building has two doorways and a balcony.
- Tunnel entrances: There are three tunnel entrances, leading to a system of tunnels that lead to Control Point B. The main entrance, accessible from the ground, splits left and right. A third entrance is only accessible from the building housing Control Point A.
The canyon
Right exit shed
Inside view of control point building


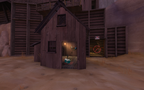
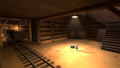
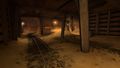
Stage 1, Point B
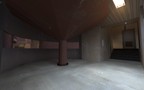
- Upper tunnel: Accessed from the building housing Control Point A, there are two exits. One exit is a one-way gate that provides access to Control Point B, and the second exit is unblocked, situated further back, with some buckets and tires as a shelter. The cave contains a medium Health and Ammo Pack.
- Left tunnel: Taking the left fork from the main tunnel entrance provides a direct path to Control Point B.
- Right tunnel: Taking the right fork from the main tunnel entrance leads to a large cave, with exits on two levels. The upper exit leads to the Bridge while the lower exit is a direct path to the Control Point. It contains a medium Health and Ammo pack.
- Bridge: A bridge leads from the upper exit of the right cave to the gate blocking the left cave. There is an entrance to the Control Point building at the left end of the bridge.
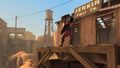
- Platform: There is a flat wooden building on the right side just opposite of the tunnel and across the bridge. It is possible to stand on the roof of this building and get an overview of the second control point. There are also some wooden crates as shelter here.
- Control Point B: Control Point B is also housed in a building. It contains a small Health and Ammo pack and is directly accessible from the middle cave exit. To the left of the Control Point is a narrow walkway with an exit on the ground and an exit that goes upstairs to the one-way gate on the left.
- Spawn roof: The roof above RED spawn is split into two parts connected by the Snipers' bridge, and has a small Health and Ammo pack on one side.
- RED spawn: The Red Spawn has one central exit which is located directly to the front (or slightly to the left/right depending on where the players spawn). The central exit is between two supply cabinet rooms. These types of spawns are vulnerable to spawn camping, as there is only one exit. The RED spawn faces away from the battlefield, and players have to make a U-turn to reach the battlefields, adding some delay to their defenses.
Exits of upper tunnel
Platform
Stage 1, control Point B
Spawn roof


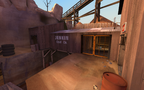
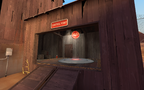
Stage 2, Point A


The first point is on top of a building on the left (from BLU's perspective).
- BLU Spawn: This is a small building that opens into the Dugout. The BLU team occupy the spawn the RED team had in the first stage.
- Dugout: Two entryways emerge from the spawn, one leading left, and one right. Defenders are free to enter after the setup gates open.
- Large Shed: On the right-hand side are two large Health and medium Ammo packs. The ladder at the back leads to the roof of the building.
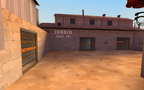
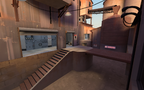
- Control Point Building: Control point is on top of the second level of the building. The second level has a small hut that contains a large Health and medium Ammo pack. The first floor has a small, open room facing the BLU spawn with a medium Health and Ammo pack. It has two doorways, and may also be entered through a window and via crates located at the front-left and tires at the rear-left.
- The Office: At the back of this area. There are two rooms; the one to the right contains a large Ammo and medium Health pack. The second room has a window facing the dugout.
- Signpost: A large Health pack and a small Ammo pack are located to the left of The Office.
- Exits: One on the left and one on the right, both leading to point B.
Large Shed with supplies inside it
Inside view of control point building
Stage 2, control point A
Signpost

The Office

Exits


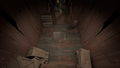
Stage 2, Point B
The second control point is on a platform next to RED's spawn.
- The Mining Tunnel: A long narrow tunnel which starts at the back right of the office building. One could say that this is the left entrance to the checkpoint 2 area.
- Double Tunnels: There are two short tunnels that are parallel to each other.
- Gated Tunnel: Branching from the double tunnels to the left is the gated tunnel. It is a long tunnel with a one-way gate at the end of it.
- The Gate: Far right from the double exits lies a one-way gate via another tunnel. There is a large Health pack at the end, near the grate.
- The Courtyard: The open area right outside the double tunnels and the exit of the long mining tunnel. It is situated next to the middle building.
- The Middle Building: A large building in the middle of the Courtyard area. The second floor contains two medium Health and Ammo packs. A ground-level corridor runs through the building which exits on the other side, directly in front of the final control point. There is also a path around the outside, sporting some tall boulders. Behind the boulders is a large Health pack.
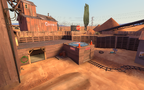
- Control Point B: The control point sits on a platform that is near the defenders' spawn and is accessible by stairs on either side.
- RED Spawn Building: This is the spawn point for the defending RED team and is behind the control point. This spawn is identical in structure to the RED Spawn in Stage One.
Exit of mining tunnel and double tunnels
Exit of gated tunnel
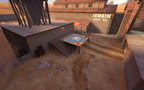
Stage 2, control point B


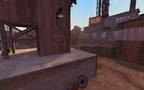
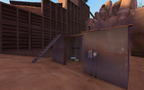
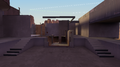
Stage 3, Point A


The first control point is on a platform straight across from BLU's exit. RED has a shortcut from one of their spawn rooms to this point. This shortcut is sealed once BLU captures this point.
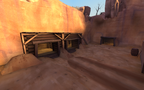
- BLU Spawn: This spawn occupies the RED Spawn from Stage 2. Upon leaving, players can take an immediate right turn and go up a long corridor to the right-hand locked gate, or take either the left or the right stairs. Both will lead to the double gate exits.
- Three Exits: Left, Middle, and Right all behind gates that open at the start of the round defenders can then move towards spawn.
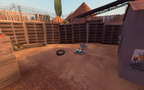
- Pillbox: A small building containing a large Ammo and small Health pack. The building stands between the gates and the control point and has two wide windows which look toward the double gates.
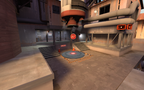
- Control point A: Located at the back of the area on a slightly raised platform.
- Loading Dock: A ledge at the end of the defenders' shortcut to control point A. Once the first control point has been taken, the doorway from RED’s spawn is locked.
Exit of Blu spawn

Pillbox

Stage 3, control point A


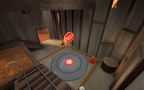
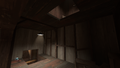
Stage 3, Point B
The final control point is the base of a launch pad, under a rocket, in the center of RED's base.
- The Alleys: These are the narrow alleyways that lead from control point A to control point B. They consist of two levels, with the main road having no Health or Ammo packs, and the side rooms on the upper level having two small Health and medium Ammo packs.
- Downstairs: Side doorway leading down underneath the base and into the valley under control point B area.
- The Balcony House: Has a bridge over the alley and a small Health and large Ammo pack. It faces control point B.
- The Sniper House: Opposite the Balcony House. Has a medium Health and large Ammo pack on the second level. On the first level, there is a bunker with windows facing down the long alley. There are two doors, one in the alley, the other at the back. These can be accessed from outside by defenders via a tiny ledge.
- Equipment Room: In front of the control point, a long room with an Ammo pack at the front and a medium Health pack in the back. Accessible by stairs.
- The Valley: Located underneath the final bridge, the Valley has one entrance, and a flight of stairs leading up to the bridge.
- Control point B: This is the final control point for this map and is situated between RED's two spawn exits, underneath a large rocket.
- RED Spawn: There are two individual RED spawns that are unique in design from its last two RED spawns in stages one and two respectively. One spawn is located to the left of control point B, and one on the right. The one on the left is significantly larger than the right RED spawn and has two different exits. One, which is in front of the RED team is the shortcut to control point A. The other exit spirals around and leads to Control Point B. The right RED respawn room is shaped like a rectangular prism, then has a curve to its only single exit. There are equal chances that the RED team player can spawn in any of these two locations. See the image "Map Overview" to see the interiors of the spawns.
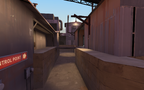
Alleys
Downstairs
The Balcony House
Inside view of sniper house
Stage 3, control point B


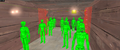
Helpful overview

1.Right Exit Shed
2.Canyon
3.Left Exit Shed
4.Platform
5.Bridge
6.Tunnels
7.Dugout
8.Large Shed
9.Control Point Building
10.The Office
11.Mining Tunnel
12.Double Tunnels
13.Gated Tunnel
14.Courtyard
15.Middle Building
16.Pillbox
17.Loading Dock
18.Alleys
19.Valley
Red/blue diagonal lines: Red/Blu first spawn
Red/blue double diagonal lines: Red/Blu second spawn
Red/blue double diagonal lines w/ a rectangle: Red/Blu third spawn
(Red and blue diagonal lines indicate that that room was once a Red spawnroom before becoming the Blu's second, third... spawn.)
Red circle: First capture point Stage 1
Blue circle: Second capture point Stage 1
Green circle: First capture point Stage 2
Black circle: Second capture point Stage 2
Yellow circle: First capture point Stage 3
White circle: Second/final capture point Stage 3
Strategy
Control point timing
All control points have the same capture times.
| Control Point | Multiplier | Seconds | ||
|---|---|---|---|---|
| All control points | ×1 |
| ||
| ×2 |
| |||
| ×3 |
| |||
| ×4 |
|
Related achievements
 General achievements
|
|


Update history
- Fixed players being able to use spectator points in Dustbowl that were not in play.
- Fixed issues on Dustbowl that could occur when a server emptied in the middle of a round.
- Now waits until either team wins fully before changing to another map on server timelimit expiring.
- Teams now score a point per captured control point, rather than per sub round.
- Prevented Demomen being able to launch grenades into the stage three alleys while standing at the final cap point.
- Fixed gaps in stage gates that allowed Snipers to kill defenders during setup.
- Fixed several model and brush perch exploits in stage three.
- Added stair access to the upper area in stage three after the first cap.
- Limited line-of-sight at the first control point in stage 3 to remove a griefable Sniper spot.
- [Undocumented] Fixed model exploit in stage one allowing Sentry Gun/Teleporter to be placed behind chain link fence.
- Fixed the problem with
mp_maxroundsnot correctly counting the number of rounds for Dustbowl after the scoring change.
- Added a new access point to the stage 2 attacker gates (drop-down left from spawn), allowing attackers a way to reach the left route without being subjected to the spam and Sentry Gun fire.
- Fixed a gap in stage 3, cap 1 that allowed a player with to wiggle above the "ceiling" clip.
- Fixed a gap behind stage 1, cap 1 house.
- Fixed a high perch on stage 1, cap 1 house roof.
- Fixed a perch offering view of nodraw textures and the skybox (stage1 cap2 rock barrier).
- Fixed a few places where rockets/Demoman pipes could pass through non-solid models.
- Sealed up a gap over stage 1 lower startgate.
- Clipped off tall windows in stage 3 to prevent Sentry Guns from being built behind them.
- Updated Dustbowl with several exploit fixes.
- Adjusted Blue team's
func_respawnroomin stage 1 to be flush against the door.
- Fixed players building in Blu's first spawn
- Fixed players shooting through rocks in stage 2
- Fixed collision in tunnels in stage 2
- Fixed textures not displaying properly in Pyrovision
- Fixed lighting on cliff faces
- Fixed skybox error in stage 3
- Fixed players getting killed through the ceiling under stage 2 cap 1
- Adjusted ceiling height in stage 3 tunnel for better clearance
- Cleaned up prop collision
- Fixed Red team's stage 1 spawn door pushing players in the air.
- Fixed collision on windows, props, and rooflines.
- Fixed floating props.
- Fixed players building inside the alternate exit from the Red spawn in stage 3.
- Fixed players standing in sky over the beginning of stage 1.
- Fixed collision on rocks in the front of stage 1 where stickybombs could be placed inside them.
- [Undocumented] Added saucers and posters to Dustbowl.
- [Undocumented] Removed saucers and posters from Dustbowl.
- Fixed Pyros shooting through the stage 3 doors.
- Updated some entities that were disabled but shouldn't have been (func_nobuilds, soundscapes, powerlines in the 3dskybox).
Bugs
- On the console versions, Snipers and other classes are able to shoot through the grating and pick off enemies (see Differences between platforms).
- Inside the double gates of BLU spawn at Stage 3 between the two gates, stickies exploded alongside the wall on the outside kill those standing inside.
- The projector noise present in the RED final spawn room plays inconsistently.
- Players are able to shoot through spawn doors if standing right in front of it.
Trivia
- Due to the map being in the game since release, Dustbowl was initially considered a control point map, but was later changed to Attack/Defend.
- Dustbowl is one of the maps designed after existing Team Fortress Classic maps, the others being 2Fort, Well, and Badlands. The gameplay of the original version was similar to one-sided Capture the Flag, in which one player on the BLU team must take a flag to the RED team's control points, with only one control point per stage.
- The various barrels throughout the stage are movable and break into smaller pieces when attacked.
- A smaller detail, the smokestack next to the rocket stops producing smoke at a certain point into Stage 3.
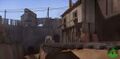
- Dustbowl was the map featured in the closing scene of Meet the Heavy, with the same scene featured in Meet the Sandvich. The area featured was the area just outside BLU's spawn on the first stage.
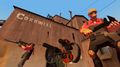
- The Cornwell company logos scattered around the map are a reference to Dean Cornwell, an artist who greatly inspired the visual design of Team Fortress 2.[1]
- Dustbowl appears in Worms Reloaded as one of the forts.
- The Dust Bowl was an economic crisis that occurred during the 1930s in the Midwestern United States and Canada.
- According to the Bronze Stamp on the Tough Break Update Page, Dustbowl was the birthplace of pneumoconiosis, a disease caused by inhaling dust known for causing coughing, lung inflammation, and scarring/thickening of lung connective tissues.
Gallery
Concept art
Dustbowl environment concept
Ditto


Pre-release
One of the first versions of Dustbowl
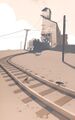
Early Stage 1, Control point A area
Early exits to Stage 1, Control point B
Stage 1, Control point B, unused exit

Ditto, upstairs
Ditto, Drop down to the second entrance of house
Ditto, view from the second entrance of house
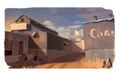
Early building exterior near old Control point B, Stage 1

Old location of Control point B, Stage 1
Stage 2, under Control point A, unused spawn points
Stage 3, Control Point B, unused platform


Release
The starting spawn for the BLU team located in Dustbowl Stage 1
BLU team spawn for Dustbowl Stage 2 and RED team spawn for Dustbowl Stage 1.
BLU team spawn for Dustbowl Stage 3 and RED team spawn for Dustbowl Stage 2.
One of the RED team spawns for Dustbowl Stage 3.

One of the RED team spawns for Dustbowl Stage 3.
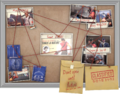
The bulletin board that appears in the first RED spawn area and the second BLU spawn area, as of Smissmas 2013.


Promotional
Heavy and Dustbowl as a playable fort in Worms Reloaded.

See also
References
- ↑ Jason Mitchell, Moby Francke, Dhabih Eng, Illustrative Rendering in Team Fortress 2 (2007), retrieved 2010-10-23.