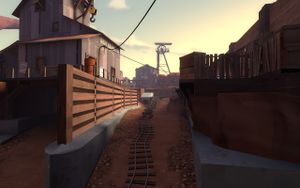
Gold Rush
| このページの内容は日本語へ翻訳中です。 もしあなたが日本語話者で編集して頂ける場合は、トークページにその旨を記していただくか(編集履歴のページを参照して)このページを過去に編集した人たちと話してください。 |
| Gold Rush | |
|---|---|
| |
| インフォメーション | |
| 製作者 | 未知 |
| マップ情報 | |
| 環境 | 砂漠 |
| 時間帯・天気: | 日中・晴天 |
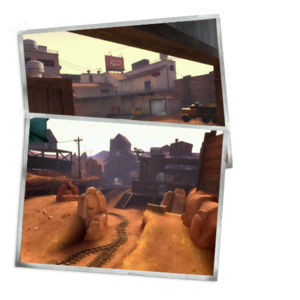
| マップ画像 | |
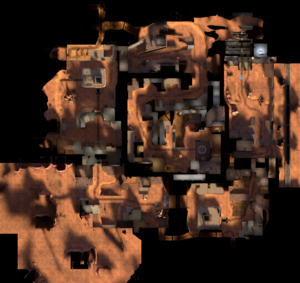
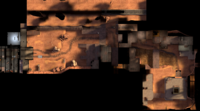
| マップ俯瞰図 | |
| 「 | Gold Rush is a map that specifically focuses on pacing so that the player feels like they are part of an overall campaign by the team. Each member of the team needs to focus on both the overall goal of either stopping or advancing the payload and also deal with local threats. As the payload moves through the map both teams need to be able to adjust their strategy depending on what approach the other is taking. Gold Rush has been designed taking all nine classes and their abilities in Team Fortress 2 into account, which means there is a spot for everyone and their favorite class to be useful.
|
」 |
Gold Rushはペイロードというゲームモードの、記念すべき最初のマップです。 マップは3つのエリアに分割されており、それぞれに中間地点としてキャプチャーゾーンが設置されています。Dustbowlと同様に、チームは攻撃側(BLU)と防御側(RED)とに分かれます。BLUチームの目標は、キャプチャーポイントを順に奪取していき、カートをマップの最後まで押し進めて、最終地点のREDの本拠地を破壊することです。そして、REDチームはそれを食い止めることが目標となります。
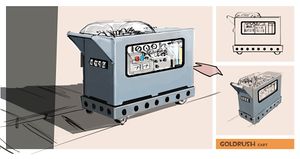
BLUのプレイヤーはカートの周りに立つとそれを押し進めることができ、人数が増えるほど速く動きます。20秒間誰も押さない状態が続くと、カートは来た道を戻り始めます。またカートはディスペンサーのように、周囲のBLUチームを回復させ、弾薬を補給する効果を持ちます。
カートをチェックポイントまで進めるごとに、制限時間が5分延長されます。攻守交替になるまで、残り時間は次のエリアへと持ち越されます。
各チームには1分5秒のセットアップ時間が与えられ、REDはマップ内を移動して準備を整えることができ、BLUはユーバーチャージを溜めておくことが出来ます。ただし、無敵状態のプレイヤー(喉ごしガツン! アトミックパンチを使ったスカウトを含む)はカートを押せません。
時間切れとなったときにカートが逆走状態でなければ、延長戦が始まります。攻撃側チームがカートを押し続けないと、逆走開始までの20秒タイマーの代わりに、試合終了までの5秒間のタイマーが作動します。このタイマーは攻撃側の誰かがカートに触れる度にリセットされます。
両チームの勝利条件は以下の通りです:
- BLU: BLUチームの最終目標は、ペイロードマップに敷設された線路に沿って、青いカートを押して終点までたどり着くことです。REDの防衛線を突破しつつ最後までカートを押し切ると、カートが大爆発してBLUチームの勝利となります。カートの周りに押しているプレイヤーがいなくなると、来た道を逆走し始めてしまいます。
- RED: REDチームはBLUチームがカートを終点まで進めるのを阻止しなくてはなりません。制限時間いっぱいまで守りきれば、REDチームの勝利となります。そのために、BLUチームをカートに近づけさせないようにする必要があります。
目次
紹介動画
各地点の解説
ステージA
チェックポイント1
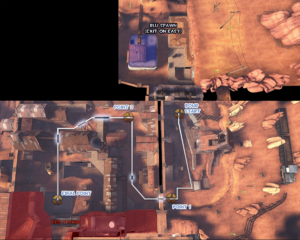
BLUのスポーン地点から第1チェックポイントの間には、長くて広い空間が広がっています。カートはBLUのスポーン地点の出口からスタートして、仮兵舎に向かい、崖の段差の間を進みます。その後、左、右と曲がって上り坂を進み、トンネルへと突入します。
- BLUスポーン地点: BLUスポーン地点には補給エリアと3箇所の出口があります。カートの後ろの出口には2対のゲートがあり、そこから付近のエリア全体を見ることが出来ます。右側の出口の前には箱が積み重ねて置いてあり、ラウンドスタート前からREDチーム、特にパイロやユーバーチャージのペアが隠れており、攻撃側がユーバーを使い終わったころに現れることがあります。攻撃側も、この箱に隠れて不意打ちを食らわせることが出来るでしょう。左側の出口はマップ右手側を向いており、上段の線路にいる敵からは死角となっています。また仮兵舎からも、崖の岩が射線を遮っています。
- 上段の線路: BLUから見てマップ左端を貫き、トンネルとチェックポイントへ続く線路です。REDチーム、特にデモマンやソルジャーはこの上から爆弾の雨を降らせることが出来ます。BLUチームも崖からしゃがみジャンプで飛び乗ることが出来ます。この付近にはいくつか弾薬箱大があるので、積極的なREDエンジニアなら、BLUスポーン側の端にレベル2か3のセントリーガンをつくっておくかもしれません。
- 崖: 本当の崖ではありませんが、BLU側から見ると一段高くなっており、小さな崖のようになっています。この"段差"の間をカートが通り抜けます。REDチームはこの崖の後ろに、パイロやセントリーガンと一緒に隠れたり、ユーバーチャージを溜めて待っています。左側の崖の後ろにはヘルスキット大があります。崖の上からは、上段の線路にしゃがみジャンプで登ったり、デモマンなら粘着爆弾ジャンプでトンネルまで飛んでいくことができます(練習すれば、チェックポイント手前のヘルスキットにちょうど着地することも可能です)。
- 仮兵舎: BLUスポーン地点から見て右奥にあります。2階建てで、BLU側を向いたベランダがついています。1階にはBLU側の扉と、その外に弾薬箱大、そして左の線路側にも扉があります。ここはスナイパーにとって絶好のポジションで、カートを押しに来たり、スポーンから出てきたばかりのBLUプレイヤーを狙撃可能です。また、エンジニアが2階のBLUスポーン側からは隠れた場所にセントリーガンを建てて、線路側を攻撃することもあります。すこし練習すれば、デモマンの粘着ジャンプで、BLUスポーンから2階のバルコニーまで飛ぶことが出来るでしょう。
- トンネル: 左奥へと続く、カートを押して通るトンネルです。チェックポイント奪取までは、このエリアと次のエリアを結ぶ唯一の通路です。このトンネルが、このステージ最大の難所となりがちです。
- Goldrush1a.jpg
ステージA、チェックポイント1
- Goldrush11cliffs.jpg
崖
- Goldrush11house.jpg
仮兵舎
- Goldrush11tunnel.jpg
トンネル
チェックポイント2
上述のトンネルに入った後、右、左と角を曲がると開けた場所に出ます。排水溝に沿って進み、橋を過ぎたところで右に曲がると、REDスポーン地点の裏手にあるチェックポイントに到達します。ここからは、RED視点で各拠点を解説します。
- REDスポーン地点: REDスポーン地点には補給エリアがあり、マップの裏手側を向いています。出口から出て左側には前線へと向かうトンネルが、右側にはアタッカー向けの開けた通路と、2階へ上がる階段とがあります。REDはスポーン地点から出て180度逆へ進んで、やってきた攻撃側チームと真正面から対峙することになります。チェックポイントは、スポーン地点の裏側、攻撃側に位置します。
- RED階上デッキ: REDスポーン地点の左側(攻撃側に向かって)には2階があります。足場の先に弾薬とヘルスキットがあり、ここにセントリーガンを建てると、トンネルを抜けてきたカートを攻撃出来ます。REDスポーン地点の屋上へと繋がる橋があり、ここはトンネルから出てきた敵を狙撃するため、スナイパーが好んで陣取る地点です。
- 排水溝: REDスポーン地点とBLU側建物の間にあり、小さな谷のようにマップを横切っています。右側は傾斜になっており、左端には線路へと登ることが出来るはしごが架かっています。排水溝には橋が架かっており、これを渡ってREDスポーン地点から反対側の建物へと直接突入することが出来ます。カートはこの排水溝に沿って進み、その後右へと曲がります。
- 屋根裏部屋: 第1キャプチャポイントから続く難所の周辺には、2階建ての建物が左右に広がっており、ここは屋根裏部屋として知られています。地上階の左側からは線路が延びています。その真上にある窓は、地上階を右奥に進んだ所にある、板敷きの坂道を登った先の屋根裏部屋のものです。この屋根裏部屋の左側の扉から出ると高台があり、チェックポイントがすぐ目の前です。REDチームはトンネル1階部分を左に進むと、第1チェックポイントやそこから続く別の通路、ヘルスキット大、そして右側の建物へと続く階段などがあります。ここはチェックポイントに近く、身を隠すことも出来るので、アタッカーがよく使います。
- その他の通路: BLUが第1チェックポイントを奪取すると、次のエリアへの通路が新たに2本開放されます。1本はBLUから見てトンネルの右側にあり、木壁で3つに区切られた部屋の2階部分に上がることが出来ます。この部屋から上述の通路へ降りることが出来ます。ここにテレポーターやセントリーガンを建てておくと、REDにとっては侵攻が難しくなります。
REDは試合開始前に、このプラットフォームに基地をつくることが出来ます。REDエンジニアは、まずスポーン地点にテレポーター入口を設置してからメタルを補給し、プラットフォームの端の下にディスペンサーを設置します。ディスペンサー完成度を60%以上にした後、その上に飛び乗ればテレポーター出口をプラットフォーム上に建てられます。ただしエンジニア自身はプラットフォーム上に登れないので、PDAを起動しつつジャンプして、その間に設置することになります。テレポーター出口が動き出せば、BLUがやってくるまでにセントリーガンとディスペンサーを用意しておき、待ち伏せすることが出来ます。
もう1本の通路は、BLUから見てさらに右奥にあり、排水溝の上にある2階建ての建物へと繋がっています。ここからは(REDから見て)右側を一望でき、またREDスポーン地点の2階部分も一部見ることが出来ます。排水溝の橋上や、その付近にいる敵を攻撃可能です。しかし、下の排水溝からソルジャーやデモマンがロケットジャンプ/粘着爆弾ジャンプで登ってきたり、あるいはスカウトがダブルジャンプで登ってきたりするので、油断は禁物です。
- Goldrush1b.jpg
ステージA、チェックポイント2
- Goldrush12house.jpg
屋根裏部屋
- Goldrush12upper.jpg
RED階上デッキ
- Goldrush12valley.jpg
排水溝
ステージB
ステージBには、BLUの奪取すべきチェックポイントが2つあります。
チェックポイント1
The cart starts out in front of a trench which separates BLU's spawn area and the battlefield. The cart runs between the Watchtower and House and then over the Bridge where the checkpoint is then located.
- BLU Spawn: There are two exits, one tunnel exit on the left and one double gate on the right. The right one is usually used for ÜberCharges while the left one is used to flank RED. From the left exit, it's easy for a Spy to sneak behind the lines. Be careful, though, as sometimes at the start of the match, an ÜberCharged Pyro will enter the left exit, usually killing everything in the tunnel.
- House Tunnel: In the tunnel on the left side of house from BLU's view, you'll find a large Ammo Pack and a small health kit. It's rare that it's guarded. From the tunnel on the left, there are stairs leading to the Sniper Ledge.
- The Sniper Ledge: On the right where RED enters the first checkpoint area, there is a small set of stairs leading to the Sniper Ledge. As its name indicates, it's often used by Snipers. You'll find cover behind some boxes and in the small hut, which also has a medium health kit.
- Watchtower: On the right from the Blue Spawn, when you go through the gates you'll see the Watchtower. Most of the RED defenders are here, since they have a height advantage and there's a large ammo pack and a medium health kit. From it's watchtower, Snipers can overlook both exits. Sentry Guns are often located here, so be sure to destroy them with an initial ÜberCharge.
- The Bridge: Just before the final stretch of track to the first checkpoint is a bridge which connects over the ditch.
- The House: The House is located to the left from the perspective of BLU. It has one exit, and two windows which RED can shoot through. Sometimes, Sentry Guns are placed on the windows or you'll find a Demoman here. Be sure to clean everything in the house, as it's a popular spot for Engineers. Grenades and stickybombs work wonders here.
- Goldrush2a.jpg
Stage B, Checkpoint 1
- Goldrush21house.jpg
The House
- Goldrush21housetunnel.jpg
House Tunnel
- Goldrush21sniperdeck.jpg
The Sniper Ledge
チェックポイント2
After the first checkpoint the cart winds through a building which separates the next battlefield. It exits out to a chokepoint area and then runs under a bridge separating the Main Building and then finally onto the next checkpoint.
- The Choke: The choke area is the small exit from the checkpoint building and the small battlefield around it which is surrounded by the two huts which separate Checkpoint 2's area.
- Battlements: The battlements are located at the far end of the area from RED's spawn. It connects from the house above Checkpoint 1's building. There are two drop downs which can be used by attackers as another entry or as an entry way for RED Soldiers or Demomen.
- Main Building: The Main Building is situated in the center of the area, cutting Checkpoint 2's battlefield in half. The Main Building has two houses which are connected by a bridge, both of which can be accessed by stairs on either side.
- Sentry Ledge: Near the Checkpoint is a small ledge on the wall of the main building, this is an extremely common spot for sentry nests.
- Alcove: Underneath a ledge on the Main Building is a small alcove which is indented into the wall of the building. This is also a very common spot for Sentry Guns.
- Goldrush2b.jpg
Stage B, Checkpoint 2
- Goldrush22choke.jpg
Choke Area
- Goldrush22houses.jpg
Main Building
- Goldrush22sniperdeck.jpg
Battlements
ステージC
ステージCには、BLUの奪取すべきチェックポイントが3つあります。
Checkpoint 1
From the BLU spawn exits the cart starts out on a track which must run straight, up through a basin where then the checkpoint is located under an open gateway.
- Tunnel: The tunnel is one of the BLU spawn entrances. It winds out from the BLU spawn and exits out under the Truck House.
- Basin: The Basin is the area which runs through and below the platform and Truck House.
- Truck House: The Truck House is the area located across from the platform. It is a small shack with a deck overlooking the track. Next to it is an underpass which houses a large truck.
- Platform: Across from the Truck House is a platform which overlooks the track. It has a small inaccessible shack on it which is useful for cover.
- Goldrush3a.jpg
Stage C, Checkpoint 1
- Goldrush31truck.jpg
Truck House
- Goldrush31valley.jpg
Basin
Checkpoint 2
From the checkpoint the track runs straight through and alleyway surrounded by buildings on both sides.
- Dropdown: The drop down is a small opening in the wall right next to the checkpoint. It serves as an entry way for RED before BLU has captured the checkpoint.
- Hallway: The hallway is located in one of the two buildings. It is a long narrow hallway with an entrance at both far sides. At the very far end is a drop down next to the track.
- Main Deck: Across from the Hallway building is another building with a deck along the wall. This can be accessed through a set of stairs in front of it and connects to another small deck which overlooks the second checkpoint.
- Sentry Decks: On both sides of the second checkpoint are two large decks which are both common spots for Sentry Guns.
- Goldrush3b.jpg
Stage C, Checkpoint 2
- Goldrush32dropdown.jpg
Dropdown
- Goldrush32house1.jpg
Main Deck
- Goldrush32sentrydecks.jpg
Sentry Decks
Checkpoint 3
From checkpoint 2 the cart runs through more buildings until reach the checkpoint which gives entry way to RED's final yard. Reaching Checkpoint 3 means victory for BLU, as well as a nice massive explosion to satisfy the victors.
- Chokepoint: The chokepoint is the very small entry way into RED's final yard. It is an infamous chokepoint for being extremely cramped when the cart is residing inside it and heavy spam makes entry very difficult.
- Chute: The chute is a dropdown by the chokepoint which exits out into the tunnels.
- House: The House is located next to the chokepoint. It is connected by a ledge along a wall, and has a dropdown which exits out behind the truck in RED's final yard. Blu Engineers will sometimes build forward bases in here.
- The Tunnels: The tunnels are located at the bottom of the chute and exit out into the valley. It is comprised of two tunnels, one of which goes up a ledge and exits out a small ledge next to the other
tunnel's exit.
- Valley: The valley is the area next to and below RED's yard. It is accessed by a long set of stairs and gives access to the tunnels and Sniper Deck.
- Sniper Deck: The Sniper Deck is located above the valley and overlooks RED's yard. There are two windows used as vantage points and a drop down with a ledge that weaves around to the final checkpoint.
- Battlements: The battlements are located above the checkpoint area and overlook the entire area. One entry way is from the winding staircases in RED's spawn and another is from jumping from the boxes and small roof across from the House's drop down area.
- Goldrush3c.jpg
Stage C, Checkpoint 3
- Goldrush33battlements.jpg
Battlements
- Goldrush33deck.jpg
Sniper Deck
- Goldrush33tunnels.jpg
The Tunnels
- Goldrush33valley.jpg
The Valley
戦術
更新履歴
- Added Gold Rush.
- Fixed map exploits in Gold Rush.
- Some changes to the second part of the first stage of Gold Rush to give the attackers more of an advantage.
- Stage 1
- Fixed overlapping train track models.
- Fixed terrain seam by red spawn exit.
- Fixed red spawn room door going through ceiling.
- Light fixture on roof structure of red's first spawn building switched to non-solid.
- Stage 2
- Added func_nobuild under bridge that would get teleported players stuck.
- Stage 3
- Added invisible func_brushes above roofs to block blind demo grenade spam.
- Fixed wood structure by main gate entrance so it doesn't destroy teleport buildables.
- Added clip brush to top of main gate entrance.
- Extended red's respawn room brushes to enclose entire interior.
- Added respawn visualizer material to back face of blocker that prevents red from entering blue's respawn area from the top route.
- Fixed collision on props and clip exploits.
- Fixed buildings being prohibited from construction in the garage near the end of stage 3.
- Players can no longer block the cart through the wall in stage.
- Players can no longer build in spawn exits.
- Players can no longer build on the shack roof near the end of stage 3.
- Players and buildings can no longer be killed through the floor in stage 1 in the upper room by the cap.
- Players can no longer build on the perch in stage 1.
- Handrails no longer collide with bullets and projectiles.
- Fixed an areaportal improperly rendering in pl_goldrush.
- Added nobuild area under the train tracks to prevent teleport trap near Blu spawn in stage 1.
外部リンク
- Goldrush 及び Medic 実績の公式ページ
- プレリリース版記事 TF2Maps.netより
| ||||||||||||||||||||
