Difference between revisions of "Upward/zh-hans"
< Upward
ShadowMan44 (talk | contribs) m |
(improve) |
||
| Line 1: | Line 1: | ||
| − | + | {{DISPLAYTITLE:Upward}} | |
| − | + | {{Map Variant}} | |
| − | {{DISPLAYTITLE:Upward | ||
| − | {{ | ||
{{Map infobox | {{Map infobox | ||
| game-type = Payload | | game-type = Payload | ||
| Line 20: | Line 18: | ||
{{Quotation|'''爆破手'''正在防守战车|敌人来袭!|sound=Demoman_incoming02.wav|en-sound=yes}} | {{Quotation|'''爆破手'''正在防守战车|敌人来袭!|sound=Demoman_incoming02.wav|en-sound=yes}} | ||
| − | '''Upward(沙漠矿区)''' | + | '''Upward(沙漠矿区)'''是一张由 Valve 官方制作的[[Payload/zh-hans|推车模式]]地图,于{{update link|Engineer Update}}中发布。这是自{{update link|Heavy Update}}以来开发和发布的第一个官方推车模式地图。 |
| − | Upward 是一张单阶段地图,设计和布局类似于地图 [[Badwater Basin]] | + | |
| + | Upward 是一张单阶段地图,设计和布局类似于地图 [[Badwater Basin/zh-hans|Badwater Basin]],在一回合具有多个[[control point (objective)/zh-hans|控制点]],不像地图 [[Gold Rush/zh-hans|Gold Rush]] 和地图 [[Thunder Mountain/zh-hans|Thunder Mountain]] 分为 3 个小型阶段,并且每阶段中带有 2 到 3 个控制点。 | ||
== 地点 == | == 地点 == | ||
| + | '''注''':如果你无法找到下方列出的位置,你可以向下滚动到[[#辅助俯视图|辅助俯视图]]的部分,以查看它们在地图上所标记的确切位置。 | ||
| + | |||
| + | ===检查点 A === | ||
| + | * '''蓝队重生区''':带有三个出口的大型重生区。左边的出口为一小段带有坡度的走廊,中间的出口往外便是战车起点,右边的出口为一个带有屋顶的走廊。 | ||
* '''推车轨道''':推车轨道环绕着整个地图,从蓝队基地开始到红队基地结束,在地图开始前可以靠近但无法使用。 | * '''推车轨道''':推车轨道环绕着整个地图,从蓝队基地开始到红队基地结束,在地图开始前可以靠近但无法使用。 | ||
| Line 45: | Line 48: | ||
Image:Upward4.jpg|最终点 | Image:Upward4.jpg|最终点 | ||
</gallery> | </gallery> | ||
| + | <!-- === Checkpoint A === | ||
| + | * '''BLU Spawn''': A large spawn with three exits. The left exit begins to lead to the slope, the middle exit to the Cart starting region, and the right exit being a corridor under the roof. | ||
| + | * '''Cart start''': The cart starts in front of the BLU spawn's middle exit, to reach the first checkpoint, the cart needs to go through a gap in the cliff and pass a small house. | ||
| + | * '''Roof''': The [[BLU]]'s right spawn exit is actually a long building extending deep into the map. Both teams can stand on the roof of this building, which gives players an overview of the entire area before the slope. | ||
| + | * '''Behind roof''': There is an area even more right of the roof itself. This area is not really behind the roof, but it is rather barren and mostly hidden by the roof, so one could say that "it is behind the roof". | ||
| + | * '''Slope''': The area leading to the checkpoint A is split in two by the "slope". A large hill spanning from the top of the stairs to the edge of the map. The area in front of the slope contains the first stretches of track, while the area behind the slope contains the house and the first checkpoint itself. There is a small gap in the slope through witch the cart passes in order to get to the other side of the slope. | ||
| + | * '''House''': Right behind the slope is small, two story house. The house is positioned side by side the checkpoint A. | ||
| + | * '''Cliff''': Opposite the house, right across the checkpoint A is a small cliff hugging the border of the map. One could say that the cliff is an extension of the slope. | ||
| + | |||
| + | === Checkpoint B === | ||
| + | * '''Hill''': There is a very large hill spanning all the way from the checkpoint A to the checkpoint B. This hill is not particularly high, but it is very long as we mentioned earlier. | ||
| + | * '''Tunnel''': There is a large tunnel complex dug out through the aforementioned hill, the tunnel is also the place where the cart passes to get to the second checkpoint. The entrance to this tunnel begins just a few meters after the first checkpoint and the exit is also just a few meters before the second checkpoint. The people in the tunnel are shielded from people up above them on the hill, however, whoever controls the hill also controls the exit from the tunnel. | ||
| + | * '''BLU Forward Spawn''': A small single spawn room with one exit. It is located halfway in the tunnel, and is unlocked for BLU when they capture B. | ||
| + | * '''Flanking cliff''': One part of the tunnel branches out to the outer edge of the hill where it "breaks" outside to the edge of the map. From there on, a small cliff (which isn't anymore apart of the tunnel), slithers its way up while hugging the right side of the hill. | ||
| + | * '''Rocks''': There is a group of rocks located in the middle of the hill, these rocks split the hill in two. | ||
| + | * '''B hut''': There is a small hut which sits right across the tunnel exit and is positioned side-by-side the checkpoint B. | ||
| + | * '''Platform''': Just as the [[RED]] team exit their spawn, they find themselves on a small elevated platform sitting just behind the checkpoint. | ||
| + | * '''Apartments''': There is a two story building sitting on the left of the checkpoint overlooking it. | ||
| + | |||
| + | === Checkpoint C === | ||
| + | * '''Sewers''': There is a small sewer system located right beneath the first RED spawn. | ||
| + | * '''Spiraling bride''': After capturing the second checkpoint, the cart cruises for a little while until it finds itself in front of a bridge which crosses a large gap. However, this bridge is not like any bridge, as it spirals upwards like a spiraling staircase. Once the cart has "climbed up" this bridge, it finds itself practically right on top of the third checkpoint. | ||
| + | * '''Under bridge''': There is a small pathway sneaking its way under the spiral bridge toward the C hut. | ||
| + | * '''C hut''': A small hut is positioned on the right side of the checkpoint. | ||
| + | * '''Balcony''': There is an elevated ledge located right across the C hut or on the left of the checkpoint C. | ||
| + | |||
| + | === Checkpoint D === | ||
| + | *'''Valley''': After the cart has "climbed up" the spiral bridge and reached the third checkpoint, it now strolls through a valley to the final area of the map. | ||
| + | * '''Final area''': A huge area encompassing the final RED spawn, pit, and the across buildings. | ||
| + | * '''Pit''': A hole right in the center of the final area of the final area in which the cart is supposed to be thrown. | ||
| + | * '''Across buildings''': A set of buildings sitting opposite of the RED spawn room right across the pit. | ||
| + | |||
| + | <gallery widths=140px heights=80px> | ||
| + | File:Upward1.jpg|First Checkpoint | ||
| + | File:Upward2.jpg|Second Checkpoint | ||
| + | File:Upward3.jpg|Third Checkpoint | ||
| + | File:Upward4.jpg|Final Terminus | ||
| + | </gallery> --> | ||
| + | |||
| + | == 辅助俯视图 == | ||
| + | [[File:Upward overview with lines.png|left|Upward 的地点|560px]] | ||
| + | 1.Roof | ||
| + | 2.Behind Roof | ||
| + | 3.Slope | ||
| + | 4.Slope | ||
| + | 5.House | ||
| + | 6.Cliff | ||
| + | 7.Hill | ||
| + | 8.Rocks | ||
| + | 9.Flanking cliff | ||
| + | 10.B hut | ||
| + | 11.Apartments | ||
| + | 12.Platform | ||
| + | 13.Balcony | ||
| + | 14.Spiraling bridge | ||
| + | 15.Under bridge | ||
| + | 16.C hut | ||
| + | 17.Valley | ||
| + | 18.Across buildings | ||
| + | |||
| + | Blue/red diagonal lines: Blu/Red first spawn | ||
| + | Blue/red double diagonal lines: Blu/Red second spawn | ||
| + | Blu/red double diagonal lines w/ a circle: Blu/Red third spawn | ||
| + | |||
| + | Yellow circle: First checkpoint | ||
| + | White circle: Second checkpoint | ||
| + | Dark red circle: Third checkpoint | ||
| + | Green circle: Final checkpoint and the Pit | ||
| + | {{clr}} | ||
== 战术 == | == 战术 == | ||
| − | {{main|Community Upward strategy}} | + | {{main|Community Upward strategy/zh-hans|l1=社区 Upward 战术}} |
== 更新历史 == | == 更新历史 == | ||
| Line 106: | Line 178: | ||
'''{{Patch name|7|7|2016}} #1''' ({{update link|Meet Your Match Update}}) | '''{{Patch name|7|7|2016}} #1''' ({{update link|Meet Your Match Update}}) | ||
| − | * Fixed an exploit where players could sometimes build Sentry Guns in the cliffside by capture point 3.}} | + | * Fixed an exploit where players could sometimes build Sentry Guns in the cliffside by capture point 3. |
| + | |||
| + | '''{{Patch name|9|26|2022}}''' | ||
| + | * Fixed exploit that allowed buildings to be built in an area that is later shut off from both teams | ||
| + | }} | ||
== 漏洞 == | == 漏洞 == | ||
| Line 115: | Line 191: | ||
== 细枝末节 == | == 细枝末节 == | ||
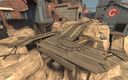
| − | [[Image:Engineer_Update_Teaser_New_Map.jpg|thumb|right|150px|Robin | + | [[Image:Engineer_Update_Teaser_New_Map.jpg|thumb|right|150px|Robin Walker 放出的Upward的初始截图]] |
| − | * | + | * Upward 是在{{update link|Engineer Update}}的第二天才正式公布的,但在此之前 Robin Walker 就已经将一张该地图的游戏截图放出了有一段时间了。 |
| − | * | + | |
| + | == 注释 == | ||
| + | * 在蓝队的最初重生区的右侧通道的墙壁上带有几个较大的开口,看上去似乎可以穿过开口进行攻击。但实际上这仍存在有一面空气墙,因此攻击无法穿透开口。 | ||
| + | |||
| + | == 参见 == | ||
| + | * [[Hassle Castle/zh-hans|迷途城堡]] | ||
== 外部链接 == | == 外部链接 == | ||
| − | *[http://www.teamfortress.com/engineerupdate/ | + | * [http://www.teamfortress.com/engineerupdate/ 工程师更新官方网页]{{lang icon|en}} |
| + | {{Engineer Update Nav}} | ||
| + | {{Maps Nav}} | ||
| − | |||
| − | |||
[[Category:Quickplay maps/zh-hans]] | [[Category:Quickplay maps/zh-hans]] | ||
Revision as of 09:21, 21 February 2023
地图Upward还拥有其它版本,其中包括迷途城堡(Hassle Castle)。
| Upward | |
|---|---|

| |
| 基本信息 | |
| 地图变种: | 迷途城堡(Hassle Castle) |
| 开发者: | 未知 |
| 地图资料 | |
| 环境: | 沙漠 |
| 设定: | 白天,晴朗 |
| 危害: | 深渊 |
| 地图照片 | |
 | |
| 地图俯视图 | |
 | |
| “ | 敌人来袭!
点击试听 (英语)
— 爆破手正在防守战车
|
” |
Upward(沙漠矿区)是一张由 Valve 官方制作的推车模式地图,于工程师更新中发布。这是自机枪手更新以来开发和发布的第一个官方推车模式地图。
Upward 是一张单阶段地图,设计和布局类似于地图 Badwater Basin,在一回合具有多个控制点,不像地图 Gold Rush 和地图 Thunder Mountain 分为 3 个小型阶段,并且每阶段中带有 2 到 3 个控制点。
地点
注:如果你无法找到下方列出的位置,你可以向下滚动到辅助俯视图的部分,以查看它们在地图上所标记的确切位置。
检查点 A
- 蓝队重生区:带有三个出口的大型重生区。左边的出口为一小段带有坡度的走廊,中间的出口往外便是战车起点,右边的出口为一个带有屋顶的走廊。
- 推车轨道:推车轨道环绕着整个地图,从蓝队基地开始到红队基地结束,在地图开始前可以靠近但无法使用。
- 通向矿山的道路:推车的路程从一个小山坡开始,这里还有一条把炸弹送至第一个控制点的木质小路。这片区域的重点在于从红队防守线上的山丘到阳台下方的开放式战斗。
- 矿山:在通过第一个控制点后,战车轨道会落入防御点 A 的阳台下面的一个浅矿道中,红队必须把注意力集中在矿道和地面上,否则其他蓝队玩家将会通过任意一个路线偷袭红队。这片区域为间谍提供了绝佳的偷袭机会,因为该区域有矿洞入口,地面路线和比较细的侧面路线。
- 木桥:在第二个控制点之后,会有一个小独木桥悬挂在通向红队基地的小下水道门上方。它在为占领B点之前的蓝队提供了一个良好的侧翼路线,侦察兵和间谍可以躲在这里。就像沿着悬崖的小路一样,这个木桥基本上没有什么能发生战斗的地方。
- 螺旋桥:在推车经过木桥并向上移动一个小斜坡后,它会到达螺旋木桥并且上升到地图的最终海拔。如果蓝队不推车的话,那么螺旋木桥的自动回退功能会使战车后退。在经过艰难的爬坡之后,蓝队能占领C点并继续前进到地图的最终部分。
- 直道:螺旋桥的顶部是一条小的开放轨道,必须将推车推入。蓝队通常很容易经过这个区域,因为红队通常不会产生太大的阻力。这是因为这片区域会给红队时间在最后一个控制点上建立防线。红队的侦察兵和士兵通常会尝试杀死一些敌人来减缓战车在轨道上的前进速度,从而减缓蓝队的占领速度。
- 最终控制点:红队基地的核心就在第三个控制点的拐角处。一大群建筑物环绕着中间的一个大洞。战车推到该区域后必须将其推上一个小型木制坡道,才能将其推入最终控制点坑中。一旦战车掉入坑中爆炸,摧毁了整个山顶基地,蓝队则赢得了此回合。该区域有阳台和地下区域,红队可以通过这片区域的防御优势来进行防御。当第三个控制点被占领后,有窗户和阳台连接到蓝队占领的建筑物,这些窗户和阳台可以作为蓝队的进攻优势。

第一检查点

第二检查点
第三检查点

最终点


辅助俯视图

1.Roof
2.Behind Roof
3.Slope
4.Slope
5.House
6.Cliff
7.Hill
8.Rocks
9.Flanking cliff
10.B hut
11.Apartments
12.Platform
13.Balcony
14.Spiraling bridge
15.Under bridge
16.C hut
17.Valley
18.Across buildings
Blue/red diagonal lines: Blu/Red first spawn
Blue/red double diagonal lines: Blu/Red second spawn
Blu/red double diagonal lines w/ a circle: Blu/Red third spawn
Yellow circle: First checkpoint
White circle: Second checkpoint
Dark red circle: Third checkpoint
Green circle: Final checkpoint and the Pit
战术
主条目: 社区 Upward 战术
更新历史
2010年7月8日补丁(工程师更新)
- 地图 Upward 被添加到游戏中。
- Fixed respawnroom entities not reaching the floor of split-level spawns.
- Fixed griefable fence facing BLU spawn near RED base.
- Added BLU high flanking route at RED base.
- Added health & ammo along BLU flanking route at RED base.
- Sealed BLU base left exit with block bullets brushes.
- Extended clip between C and BLU spawn to prevent sticky jump spawn camping.
- Fixed non-clipped non-solid railing in RED base.
- Fixed kill brush in middle spawn not extending to the ceiling.
- Put a block bullets brush on grate below middle spawn.
- Fixed some high micro-ledges accessible to sticky-jumpers.
- Fixed ending the game mid-round when mp_timelimit has been reached.
- Fixed several exploit areas.
- Fixed a teleporter griefing position near control point B.
- Fixed exploit where Blu team could be trapped in their final spawn room.
- Fixed gap in collision which allowed Blu players to be shot in their first spawn.
- Fixed fade distances on props in Blu spawn.
- Fixed players building under catwalk on the ledge of the final pit.
- Fixed clip brush exploits.
- Players can no longer be trapped by teleporting under stairs near final capture point.
- Players can no longer build inside of Red's final spawn room.
- Players can no longer build inside of spawn room doors.
- Players can no longer be trapped inside of the capture point sign.
- Prevented Blu team from entering final spawn room while it is neutral.
- Smoothed clipping collision.
- Collision performance increases.
- Handrails no longer collide with bullets and projectiles.
- Replaced floor texture in Red team final spawn room.
- Fixed players getting stuck in the initial Red spawn room after control point 2 is capped.
- Improved bot navigation.
- Fixed being able to construct buildings in the skybox.
- Fixed physics debris triggering the Payload cart's finale explosion
- Added stairs to forward Blue spawn underground.
- Updated the trigger hurt in the outer cliff area to cover the bottom of the map.
- Fixed a teleporter-trap exploit inside the tunnel after the first control point.
2016年7月7日补丁 #1 (棋逢对手更新)
- Fixed an exploit where players could sometimes build Sentry Guns in the cliffside by capture point 3.
- Fixed exploit that allowed buildings to be built in an area that is later shut off from both teams
漏洞
- 在蓝队第一个推进重生点的隧道顶梁柱可能会因为在下方跳跃而被卡住。
- 由于不可见的纹理,在准备阶段蓝队可能会离开重生点,但由于存在不可见的墙,蓝队无法对红队射击。
- 蓝队可以从重生点的墙壁小裂缝中射击,但是由于裂缝很小,所以很难击中任何敌人。
- 在通向最后一个控制点的建筑物外,可以穿过墙壁射击蓝队的第一个重生点,也可以射击到战车初始位置和到第一个控制点之间的道路上。
细枝末节

- Upward 是在工程师更新的第二天才正式公布的,但在此之前 Robin Walker 就已经将一张该地图的游戏截图放出了有一段时间了。
注释
- 在蓝队的最初重生区的右侧通道的墙壁上带有几个较大的开口,看上去似乎可以穿过开口进行攻击。但实际上这仍存在有一面空气墙,因此攻击无法穿透开口。
参见
外部链接
- 工程师更新官方网页(英语)
| |||||||||||||||||||||||