Difference between revisions of "Jungle Inferno Update/ko"
m (→도발) |
(updated (I'm 99% sure the original translator used automatic translator. The overall quality was too bad. I can say I "translated" this article.)) |
||
| (33 intermediate revisions by 6 users not shown) | |||
| Line 1: | Line 1: | ||
| − | {{DISPLAYTITLE: | + | {{DISPLAYTITLE:정글 인페르노 업데이트}} |
{{patch info|10|20|2017}} | {{patch info|10|20|2017}} | ||
[[File:Jungle Inferno Update.jpg|frameless|right|290px|link=http://www.teamfortress.com/jungleinferno/]] | [[File:Jungle Inferno Update.jpg|frameless|right|290px|link=http://www.teamfortress.com/jungleinferno/]] | ||
| − | {{Quotation|''' | + | {{Quotation|'''팀 포트리스 2 공식 웹사이트'''|쥬라기 공원이 우리에게 한 가지를 가르쳐 준다면 그건 '인생이란 길을 찾는 것' 입니다. 쥬라기 공원이 우리에게 "두 가지"를 가르쳐 준다면, 하나 '인생이란 길을 찾는 것' 이고, 나머지 하나는 업데이트에 쓸 새로운 아이디어를 얻기 위해 '쥬라기 공원' 을 베끼는 것이 좋다는 것입니다. 그 후에 만약 Valve의 법률 팀이 우리에게 한 가지 가르쳐 준다면 그것은 "쥬라기 공원이 우리에게 가르쳐 준 두 번째 사실을 말하지 않았다는 것" 에 대해 우리에게 소리치는 겁니다.<br><br>우리에게 소리치는 사람들이 우리에게 한 가지를 가르쳐 주었다면 그들의 시끄러운 고함으로 인해 우리는 백스페이스 키가 어디에 있는지 잊어버렸다는 겁니다. 그래서 우리는 그냥 앞으로 나아갔고 '우리가 만든 매우 독창적인' 테마파크에서 탈출하는 치명적인 동물들에 대한 업데이트를 발표하게 되어 우리는 기쁩니다. 왜냐하면, 우리가 쥬라기 공원에서 <s>베낀</s> 배운 인생에서 길을 찾는 방법을 알게 돼서입니다.}} |
| − | '''Jungle Inferno | + | '''{{update name|Jungle Inferno Update}}'''는 2017년 10월 16일부터 4일 동안 진행되고 하루를 더 지연해 2017년 10월 21일에 공개된 ''[[Team Fortress 2/ko|팀 포트리스 2]]''의[[Patches/ko#주요 업데이트|주요 업데이트]]입니다. 5개의 새로운 무기, 5개의 새로운 [[Steam Workshop/ko|커뮤니티 제작]] 맵, 1개의 새로운 [[Valve/ko|Valve]] 맵, 7개의 새로운 [[Taunts/ko|도발]], 1개의 새로운 처치 도발, 49개의 새로운 [[Cosmetic items/ko|장식 아이템]], [[Pyro/ko|파이로]] 병과뿐만 아니라 기존 무기에 대한 많은 재조정 등이 소개되었습니다. 또한 [[ConTracker/ko|계약기]]의 도입과 함께 계약 시스템을 개편하고 무기 스킨 대신에 [[War Paint/ko|전투 도색]]을 도입했습니다. |
== 영상 == | == 영상 == | ||
| Line 11: | Line 11: | ||
== 공지 사항 == | == 공지 사항 == | ||
| − | Jungle Inferno 업데이트 페이지는 공식적으로 [[TF2 Official Blog/ko| | + | Jungle Inferno 업데이트 페이지는 공식적으로 [[TF2 Official Blog/ko|팀 포트리스 2 공식 블로그]]의 게시물에 발표된 대로 2017년 10월 16일에 시작되었습니다. "[http://www.teamfortress.com/post.php?id=33662 용병 공원에 온 걸 환영한다!]" {{lang icon|en}} |
== 업데이트 진행 == | == 업데이트 진행 == | ||
| − | Jungle Inferno | + | {{update name|Jungle Inferno Update}}는 4일 간의 업데이트를 통해 출시되었습니다. |
* 1일차는 7개의 새로운 도발, 6개의 새로운 맵 및 짧은 SFM 예고편이 포함되었습니다. | * 1일차는 7개의 새로운 도발, 6개의 새로운 맵 및 짧은 SFM 예고편이 포함되었습니다. | ||
| − | * 2일차는 | + | * 2일차는 전투 도색들과 무료 계약과 유료 계약을 맺을 수 있는 새로운 계약 PDA가 소개되었습니다. 무료 계약은 새로운 무기를 주고, 유료 계약은 몇 가지 새로운 장식 아이템을 보여주는 이미지와 함께 청부금과 전투 도색을 줍니다. |
| − | * 3일차는 새로운 무기인 | + | * 3일차는 새로운 무기인 {{item link|Dragon's Fury}}(화염 방사기/주무기), {{item link|Thermal Thruster}}가열 가속기(제트팩/[[Gas Blast/ko|특수 도발]]을 가진 보조무기), {{item link|Gas Passer}}(방사능 가스 구름/보조무기)와 {{item link|Hot Hand}}(장갑/근접 무기)를 보여줬습니다. |
| − | * 4일차는 마지막 | + | * 4일차는 마지막 날로, 완전한 패치 노트와 출시일을 포함한 블로그 포스트를 동반한 마지막 날이었습니다. |
=== 1일차 === | === 1일차 === | ||
| − | Jungle Inferno | + | {{update name|Jungle Inferno Update}}는 새로운 Valve [[map/ko|맵]]과 5개의 [[Steam Workshop/ko|커뮤니티 제작]] 맵과 2개의 새로운 Valve의 [[taunt/ko|도발]] 및 5개의 새로운 커뮤니티 제작 도발을 공개했습니다. |
==== 맵 ==== | ==== 맵 ==== | ||
| − | {{hatnote| | + | {{main|List of maps/ko|l1={{common string|List of maps}}}} |
| + | {{hatnote|커뮤니티 맵은 이탤릭체로 표시됩니다.}} | ||
{| class="wikitable" cellpadding=2 style="text-align:center;" | {| class="wikitable" cellpadding=2 style="text-align:center;" | ||
|- style="height: 20px;" | |- style="height: 20px;" | ||
| − | ! class="header" style="background-color:#748c41;color:white;" |Name | + | ! class="header" style="background-color:#748c41;color:white;" |{{common string|Name}} |
| − | ! class="header" style="background-color:#748c41;color:white;" |Picture | + | ! class="header" style="background-color:#748c41;color:white;" |{{common string|Picture}} |
| − | ! class="header" style="background-color:#748c41;color:white;" |Game | + | ! class="header" style="background-color:#748c41;color:white;" |{{common string|Game mode}} |
| − | ! class="header" style="background-color:#748c41;color:white;" |File | + | ! class="header" style="background-color:#748c41;color:white;" |{{common string|File name}} |
|- | |- | ||
| − | | style="background-color:#b5b85c;" |'''''[[Banana Bay]]''''' | + | | style="background-color:#b5b85c;" | '''''[[Banana Bay{{if lang}}|<span style="color:#000;">Banana Bay</span>]]''''' |
| − | | style="background-color:#f8d28c;" | + | | style="background-color:#f8d28c;" | [[File:Bananabay_main.jpg|160px|link=Banana Bay{{if lang}}]] |
| − | | style="background-color:#f8d28c; | + | | style="background-color:#f8d28c;" | '''[[Payload{{if lang}}|{{common string|Payload Race}}]]'''<br>[[File:RED Bombcart.png|30px|link=Payload Race{{if lang}}]][[File:BLU Bombcart.png|30px|link=Payload Race]] |
| − | | style="background-color:#f8e2a1;" | + | | style="background-color:#f8e2a1;" | {{code|plr_bananabay}} |
|- | |- | ||
| − | | style="background-color:#b5b85c;" |'''''[[Brazil]]''''' | + | | style="background-color:#b5b85c;" | '''''[[Brazil{{if lang}}|<span style="color:#000;">Brazil</span>]]''''' |
| − | | style="background-color:#f8d28c;" | + | | style="background-color:#f8d28c;" | [[File:Brazil_main.jpg|160px|link=Brazil{{if lang}}]] |
| − | | style="background-color:#f8d28c; | + | | style="background-color:#f8d28c;" | '''[[King of the Hill{{if lang}}|{{common string|King of the Hill}}]]'''<br>[[File:Controlpoint.png|50px|link=King of the Hill{{if lang}}]] |
| − | | style="background-color:#f8e2a1;" | + | | style="background-color:#f8e2a1;" | {{code|koth_brazil}} |
|- | |- | ||
| − | | style="background-color:#b5b85c;" |'''''[[Enclosure]]''''' | + | | style="background-color:#b5b85c;" | '''''[[Enclosure{{if lang}}|<span style="color:#000;">Enclosure</span>]]''''' |
| − | | style="background-color:#f8d28c;" | + | | style="background-color:#f8d28c;" | [[File:Enclosure_main.jpg|160px|link=Enclosure{{if lang}}]] |
| − | | style="background-color:#f8d28c; | + | | style="background-color:#f8d28c;" | '''[[Payload{{if lang}}|{{common string|Payload}}]]'''<br>[[File:BLU_Bombcart.png|50px|link=Payload{{if lang}}]] |
| − | | style="background-color:#f8e2a1;" | + | | style="background-color:#f8e2a1;" | {{code|pl_enclosure_final}} |
|- | |- | ||
| − | | style="background-color:#b5b85c;" |'''''[[Lazarus]]''''' | + | | style="background-color:#b5b85c;" | '''''[[Lazarus{{if lang}}|<span style="color:#000;">Lazarus</span>]]''''' |
| − | | style="background-color:#f8d28c;" | + | | style="background-color:#f8d28c;" | [[File:Lazarus_main.jpg|160px|link=Lazarus{{if lang}}]] |
| − | | style="background-color:#f8d28c; | + | | style="background-color:#f8d28c;" | '''[[King of the Hill{{if lang}}|{{common string|King of the Hill}}]]'''<br>[[File:Controlpoint.png|50px|link=King of the Hill{{if lang}}]] |
| − | | style="background-color:#f8e2a1;" | + | | style="background-color:#f8e2a1;" | {{code|koth_lazarus}} |
|- | |- | ||
| − | | style="background-color:#b5b85c;" |'''[[Mercenary Park | + | | style="background-color:#b5b85c;" | '''[[Mercenary Park{{if lang}}|<span style="color:#000;">Mercenary Park</span>]]''' |
| − | | style="background-color:#f8d28c;" | + | | style="background-color:#f8d28c;" | [[File:Yetipark 5.png|160px|link=Mercenary Park (map){{if lang}}]] |
| − | | style="background-color:#f8d28c; | + | | style="background-color:#f8d28c;" | '''[[Control Point (game mode){{if lang}}|{{common string|Attack/Defend}}]]'''<br>[[File:Controlpoint.png|50px|link=Control Point (game mode){{if lang}}]] |
| − | | style="background-color:#f8e2a1;" | + | | style="background-color:#f8e2a1;" | {{code|cp_mercenarypark}} |
|- | |- | ||
| − | | style="background-color:#b5b85c;" |'''''[[Mossrock]]''''' | + | | style="background-color:#b5b85c;" | '''''[[Mossrock{{if lang}}|<span style="color:#000;">Mossrock</span>]]''''' |
| − | | style="background-color:#f8d28c;" | + | | style="background-color:#f8d28c;" | [[File:Mossrock_main.jpg|160px|link=Mossrock{{if lang}}]] |
| − | | style="background-color:#f8d28c; | + | | style="background-color:#f8d28c;" | '''[[Control Point (game mode){{if lang}}|{{common string|Attack/Defend}}]]'''<br>[[File:Controlpoint.png|50px|link=Control Point (game mode){{if lang}}]] |
| − | | style="background-color:#f8e2a1;" | + | | style="background-color:#f8e2a1;" | {{code|cp_mossrock}} |
|} | |} | ||
==== 도발 ==== | ==== 도발 ==== | ||
| + | {{main|Taunts/ko|l1=도발}} | ||
{| class="wikitable collapsible" cellpadding=2 style="text-align:center;" | {| class="wikitable collapsible" cellpadding=2 style="text-align:center;" | ||
|- | |- | ||
| − | | style="background: #b5b85c | + | | width="90px" style="background:#b5b85c;" rowspan="1" | '''{{class link|Pyro|br=yes|color=black}}''' |
| − | | | + | | style="background:#f8d28c;" | {{Icon item|Headcase|75px}} |
| − | | style="background: #f8e2a1 "| '''{{item link|Headcase}}''' | + | | style="background:#f8e2a1;" | '''{{item link|Headcase}}''' |
|- | |- | ||
| − | | style="background: #b5b85c | + | | style="background:#b5b85c;" rowspan="2" | '''{{class link|Heavy|br=yes|color=black}}''' |
| − | | | + | | style="background:#f8d28c;" | {{Icon item|Russian Arms Race|75px}} |
| − | | style="background: #f8e2a1 "| '''{{item link|Russian Arms Race}}''' | + | | style="background:#f8e2a1;" | '''{{item link|Russian Arms Race}}''' |
|- | |- | ||
| − | | | + | | style="background:#f8d28c;" | {{Icon item|Soviet Strongarm|75px}} |
| − | | style="background: #f8e2a1 "| '''{{item link|Soviet Strongarm}}''' | + | | style="background:#f8e2a1;" | '''{{item link|Soviet Strongarm}}''' |
|- | |- | ||
| − | | style="background: #b5b85c | + | | style="background:#b5b85c;" rowspan="2" | '''{{class link|Engineer|br=yes|color=black}}''' |
| − | | | + | | style="background:#f8d28c;" | {{Icon item|Dueling Banjo|75px}} |
| − | | style="background: #f8e2a1 "| '''{{item link|Dueling Banjo}}''' | + | | style="background:#f8e2a1;" | '''{{item link|Dueling Banjo}}''' |
|- | |- | ||
| − | | | + | | style="background:#f8d28c;" | {{Icon item|Jumping Jack|75px}} |
| − | | style="background: #f8e2a1 "| '''{{item link|Jumping Jack}}''' | + | | style="background:#f8e2a1;" | '''{{item link|Jumping Jack}}''' |
|- | |- | ||
| − | | style="background: #b5b85c | + | | style="background:#b5b85c;" rowspan="2" | '''{{class link|All Classes|br=yes|color=black}}''' |
| − | | | + | | style="background:#f8d28c;" | {{Icon item|Yeti Punch|75px}} |
| − | | style="background: #f8e2a1 "| '''{{item link|Yeti Punch}}''' | + | | style="background:#f8e2a1;" | '''{{item link|Yeti Punch}}''' |
|- | |- | ||
| − | | | + | | style="background:#f8d28c;" | {{Icon item|Yeti Smash|75px}} |
| − | | style="background: #f8e2a1 "| '''{{item link|Yeti Smash}}''' | + | | style="background:#f8e2a1;" | '''{{item link|Yeti Smash}}''' |
|} | |} | ||
=== 2일차 === | === 2일차 === | ||
| − | 2일차에는 캠페인 무기 획득 및 무기 상자를 대체 할 [[Jungle Inferno Campaign/ko|Jungle Inferno Campaign]] 및 [[War Paint/ko| | + | 2일차에는 캠페인 무기 획득 및 무기 상자를 대체 할 [[Jungle Inferno Campaign/ko|Jungle Inferno Campaign]] 및 [[War Paint/ko|전투 도색]]이 공개되었습니다. 2개의 새로운 장식 아이템 상자와 새로운 작전 시스템이 추가되었습니다. 이 캠페인에는 36개의 신규 계약이 포함되어 있으며 협동으로도 완료 할 수 있습니다. 계약 완료는 캠페인 관련 항목 또는 "청부금" 을 얻습니다. 이 항목을 사용하여 전투 도색 및 상자를 구매 할 수 있습니다. |
| − | ==== | + | ==== 작전 ==== |
| − | + | <!-- Campaign이란 단어는 총기 패기 및 불행한 휴가 업데이트에 작전 이라고 쓰였으므로 작전이라고 번역하는게 옳습니다. 현재 번역이 느려 작전 참가권 및 계약기를 포함한 모든 번역이 늦어져 이전 문서에 Campaign으로 남아있던 것을 고친 것입니다. --> | |
| + | 정글 인페르노 작전은 [[Jungle Inferno Campaign Pass/ko|Jungle Inferno Campaign Pass]]를 구매해야 합니다. 또한, [[ConTracker/ko|계약]] PDA가 포함되며 플레이어의 계약 진행과 용병 공원 기념품점에 대한 접근 권한을 얻습니다. Friendly Fire는 캠페인과 파티 시스템이 함께 제공되는 새로운 기능으로, 두 명의 플레이어가 파티에 있을 때 친구와 함께 게임을 하거나 계약을 맺을 때 서로 도울 수 있습니다. | ||
| − | ==== | + | ==== {{common string|Cosmetic items}} ==== |
| − | {{main|Cosmetic items}} | + | {{main|Cosmetic items{{if lang}}|l1={{common string|Cosmetic items}}}} |
{| class="wikitable collapsible" cellpadding=2 style="text-align:center;" | {| class="wikitable collapsible" cellpadding=2 style="text-align:center;" | ||
| + | | width="90px" style="background:#b5b85c;" rowspan="3" | '''{{class link|Scout|br=yes|color=black}}''' | ||
| + | | style="background:#4B69FF;" | {{Icon item|Forest Footwear|75px}} | ||
| + | | style="background:#f8e2a1;" | '''{{item link|Forest Footwear}}''' | ||
|- | |- | ||
| − | | style="background: # | + | | style="background:#D32CE6;" | {{Icon item|Jungle Jersey|75px}} |
| − | + | | style="background:#f8e2a1;" | '''{{item link|Jungle Jersey}}''' | |
| − | | style="background: #f8e2a1 "| '''{{item link| | ||
|- | |- | ||
| − | | | + | | style="background:#8847FF;" | {{Icon item|Transparent Trousers|75px}} |
| − | | style="background: #f8e2a1 "| '''{{item link| | + | | style="background:#f8e2a1;" | '''{{item link|Transparent Trousers}}''' |
|- | |- | ||
| − | | | + | | style="background:#b5b85c;" rowspan="4" | '''{{class link|Soldier|br=yes|color=black}}''' |
| − | | style="background: #f8e2a1 "| '''{{item link| | + | | style="background:#4B69FF;" | {{Icon item|Attack Packs|75px}} |
| + | | style="background:#f8e2a1;" | '''{{item link|Attack Packs}}''' | ||
|- | |- | ||
| − | | style="background: # | + | | style="background:#8847FF;" | {{Icon item|Crit Cloak|75px}} |
| − | + | | style="background:#f8e2a1;" | '''{{item link|Crit Cloak}}''' | |
| − | | style="background: #f8e2a1 "| '''{{item link| | ||
|- | |- | ||
| − | | | + | | style="background:#4B69FF;" | {{Icon item|Sharp Chest Pain|75px}} |
| − | | style="background: #f8e2a1 "| '''{{item link| | + | | style="background:#f8e2a1;" | '''{{item link|Sharp Chest Pain}}''' |
|- | |- | ||
| − | | | + | | style="background:#4B69FF;" | {{Icon item|Shellmet|75px}} |
| − | | style="background: #f8e2a1 "| '''{{item link| | + | | style="background:#f8e2a1;" | '''{{item link|Shellmet}}''' |
|- | |- | ||
| − | | | + | | style="background:#b5b85c;" rowspan="6" | '''{{class link|Pyro|br=yes|color=black}}''' |
| − | | style="background: #f8e2a1 "| '''{{item link| | + | | style="background:#4B69FF;" | {{Icon item|Deity's Dress|75px}} |
| + | | style="background:#f8e2a1;" | '''{{item link|Deity's Dress}}''' | ||
|- | |- | ||
| − | | style="background: # | + | | style="background:#8847FF;" | {{Icon item|D-eye-monds|75px}} |
| − | + | | style="background:#f8e2a1;" | '''{{item link|D-eye-monds}}''' | |
| − | | style="background: #f8e2a1 "| '''{{item link| | ||
|- | |- | ||
| − | | | + | | style="background:#8847FF;" | {{Icon item|Feathered Fiend|75px}} |
| − | | style="background: #f8e2a1 "| '''{{item link| | + | | style="background:#f8e2a1;" | '''{{item link|Feathered Fiend}}''' |
|- | |- | ||
| − | | | + | | style="background:#4B69FF;" | {{Icon item|Fireman's Essentials|75px}} |
| − | | style="background: #f8e2a1 "| '''{{item link| | + | | style="background:#f8e2a1;" | '''{{item link|Fireman's Essentials}}''' |
|- | |- | ||
| − | | | + | | style="background:#8847FF;" | {{Icon item|Hot Huaraches|75px}} |
| − | | style="background: #f8e2a1 "| '''{{item link| | + | | style="background:#f8e2a1;" | '''{{item link|Hot Huaraches}}''' |
|- | |- | ||
| − | | | + | | style="background:#D32CE6;" | {{Icon item|Sacrificial Stone|75px}} |
| − | | style="background: #f8e2a1 "| '''{{item link| | + | | style="background:#f8e2a1;" | '''{{item link|Sacrificial Stone}}''' |
|- | |- | ||
| − | | | + | | style="background:#b5b85c;" rowspan="5" | '''{{class link|Heavy|br=yes|color=black}} |
| − | | style="background: #f8e2a1 "| '''{{item link| | + | | style="background:#D32CE6;" | {{Icon item|Aztec Aggressor|75px}} |
| + | | style="background:#f8e2a1;" | '''{{item link|Aztec Aggressor}}''' | ||
|- | |- | ||
| − | | style="background: # | + | | style="background:#4B69FF;" | {{Icon item|Commando Elite|75px}} |
| − | + | | style="background:#f8e2a1;" | '''{{item link|Commando Elite}}''' | |
| − | | style="background: #f8e2a1 "| '''{{item link| | ||
|- | |- | ||
| − | | | + | | style="background:#4B69FF;" | {{Icon item|Fat Man's Field Cap|75px}} |
| − | | style="background: #f8e2a1 "| '''{{item link| | + | | style="background:#f8e2a1;" | '''{{item link|Fat Man's Field Cap}}''' |
|- | |- | ||
| − | | | + | | style="background:#4B69FF;" | {{Icon item|Heavy Harness|75px}} |
| − | | style="background: #f8e2a1 "| '''{{item link| | + | | style="background:#f8e2a1;" | '''{{item link|Heavy Harness}}''' |
|- | |- | ||
| − | | | + | | style="background:#4B69FF;" | {{Icon item|Siberian Tigerstripe|75px}} |
| − | | style="background: #f8e2a1 "| '''{{item link| | + | | style="background:#f8e2a1;" | '''{{item link|Siberian Tigerstripe}}''' |
|- | |- | ||
| − | | | + | | style="background:#b5b85c;" rowspan="2" | '''{{class link|Engineer|br=yes|color=black}}''' |
| − | | style="background: #f8e2a1 "| '''{{item link| | + | | style="background:#4B69FF;" | {{Icon item|Conaghers' Utility Idol|75px}} |
| + | | style="background:#f8e2a1;" | '''{{item link|Conaghers' Utility Idol}}''' | ||
|- | |- | ||
| − | | | + | | style="background:#D32CE6;" | {{Icon item|Tropical Toad|75px}} |
| − | | style="background: #f8e2a1 "| '''{{item link| | + | | style="background:#f8e2a1;" | '''{{item link|Tropical Toad}}''' |
|- | |- | ||
| − | | | + | | style="background:#b5b85c;" rowspan="2" | '''{{class link|Medic|br=yes|color=black}}''' |
| − | | style="background: #f8e2a1 "| '''{{item link| | + | | style="background:#4B69FF;" | {{Icon item|Battle Boonie|75px}} |
| + | | style="background:#f8e2a1;" | '''{{item link|Battle Boonie}}''' | ||
|- | |- | ||
| − | | | + | | style="background:#4B69FF;" | {{Icon item|Vitals Vest|75px}} |
| − | | style="background: #f8e2a1 "| '''{{item link| | + | | style="background:#f8e2a1;" | '''{{item link|Vitals Vest}}''' |
|- | |- | ||
| − | | style="background: #b5b85c | + | | style="background:#b5b85c;" rowspan="6" | '''{{class link|Sniper|br=yes|color=black}}''' |
| − | | | + | | style="background:#4B69FF;" | {{Icon item|Bait and Bite|75px}} |
| − | | style="background: #f8e2a1 "| '''{{item link| | + | | style="background:#f8e2a1;" | '''{{item link|Bait and Bite}}''' |
|- | |- | ||
| − | | | + | | style="background:#4B69FF;" | {{Icon item|Cammy Jammies|75px}} |
| − | | style="background: #f8e2a1 "| '''{{item link| | + | | style="background:#f8e2a1;" | '''{{item link|Cammy Jammies}}''' |
|- | |- | ||
| − | | style="background: # | + | | style="background:#4B69FF;" | {{Icon item|Classy Capper|75px}} |
| − | + | | style="background:#f8e2a1;" | '''{{item link|Classy Capper}}''' | |
| − | | style="background: #f8e2a1 "| '''{{item link| | ||
|- | |- | ||
| − | | | + | | style="background:#8847FF;" | {{Icon item|Conspicuous Camouflage|75px}} |
| − | | style="background: #f8e2a1 "| '''{{item link| | + | | style="background:#f8e2a1;" | '''{{item link|Conspicuous Camouflage}}''' |
|- | |- | ||
| − | | style="background: # | + | | style="background:#4B69FF;" | {{Icon item|Most Dangerous Mane|75px}} |
| − | + | | style="background:#f8e2a1;" | '''{{item link|Most Dangerous Mane}}''' | |
| − | | style="background: #f8e2a1 "| '''{{item link| | ||
|- | |- | ||
| − | | | + | | style="background:#8847FF;" | {{Icon item|Rifleman's Regalia|75px}} |
| − | | style="background: #f8e2a1 "| '''{{item link| | + | | style="background:#f8e2a1;" | '''{{item link|Rifleman's Regalia}}''' |
|- | |- | ||
| − | | align=" | + | | align="left" style="background:#b5b85c;" | '''{{Class link|Scout|color=black}}'''<br/>'''{{Class link|Engineer|color=black}}'''<br/>'''{{Class link|Spy|color=black}}''' |
| − | | style="background: #f8e2a1 "| '''{{item link| | + | | style="background:#4B69FF;" | {{Icon item|Aloha Apparel|75px}} |
| + | | style="background:#f8e2a1;" | '''{{item link|Aloha Apparel}}''' | ||
|- | |- | ||
| − | | align=" | + | | align="left" style="background:#b5b85c;"| '''{{Class link|Soldier|color=black}}'''<br/>'''{{Class link|Pyro|color=black}}'''<br/>'''{{Class link|Demoman|color=black}}''' |
| − | | style="background: #f8e2a1 "| '''{{item link| | + | | style="background:#D32CE6;" | {{Icon item|Bananades|75px}} |
| + | | style="background:#f8e2a1;" | '''{{item link|Bananades}}''' | ||
|- | |- | ||
| − | | align=" | + | | align="left" style="background:#b5b85c;" | '''{{Class link|Soldier|color=black}}'''<br/>'''{{Class link|Demoman|color=black}}'''<br/>'''{{Class link|Heavy|color=black}}''' |
| − | | style="background: #f8e2a1 "| '''{{item link| | + | | style="background:#EB4B4B;" | {{Icon item|War Eagle|75px}} |
| + | | style="background:#f8e2a1;" | '''{{item link|War Eagle}}''' | ||
|- | |- | ||
| − | | align=" | + | | align="left" style="background:#b5b85c;" | '''{{Class link|Soldier|color=black}}'''<br/>'''{{Class link|Heavy|color=black}}''' |
| − | | style="background: #f8e2a1 "| '''{{item link| | + | | style="background:#4B69FF;" | {{Icon item|Nuke|75px}} |
| + | | style="background:#f8e2a1;" | '''{{item link|Nuke}}''' | ||
|- | |- | ||
| − | | style="background: #b5b85c; | + | | style="background:#b5b85c;" rowspan="14" | '''{{class link|All Classes|br=yes|color=black}}''' |
| − | | | + | | style="background:#EB4B4B;" | {{Icon item|Aztec Warrior|75px}} |
| − | | style="background: #f8e2a1; " | '''{{item link| | + | | style="background:#f8e2a1;" | '''{{item link|Aztec Warrior}}''' |
|- | |- | ||
| − | | style="background: # | + | | style="background:#8847FF;" | {{Icon item|Croaking Hazard|75px}} |
| − | + | | style="background:#f8e2a1;" | '''{{item link|Croaking Hazard}}''' | |
| − | | style="background: #f8e2a1; " | '''{{item link| | ||
|- | |- | ||
| − | | style="background: # | + | | style="background:#8847FF;" | {{Icon item|Hunter in Darkness|75px}} |
| − | + | | style="background:#f8e2a1;" | '''{{item link|Hunter in Darkness}}''' | |
| − | | style="background: #f8e2a1; " | '''{{item link| | ||
|- | |- | ||
| − | | style="background: # | + | | style="background:#D32CE6;" | {{Icon item|Jungle Wreath|75px}} |
| − | + | | style="background:#f8e2a1;" | '''{{item link|Jungle Wreath}}''' | |
| − | | style="background: #f8e2a1; " | '''{{item link| | ||
|- | |- | ||
| − | | style="background: # | + | | style="background:#FFD700;" | {{Icon item|Mannanas Hat|75px}} |
| − | + | | style="background:#f8e2a1;" | '''{{item link|Mannanas Hat}}''' | |
| − | | style="background: #f8e2a1 "| '''{{item link| | ||
|- | |- | ||
| − | | | + | | style="background:#FFD700;" | {{Icon item|Mercenary Park|75px}} |
| − | | style="background: #f8e2a1 "| '''{{item link| | + | | style="background:#f8e2a1;" | '''{{item link|Mercenary Park (hat)}}''' |
|- | |- | ||
| − | | | + | | style="background:#FFD700;" | {{Icon item|Monstrous Memento|75px}} |
| − | | style="background: #f8e2a1 "| '''{{item link| | + | | style="background:#f8e2a1;" | '''{{item link|Monstrous Memento}}''' |
|- | |- | ||
| − | | | + | | style="background:#FFD700;" | {{Icon item|Never Forget Hat|75px}} |
| − | | style="background: #f8e2a1 "| '''{{item link| | + | | style="background:#f8e2a1;" | '''{{item link|Never Forget Hat}}''' |
|- | |- | ||
| − | | | + | | style="background:#4B69FF;" | {{Icon item|Pithy Professional|75px}} |
| − | | style="background: #f8e2a1 "| '''{{item link| | + | | style="background:#f8e2a1;" | '''{{item link|Pithy Professional}}''' |
|- | |- | ||
| − | | | + | | style="background:#8847FF;" | {{Icon item|Pocket Saxton|75px}} |
| − | | style="background: #f8e2a1 "| '''{{item link| | + | | style="background:#f8e2a1;" | '''{{item link|Pocket Saxton}}''' |
|- | |- | ||
| − | | | + | | style="background:#EB4B4B;" | {{Icon item|Quizzical Quetzal|75px}} |
| − | | style="background: #f8e2a1 "| '''{{item link| | + | | style="background:#f8e2a1;" | '''{{item link|Quizzical Quetzal}}''' |
|- | |- | ||
| − | | | + | | style="background:#FFD700;" | {{Icon item|Saxton|75px}} |
| − | | style="background: #f8e2a1 "| '''{{item link| | + | | style="background:#f8e2a1;" | '''{{item link|Saxton}}''' |
|- | |- | ||
| − | | | + | | style="background:#EB4B4B;" | {{Icon item|Slithering Scarf|75px}} |
| − | | style="background: #f8e2a1 "| '''{{item link| | + | | style="background:#f8e2a1;" | '''{{item link|Slithering Scarf}}''' |
|- | |- | ||
| − | | | + | | style="background:#FFD700;" | {{Icon item|Yeti Park Hardhat|75px}} |
| − | | style="background: #f8e2a1 "| '''{{item link| | + | | style="background:#f8e2a1;" | '''{{item link|Yeti Park Hardhat}}''' |
|} | |} | ||
==== 세트 ==== | ==== 세트 ==== | ||
| + | {{main|Item sets/ko|l1=아이템 세트}} | ||
{| class="wikitable collapsible" cellpadding="2" style="text-align:center;" | {| class="wikitable collapsible" cellpadding="2" style="text-align:center;" | ||
| − | | style="background: #b5b85c | + | | width="90px" style="background:#b5b85c;" rowspan="3" | '''{{class link|Heavy|br=yes|color=black}}''' |
| − | | style="background: #f8e2a1;" rowspan="3" | ''' | + | | style="background:#f8e2a1;" rowspan="3" | '''{{item link|Monster Mash-Up Pack}}'''<br/> |
| − | | | + | | style="background:#f8d28c;" | {{icon item|Kathman-Hairdo|80px}} |
| − | | style="background: #f8e2a1;" | '''{{item link|Kathman-Hairdo}}''' | + | | style="background:#f8e2a1;" | '''{{item link|Kathman-Hairdo}}''' |
|- | |- | ||
| − | | | + | | style="background:#f8d28c;" | {{item icon|Himalayan Hair Shirt|80px}} |
| − | | style="background: #f8e2a1;" | '''{{item link|Himalayan Hair Shirt | + | | style="background:#f8e2a1;" | '''{{item link|Himalayan Hair Shirt}}''' |
| − | |||
| − | |||
| − | |||
|- | |- | ||
| + | | style="background:#f8d28c;" | {{item icon|Abominable Snow Pants|80px}} | ||
| + | | style="background:#f8e2a1;" | '''{{item link|Abominable Snow Pants}}''' | ||
|} | |} | ||
==== 도구 ==== | ==== 도구 ==== | ||
| − | {{main|Tools}} | + | {{main|Tools/ko|l1=도구}} |
{| class="wikitable collapsible" cellpadding="3" style="text-align:center;" | {| class="wikitable collapsible" cellpadding="3" style="text-align:center;" | ||
| − | | | + | | width="90px" style="background:#f8d28c;" | {{Icon item|Abominable Cosmetic Case|75px}} |
| − | | style="background: #f8e2a1 "| '''{{item link|Abominable Cosmetic Case}}''' | + | | style="background:#f8e2a1;" | '''{{item link|Abominable Cosmetic Case}}''' |
|- | |- | ||
| − | | | + | | style="background:#f8d28c;" | {{Icon item|Abominable Cosmetic Key|75px}} |
| − | | style="background: #f8e2a1 "| '''{{item link|Unleash the Beast Cosmetic Case}}''' | + | | style="background:#f8e2a1;" | '''{{item link|Abominable Cosmetic Key}}''' |
| + | |- | ||
| + | | style="background:#f8d28c;" | {{Icon item|Unleash the Beast Cosmetic Case|75px}} | ||
| + | | style="background:#f8e2a1;" | '''{{item link|Unleash the Beast Cosmetic Case}}''' | ||
| + | |- | ||
| + | | style="background:#f8d28c;" | {{Icon item|Unleash the Beast Cosmetic Key|75px}} | ||
| + | | style="background:#f8e2a1;" | '''{{item link|Unleash the Beast Cosmetic Key}}''' | ||
|- | |- | ||
| − | | | + | | style="background:#f8d28c;" | {{Icon item|Jungle Inferno Campaign Pass|75px}} |
| − | | style="background: #f8e2a1 "| '''{{item link|Jungle Inferno Campaign Pass}}''' | + | | style="background:#f8e2a1;" | '''{{item link|Jungle Inferno Campaign Pass}}''' |
|- | |- | ||
| − | | align=" | + | | style="background:#f8d28c;" | {{Icon item|Infernal Reward War Paint Case|75px}} |
| − | | style="background: #f8e2a1 "| '''{{item link|Jungle Inferno ConTracker}}''' | + | | style="background:#f8e2a1;" | '''{{item link|Infernal Reward War Paint Case}}''' |
| + | |- | ||
| + | | style="background:#f8d28c;" | {{Icon item|Infernal Reward War Paint Key|75px}} | ||
| + | | style="background:#f8e2a1;" | '''{{item link|Infernal Reward War Paint Key}}''' | ||
| + | |- | ||
| + | | style="background:#f8d28c;" | {{Icon item|Jungle Jackpot War Paint Case|75px}} | ||
| + | | style="background:#f8e2a1;" | '''{{item link|Jungle Jackpot War Paint Case}}''' | ||
| + | |- | ||
| + | | style="background:#f8d28c;" | {{Icon item|Jungle Jackpot War Paint Key|75px}} | ||
| + | | style="background:#f8e2a1;" | '''{{item link|Jungle Jackpot War Paint Key}}''' | ||
| + | |} | ||
| + | |||
| + | ==== 액션 아이템 ==== | ||
| + | {{main|Action items/ko|l1=액션 아이템}} | ||
| + | {| class="wikitable collapsible" cellpadding="3" style="text-align:center;" | ||
| + | | width="90px" style="background:#f8d28c;" | {{Icon item|Jungle Inferno ConTracker|75px}} | ||
| + | | style="background:#f8e2a1;" | '''{{item link|Jungle Inferno ConTracker}}''' | ||
|} | |} | ||
| + | |||
| + | ==== {{item name|War Paints}} ==== | ||
| + | {{main|War Paint{{if lang}}|l1={{item name|War Paint}}}} | ||
| + | |||
| + | ===== {{decorated name|Jungle Jackpot Collection}} ===== | ||
| + | <gallery> | ||
| + | File:Backpack Park Pigmented War Paint Factory New.png|<div class="warpaint item-grade elite">{{Decorated name|park pigmented}}</div> | ||
| + | File:Backpack Sax Waxed War Paint Factory New.png|<div class="warpaint item-grade assassin">{{Decorated name|sax waxed}}</div> | ||
| + | File:Backpack Yeti Coated War Paint Factory New.png|<div class="warpaint item-grade assassin">{{Decorated name|yeti coated}}</div> | ||
| + | File:Backpack Croc Dusted War Paint Factory New.png|<div class="warpaint item-grade commando">{{Decorated name|croc dusted}}</div> | ||
| + | File:Backpack Macaw Masked War Paint Factory New.png|<div class="warpaint item-grade commando">{{Decorated name|macaw masked}}</div> | ||
| + | File:Backpack Piña Polished War Paint Factory New.png|<div class="warpaint item-grade commando">{{Decorated name|piña polished}}</div> | ||
| + | File:Backpack Anodized Aloha War Paint Factory New.png|<div class="warpaint item-grade mercenary">{{Decorated name|anodized aloha}}</div> | ||
| + | File:Backpack Bamboo Brushed War Paint Factory New.png|<div class="warpaint item-grade mercenary">{{Decorated name|bamboo brushed}}</div> | ||
| + | File:Backpack Leopard Printed War Paint Factory New.png|<div class="warpaint item-grade mercenary">{{Decorated name|leopard printed}}</div> | ||
| + | File:Backpack Mannana Peeled War Paint Factory New.png|<div class="warpaint item-grade mercenary">{{Decorated name|mannana peeled}}</div> | ||
| + | File:Backpack Tiger Buffed War Paint Factory New.png|<div class="warpaint item-grade mercenary">{{Decorated name|tiger buffed}}</div> | ||
| + | </gallery> | ||
| + | |||
| + | ===== {{decorated name|Infernal Reward Collection}} ===== | ||
| + | <gallery> | ||
| + | File:Backpack Fire Glazed War Paint Factory New.png|<div class="warpaint item-grade elite">{{Decorated name|fire glazed}}</div> | ||
| + | File:Backpack Bonk Varnished War Paint Factory New.png|<div class="warpaint item-grade assassin">{{Decorated name|bonk varnished}}</div> | ||
| + | File:Backpack Dream Piped War Paint Factory New.png|<div class="warpaint item-grade assassin">{{Decorated name|dream piped}}</div> | ||
| + | File:Backpack Freedom Wrapped War Paint Factory New.png|<div class="warpaint item-grade assassin">{{Decorated name|freedom wrapped}}</div> | ||
| + | File:Backpack Bank Rolled War Paint Factory New.png|<div class="warpaint item-grade commando">{{Decorated name|bank rolled}}</div> | ||
| + | File:Backpack Clover Camo'd War Paint Factory New.png|<div class="warpaint item-grade commando">{{Decorated name|clover camo'd}}</div> | ||
| + | File:Backpack Kill Covered War Paint Factory New.png|<div class="warpaint item-grade commando">{{Decorated name|kill covered}}</div> | ||
| + | File:Backpack Pizza Polished War Paint Factory New.png|<div class="warpaint item-grade commando">{{Decorated name|pizza polished}}</div> | ||
| + | File:Backpack Bloom Buffed War Paint Factory New.png|<div class="warpaint item-grade mercenary">{{Decorated name|bloom buffed}}</div> | ||
| + | File:Backpack Cardboard Boxed War Paint Factory New.png|<div class="warpaint item-grade mercenary">{{Decorated name|cardboard boxed}}</div> | ||
| + | File:Backpack Merc Stained War Paint Factory New.png|<div class="warpaint item-grade mercenary">{{Decorated name|merc stained}}</div> | ||
| + | File:Backpack Quack Canvassed War Paint Factory New.png|<div class="warpaint item-grade mercenary">{{Decorated name|quack canvassed}}</div> | ||
| + | File:Backpack Star Crossed War Paint Factory New.png|<div class="warpaint item-grade mercenary">{{Decorated name|star crossed}}</div> | ||
| + | </gallery> | ||
| + | |||
| + | ===== {{decorated name|Decorated War Hero Collection}} ===== | ||
| + | <gallery> | ||
| + | File:Backpack Carpet Bomber Mk.II War Paint Factory New.png|<div class="warpaint item-grade commando">{{Decorated name|carpet bomber mk.ii}}</div> | ||
| + | File:Backpack Woodland Warrior Mk.II War Paint Factory New.png|<div class="warpaint item-grade commando">{{Decorated name|woodland warrior mk.ii}}</div> | ||
| + | File:Backpack Wrapped Reviver Mk.II War Paint Factory New.png|<div class="warpaint item-grade commando">{{Decorated name|wrapped reviver mk.ii}}</div> | ||
| + | File:Backpack Forest Fire Mk.II War Paint Factory New.png|<div class="warpaint item-grade mercenary">{{Decorated name|forest fire mk.ii}}</div> | ||
| + | File:Backpack Night Owl Mk.II War Paint Factory New.png|<div class="warpaint item-grade mercenary">{{Decorated name|night owl mk.ii}}</div> | ||
| + | File:Backpack Woodsy Widowmaker Mk.II War Paint Factory New.png|<div class="warpaint item-grade mercenary">{{Decorated name|woodsy widowmaker mk.ii}}</div> | ||
| + | File:Backpack Autumn Mk.II War Paint Factory New.png|<div class="warpaint item-grade freelance">{{Decorated name|autumn mk.ii}}</div> | ||
| + | File:Backpack Plaid Potshotter Mk.II War Paint Factory New.png|<div class="warpaint item-grade freelance">{{Decorated name|plaid potshotter mk.ii}}</div> | ||
| + | File:Backpack Civil Servant Mk.II War Paint Factory New.png|<div class="warpaint item-grade civilian">{{Decorated name|civil servant mk.ii}}</div> | ||
| + | File:Backpack Civic Duty Mk.II War Paint Factory New.png|<div class="warpaint item-grade civilian">{{Decorated name|civic duty mk.ii}}</div> | ||
| + | </gallery> | ||
| + | |||
| + | ===== {{decorated name|Contract Campaigner Collection}} ===== | ||
| + | <gallery> | ||
| + | File:Backpack Bovine Blazemaker Mk.II War Paint Factory New.png|<div class="warpaint item-grade commando">{{Decorated name|bovine blazemaker mk.ii}}</div> | ||
| + | File:Backpack Dead Reckoner Mk.II War Paint Factory New.png|<div class="warpaint item-grade commando">{{Decorated name|dead reckoner mk.ii}}</div> | ||
| + | File:Backpack Backwoods Boomstick Mk.II War Paint Factory New.png|<div class="warpaint item-grade mercenary">{{Decorated name|backwoods boomstick mk.ii}}</div> | ||
| + | File:Backpack Masked Mender Mk.II War Paint Factory New.png|<div class="warpaint item-grade mercenary">{{Decorated name|masked mender mk.ii}}</div> | ||
| + | File:Backpack Iron Wood Mk.II War Paint Factory New.png|<div class="warpaint item-grade freelance">{{Decorated name|iron wood mk.ii}}</div> | ||
| + | File:Backpack Macabre Web Mk.II War Paint Factory New.png|<div class="warpaint item-grade freelance">{{Decorated name|macabre web mk.ii}}</div> | ||
| + | File:Backpack Nutcracker Mk.II War Paint Factory New.png|<div class="warpaint item-grade civilian">{{Decorated name|nutcracker mk.ii}}</div> | ||
| + | File:Backpack Smalltown Bringdown Mk.II War Paint Factory New.png|<div class="warpaint item-grade civilian">{{Decorated name|smalltown bringdown mk.ii}}</div> | ||
| + | </gallery> | ||
| + | |||
| + | ===== {{decorated name|Saxton Select Collection}} ===== | ||
| + | <gallery> | ||
| + | File:Backpack Dragon Slayer War Paint Factory New.png|<div class="warpaint item-grade elite">{{Decorated name|dragon slayer}}</div> | ||
| + | </gallery> | ||
=== 3일차 === | === 3일차 === | ||
| − | 3일차는 새로운 파이로 무기 4개를 공개했습니다 | + | 3일차는 새로운 파이로 무기 4개를 공개했습니다. 특수 도발을 가진 파이로 무기인 {{item link|Thermal Thruster}}, 헤비의 도시락 아이템과 화염 방사기의 변경 사항입니다. |
==== 무기 ==== | ==== 무기 ==== | ||
| + | {{main|Weapons/ko|l1=무기}} | ||
{| class="wikitable collapsible" cellpadding=2 style="text-align:center;" | {| class="wikitable collapsible" cellpadding=2 style="text-align:center;" | ||
| + | | width="90px" style="background:#b5b85c;" rowspan="4" | '''{{class link|Pyro|br=yes|color=black}}''' | ||
| + | | style="background:#f8d28c;" | {{Icon item|Dragon's Fury|75px}} | ||
| + | | style="background:#f8e2a1;" | '''{{item link|Dragon's Fury}}''' | ||
|- | |- | ||
| − | | style="background: # | + | | style="background:#f8d28c;" | {{Icon item|Gas Passer|75px}} |
| − | + | | style="background:#f8e2a1;" | '''{{item link|Gas Passer}}''' | |
| − | | style="background: #f8e2a1 "| '''{{item link| | ||
|- | |- | ||
| − | | | + | | style="background:#f8d28c;" | {{Icon item|Hot Hand|75px}} |
| − | | style="background: #f8e2a1 "| '''{{item link| | + | | style="background:#f8e2a1;" | '''{{item link|Hot Hand}}''' |
|- | |- | ||
| − | | | + | | style="background:#f8d28c;" | {{Icon item|Thermal Thruster|75px}} |
| − | | style="background: #f8e2a1 "| '''{{item link| | + | | style="background:#f8e2a1;" | '''{{item link|Thermal Thruster}}''' |
|- | |- | ||
| − | | | + | | style="background:#b5b85c;" rowspan="1" | '''{{class link|Heavy|br=yes|color=black}}''' |
| − | + | | style="background:#f8d28c;" | {{Icon item|Second Banana|75px}} | |
| − | | | + | | style="background:#f8e2a1;" | '''{{item link|Second Banana}}''' |
| − | | | ||
| − | | | ||
| − | | style="background: #f8e2a1 "| '''{{item link|Second Banana}}''' | ||
| − | |||
|} | |} | ||
==== 조정된 병과==== | ==== 조정된 병과==== | ||
{| class="wikitable" | {| class="wikitable" | ||
| − | ! style="background: #748c41;" class="header" | <span style="color: white;"> | + | ! style="background:#748c41;" class="header" | <span style="color: white;"> 병과 |
| − | ! style="background: #748c41;" class="header" | <span style="color: white;"> | + | ! style="background:#748c41;" class="header" | <span style="color: white;"> 변경점 |
|- | |- | ||
| − | ! style="background: #b5b85c;" rowspan="6"| {{ | + | ! width="90px" style="background:#b5b85c;" rowspan="6" | {{class link|Pyro|br=yes|color=black}} |
| − | | style="background: #f8e2a1" | {{c|+| | + | | style="background:#f8e2a1;" | {{c|+|변경점:}} 압축 공기 분사의 적중 감지 모양이 이제 원뿔 모양입니다. |
|- | |- | ||
| − | | style="background: #f8e2a1" | {{c|+| | + | | style="background:#f8e2a1;" | {{c|+|변경점:}} 압축 공기 분사의 힘이 증가했습니다. |
|- | |- | ||
| − | | style="background: #f8e2a1" | {{c|-| | + | | style="background:#f8e2a1;" | {{c|-|변경점:}} 압축 공기 분사의 효과를 받은 적군은 잠깐 동안 조금 느려지고, 공중에서 제어를 조금 잃습니다. |
|- | |- | ||
| − | | style="background: #f8e2a1" | {{c|=| | + | | style="background:#f8e2a1;" | {{c|=|변경점:}} 압축 공기 분사는 파이로와 대상의 속도를 고려하여, 상호 작용에 대해 파이로와 대상 모두에게 통제를 더 부여합니다. |
|- | |- | ||
| − | | style="background: #f8e2a1" | {{c|=| | + | | style="background:#f8e2a1;" | {{c|=|변경점:}} 압축 공기 분사를 사용할 때, 압축 공기 분사의 방향이 위로 고정되지 않고 플레이어가 보는 방향에 따라 달라집니다. |
|- | |- | ||
| − | | style="background: #f8e2a1" | {{c|=| | + | | style="background:#f8e2a1;" | {{c|=|변경점:}} 화상 지속 시간은 이제 피해를 준 시간에 따라 달라집니다. |
|- | |- | ||
|} | |} | ||
| Line 329: | Line 421: | ||
==== 조정된 무기 ==== | ==== 조정된 무기 ==== | ||
{| class="wikitable" | {| class="wikitable" | ||
| − | ! style="background: #748c41;" class="header" | <span style="color: white;"> | + | ! style="background:#748c41;" class="header" | <span style="color: white;"> 병과 |
| − | ! style="background: #748c41;" class="header" | <span style="color: white;"> | + | ! style="background:#748c41;" class="header" | <span style="color: white;"> 무기 |
| − | ! style="background: #748c41;" class="header" | <span style="color: white;"> | + | ! style="background:#748c41;" class="header" | <span style="color: white;"> 변경점 |
|- | |- | ||
| − | ! style="background: #b5b85c;" rowspan=7| {{ | + | ! width="90px" style="background:#b5b85c;" rowspan=7 | {{class link|Pyro|br=yes|color=black}} |
| − | ! style="background: #f8d28c;" rowspan=2 | {{Icon item|Flame Thrower|icon-size=75px}} <br /> {{item link|Flame Thrower}} | + | ! style="background:#f8d28c;" rowspan=2 | {{Icon item|Flame Thrower|icon-size=75px}} <br /> {{item link|Flame Thrower}} 종류 |
| − | | style="background: #f8e2a1;" | {{c|=| | + | | style="background:#f8e2a1;" | {{c|=|변경점:}} 시각적 동기화를 개선하고, 일관성을 향상시켜 시각적/피해량과 일치하지 않는 문제를 해결했습니다. |
|- | |- | ||
| − | | style="background: #f8e2a1;" | {{c|=| | + | | style="background:#f8e2a1;" | {{c|=|변경점:}} 새로운 화염 효과를 추가했습니다. |
|} | |} | ||
=== 4일차 === | === 4일차 === | ||
| − | 4일차에는 다양한 무기 변경, 새로운 무기에 대한 정보, 여러 버그 수정 및 매치메이킹 시스템 변경 사항을 포함하여 Jungle Inferno | + | 4일차에는 다양한 무기 변경, 새로운 무기에 대한 정보, 여러 버그 수정 및 매치메이킹 시스템 변경 사항을 포함하여 {{update name|Jungle Inferno Update}}에 대한 패치 노트가 발표되었습니다. 또한, 모든 무기에 대한 1인칭 무기 확인 기능을 소개했습니다. |
====조정된 병과==== | ====조정된 병과==== | ||
{| class="wikitable" | {| class="wikitable" | ||
| − | ! style="background: #748c41;" class="header" | <span style="color: white;"> | + | ! style="background:#748c41;" class="header" | <span style="color: white;"> 병과 |
| − | ! style="background: #748c41;" class="header" | <span style="color: white;"> | + | ! style="background:#748c41;" class="header" | <span style="color: white;"> 변경점 |
|- | |- | ||
| − | ! style="background: #b5b85c;" rowspan="2" | {{ | + | ! width="90px" style="background:#b5b85c;" rowspan="2" | {{class link|Heavy|br=yes|color=black}} |
| − | | style="background: #f8e2a1;" | {{c|+| | + | | style="background:#f8e2a1;" | {{c|+|변경점:}} 헤비가 쏘든 쏘지 않든에 상관 없이 {{item name|Minigun}}이 돌아가는 처음 1초 동안 피해량이 감소하고 정확도가 떨어집니다. |
|- | |- | ||
| − | | style="background: #f8e2a1;" | {{c|+| | + | | style="background:#f8e2a1;" | {{c|+|변경점:}} {{item name|Minigun}}의 예열이나 사격이 멈추면 데미지 감소가 초기화 됩니다. |
|- | |- | ||
| − | ! style="background: #b5b85c;" | {{ | + | ! style="background:#b5b85c;" | {{class link|Engineer|br=yes|color=black}} |
| − | | style="background: #f8e2a1;" | {{c|+| | + | | style="background:#f8e2a1;" | {{c|+|추가점:}} "준비 시간" 동안에 구조물을 개선할 때 개선 효율이 2배 증가합니다. |
|- | |- | ||
|} | |} | ||
| Line 360: | Line 452: | ||
==== 조정된 무기 ==== | ==== 조정된 무기 ==== | ||
{| class="wikitable" | {| class="wikitable" | ||
| − | ! style="background: #748c41;" class="header" | <span style="color: white;"> Class | + | ! style="background:#748c41;" class="header" | <span style="color: white;"> Class |
| − | ! style="background: #748c41;" class="header" colspan=2 | <span style="color: white;"> Weapon | + | ! style="background:#748c41;" class="header" colspan=2 | <span style="color: white;"> Weapon |
| − | ! style="background: #748c41;" class="header" | <span style="color: white;"> Changes | + | ! style="background:#748c41;" class="header" | <span style="color: white;"> Changes |
| − | |||
| − | |||
| − | |||
| − | |||
|- | |- | ||
| − | | style="background: #f8e2a1;" | {{c| | + | ! width="90px" style="background:#b5b85c;" rowspan=25 | {{class link|Scout|br=yes|color=black}} |
| + | ! style="background:#f8d28c;" colspan=2 rowspan=2 | {{Icon item|Bonk! Atomic Punch|icon-size=75px}} <br /> {{item link|Bonk! Atomic Punch}} | ||
| + | | style="background:#f8e2a1;" | {{c|-|추가점:}} 감속 효과가 플레이어의 효과가 끝난 후 적용되며, 감소량은 효과 지속 도중 받는 피해량을 기준으로 적용됩니다. 낮은 피해량은 이동속도가 25% 느려지고, 200을 넘어가는 피해량부터는 이동속도가 50% 느려집니다. | ||
|- | |- | ||
| − | + | | style="background:#f8e2a1;" | {{c|=|주석:}} 속도 저하 효과는 5초간 지속됩니다. | |
| − | | style="background: #f8e2a1;" | {{c| | ||
|- | |- | ||
| − | | style="background: #f8e2a1;" | {{c| | + | ! style="background:#f8d28c;" colspan=2 rowspan=4 | {{Icon item|Crit-A-Cola|icon-size=75px}} <br /> {{item link|Crit-A-Cola}} |
| + | | style="background:#f8e2a1;" | {{c|-|추가점:}} 효과가 발동됐을 때 5초간 죽음의 표식이 새겨집니다. | ||
|- | |- | ||
| − | | style="background: #f8e2a1;" | {{c|+| | + | | style="background:#f8e2a1;" | {{c|+|제거점:}} 효과가 끝나면 죽음의 표식이 새겨지는 것을 삭제했습니다. |
|- | |- | ||
| − | | style="background: #f8e2a1;" | {{c| | + | | style="background:#f8e2a1;" | {{c|+|제거점:}} 받는 피해량이 10% 증가하는 것을 삭제했습니다. |
|- | |- | ||
| − | + | | style="background:#f8e2a1;" | {{c|-|제거점:}} 이동 속도가 25% 증가하는 것을 삭제했습니다. | |
| − | | style="background: #f8e2a1;" | {{c|-| | ||
|- | |- | ||
| − | | style="background: #f8e2a1;" | {{c| | + | ! style="background:#f8d28c;" colspan=2 rowspan=5 | {{Icon item|Pretty Boy's Pocket Pistol|icon-size=75px}} <br /> {{item link|Pretty Boy's Pocket Pistol}} |
| + | | style="background:#f8e2a1;" | {{c|-|변경점:}} 장탄수가 25% 감소했습니다. | ||
|- | |- | ||
| − | | style="background: #f8e2a1;" | {{c|+|변경됨:}} | + | | style="background:#f8e2a1;" | {{c|+|변경됨:}} 발사 속도가 15% 증가했습니다. |
|- | |- | ||
| − | | style="background: #f8e2a1;" | {{c|+| | + | | style="background:#f8e2a1;" | {{c|+|변경됨:}} 적중 시 회복하는 체력이 7로 증가했습니다. |
|- | |- | ||
| − | | style="background: #f8e2a1;" | {{c| | + | | style="background:#f8e2a1;" | {{c|+|제거점:}} 착용 시 피해에 20% 취약해지는 것을 삭제했습니다. |
|- | |- | ||
| − | + | | style="background:#f8e2a1;" | {{c|-|제거점:}} 착용 시 낙하 피해를 무효화하는 것을 삭제했습니다. | |
| − | | style="background: #f8e2a1;" | {{c| | ||
|- | |- | ||
| − | | style="background: #f8e2a1;" | {{c|+| | + | ! style="background:#f8d28c;" colspan=2 rowspan=4 | {{Icon item|Flying Guillotine|icon-size=75px}} <br /> {{item link|Flying Guillotine}} |
| + | | style="background:#f8e2a1;" | {{c|+|변경점:}} 장거리 피격 시 재충전 속도가 감소합니다. | ||
|- | |- | ||
| − | | style="background: #f8e2a1;" | {{c| | + | | style="background:#f8e2a1;" | {{c|+|변경됨:}} 위의 장거리 피격의 기준은 변경 전 소형 치명타가 발생하는 거리의 반으로 줄어듭니다. |
|- | |- | ||
| − | | style="background: #f8e2a1;" | {{c|-| | + | | style="background:#f8e2a1;" | {{c|-|제거점:}} 기절 상태의 적에게 공격 시 100% 치명타를 삭제했습니다. |
|- | |- | ||
| − | + | | style="background:#f8e2a1;" | {{c|-|제거점:}} 장거리 피격 시 소형 치명타 발생을 삭제했습니다. | |
| − | | style="background: #f8e2a1;" | {{c| | ||
|- | |- | ||
| − | | style="background: #f8e2a1;" | {{c|+|변경됨:}} | + | ! style="background:#f8d28c;" colspan=2 rowspan=4 | {{Icon item|Sandman|icon-size=75px}} <br /> {{item link|Sandman}} |
| + | | style="background:#f8e2a1;" | {{c|+|변경됨:}} 최대 거리로 날아간 공은 이제 피해량이 50% 증가합니다. | ||
|- | |- | ||
| − | | style="background: #f8e2a1;" | {{c|+|변경됨:}} | + | | style="background:#f8e2a1;" | {{c|+|변경됨:}} "최대" 효과를 유발하는데 요구되는 비행 시간이 20%만큼 감소되었습니다. |
|- | |- | ||
| − | | style="background: #f8e2a1;" | {{c| | + | | style="background:#f8e2a1;" | {{c|+|변경됨:}} 공의 재충전 시간이 10초로 변경되었습니다. |
|- | |- | ||
| − | + | | style="background:#f8e2a1;" | {{c|-|변경됨:}} 이제 장거리 공에 맞아도 대상이 무기 발사를 할 수 있습니다. | |
| − | | style="background: #f8e2a1;" | {{c| | ||
|- | |- | ||
| − | | style="background: #f8e2a1;" | {{c| | + | ! style="background:#f8d28c;" colspan=2 rowspan=6 | {{Icon item|Atomizer|icon-size=75px}} <br /> {{item link|Atomizer}} |
| + | | style="background:#f8e2a1;" | {{c|+|추가점:}} 공중에서 근접 공격 시 소형 치명타가 발생합니다. | ||
|- | |- | ||
| − | | style="background: #f8e2a1;" | {{c| | + | | style="background:#f8e2a1;" | {{c|-|추가점:}} 꺼내는 속도가 50% 감소합니다. |
|- | |- | ||
| − | | style="background: #f8e2a1;" | {{c| | + | | style="background:#f8e2a1;" | {{c|+|변경됨:}} 플레이어 대상 피해가 15% 감소합니다. |
|- | |- | ||
| − | | style="background: #f8e2a1;" | {{c| | + | | style="background:#f8e2a1;" | {{c|-|변경됨:}} 3단 점프는 이제 들고 있어야 발동됩니다. |
|- | |- | ||
| − | | style="background: #f8e2a1;" | {{c|+| | + | | style="background:#f8e2a1;" | {{c|+|제거점:}} 3단 점프시 10의 피해를 받는 것을 삭제했습니다. |
|- | |- | ||
| − | + | | style="background:#f8e2a1;" | {{c|+|제거점:}} 공격 속도 감소를 삭제했습니다. | |
| − | |||
| − | | style="background: #f8e2a1;" | {{c| | ||
|- | |- | ||
| − | | style="background: #f8e2a1;" | {{c| | + | ! style="background:#b5b85c;" rowspan=8 | {{class link|Soldier|br=yes|color=black}} |
| + | ! style="background:#f8d28c;" colspan=2 rowspan=2 | {{Icon item|Cow Mangler 5000|icon-size=75px}} <br /> {{item link|Cow Mangler 5000}} | ||
| + | | style="background:#f8e2a1;" | {{c|-|추가점:}} 치명타는 이제 소형 치명타로 적용됩니다. | ||
|- | |- | ||
| − | + | | style="background:#f8e2a1;" | {{c|+|제거점:}} 치명타 증진을 받을 수 없는 것을 삭제했습니다. | |
| − | | style="background: #f8e2a1;" | {{c|+| | ||
|- | |- | ||
| − | | style="background: #f8e2a1;" | {{c|+| | + | ! style="background:#f8d28c;" colspan=2 rowspan=2 | {{Icon item|Mantreads|icon-size=75px}} <br /> {{item link|Mantreads}} |
| + | | style="background:#f8e2a1;" | {{c|+|추가점:}} 폭발 점프 시 공중 제어력이 200% 증가합니다. | ||
|- | |- | ||
| − | + | | style="background:#f8e2a1;" | {{c|+|변경됨:}} 이제 밀어내기 위력 75% 감소에 압축 공기 분사도 포함됩니다. | |
| − | | style="background: #f8e2a1;" | {{c| | ||
|- | |- | ||
| − | | style="background: #f8e2a1;" | {{c| | + | ! style="background:#f8d28c;" colspan=2 rowspan=4 | {{Icon item|Righteous Bison|icon-size=75px}} <br /> {{item link|Righteous Bison}} |
| + | | style="background:#f8e2a1;" | {{c|=|주석:}} 이전 디자인으로 되돌려졌습니다. | ||
|- | |- | ||
| − | | style="background: #f8e2a1;" | {{c|+|변경됨:}} | + | | style="background:#f8e2a1;" | {{c|+|변경됨:}} 투사체는 같은 대상을 타격할 수 있는 횟수에 제한이 없습니다. |
|- | |- | ||
| − | | style="background: #f8e2a1;" | {{c| | + | | style="background:#f8e2a1;" | {{c|+|변경됨:}} 투사체 속도가 1200 해머 유닛으로 증가했습니다. |
|- | |- | ||
| − | + | | style="background:#f8e2a1;" | {{c|-|변경됨:}} 틱당 20 피해를 입힙니다. | |
| − | |||
| − | | style="background: #f8e2a1;" | {{c| | ||
|- | |- | ||
| − | | style="background: #f8e2a1;" | {{c| | + | ! style="background:#b5b85c;" rowspan=3 | {{class link|Demoman|br=yes|color=black}} |
| + | ! style="background:#f8d28c;" colspan=2 rowspan=3 | {{Icon item|Claidheamh Mòr|icon-size=75px}} <br /> {{item link|Claidheamh Mòr}} | ||
| + | | style="background:#f8e2a1;" | {{c|=|주석:}} 이전 디자인으로 되돌려졌습니다. | ||
|- | |- | ||
| − | | style="background: #f8e2a1;" | {{c| | + | | style="background:#f8e2a1;" | {{c|+|추가점:}} 돌격 시간이 0.5초 증가됩니다. |
|- | |- | ||
| − | + | | style="background:#f8e2a1;" | {{c|-|제거점:}} 처치 시 체력을 25 회복합니다. | |
| − | |||
| − | |||
| − | | style="background: #f8e2a1;" | {{c|-| | ||
|- | |- | ||
| − | | style="background: #f8e2a1;" | {{c| | + | ! style="background:#b5b85c;" rowspan=11 | {{class link|Heavy|br=yes|color=black}} |
| + | ! style="background:#f8d28c;" rowspan=5 | {{Icon item|Gloves of Running Urgently|icon-size=75px}} <br /> {{item link|Gloves of Running Urgently}} | ||
| + | ! style="background:#f8d28c;" rowspan=5 | {{Icon item|Bread Bite|icon-size=75px}} <br /> {{item link|Bread Bite}} | ||
| + | | style="background:#f8e2a1;" | {{c|-|추가점:}} 무기를 들고 있을때 최대 체력이 감소하고 무기를 집어 넣으면 체력이 다시 증가합니다. | ||
|- | |- | ||
| − | | style="background: #f8e2a1;" | {{c|=|주석:}} | + | | style="background:#f8e2a1;" | {{c|=|주석:}} 무기를 들고 있었을 때 깎인 최대 체력만큼만 무기를 넣었을 때 다시 재생됩니다무기를 들고 있었을 때 피해를 입어 깎인 체력은 재생되지 않습니다. |
|- | |- | ||
| − | | style="background: #f8e2a1;" | {{c| | + | | style="background:#f8e2a1;" | {{c|=|주석:}} 무기를 계속 들고 있을수록 최대 체력은 더 빨리 감소합니다. |
|- | |- | ||
| − | | style="background: #f8e2a1;" | {{c|+| | + | | style="background:#f8e2a1;" | {{c|+|제거점:}} 들고 있을 때 죽음의 표식이 새겨지는 것을 삭제했습니다. |
|- | |- | ||
| − | + | | style="background:#f8e2a1;" | {{c|+|제거점:}} 피해량이 25% 감소되는 것을 삭제했습니다. | |
| − | | style="background: #f8e2a1;" | {{c| | ||
|- | |- | ||
| − | | style="background: #f8e2a1;" | {{c|-| | + | ! style="background:#f8d28c;" colspan=2 rowspan=2 | {{Icon item|Fists of Steel|icon-size=75px}} <br /> {{item link|Fists of Steel}} |
| + | | style="background:#f8e2a1;" | {{c|-|추가점:}} 들고 있을 때 과치료량이 40% 감소합니다. | ||
|- | |- | ||
| − | + | | style="background:#f8e2a1;" | {{c|-|추가점:}} 들고 있을 때 치료량이 40% 감소합니다. | |
| − | | style="background: #f8e2a1;" | {{c|-| | ||
|- | |- | ||
| − | | style="background: #f8e2a1;" | {{c| | + | ! style="background:#f8d28c;" colspan=2 rowspan=4 | {{Icon item|Eviction Notice|icon-size=75px}} <br /> {{item link|Eviction Notice}} |
| + | | style="background:#f8e2a1;" | {{c|-|추가점:}} 무기를 들고 있을때 최대 체력이 감소하고 무기를 집어 넣으면 체력이 다시 증가합니다. | ||
|- | |- | ||
| − | | style="background: #f8e2a1;" | {{c|=|주석:}} | + | | style="background:#f8e2a1;" | {{c|=|주석:}} 무기를 들고 있었을 때 깎인 최대 체력만큼만 무기를 넣었을 때 다시 재생됩니다. 무기를 들고 있었을 때 피해를 입어 깎인 체력은 재생되지 않습니다. |
|- | |- | ||
| − | | style="background: #f8e2a1;" | {{c| | + | | style="background:#f8e2a1;" | {{c|=|주석:}} 무기를 계속 들고 있을수록 최대 체력은 더 빨리 감소합니다. |
|- | |- | ||
| − | + | | style="background:#f8e2a1;" | {{c|+|제거점:}} 피해에 20% 취약해지는 것을 삭제했습니다. | |
| − | |||
| − | | style="background: #f8e2a1;" | {{c| | ||
|- | |- | ||
| − | ! style="background: #b5b85c;" | + | ! style="background:#b5b85c;" | {{class link|Engineer|br=yes|color=black}} |
| − | ! style="background: #f8d28c;" colspan | + | ! style="background:#f8d28c;" colspan=2 | {{Icon item|Rescue Ranger|icon-size=75px}} <br /> {{item link|Rescue Ranger}} |
| − | | style="background: #f8e2a1;" | {{c|-| | + | | style="background:#f8e2a1;" | {{c|-|변경:}} 투사체로 한 수리는 이제 금속을 소비합니다. |
|- | |- | ||
| − | | style="background: #f8e2a1;" | {{c| | + | ! style="background:#b5b85c;" rowspan=5 | {{class link|Medic|br=yes|color=black}} |
| + | ! style="background:#f8d28c;" colspan=2 rowspan=2 | {{Icon item|Crusader's Crossbow|icon-size=75px}} <br /> {{item link|Crusader's Crossbow}} | ||
| + | | style="background:#f8e2a1;" | {{c|-|변경됨:}} 얻는 우버차지량이 메디 건의 치료율 방식으로 감소합니다. 치료 대상이 마지막으로 피해를 입고 나서 얼마나 흘렀는지에 따라 감소합니다. | ||
|- | |- | ||
| − | + | | style="background:#f8e2a1;" | {{c|=|주석:}} 치료 대상이 피해를 입은지 1 - 10초 사이에 치료를 하면 얻는 우버차지량은 3분의 1로 감소하고 10초에서 15초가 지날 때까지 서서히 증가합니다. | |
| − | | style="background: #f8e2a1;" | {{c| | ||
|- | |- | ||
| − | | style="background: #f8e2a1;" | {{c|+| | + | ! style="background:#f8d28c;" colspan=2 rowspan=3 | {{Icon item|Vita-Saw|icon-size=75px}} <br /> {{item link|Vita-Saw}} |
| + | | style="background:#f8e2a1;" | {{c|+|추가점:}} {{item name|Vita-Saw}}으로 타격시 대상의 장기를 수확합니다. | ||
|- | |- | ||
| − | | style="background: #f8e2a1;" | {{c| | + | | style="background:#f8e2a1;" | {{c|+|추가점:}} 사망 시 장기 1개당 죽기 전 모아둔 장기 당 우버차지 15%씩 유지됩니다. 최대 60%까지 유지됩니다. |
|- | |- | ||
| − | + | | style="background:#f8e2a1;" | {{c|-|제거점:}} 사망 시 모아둔 우버차지가 최대 20%까지 유지되는 것을 삭제했습니다. | |
| − | |||
| − | | style="background: #f8e2a1;" | {{c| | ||
|- | |- | ||
| − | | style="background: #f8e2a1;" | {{c| | + | ! style="background:#b5b85c;" rowspan=7 | {{class link|Sniper|br=yes|color=black}} |
| + | ! style="background:#f8d28c;" colspan=2 rowspan=2 | {{Icon item|Razorback|icon-size=75px}} <br /> {{item link|Razorback}} | ||
| + | | style="background:#f8e2a1;" | {{c|+|추가점:}} 레이저백은 30초 후 재생성됩니다. | ||
|- | |- | ||
| − | + | | style="background:#f8e2a1;" | {{c|-|추가점:}} 과치료량 100% 감소합니다. | |
| − | | style="background: #f8e2a1;" | {{c| | ||
|- | |- | ||
| − | | style="background: #f8e2a1;" | {{c|+| | + | ! style="background:#f8d28c;" colspan=2 rowspan=5 | {{Icon item|Darwin's Danger Shield|icon-size=75px}} <br /> {{item link|Darwin's Danger Shield}} |
| + | | style="background:#f8e2a1;" | {{c|+|추가점:}} 화상에 면역이 됩니다. | ||
|- | |- | ||
| − | | style="background: #f8e2a1;" | {{c|+| | + | | style="background:#f8e2a1;" | {{c|+|추가점:}} 화상 피해 저항력이 50% 증가합니다. |
|- | |- | ||
| − | | style="background: #f8e2a1;" | {{c| | + | | style="background:#f8e2a1;" | {{c|+|제거점:}} 착용 시 폭발 피해에 20% 취약해지는 것을 삭제했습니다. |
|- | |- | ||
| − | | style="background: #f8e2a1;" | {{c|-| | + | | style="background:#f8e2a1;" | {{c|-|제거점:}} 착용 시 체력이 25 증가하는 것을 삭제했습니다. |
|- | |- | ||
| − | + | | style="background:#f8e2a1;" | {{c|-|제거점:}} 착용 시 탄환 피해 저항력이 15% 증진되는 것을 삭제했습니다. | |
| − | |||
| − | | style="background: #f8e2a1;" | {{c|-| | ||
|- | |- | ||
| − | | style="background: #f8e2a1;" | {{c|-|변경됨:}} | + | ! style="background:#b5b85c;" rowspan=8 | {{class link|Spy|br=yes|color=black}} |
| + | ! style="background:#f8d28c;" colspan=2 rowspan=2 | {{Icon item|Ambassador|icon-size=75px}} <br /> {{item link|Ambassador}} | ||
| + | | style="background:#f8e2a1;" | {{c|-|변경됨:}} 헤드샷은 이제 거리에 따라 피해량이 달라집니다. | ||
|- | |- | ||
| − | + | | style="background:#f8e2a1;" | {{c|-|변경됨:}} 1200 해머 유닛 이상 거리에서 헤드샷을 해도 일반 피해로 적용됩니다. | |
| − | |||
| − | | style="background: #f8e2a1;" | {{c|-| | ||
|- | |- | ||
| − | | style="background: #f8e2a1;" | {{c|-| | + | ! style="background:#f8d28c;" rowspan=3 | {{Icon item|Your Eternal Reward|icon-size=75px}} <br /> {{item link|Your Eternal Reward}} |
| + | ! style="background:#f8d28c;" rowspan=3 | {{Icon item|Wanga Prick|icon-size=75px}} <br /> {{item link|Wanga Prick}} | ||
| + | | style="background:#f8e2a1;" | {{c|-|추가점:}} 변장 도구로 변장 할 때 모든 은폐 에너지를 소모합니다. | ||
|- | |- | ||
| − | | style="background: #f8e2a1;" | {{c| | + | | style="background:#f8e2a1;" | {{c|-|추가점:}} 은폐 소모량을 33% 증가시켰습니다. |
|- | |- | ||
| − | + | | style="background:#f8e2a1;" | {{c|+|제거점:}} 착용 시 변장 불가하던 것을 삭제했습니다. | |
| − | | style="background: #f8e2a1;" | {{c| | ||
|- | |- | ||
| − | | style="background: #f8e2a1;" | {{c| | + | ! style="background:#f8d28c;" colspan=2 rowspan=3 | {{Icon item|Dead Ringer|icon-size=75px}} <br /> {{item link|Dead Ringer}} |
| + | | style="background:#f8e2a1;" | {{c|-|추가점:}} 탄약 상자와 디스펜서로부터 은폐 에너지를 충전할 수 없습니다. | ||
|- | |- | ||
| − | | style="background: #f8e2a1;" | {{c|+| | + | | style="background:#f8e2a1;" | {{c|+|제거점:}} 은폐 상태일 때 탄약을 먹어도 은폐 미터가 차오르지 않습니다. |
|- | |- | ||
| − | + | | style="background:#f8e2a1;" | {{c|+|제거점:}} 탄약 상자에서 은폐 에너지 획득량이 35% 감소하던 것을 삭제했습니다. | |
| − | |||
| − | | style="background: #f8e2a1;" | {{c|+| | ||
|- | |- | ||
| − | | style="background: #f8e2a1;" | {{c| | + | ! style="background:#b5b85c; text-align:left;" rowspan=2 | {{class link|Soldier|color=black}}<br />{{class link|Pyro|color=black}} |
| + | ! style="background:#f8d28c;" colspan=2 rowspan=2 | {{Icon item|Reserve Shooter|icon-size=75px}} <br /> {{item link|Reserve Shooter}} | ||
| + | | style="background:#f8e2a1;" | {{c|+|추가점:}} {{item name|Thermal Thruster}}로 공중에 떠있는 적에게 소형 치명타를 입힙니다. | ||
|- | |- | ||
| − | + | | style="background:#f8e2a1;" | {{c|-|변경됨:}} 압축 공기 분사로 공중에 띄워진 적군에게 더 이상 소형 치명타를 입히지 않습니다. | |
| − | |||
| − | | style="background: #f8e2a1;" | {{c|-| | ||
|- | |- | ||
| − | | style="background: #f8e2a1;" | {{c|-| | + | ! style="background:#b5b85c; text-align:left;" rowspan=2 | {{class link|Soldier|color=black}}<br />{{class link|Demoman|color=black}} |
| + | ! style="background:#f8d28c;" colspan=2 rowspan=2 | {{Icon item|B.A.S.E. Jumper|icon-size=75px}} <br /> {{item link|B.A.S.E. Jumper}} | ||
| + | | style="background:#f8e2a1;" | {{c|-|추가점:}} 낙하산을 펼칠시 공중 제어력이 50% 감소합니다. | ||
|- | |- | ||
| − | + | | style="background:#f8e2a1;" | {{c|-|변경됨:}} 낙하산을 한번 펼친 후 다시 접는다면 플레이어가 다시 땅에 착지하기 전에는 다시 펼 수 없습니다. | |
| − | |||
| − | | style="background: #f8e2a1;" | {{c| | ||
|- | |- | ||
| − | | style="background: #f8e2a1;" | {{c| | + | ! style="background:#b5b85c; text-align:left;" rowspan=8 | {{class link|Soldier|color=black}}<br />{{class link|Pyro|color=black}}<br />{{class link|Heavy|color=black}}<br />{{class link|Engineer|color=black}} |
| + | ! style="background:#f8d28c;" colspan=2 rowspan=8 | {{Icon item|Panic Attack|icon-size=75px}} <br /> {{item link|Panic Attack}} | ||
| + | | style="background:#f8e2a1;" | {{c|+|추가점:}} 발사되는 탄환수가 50% 증가됩니다. | ||
|- | |- | ||
| − | | style="background: #f8e2a1;" | {{c|+| | + | | style="background:#f8e2a1;" | {{c|+|추가점:}} 탄환 집탄도가 고정됩니다. |
|- | |- | ||
| − | | style="background: #f8e2a1;" | {{c| | + | | style="background:#f8e2a1;" | {{c|-|제거점:}} 재장전 속도 50% 증가를 삭제했습니다. |
|- | |- | ||
| − | | style="background: #f8e2a1;" | {{c| | + | | style="background:#f8e2a1;" | {{c|-|추가점:}} 피해량이 30% 감소됩니다. |
|- | |- | ||
| − | | style="background: #f8e2a1;" | {{c|-| | + | | style="background:#f8e2a1;" | {{c|-|제거점:}} 발사 속도가 체력이 낮을 수록 빨라지는 것을 삭제했습니다. |
|- | |- | ||
| − | | style="background: #f8e2a1;" | {{c|=| | + | | style="background:#f8e2a1;" | {{c|=|변경됨:}} 연속 사격 시 집탄율이 낮아지며 재장전 또는 발사를 멈추면 집탄율이 다시 원래대로 됩니다. |
| − | |||
| − | |||
|- | |- | ||
| + | | style="background:#f8e2a1;" | {{c|=|제거점:}} 재장전하여 4발을 장전하고 한번에 쏠 수 있는 것을 삭제했습니다. | ||
|} | |} | ||
==== 업데이트 지연 ==== | ==== 업데이트 지연 ==== | ||
| − | 업데이트의 출시 예정일인 4 일째,[http://www.teamfortress.com/post.php?id=33776 블로그 포스트]에서 | + | 업데이트의 출시 예정일인 4 일째, [http://www.teamfortress.com/post.php?id=33776 블로그 포스트]에서 팀 포트리스 2 팀이 추가적인 스트레스 테스트를 수행하기 위해 기간을 하루 늦추었습니다. |
| − | == 상식== | + | == 상식 == |
| − | * | + | * 몇몇 아이템이 사전에 공개되었습니다: |
| − | + | ** 업데이트 1일 날의 아래쪽을 보면, {{item link|Gas Passer}} 아이템이 바닥에 널브러져 있는 게 보입니다, 그리고 배경에는 파이로가 {{item link|Thermal Thruster}}를 이용해 날고 있습니다. | |
| − | + | ** 2일차의 업데이트 페이지에서는, [[War Paint/ko|전투 도색]]이 적용될 수 있는 각종 무기를 볼 수 있으며, 그 중에 {{item link|Dragon's Fury}}가 있는 걸 볼 수 있습니다. 또한, 용병들이 새로운 아이템을 자랑하고 있는 장면에서, 파이로는 {{item name|Dragon's Fury}}를 들고 있는 것으로 보이며, 헤비는 {{item link|Second Banana}}를 들고 있습니다. | |
| − | ** | + | * 2일차 업데이트 페이지의 아래쪽 부분에는, [[Saxton Hale/ko|색스턴 헤일]]이 [[ConTracker/ko|계약기]]를 들고 있는 것으로 보입니다. 화면에는 두 개의 지역이 나와 있는데, 하나는 "용병 공원", 하나는 "파이로 동산" 이라고 적혀있는 걸 볼 수 있습니다. 이는 나중에 "파이로 동산" 지역의 임무를 완수하여 플레이어는 네 개의 파이로 무기를 획득할 수 있고, 여섯 개의 계약서를 추가 완수하여 헤비의 무기도 획득 가능해졌습니다. 세 개의 빨간 레이저가 색스턴의 어깨에 앉아있는 앵무새를 가리키는 걸 볼 수 있는데, 앵무새에게 마우스 커서를 갖다 대면, 머리가 터져버리고, 뼈가 보이며, 피가 색스턴 헤일의 어깨에 뭍고, 깃털이 공중을 떠다니게 됩니다. 세 개의 레이저는 [[w:ko:프레데터 (시리즈)|Predator]] 시리즈에 대한 언급으로, 이 이름의 시조가 된 외계인 사냥꾼들이 [https://avp.wikia.com/wiki/Plasmacaster 플라즈마 캐스터]에 조준하기 위해 비슷한 것을 사용한 것에서 따왔습니다. 첫 Predator 영화는 사람들이 정글에서 쫓기는 장면이 나옵니다. 웹사이트에서 element 관찰을 이용하면 이미지의 이름이 "parrator" 이라는 것을 알 수 있습니다. |
| − | ** | ||
| − | * | ||
| − | |||
== 갤러리 == | == 갤러리 == | ||
<gallery> | <gallery> | ||
File:News item 2017-10-21 Jungle Inferno Update.png|업데이트 릴리스에 대한 게임 내 알림. | File:News item 2017-10-21 Jungle Inferno Update.png|업데이트 릴리스에 대한 게임 내 알림. | ||
| − | File:Jungle Inferno Update_Day_1.jpg|''' | + | File:Jungle Inferno Update_Day_1.jpg|'''1일차.''' [http://www.teamfortress.com/jungleinferno/ 맵과 도발들]. {{lang icon|en}} |
| − | File:Jungle Inferno Update_Day_2.jpg|''' | + | File:Jungle Inferno Update_Day_2.jpg|'''2일차.''' [http://www.teamfortress.com/jungleinferno/campaign.php Campaign Pass와 장식들].{{lang icon|en}} |
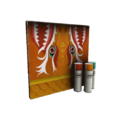
| − | File:Jungle Inferno Update_Day_3.jpg|''' | + | File:Jungle Inferno Update_Day_3.jpg|'''3일차.''' [http://www.teamfortress.com/jungleinferno/pyro.php 파이로의 새로운 병과 모음과 보조 임무들].{{lang icon|en}} |
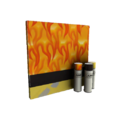
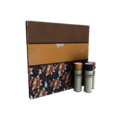
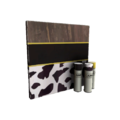
| − | File:Jungle Inferno Update_Day_4.jpg|''' | + | File:Jungle Inferno Update_Day_4.jpg|'''4일차.''' [http://www.teamfortress.com/jungleinferno/notes.php 최종 패치 노트]. {{lang icon|en}} |
</gallery> | </gallery> | ||
| − | == | + | == 같이 보기 == |
| − | * [http://www.teamfortress.com/post.php?id=33662 | + | * {{item link|Jungle Inferno Contracts Pass}} |
| − | * [http://www.teamfortress.com/jungleinferno/ | + | |
| − | * [http://www.teamfortress.com/post.php?id=33689 | + | == 외부 링크 == |
| − | * [http://www.teamfortress.com/jungleinferno/campaign.php | + | * [http://www.teamfortress.com/post.php?id=33662 용병 공원에 온 걸 환영한다!] {{lang icon|en}} |
| − | * [http://www.teamfortress.com/post.php?id=33731 | + | * [http://www.teamfortress.com/jungleinferno/ 정글 인페르노 업데이트 날 1] {{lang icon|en}} |
| − | * [http://www.teamfortress.com/jungleinferno/pyro.php | + | * [http://www.teamfortress.com/post.php?id=33689 캠페인의 자취를 남기자!] {{lang icon|en}} |
| − | * [http://www.teamfortress.com/post.php?id=33776 | + | * [http://www.teamfortress.com/jungleinferno/campaign.php 업데이트 날 2] {{lang icon|en}} |
| − | * [http://www.teamfortress.com/jungleinferno/notes.php | + | * [http://www.teamfortress.com/post.php?id=33731 따끈따끈한 소식!] {{lang icon|en}} |
| − | * [http://www.teamfortress.com/post.php?id=33847 | + | * [http://www.teamfortress.com/jungleinferno/pyro.php 업데이트 날 3] {{lang icon|en}} |
| + | * [http://www.teamfortress.com/post.php?id=33776 우리 거의 살아있어!] {{lang icon|en}} | ||
| + | * [http://www.teamfortress.com/jungleinferno/notes.php 업데이트 날 4] {{lang icon|en}} | ||
| + | * [http://www.teamfortress.com/post.php?id=33847 정글 인페르노의 삶!] {{lang icon|en}} | ||
{{Jungle Inferno Update Nav}} | {{Jungle Inferno Update Nav}} | ||
{{Major updates nav}} | {{Major updates nav}} | ||
| + | {{Pyro Nav}} | ||
[[Category:Events/ko]] | [[Category:Events/ko]] | ||
[[Category:Major updates/ko]] | [[Category:Major updates/ko]] | ||
Latest revision as of 15:05, 17 March 2023

| “ | 쥬라기 공원이 우리에게 한 가지를 가르쳐 준다면 그건 '인생이란 길을 찾는 것' 입니다. 쥬라기 공원이 우리에게 "두 가지"를 가르쳐 준다면, 하나 '인생이란 길을 찾는 것' 이고, 나머지 하나는 업데이트에 쓸 새로운 아이디어를 얻기 위해 '쥬라기 공원' 을 베끼는 것이 좋다는 것입니다. 그 후에 만약 Valve의 법률 팀이 우리에게 한 가지 가르쳐 준다면 그것은 "쥬라기 공원이 우리에게 가르쳐 준 두 번째 사실을 말하지 않았다는 것" 에 대해 우리에게 소리치는 겁니다.
우리에게 소리치는 사람들이 우리에게 한 가지를 가르쳐 주었다면 그들의 시끄러운 고함으로 인해 우리는 백스페이스 키가 어디에 있는지 잊어버렸다는 겁니다. 그래서 우리는 그냥 앞으로 나아갔고 '우리가 만든 매우 독창적인' 테마파크에서 탈출하는 치명적인 동물들에 대한 업데이트를 발표하게 되어 우리는 기쁩니다. 왜냐하면, 우리가 쥬라기 공원에서 — 팀 포트리스 2 공식 웹사이트
|
” |
정글 인페르노 업데이트는 2017년 10월 16일부터 4일 동안 진행되고 하루를 더 지연해 2017년 10월 21일에 공개된 팀 포트리스 2의주요 업데이트입니다. 5개의 새로운 무기, 5개의 새로운 커뮤니티 제작 맵, 1개의 새로운 Valve 맵, 7개의 새로운 도발, 1개의 새로운 처치 도발, 49개의 새로운 장식 아이템, 파이로 병과뿐만 아니라 기존 무기에 대한 많은 재조정 등이 소개되었습니다. 또한 계약기의 도입과 함께 계약 시스템을 개편하고 무기 스킨 대신에 전투 도색을 도입했습니다.
영상
공지 사항
Jungle Inferno 업데이트 페이지는 공식적으로 팀 포트리스 2 공식 블로그의 게시물에 발표된 대로 2017년 10월 16일에 시작되었습니다. "용병 공원에 온 걸 환영한다!" (영어)
업데이트 진행
정글 인페르노 업데이트는 4일 간의 업데이트를 통해 출시되었습니다.
- 1일차는 7개의 새로운 도발, 6개의 새로운 맵 및 짧은 SFM 예고편이 포함되었습니다.
- 2일차는 전투 도색들과 무료 계약과 유료 계약을 맺을 수 있는 새로운 계약 PDA가 소개되었습니다. 무료 계약은 새로운 무기를 주고, 유료 계약은 몇 가지 새로운 장식 아이템을 보여주는 이미지와 함께 청부금과 전투 도색을 줍니다.
- 3일차는 새로운 무기인 용의 격노(화염 방사기/주무기), 가열 가속기가열 가속기(제트팩/특수 도발을 가진 보조무기), 가스 패서(방사능 가스 구름/보조무기)와 화끈한 손(장갑/근접 무기)를 보여줬습니다.
- 4일차는 마지막 날로, 완전한 패치 노트와 출시일을 포함한 블로그 포스트를 동반한 마지막 날이었습니다.
1일차
정글 인페르노 업데이트는 새로운 Valve 맵과 5개의 커뮤니티 제작 맵과 2개의 새로운 Valve의 도발 및 5개의 새로운 커뮤니티 제작 도발을 공개했습니다.
맵
| 이름 | 사진 | 게임 모드 | 파일명 |
|---|---|---|---|
| Banana Bay | 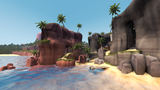
|
수레 경주 |
plr_bananabay
|
| Brazil | 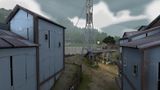
|
언덕의 왕 |
koth_brazil
|
| Enclosure | 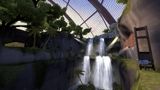
|
수레 밀기
|
pl_enclosure_final
|
| Lazarus | 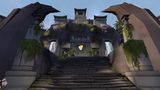
|
언덕의 왕 |
koth_lazarus
|
| Mercenary Park | 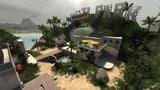
|
공격/방어 |
cp_mercenarypark
|
| Mossrock | 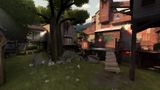
|
공격/방어 |
cp_mossrock
|
도발
| Headcase | ||
| 러시아식 완력 경쟁 | ||
| 내레 인민의 팔힘을 보여주갔어 | ||
| 밴조 연주 겨루기 | ||
| 착착 뛰는 착암기 | ||
| 예티 주먹 | ||
| 예티 강타 |
2일차
2일차에는 캠페인 무기 획득 및 무기 상자를 대체 할 Jungle Inferno Campaign 및 전투 도색이 공개되었습니다. 2개의 새로운 장식 아이템 상자와 새로운 작전 시스템이 추가되었습니다. 이 캠페인에는 36개의 신규 계약이 포함되어 있으며 협동으로도 완료 할 수 있습니다. 계약 완료는 캠페인 관련 항목 또는 "청부금" 을 얻습니다. 이 항목을 사용하여 전투 도색 및 상자를 구매 할 수 있습니다.
작전
정글 인페르노 작전은 Jungle Inferno Campaign Pass를 구매해야 합니다. 또한, 계약 PDA가 포함되며 플레이어의 계약 진행과 용병 공원 기념품점에 대한 접근 권한을 얻습니다. Friendly Fire는 캠페인과 파티 시스템이 함께 제공되는 새로운 기능으로, 두 명의 플레이어가 파티에 있을 때 친구와 함께 게임을 하거나 계약을 맺을 때 서로 도울 수 있습니다.
장식 아이템
세트
| The Monster Mash-Up Pack |
Kathman-Hairdo | ||
| 히말라야 털옷 | |||
| 흉측한 설상 바지 |
도구
액션 아이템
| Jungle Inferno ConTracker |
워 페인트
Jungle Jackpot Collection
 Park Pigmented
 Sax Waxed
 예티 코팅
예티 코팅 Croc Dusted
 금강앵무의
금강앵무의 Piña Polished
 Anodized Aloha
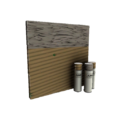 Bamboo Brushed
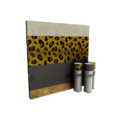 Leopard Printed
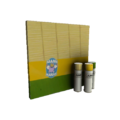 Mannana Peeled
 Tiger Buffed


Infernal Reward Collection
 화염 무늬
화염 무늬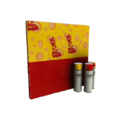 봉크 광택
봉크 광택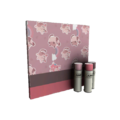 드림 파이프
 포장된 자유
 돈 뭉텅이
돈 뭉텅이 클로버 위장
 살인의 점칠
 윤기나는 피자
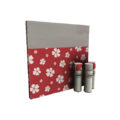 개화
개화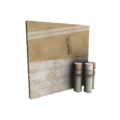 골판지 상자
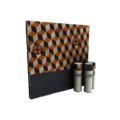 용병 스테인드
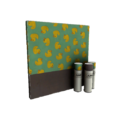 오리 캔버스
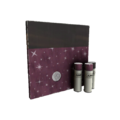 불행한 연인


Decorated War Hero Collection
 융단폭격기 Mk.II
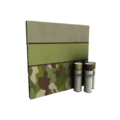 삼림지 전사 Mk.II
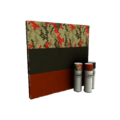 붕대로 싼 소생기 Mk.II
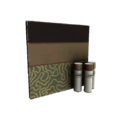 포레스트 파이어 Mk.II
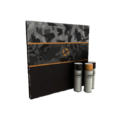 야행성 Mk.II
 숲속의 과부제조기 Mk.II
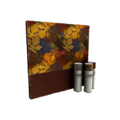 가을 Mk.II
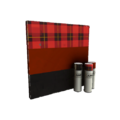 격자무늬 난사기 Mk.II
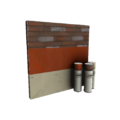 공무원 Mk.II
 시민의 의무 Mk.II


Contract Campaigner Collection
 소 소각기 Mk.II
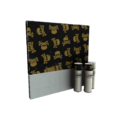 죽음의 청산인 Mk.II
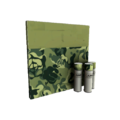 백우즈 붐스틱 Mk.II
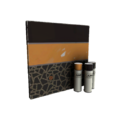 복면의 수선자 Mk.II
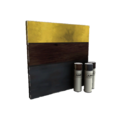 아이언 우드 Mk.II
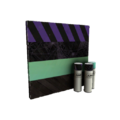 죽음의 거미줄 Mk.II
 호두까기 Mk.II
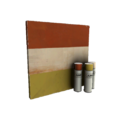 스몰타운 브링다운 Mk.II


Saxton Select Collection
 드래곤 슬레이어

3일차
3일차는 새로운 파이로 무기 4개를 공개했습니다. 특수 도발을 가진 파이로 무기인 가열 가속기, 헤비의 도시락 아이템과 화염 방사기의 변경 사항입니다.
무기
| 용의 격노 | ||
| 가스 패서 | ||
| 화끈한 손 | ||
| 가열 가속기 | ||
| 2인자의 바나나 |
조정된 병과
| 병과 | 변경점 |
|---|---|
조정된 무기
| 병과 | 무기 | 변경점 |
|---|---|---|
화염 방사기 종류 |
||
4일차
4일차에는 다양한 무기 변경, 새로운 무기에 대한 정보, 여러 버그 수정 및 매치메이킹 시스템 변경 사항을 포함하여 정글 인페르노 업데이트에 대한 패치 노트가 발표되었습니다. 또한, 모든 무기에 대한 1인칭 무기 확인 기능을 소개했습니다.
조정된 병과
| 병과 | 변경점 |
|---|---|
조정된 무기
| Class | Weapon | Changes | |
|---|---|---|---|
봉크! 원자맛 음료 |
|||
훅가콜라 |
|||
계집애같은 사내의 소형 권총 |
|||
혈적자 |
|||
샌드맨 |
|||
인수분해 |
|||
소도륙 5000 |
|||
인간딛개 |
|||
정의의 들소 |
|||
클레이브 모어 |
|||
G.R.U. |
빵으로 물기 |
||
강철 주먹 |
|||
퇴거 통보 |
|||
구조대원 |
|||
십자군의 쇠뇌 |
|||
비타톱 |
|||
레이저백 |
|||
다윈산 차단막 |
|||
외교대사 |
|||
영원한 안식 |
왕가 부족의 찌르개 |
||
데드 링어 |
|||
부사수 |
|||
고지 도약기 |
|||
공황 공격 |
|||
업데이트 지연
업데이트의 출시 예정일인 4 일째, 블로그 포스트에서 팀 포트리스 2 팀이 추가적인 스트레스 테스트를 수행하기 위해 기간을 하루 늦추었습니다.
상식
- 몇몇 아이템이 사전에 공개되었습니다:
- 2일차 업데이트 페이지의 아래쪽 부분에는, 색스턴 헤일이 계약기를 들고 있는 것으로 보입니다. 화면에는 두 개의 지역이 나와 있는데, 하나는 "용병 공원", 하나는 "파이로 동산" 이라고 적혀있는 걸 볼 수 있습니다. 이는 나중에 "파이로 동산" 지역의 임무를 완수하여 플레이어는 네 개의 파이로 무기를 획득할 수 있고, 여섯 개의 계약서를 추가 완수하여 헤비의 무기도 획득 가능해졌습니다. 세 개의 빨간 레이저가 색스턴의 어깨에 앉아있는 앵무새를 가리키는 걸 볼 수 있는데, 앵무새에게 마우스 커서를 갖다 대면, 머리가 터져버리고, 뼈가 보이며, 피가 색스턴 헤일의 어깨에 뭍고, 깃털이 공중을 떠다니게 됩니다. 세 개의 레이저는 Predator 시리즈에 대한 언급으로, 이 이름의 시조가 된 외계인 사냥꾼들이 플라즈마 캐스터에 조준하기 위해 비슷한 것을 사용한 것에서 따왔습니다. 첫 Predator 영화는 사람들이 정글에서 쫓기는 장면이 나옵니다. 웹사이트에서 element 관찰을 이용하면 이미지의 이름이 "parrator" 이라는 것을 알 수 있습니다.
갤러리

업데이트 릴리스에 대한 게임 내 알림.

1일차. 맵과 도발들. (영어)

2일차. Campaign Pass와 장식들.(영어)
3일차. 파이로의 새로운 병과 모음과 보조 임무들.(영어)

4일차. 최종 패치 노트. (영어)

같이 보기
외부 링크
- 용병 공원에 온 걸 환영한다! (영어)
- 정글 인페르노 업데이트 날 1 (영어)
- 캠페인의 자취를 남기자! (영어)
- 업데이트 날 2 (영어)
- 따끈따끈한 소식! (영어)
- 업데이트 날 3 (영어)
- 우리 거의 살아있어! (영어)
- 업데이트 날 4 (영어)
- 정글 인페르노의 삶! (영어)
| ||||||||||||||||||||||||||||||||||||||||||||||||||||
| |||||||||||||||||||||||||||||||||||||||||||||||||||||||||||||||||||||||||||||||||||||||||||||||