Difference between revisions of "Turbine"
(→Strategy) |
m (→Locations) |
||
| (110 intermediate revisions by 65 users not shown) | |||
| Line 1: | Line 1: | ||
{{Map infobox | {{Map infobox | ||
| − | |game-type=Capture the Flag | + | | map-status = community |
| − | |file-name=ctf_turbine | + | | map-game-type = Capture the Flag |
| − | |map-image= | + | | map-file-name = ctf_turbine |
| − | | | + | | map-image = CTF Turbine Center.png |
| + | | map-released = {{Patch name|6|19|2008}} | ||
| + | | map-released-major = Pyro Update | ||
| + | | map-environment = Industrial | ||
| + | | map-setting = Indoor | ||
| + | | map-pickups-health-small = 2 | ||
| + | | map-pickups-health-medium = 4 | ||
| + | | map-pickups-ammo-medium = 4 | ||
| + | | map-has-bots = yes | ||
| + | | map-stamp-link = https://steamcommunity.com/stats/TF2/leaderboards/30381 | ||
}} | }} | ||
| − | ''' | + | {{Quotation|'''[https://www.teamfortress.com/pyro/ The Pyro Update]'''|A CTF map inside a large industrial compound. It's clean and straightforward, making it easy to learn, but its well-balanced layout ensures there are still a wide variety of strategic choices for teams to make, and for individual classes to shine.}} |
| − | + | '''Turbine''' is a [[Steam Workshop|community-created]] [[Capture the Flag]] map added in the [[Pyro Update]]. | |
| − | + | Turbine and [[Fastlane]] became the first community-created maps to be added to ''Team Fortress 2'' by [[Valve]] as official maps due to their outstanding quality. | |
| − | + | ||
| + | Turbine has been played in various competitive leagues, including the [[Competitive Mode|official Competitive Mode]]. | ||
== Locations == | == Locations == | ||
| − | ''' | + | {{HelpfulOverviewNote}} |
| − | '''Hallway''' | + | === Turbine Room === |
| − | '''Resupply Area''' | + | * '''Turbine Room''': The main area that links RED and BLU bases. It is a large room with three turbines in the middle and a shipping container on either side. Two staircases near the base exits lead up to a balcony spanning the width of the opposite side of the room, leading to the other team's vents. To the side of the base, exits are the main hallway, leading to the Intelligence room. The containers and turbines provide good cover for players, even from people standing on the balconies. |
| − | '''Vents''' | + | * '''Alcove''': A small alcove at the foot of each staircase contains a medium Health pack. |
| − | + | * '''Balcony''': A balcony that spans the width of the room connects each team's vents to the Turbine Room. Most of the floor of the room can be seen from the balconies, making them an ideal location for Snipers. | |
| − | <gallery> | + | * '''Balcony Observation Room''': A small windowed, doorless room lies at the center of the balcony. It opens on both sides to the rest of the balcony. The room provides some cover from players attacking from the floor of the Turbine Room. The outside of the room can be used to place sticky traps. |
| − | + | ||
| − | + | === Intelligence room === | |
| − | + | * '''Intelligence Room''': The Intelligence room is a rectangular room with railings partially bordering the lower area. The Intelligence is located in the corner of the room. | |
| − | + | * '''Entrances''': There are three entrances to the Intelligence room. | |
| − | + | ** A set of stairs leads down from spawn to the Intelligence room. | |
| − | + | ** Players can drop through a hole in the ceiling, connecting from the vent system. | |
| − | + | ** Two large entrances connect to the main hallway that connects to the Turbine Room. | |
| + | |||
| + | === Main Hallway === | ||
| + | * '''Main Hallway''': A hallway connects the Turbine Room to the Intelligence room. The hallway makes two right-angle turns, providing some cover for players and the opportunity to set up sticky traps and sentry nests. | ||
| + | * '''Raised Platform''': There is a raised platform along the corridor that leads directly into the Intelligence room with a medium health pack. The platform is too high to jump on top of normally, being accessible by either crouch-jumping, [[explosive jump]]ing, or using a jump-boosting weapon. For other classes, there is a small cart next to the platform that can be crouch-jumped on in order to get on top, but the cart is located right next to the entrances to the Intelligence room, making platform access dangerous for enemy players. | ||
| + | |||
| + | === Resupply and Vents === | ||
| + | * '''Resupply Area''': The resupply room is L-shaped, and the hallway it leads out to is L-shaped as well. One end of the hallway leads to a staircase that descends to the Turbine Room, and the other end of the hallway leads to a staircase that descends to the Intelligence room. | ||
| + | * '''Vent Access''': The vent system can be reached at the top of the stairs leading to the Turbine Room. | ||
| + | * '''Vents''': Small vent tunnels provide passages from the Turbine Room to the resupply areas and to the Intelligence room through a hole in the ceiling of the room. The Vents are broken into two sections, joining at the Resupply Area entrance. | ||
| + | |||
| + | <gallery widths="150px" heights="90px"> | ||
| + | File:turbine01.png|RED intelligence room. | ||
| + | File:turbine02.png|Hallway. | ||
| + | File:turbine03.png|RED Resupply area exit. | ||
| + | File:turbine04.png|The vents. | ||
| + | File:turbine05.png|Turbine room. | ||
| + | File:turbine06.png|RED balcony. | ||
| + | File:CTF Turbine Billboard.PNG|Billboard outside Turbine room. | ||
| + | File:CTF Turbine SpawnCorridor.png|BLU spawn corridor. | ||
| + | File:CTF Turbine SpawnExit.png|BLU resupply area exit. | ||
</gallery> | </gallery> | ||
| + | |||
| + | == Helpful overview == | ||
| + | [[File:Turbine overview with lines.png|left|Turbine's locations|550px]] | ||
| + | <big>1.Turbines | ||
| + | 2.Alcoves | ||
| + | 3.Balcony | ||
| + | 4.Vents | ||
| + | 5.Main Hallway | ||
| + | 6.Raised Platform</big> | ||
| + | |||
| + | {{clr}} | ||
== Strategy == | == Strategy == | ||
| − | + | {{map strategy link|Turbine|main=yes|stub=yes}} | |
| − | * | + | |
| − | + | == Update history == | |
| − | + | {{Update history| | |
| − | + | '''{{Patch name|6|19|2008}}''' ([[Pyro Update]]) | |
| − | * | + | * Added Turbine to the game. |
| − | * | + | |
| − | + | '''{{Patch name|4|24|2014}}''' | |
| − | * | + | * Fixed collision on spawn doors |
| − | * | + | * Added prop to facilitate players jumping up to raised platform and fixed surrounding collision |
| − | * | + | * Fixed collision under stairs in mid-room |
| − | * | + | * Fixed misc prop collision |
| − | * | + | * Fixed collision on signs in mid-room |
| − | * | + | * Fixed the clipping in the rafters of flag rooms |
| − | * | + | * Increased performance with addition of [[vdc:areaportal|area portals]] |
| − | * | + | * Added decals under ammo and health packs |
| − | + | * Smoothed geometry in the vents | |
| − | * | + | * Added [[vdc:func_nobuild|nobuild]] around spawn doors |
| − | + | * Added light props over Red and Blu gate 1 doorways | |
| − | * | + | |
| − | * | + | '''{{Patch name|2|29|2016}}''' |
| − | + | * Updated several maps to support [[Competitive Mode]]. | |
| − | * | + | |
| − | * | + | '''{{Patch name|10|21|2016}}''' ([[Scream Fortress 2016]]) |
| + | * Added {{code|ctf_turbine}} to the Competitive maps list. | ||
| + | |||
| + | '''{{Patch name|10|25|2016}} #2''' | ||
| + | * Removed {{code|ctf_turbine}} from the Competitive maps list. | ||
| + | |||
| + | '''{{Patch name|3|28|2018}} #1''' | ||
| + | * Added a bot navigation file for {{code|ctf_turbine}}. | ||
| + | }} | ||
| + | |||
| + | == Bugs == | ||
| + | * Certain props on the map are not solid and can be walked through. | ||
| − | == | + | == External links == |
| − | *[ | + | * [https://www.teamfortress.com/pyro/ The Pyro Update] |
| + | {{Pyro Update Nav}} | ||
| + | {{Maps Nav}} | ||
| − | + | [[Category:Quickplay maps]] | |
Latest revision as of 19:44, 9 April 2024
| Turbine | |
|---|---|

| |
| Basic Information | |
| Map type: | Capture the Flag |
| File name: | ctf_turbine
|
| Released: | June 19, 2008 Patch (Pyro Update) |
| Variants: | Turbine Center |
| Developer(s): | Flobster |
| Map Info | |
| Environment: | Industrial |
| Setting: | Indoor |
| Bot support: | Yes |
| Map Items | |
| Map Photos | |
 | |
| Map Overview | |
 | |
| Map Stamp | |
| Supporters Leaderboard | |
| “ | A CTF map inside a large industrial compound. It's clean and straightforward, making it easy to learn, but its well-balanced layout ensures there are still a wide variety of strategic choices for teams to make, and for individual classes to shine.
|
” |
Turbine is a community-created Capture the Flag map added in the Pyro Update.
Turbine and Fastlane became the first community-created maps to be added to Team Fortress 2 by Valve as official maps due to their outstanding quality.
Turbine has been played in various competitive leagues, including the official Competitive Mode.
Contents
Locations
Note: If you are having trouble with finding the locations listed here, see the Helpful overview section to see their exact position marked on the map.
Turbine Room
- Turbine Room: The main area that links RED and BLU bases. It is a large room with three turbines in the middle and a shipping container on either side. Two staircases near the base exits lead up to a balcony spanning the width of the opposite side of the room, leading to the other team's vents. To the side of the base, exits are the main hallway, leading to the Intelligence room. The containers and turbines provide good cover for players, even from people standing on the balconies.
- Alcove: A small alcove at the foot of each staircase contains a medium Health pack.
- Balcony: A balcony that spans the width of the room connects each team's vents to the Turbine Room. Most of the floor of the room can be seen from the balconies, making them an ideal location for Snipers.
- Balcony Observation Room: A small windowed, doorless room lies at the center of the balcony. It opens on both sides to the rest of the balcony. The room provides some cover from players attacking from the floor of the Turbine Room. The outside of the room can be used to place sticky traps.
Intelligence room
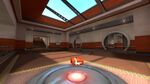
- Intelligence Room: The Intelligence room is a rectangular room with railings partially bordering the lower area. The Intelligence is located in the corner of the room.
- Entrances: There are three entrances to the Intelligence room.
- A set of stairs leads down from spawn to the Intelligence room.
- Players can drop through a hole in the ceiling, connecting from the vent system.
- Two large entrances connect to the main hallway that connects to the Turbine Room.
Main Hallway
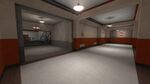
- Main Hallway: A hallway connects the Turbine Room to the Intelligence room. The hallway makes two right-angle turns, providing some cover for players and the opportunity to set up sticky traps and sentry nests.
- Raised Platform: There is a raised platform along the corridor that leads directly into the Intelligence room with a medium health pack. The platform is too high to jump on top of normally, being accessible by either crouch-jumping, explosive jumping, or using a jump-boosting weapon. For other classes, there is a small cart next to the platform that can be crouch-jumped on in order to get on top, but the cart is located right next to the entrances to the Intelligence room, making platform access dangerous for enemy players.
Resupply and Vents
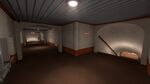
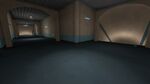
- Resupply Area: The resupply room is L-shaped, and the hallway it leads out to is L-shaped as well. One end of the hallway leads to a staircase that descends to the Turbine Room, and the other end of the hallway leads to a staircase that descends to the Intelligence room.
- Vent Access: The vent system can be reached at the top of the stairs leading to the Turbine Room.
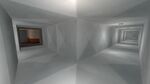
- Vents: Small vent tunnels provide passages from the Turbine Room to the resupply areas and to the Intelligence room through a hole in the ceiling of the room. The Vents are broken into two sections, joining at the Resupply Area entrance.
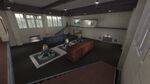
RED intelligence room.
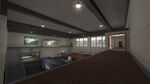
Hallway.
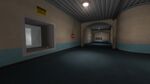
RED Resupply area exit.
The vents.
Turbine room.
RED balcony.
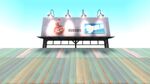
Billboard outside Turbine room.
BLU spawn corridor.
BLU resupply area exit.


Helpful overview

1.Turbines
2.Alcoves
3.Balcony
4.Vents
5.Main Hallway
6.Raised Platform
Strategy
Main article: Community Turbine strategy
 | “Sun Tzu's got nothing on us!” This map's Community strategy page is a stub. As such, it is not complete. You can help the Team Fortress Wiki Community Strategy Project by expanding it. Notes: None added |
Update history
June 19, 2008 Patch (Pyro Update)
- Added Turbine to the game.
- Fixed collision on spawn doors
- Added prop to facilitate players jumping up to raised platform and fixed surrounding collision
- Fixed collision under stairs in mid-room
- Fixed misc prop collision
- Fixed collision on signs in mid-room
- Fixed the clipping in the rafters of flag rooms
- Increased performance with addition of area portals
- Added decals under ammo and health packs
- Smoothed geometry in the vents
- Added nobuild around spawn doors
- Added light props over Red and Blu gate 1 doorways
- Updated several maps to support Competitive Mode.
October 21, 2016 Patch (Scream Fortress 2016)
- Added
ctf_turbineto the Competitive maps list.
- Removed
ctf_turbinefrom the Competitive maps list.
- Added a bot navigation file for
ctf_turbine.
Bugs
- Certain props on the map are not solid and can be walked through.
External links
| ||||||||||||||||||||