Difference between revisions of "Junction"
m |
Padgriffin (talk | contribs) (rm sentence, as it implies a setup similar to Steel where you can cap C without also capping the previous points- time being added on cap is a standard CP feature.) |
||
| (2 intermediate revisions by 2 users not shown) | |||
| Line 1: | Line 1: | ||
{{Map infobox | {{Map infobox | ||
| map-status = community | | map-status = community | ||
| − | | map-game-type = Control Point | + | | map-game-type = Control Point (attack/defend) |
| map-file-name = cp_junction_final | | map-file-name = cp_junction_final | ||
| − | | map-image = Junct 01. | + | | map-image = Junct 01.png |
| map-released = {{Patch name|2|24|2009}} | | map-released = {{Patch name|2|24|2009}} | ||
| map-released-major = Scout Update | | map-released-major = Scout Update | ||
| Line 18: | Line 18: | ||
'''Junction''' is a [[Steam Workshop|community-created]] [[Control Point (game mode)#Attack/Defend|Attack/Defend Control Point]] map. It was included with the [[Scout Update]] as an official community-developed map due to its outstanding quality. Its design is similar to [[Gravel Pit]]. | '''Junction''' is a [[Steam Workshop|community-created]] [[Control Point (game mode)#Attack/Defend|Attack/Defend Control Point]] map. It was included with the [[Scout Update]] as an official community-developed map due to its outstanding quality. Its design is similar to [[Gravel Pit]]. | ||
| − | The goal for BLU is | + | The goal for BLU is to attack and capture all three points in order to win the match. A and B must be captured before C can be. For RED to win, they must hold out and prevent BLU from capturing the final point C. |
== Locations == | == Locations == | ||
Latest revision as of 01:28, 15 August 2024
| Junction | |
|---|---|

| |
| Basic Information | |
| Map type: | Attack/Defend |
| File name: | cp_junction_final
|
| Released: | February 24, 2009 Patch (Scout Update) |
| Developer(s): | Sean "Heyo" Cutino |
| Map Info | |
| Environment: | Spytech |
| Setting: | Indoor |
| Map Items | |
| Map Photos | |
| Map Overview | |
| Map Stamp | |
| Supporters Leaderboard | |
| “ | A Gravel Pit style map. Junction is a sharp contrast to Watchtower. It’s full of tight spaces and short sightlines, which create combat opportunities dominated by ambushes and explosive weaponry.
|
” |
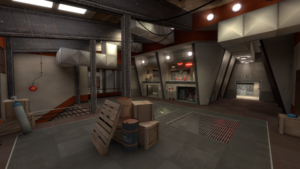
Junction is a community-created Attack/Defend Control Point map. It was included with the Scout Update as an official community-developed map due to its outstanding quality. Its design is similar to Gravel Pit.
The goal for BLU is to attack and capture all three points in order to win the match. A and B must be captured before C can be. For RED to win, they must hold out and prevent BLU from capturing the final point C.
Contents
Locations
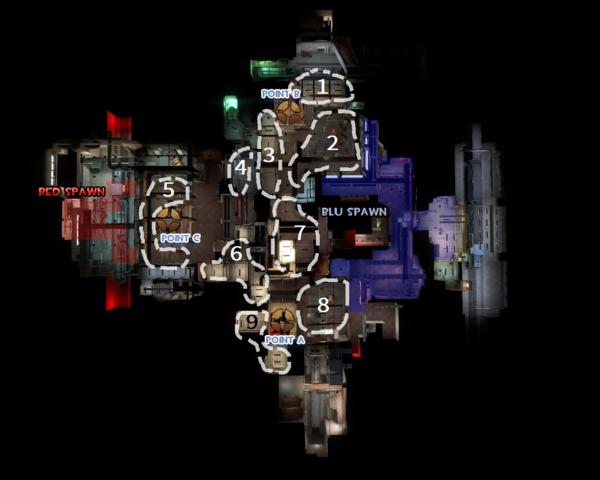
Note: If you are having trouble with finding the locations listed here, see the Helpful overview section to see their exact position marked on the map.
Junction is a tight, enclosed map with lots of hallways and passages leading to the three main control points. Make use of the Demoman and Soldier classes here for optimal results defensively and offensively.
Control Point A
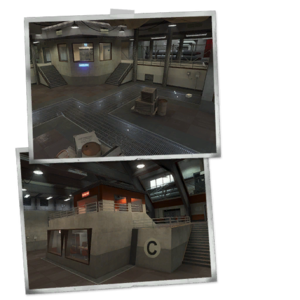
Point A is located in a small room; it lies on an elevated platform with two sets of stairs leading up to it. The stairways are underneath the point itself, one in front facing BLU's spawn and one on the side.
- A Lobby: The A Lobby is the small area right outside of BLU's spawn and below the point. It connects to the A/B flank hallway, stairs, and A/C flank hallway.
- Stairs: Underneath the point is a small set of stairs that lead directly behind the point.
- Platform: The platform is the raised area at the end of the stairs overlooking the lobby where the control point rests upon.
- A/B Flank: Connected to the lobby is the A/B flank. It is a hallway that runs straight to B's control point. It also connects to the A/C flank.
Control Point B
Point B is located in a larger room with a balcony that covers two walls within it. B is in the corner where the two balconies meet, and it is only accessible through two side doorways. The point itself is covered by an indestructible window, preventing enemy fire directly on the point. Two stairways border and lead up to the point.
- B Lobby: The B Lobby is the other lobby outside BLU's spawn. It is larger than the A lobby and has crates scattered about it. It connects to the A/B flank and leads up to the balconies.
- Balconies: The balconies lay atop the stairs in the lobby and run along the outer walls. Both of them lead to the control point room. The far balcony connects to the B/C flank.
- Point Room: The point room is located at the end of the balconies and houses the control point. It is sealed off by windows that overlook the balcony,
Control Point C
Point C is located on a platform that rests on an elevated area that is, again, only accessible by stairs. The point itself has a small balcony surrounding its front side and two side doors. Stairs lead from the point down to the elevated area. The elevated area also has stairs leading down to ground level. There are three entrances to C, two from A and one from B. The entrance from B is at the bottom of a flight of stairs, and the two from A are small doorways.
- A/C Flank: From Point A is a hallway that forks into two entrances to C. Both of these are located near each other at the bottom of the stairwell.
- B/C Flank: From Point B is another hallway that leads to an entrance at the other end of the stairwell. Next to the hallway is a room with two open windows viewing the area around the point.
- Platform: Surrounding the point room, at the top of the stairs is a platform from which the entire stairwell area can be seen. This area gives a height advantage against any attackers.
- Battlements: Next to the point near the A/C flank is a small hallway and set of stairs. At the end of them is a tight area with a window all along the wall facing the point. This spot overlooks most of the area and is very useful as a Sentry Gun placement spot.
- Point Room: The point room is located in the center of the area, right outside the spawn, and on top of the stairs. It is shaped like a box with two entrances on each side of the balcony. Each side also has large windows along the walls.
Helpful overview
1.Balconies
2.B Lobby
3.Balconies
4.B/C flank
5.Platform
6.A/C flank
7.A/B route
8.A Lobby
9.Stairs
Strategy
 | “Sun Tzu's got nothing on us!” This map's Community strategy page is a stub. As such, it is not complete. You can help the Team Fortress Wiki Community Strategy Project by expanding it. Notes: None added |
Control Point timing
| Control Point | Multiplier | Seconds | ||
|---|---|---|---|---|
| Control Point A | ×1 |
| ||
| ×2 |
| |||
| ×3 |
| |||
| ×4 |
| |||
| Control Point B | ×1 |
| ||
| ×2 |
| |||
| ×3 |
| |||
| ×4 |
| |||
| Control Point C | ×1 |
| ||
| ×2 |
| |||
| ×3 |
| |||
| ×4 |
|
Update history
February 24, 2009 Patch (Scout Update)
- Added Junction to the game.
- Fixed an exploit where Engineers could build a teleporter exit in an invalid area.
- Fixed a few bad overlay assignments and other minor issues.
- Updated Junction to score per-capture instead of per-round. This fixes the map not working correctly with Tournament mode and the stopwatch.
- Players are now prevented from building in spawn rooms.
Bugs
- Players can walk through a computer console in the area outside BLU's spawn.
External links
| |||||||||||||||||


