Difference between revisions of "Vanguard"
(Added Map Stamp Link) |
m (Consistency with other Workshop map wiki pages) |
||
| Line 15: | Line 15: | ||
}} | }} | ||
| − | '''Vanguard''' is a [[Control Point (game mode)#Symmetric|Control Point]] map. It is set in a construction site, with many floors at varying heights. With many alternate routes towards objectives created by the construction props, it is easy to flank and gain a height advantage for all classes. | + | '''Vanguard''' is a [[Steam Workshop|community-created]] [[Control Point (game mode)#Symmetric|Control Point]] map. It is set in a construction site, with many floors at varying heights. With many alternate routes towards objectives created by the construction props, it is easy to flank and gain a height advantage for all classes. |
Vanguard was [https://steamcommunity.com/sharedfiles/filedetails/?id=462908782 contributed] to the Steam Workshop and was made an official map in the [[Tough Break Update]]. | Vanguard was [https://steamcommunity.com/sharedfiles/filedetails/?id=462908782 contributed] to the Steam Workshop and was made an official map in the [[Tough Break Update]]. | ||
Revision as of 22:21, 26 September 2023
| Vanguard | |
|---|---|
| |
| Basic Information | |
| Developer(s): | Unknown |
| Map Info | |
| Environment: | Construction |
| Setting: | Daytime |
| Map Photos | |
| Map Overview | |
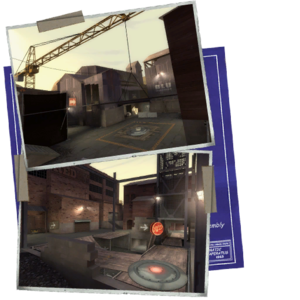
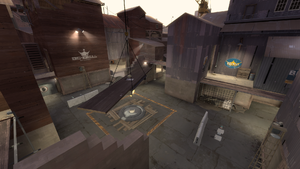
Vanguard is a community-created Control Point map. It is set in a construction site, with many floors at varying heights. With many alternate routes towards objectives created by the construction props, it is easy to flank and gain a height advantage for all classes.
Vanguard was contributed to the Steam Workshop and was made an official map in the Tough Break Update.
Contents
Locations
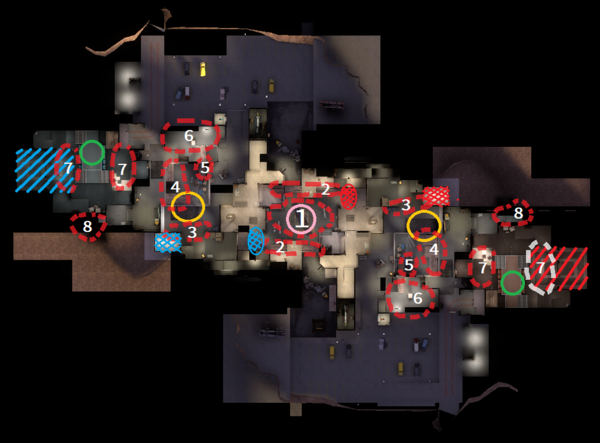
Note: If you are having trouble with finding the locations listed here, you can scroll down to the Helpful overview section to see their exact position marked on the map.
Control Point 3
The middle capture is located in the center of the yard, underneath a suspended board.
- Entrances: For each team, there are five entrances through their team-colored buildings: The side entrance, the above platform, the center doorway, the unfinished wall, and the doorway next to the unfinished wall.
- Scaffolding: To the sides of the yard in the structures are rows of scaffolding bridges. The scaffolding can be used for cover, or as a path to the board above the point.
- Center Yard: The yard with the control point is an open area with no cover. Above the control point is a suspended board with a medium ammo kit on it.
- Secondary Spawn: Inside each team's entrance structure is a secondary spawn that will become active once their respective team has captured all but the last control point.
Control Point 2 & 4
The second and fourth control points are on a piece of scaffolding next to an elevator.
- Elevator: To the side of the control point is an inactive elevator tower. The elevator is on the second floor, turning the bottom floor into a walkway into the adjunct building. The elevator itself can be used as a lookout and a teleporter hiding spot.
- Center Scaffolding: The scaffolding holding the control point is a raised platform with a bridge across to the team spawn.
- Right Balcony: Overlooking the control point is a structure with a balcony that can provide suppressive fire against the enemy team.
- Left Building: The structure to the left of the control point that links to the elevator.
Control Point 1 & 5
The final Control Point is to the side in the middle of a section of computer terminals.
- Air Vent: An air vent lays on the side of the building, allowing an ambush to the enemy team's spawn doors.
- Observation Room: Overlooking the control point is a large observation room. The glass is one way, allowing for sneak attacks.
- Control Area: The terminal area with the control point.
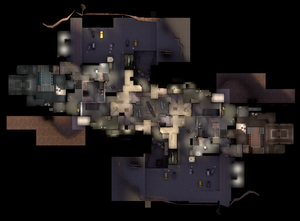
Helpful overview
1.Center Yard
2.Scaffoldings
3.Right Balcony
4.Center Scaffoldings
5.Elevator
6.Left Building
7.Observation rooms
8.Air Vent
Red/blue diagonal lines: Red/Blu first spawn
Red/blue double diagonal lines: Red/Blu second spawn
Red/blue double diagonal lines w/ a circle: Red/Blu third spawn
Pink circle: Middle/third points
Yellow circles: Second/fourth points
Green circles: First/fifth points
Strategy
 | “Sun Tzu's got nothing on us!” This map's Community strategy page is a stub. As such, it is not complete. You can help the Team Fortress Wiki Community Strategy Project by expanding it. Notes: None added |
Control point timing
| Control Point | Multiplier | Seconds | ||
|---|---|---|---|---|
| Control Point 1 and 5 | ×1 |
| ||
| ×2 |
| |||
| ×3 |
| |||
| ×4 |
| |||
| Control Point 2 and 4 | ×1 |
| ||
| ×2 |
| |||
| ×3 |
| |||
| ×4 |
| |||
| Control Point 3 | ×1 |
| ||
| ×2 |
| |||
| ×3 |
| |||
| ×4 |
|
Update history
December 17, 2015 Patch (Tough Break Update)
- Added Vanguard to the game.
- Updated Vanguard to fix an exploit related to spawn room doors.
- Added new path to the last point.
- New geometry to reduce sightlines on the middle point.
- Reorganized spawn points to better exit final spawns.
- Fixed Red forward spawn door blocking when held open.
- Fixed some material issues.
- Removed teleporter exploit on second point.
- Various minor fixes (lighting, collision, optimization).
- [Undocumented] Added Vanguard, Landfall, Highpass and Snowycoast to their respective modes' Quickplay rotations.
Trivia
- Behind the vault doors near both spawns, there is a small room with a single banana peel.
Gallery
| |||||||||||||||||||||||||||||||
