Difference between revisions of "Badlands"
m |
(→Control Point Timing: Use Template:Control Point Timing/Official Map) |
||
| Line 44: | Line 44: | ||
== Control Point Timing == | == Control Point Timing == | ||
| − | {{Control Point Timing | + | {{Control Point Timing/Official Map | MAP = Badlands (Control Point)}} |
| − | + | ||
| − | |||
| − | |||
| − | |||
| − | | | ||
| − | |||
| − | |||
| − | |||
| − | |||
| − | }} | ||
{{Maps nav}} | {{Maps nav}} | ||
{{Languages}} | {{Languages}} | ||
Revision as of 23:17, 7 July 2010
| Badlands | |
|---|---|

| |
| Basic Information | |
| Developer(s): | Unknown |
| Map Photos | |
| Map Overview | |
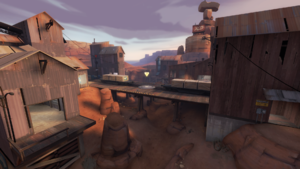
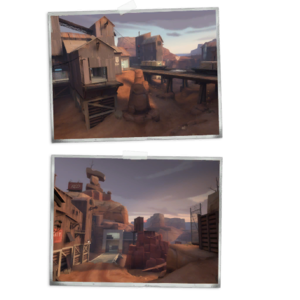
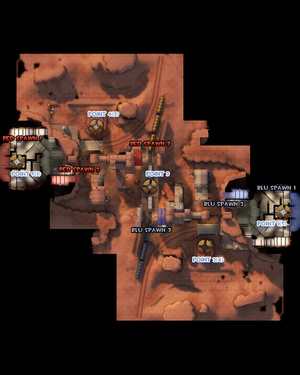
Badlands is a remake of the classic CTF_Badlands from Team Fortress Classic. Much of the map has been changed and the map type has been changed from capture the flag to control point. The map consists of a base for each team, an open second point for each team located on the top of a hill, and a center point on the bridge.
The objective of Badlands is to control all five capture points. Each team starts with their second and final control points locked, leaving only the middle point available.
Contents
Introduction video
Locations
Control Point 3
The middle capture point is located on the bridge that separates the map in half.
- Entrances: Each team has 3 paths to the bridge. One from either of the two buildings, and a third from the dirt ramps on the ends of the bridge.
- Under the bridge: Each team also has a path that goes under the bridge.
- Rail Cars: There are rail cars located on either side of the capture point. Not only do these cars serve as cover, they also divide the bridge in half. The boxes on top of the cars are slightly smaller than the cars themselves, which allows for any class to jump over them by first jumping onto the car.
- Window: There is a window and balcony on either side of the bridge. This spot is typically used as a Sniper nest.
- Pillars: Each side also has a pair of rock pillars that allow access from the bridge onto the balcony next to the window.
Control Points 2 & 4
The second capture points are located at the end of either dirt path leading off of the bridge. Both of these points are located on the top of a large rock spire.
- Entrances from the middle point: The second control point can be reached either by the dirt road at the end of the bridge, or by passing under the bridge.
- Deck: There is a small deck along the back side of either point. This is the only place on the top of the spire that Engineer's can build on.
- Ledge: When approaching from the dirt path, there is a small ledge against the edge of the map. This ledge allows jumping classes such as the Scout and the Soldier easy access to the top of the spire.
Control Points 1 & 5
The final control points are located inside the complexes at either end of the map.
- Entrances from the second point: There are four paths to the final control point from the second one. There is the main entrance, which is in front of a low concrete bridge. There is the side entrance, which is to the right of the main entrance if you're facing the final point from the second one. Lastly, there is also the upper entrances, which are above the main and side entrances. The upper entrance shielded by metal plates can be reached by most classes by jumping off the control point. The upper entrance shielded by boxes can only be reached by Scouts and rocket/sticky jumping.
- Atrium: The main and side entrances both lead to a small atrium that looks directly at the final control point. There are stairs to the left that lead up to the battlements, and a small bit of cover in the form of metal barrels on the right.
- Battlements: Both upper entrances lead onto the battlements, as well as the side entrance via a set of stairs. The battlements allow access to the final point via stairs down to the lower level (from both the sides and the atrium), as well as a pair of ledges that surround the point from either side.
- Battlements exit: There is also an open vent that acts as a one way exit from the battlements onto the path that leads under the bridge. It is also possible to rocket/sticky/double jump into it.
Strategy
- Control the bridge by erecting a defense on the opponents side, because of the open nature of the map this defense has to be mobile and reactive, Turtling is harder than attacking on this map.
- As the map has many twists and turns , Demomen and Heavys are extremely effective on this map.
- Despite its open nature Snipers are generally only useful at defending the second control point.
- Scouts are extremely effective on this map. A team of coordinated Scouts can easily beat the map within a minute.
- The final control point caps very quickly. The defenders must always make sure someone is on or next to it at all times. The best strategy for the attackers is to storm the point as soon as the fourth control point is captured. It is possible for a decloaking Spy to cap this point before sentry gun fire reaches him provided no defenders are blocking the capture, though this depends on how far away it is.
Control Point Timing
| Control Point | Multiplier | Seconds | ||
|---|---|---|---|---|
| Control Point 1 and 5 | ×1 |
| ||
| ×2 |
| |||
| ×3 |
| |||
| ×4 |
| |||
| Control Point 2 and 4 | ×1 |
| ||
| ×2 |
| |||
| ×3 |
| |||
| ×4 |
| |||
| Control Point 3 | ×1 |
| ||
| ×2 |
| |||
| ×3 |
| |||
| ×4 |
|
| Languages: | English · čeština · dansk · Deutsch · español · français · italiano · 日本語 · 한국어 · Nederlands · norsk · polski · português do Brasil · română · русский · 中文(简体) · 中文(繁體) |

